CORALLY Kronos XTR XP6S MAINTENANCE & SETTINGS
SHOCK ABSORBER MAINTENANCE
It may be necessary to replace the silicone oil in the shock absorbers every 40 runs (depends on how you drive and the type of terrain you drive on).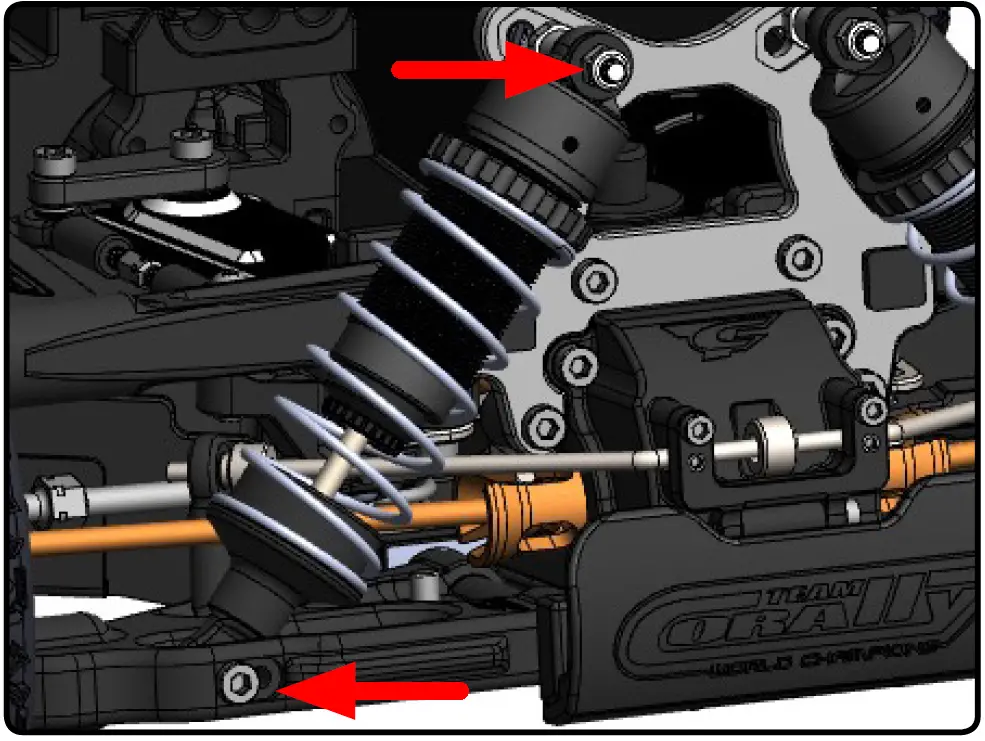
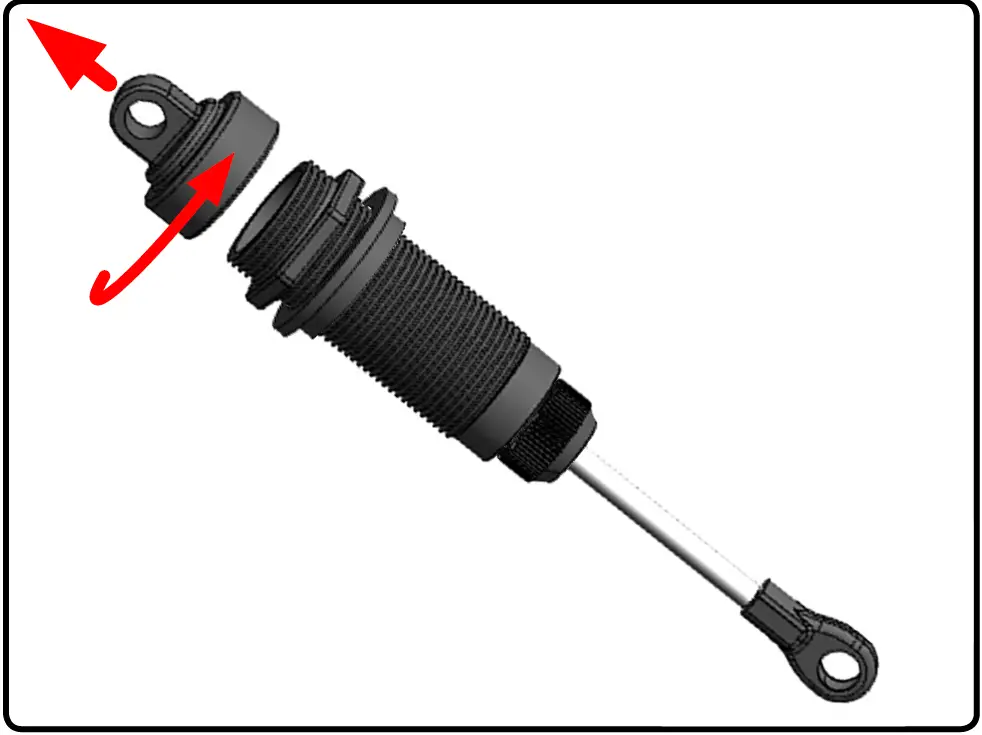
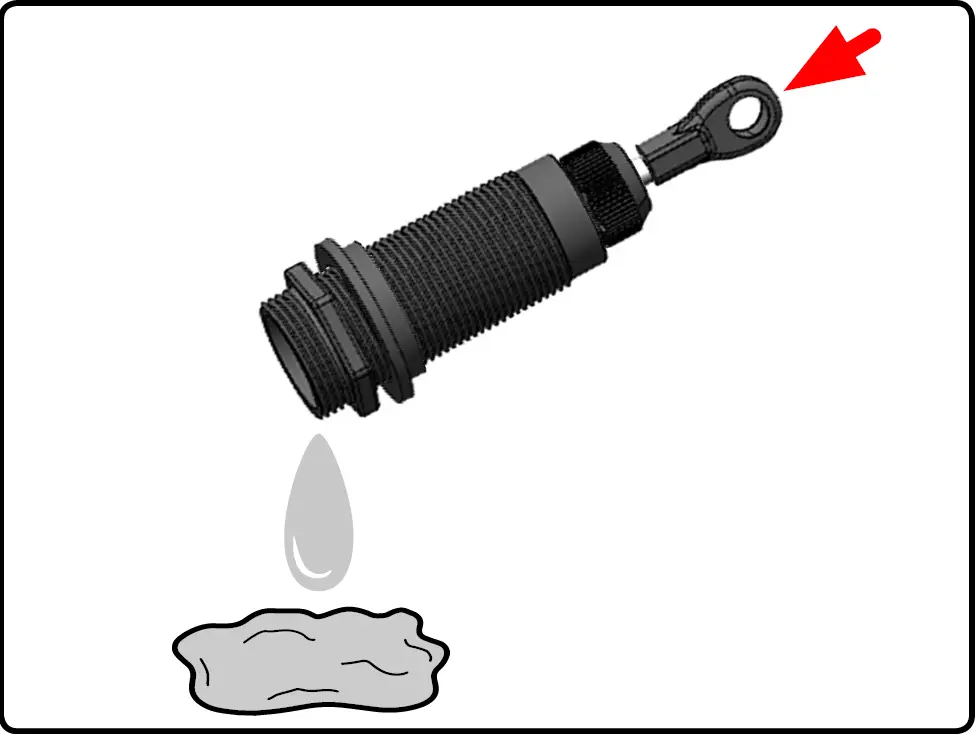
ALWAYS USE SILICONE OIL, NEVER USE ANY OTHER TYPES OF OIL.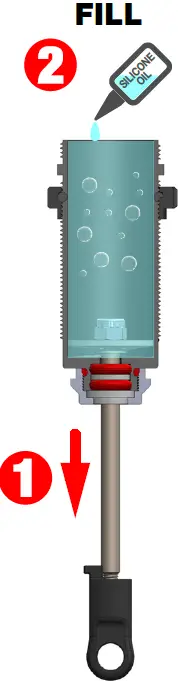
- Fill the shock with silicone oil.

- Move the piston up & down (3-4x) to release the air bubbles in the silicone oil.

- Pull the Shock shaft down and wait until the bubbles rise to the surface.


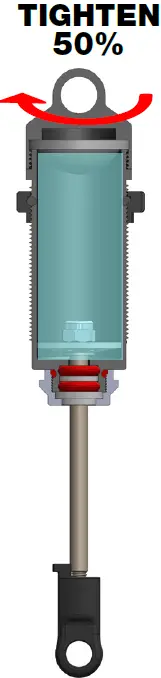
- Screw in the shock absorber cap at 50%.

- Gently move the piston in upper position, the oil excess will flow out.

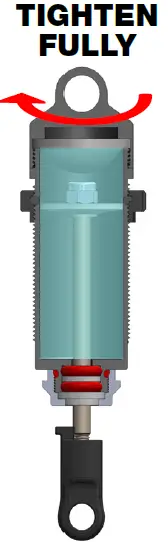
- Now tighten the cap fully but not too much otherwise the membrane will be deformed.
FRONT REAR SILICONE OIL SPRING TENSION SILICONE OIL SPRING TENSION SHOCK PISTON TRACK USE 450CPS 4mm 400CPS 0mm 6 Holes Ø1.3mm OFF-ROAD 600CPS 4mm 500CPS 0mm 6 Holes Ø1.3mm BASHING 650CPS 4mm 550CPS 0mm 6 Holes Ø1.3mm FACTORY 600CPS 500CPS 6 Holes Ø1.3mm

DIFFERENTIAL MAINTENANCE
- Perform the same maintenance operation for the Centre and Rear differentials.

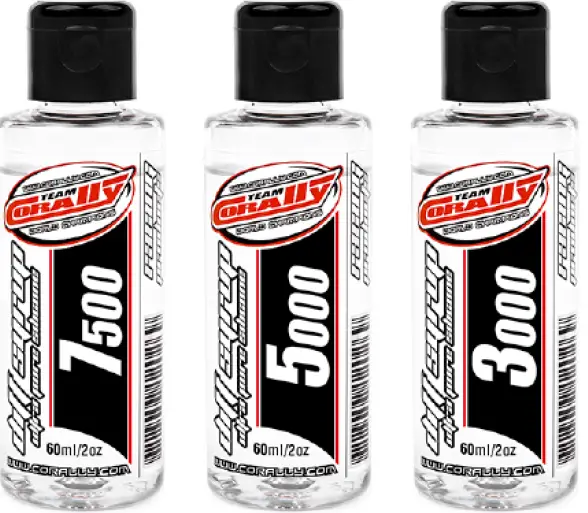
www. corally.com/Chemicals/Silicone-Oils/
| FRONT DIFF | CENTRE DIFF | REAR DIFF | |
| TRACK USE | 7500CPS | 15.000CPS | 5000CPS |
| OFF-ROAD | 10.000CPS | 30.000CPS | 7500CPS |
| BASHING | 20.000CPS | 100.000CPS | 10.000CPS |
| FACTORY | 20.000CPS | 100.000CPS | 10.000CPS |
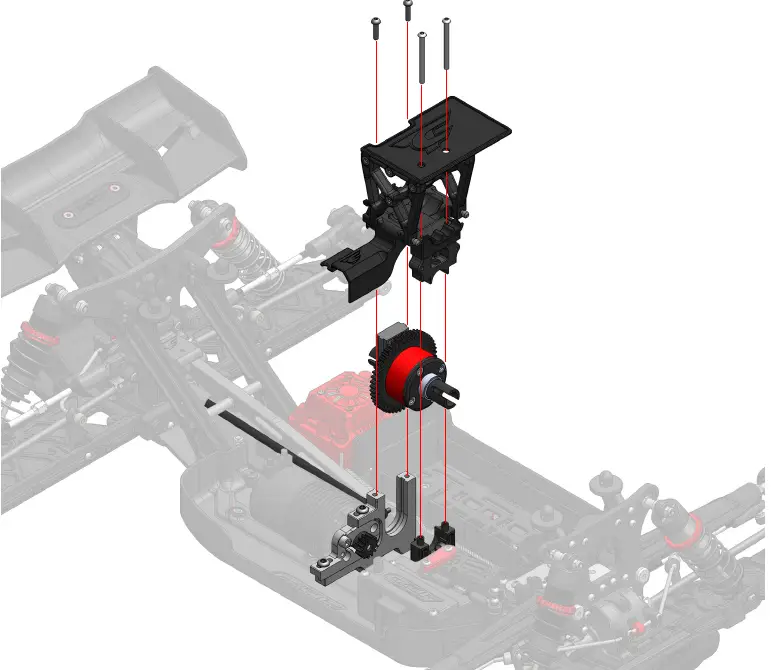
REMOVING THE CENTRE DIFFERENTIAL
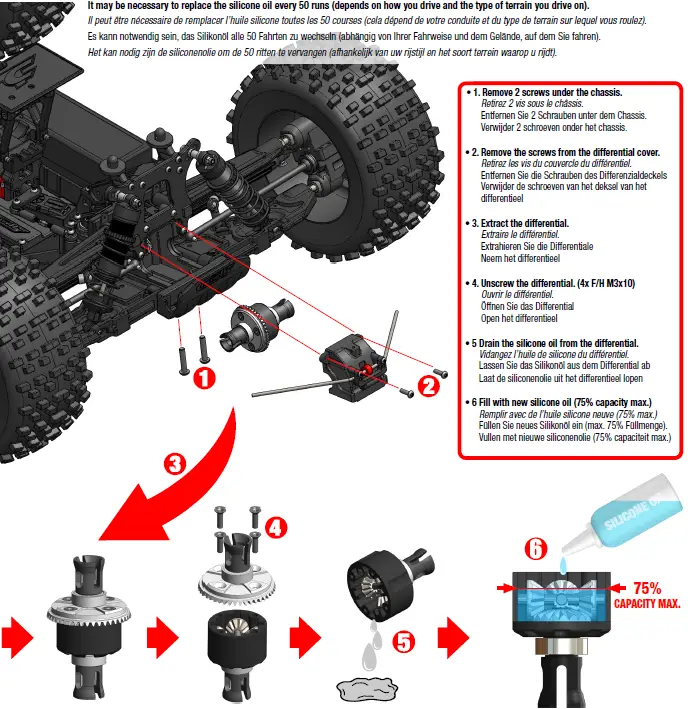
It may be necessary to replace the silicone oil every 50 runs (depends on how you drive and the type of terrain you drive on).
- Remove 4 screws.
- Release the Centre Diff Plate Cover.
- Extract the differential and follow the maintenance instruction on the DIFFERENTIAL MAINTENANCE section.

GEAR RATIO
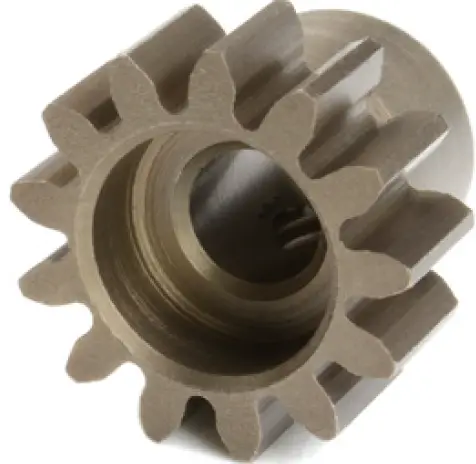
MOTOR PINION MOD1.0
High-performance 13T tooth pinion gear, manufactured from special steel for toughness and durability with precise tolerances and assures unparalleled concentricity. Created on a special gear machine, all pinions feature ultra-precise tooth shaping and ultra-true running for vibration-free operation. Each pinion is marked with the tooth number for easy and quick identification.
- Special hardened steel

- CNC cut teeth for perfect teeth shape and concentricity
- Fits all cars with MOD1 gears (1/8 Scale)
- For 5.0mm motor shafts
SPEED GEAR CHART
For Buggy – Gear Ratio 3.31 For Monster Truck – Gear Ratio 3.31
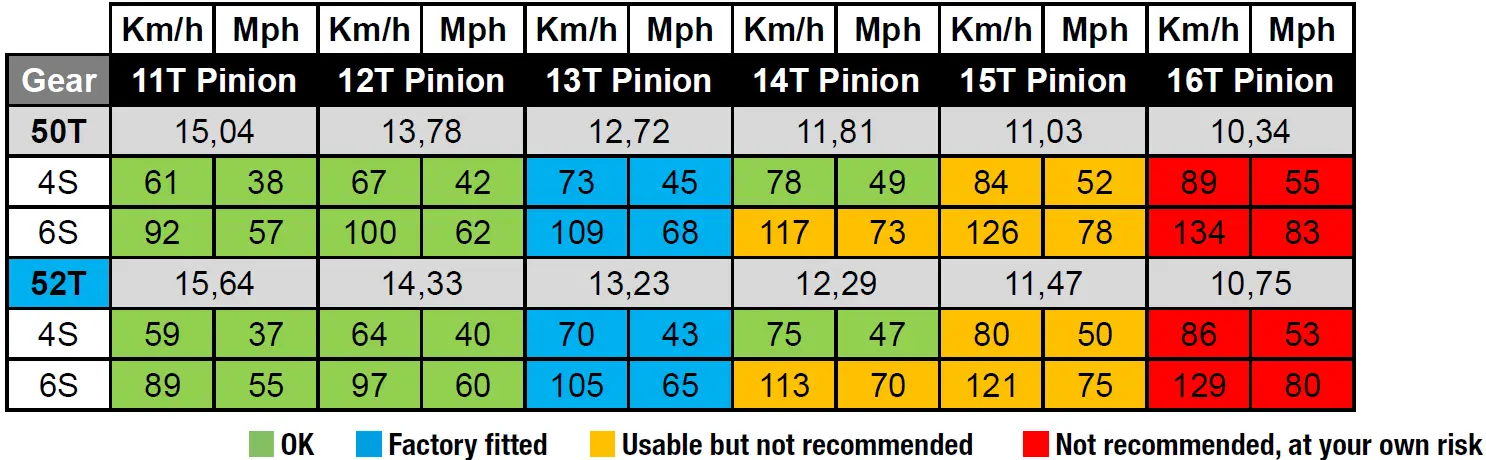
 Note:
Note:
The speed indicated in the table is a theoretical speed for information purposes. The real speed varies according to the type of terrain, electronic equipment, atmospheric conditions and other driving parameters.
GEAR MESH ADJUSTMENT
If the gear mesh is not correct, you wear out the spur gear prematurely, the transmission will make noise, give unnecessary load on the motor (higher consumption, heating of the transmission).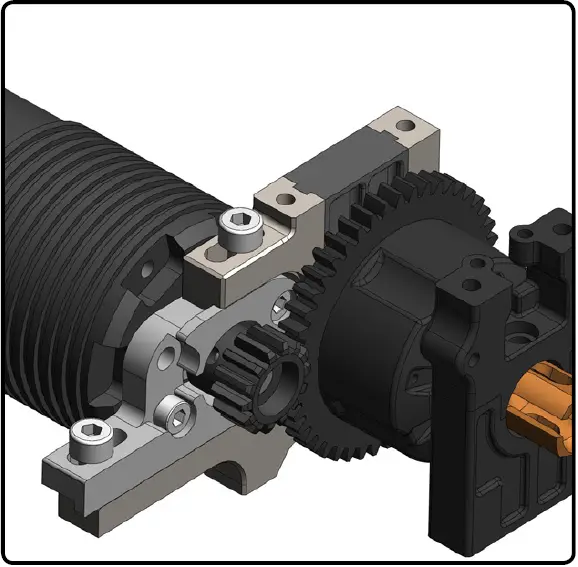
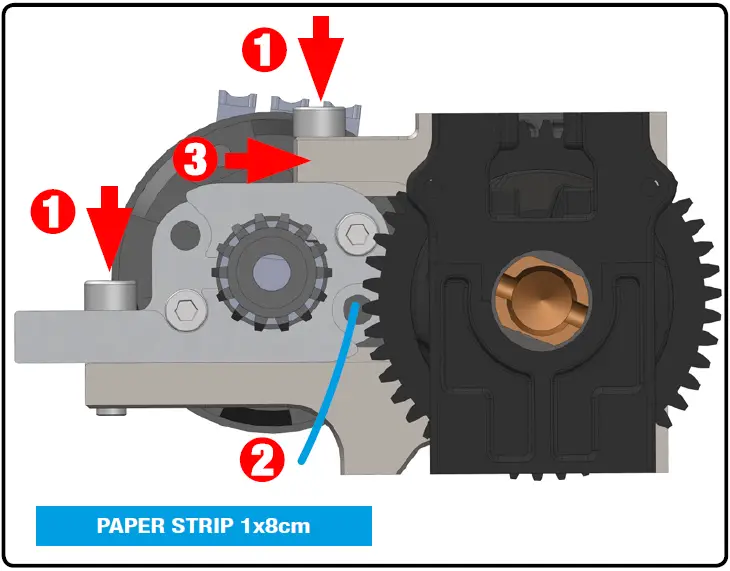
- Loosen the screws.
- Insert the paper strip.
- Push the motor against the spur gear.
- Turn the spur gear to run the paper through the teeth. Stop when the paper is in the middle. Make sure that the motor pinion is against the spur gear.
- Maintain and tighten the fixing screws.


