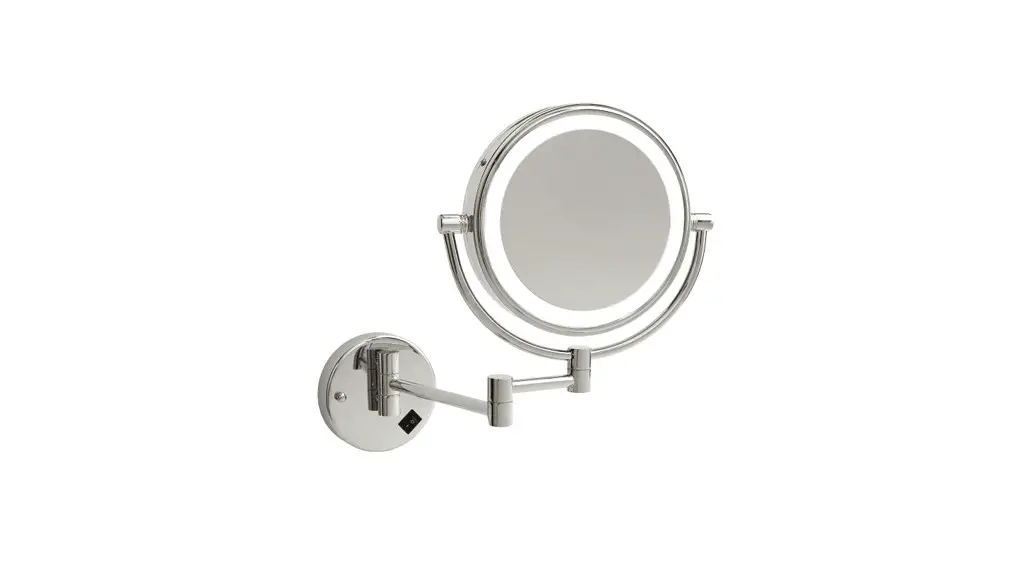
![]() Ablaze Lighted Magnifying Mirrors
Ablaze Lighted Magnifying Mirrors
Installation Guide
Round Mirror Installation
The Round Mirror Installation Instructions applies to the following models:
| L252CSMC/E | L258CSMC/E |
| L253CSMC | LR257CSM |
| L255CSMC/E | L252CSMCB |
| L155CSMC | L252GSMC |
- Begin by determining the appropriate location and height. We recommend approximately 150cm from the floor if the mirror is to be used while standing, and 120cm from the floor if used while seated.
- Remove the unit from its packaging and lay it carefully on a stable surface on top of the product bag so that it does not get scratched.
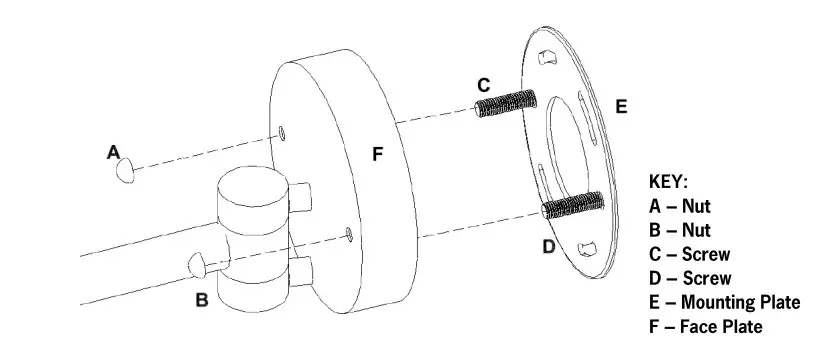
- Remove nuts A & B from screws C & D. Separate mounting plate E from face plate F (see diagram below).
- Using mounting template E determine the exact location for the magnifying mirror and mark this onto the wall.
- Caution: Check the internal wall location for structural strength. Injury to people or damage to the mirror and/or mounting surface may result if mirror is pulled from the surface. To limit the likelihood of such injury or damage, mount the mirror on a structural wall material that is sound.
- Drill holes and insert the wall plugs provided then proceed to mount bracket E to the wall.
- For hard wired models refer to wiring instructions on page 5.
- Lift the magnifying mirror and slide screws C and D back through the face plate and fasten in position with nuts A and B and ensure these are tight.
- For exposed wired (plug-in) models you can now plug the magnifying mirror directly into a power point.

Square Mirror Installation
The Square Mirror Installation Instructions applied to the following models:
LS205CSMC/E
LS205CSMCB
- Begin by determining the appropriate location and height. We recommend approximately 150cm from the floor if the mirror is to be used while standing, and 120cm from the floor if used while seated.
- Remove the unit from its packaging and lay it carefully on a stable surface on top of the product bag so that it does not get scratched.
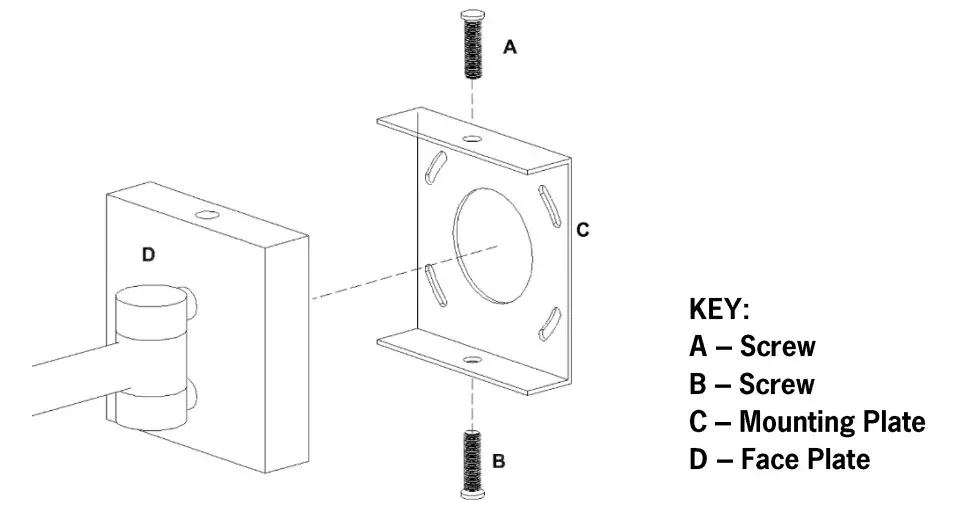
- Remove screws A & B from the face plate using a Philips head screw driver. Separate mounting plate C from face plate D. (See diagram below).
- Using mounting template C determine the exact location for the magnifying mirror and mark this onto the wall.
- Caution: Check the internal wall location for structural strength. Injury to people or damage to the mirror and/or mounting surface may result if mirror is pulled from the surface. To limit the likelihood of such injury or damage, mount the mirror on a structural wall material that is sound.
- Drill holes and insert the wall plugs provided then proceed to mount bracket C to the wall.
- For hard wired models refer to wiring instructions on page 5
- Lift the magnifying mirror back onto mounting plate C so that face plate D is now sitting flush against the wall.
- Refit screws A & B and tighten to hold the magnifying mirror firmly to the mounting plate
- For exposed wired (plug-in) models you can now plug the magnifying mirror directly into a power point.

Electrical Wiring Guide
Wiring Instruction:
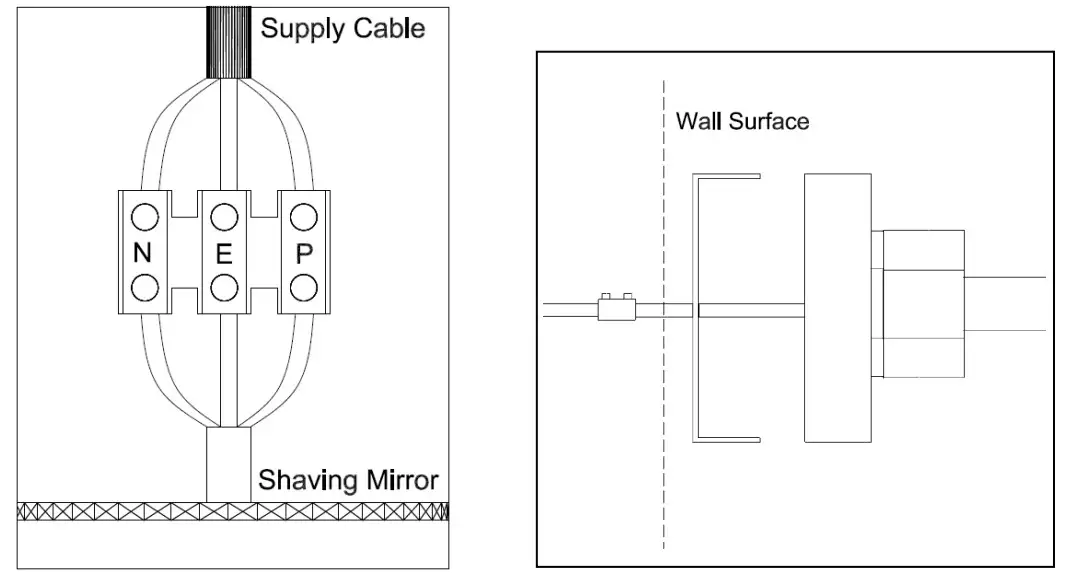
- Ensure you have 240V supply cable located at the centre of where you wish to mount your mirror
- Ensure the power is switched off before carrying out any electrical work
- Ensure you have a hole into the wall large enough to fit the connector box on the magnifying mirror
- Connect the supply cable into the connector box as shown in diagram and tighten firmly
– it is important to make sure you earth the unit - We recommend taping the connection box with electrical tape for added strength.
You may now continue to install the magnifying mirror.
![]() ALL ELECTRICAL WORK IS TO BE CARRIED OUT BY A QUALIFIED ELECTRICIAN IN ACCORDANCE WITH ELECTRICAL GUIDELINES
ALL ELECTRICAL WORK IS TO BE CARRIED OUT BY A QUALIFIED ELECTRICIAN IN ACCORDANCE WITH ELECTRICAL GUIDELINES![]() THIS UNIT IS 240V AT THE BASE SO IT NEEDS TO BE INSTALLED IN THE APPROPRIATE ZONE (OUTSIDE OF ZONE 1) AT THE DISCRETION OF THE ELECTRICIAN.
THIS UNIT IS 240V AT THE BASE SO IT NEEDS TO BE INSTALLED IN THE APPROPRIATE ZONE (OUTSIDE OF ZONE 1) AT THE DISCRETION OF THE ELECTRICIAN.
Warranty
Thermogroup covers all its products with a satisfaction guarantee. In addition, Thermogroup will supply a replacement product where a fault is shown to be caused by manufacture, materials or workmanship providing the goods have been installed correctly and according to installation instructions. This guarantee does not include removal, freight or installation costs. Thermogroup’s products come with guarantees that cannot be excluded under Australian Consumer Law and you are entitled to a replacement or refund for a major failure & compensation for any other reasonable foreseeable loss or damage.
You are also entitled to have the goods repaired or replaced if the goods fail to be of acceptable quality and the failure does not amount to a major failure.
All the Ablaze Magnifying Mirrors have a 1 Year warranty. To use the warranty, repair or service the customer must provide purchase invoice/receipt, and any other relevant details.
If the product develops a fault within the warranty period due to normal wear and tear, Ablaze mirrors at its discretion will recognise whether it’s a faulty product or not. If it is impossible or not economical for the manufacturer to repair the product, the manufacturer will replace the faulty product with a new unit of the same model or if there is no stock available of the same model as the product, the manufacturer will replace the product with a new unit of a similar size. No responsibility can be taken for altered dimensions and lining up of existing holes.
The repair service offered within the warranty period only covers the faults and problem as developed from the manufacturer’s errors. Any damage caused by improper use or carelessness or incorrect wiring is not covered.
Ablaze Mirrors is not responsible for any monetary loss or injuries caused by improper use of this product.
Technical Specification
| STOCK NO | DESCRIPTION | SIZE(MM) | ARM LENTH (MM) |
| L252CSMC/E | Chrome, 3x Magnification, White LED | 250 ø | 390 |
| L253CSMC | Chrome, 3x Magnification, Warm LED | 250 ø | 390 |
| L255CSMC/E | Chrome, 5x Magnification, White LED | 250 ø | 390 |
| L252CSMBB | Brushed Brass, 3x Magnification, White LED | 250 ø | 390 |
| L252CSMBN | Brushed Nickel, 3x Magnification, White LED | 250 ø | 390 |
| L155CSMC | Chrome, 1 & 5x Magnification, White LED | 200 ø | 320 |
| L258CSMC/E | Chrome, 1 & 8x Magnification, White LED | 200 ø | 320 |
| LR257CSM | Chrome, 7x Magnification, White LED | 200 ø | 380 |
| L252CSMCB | Matt Black, 3x Magnification, White LED | 250 ø | 390 |
| L252GSMC | Polished Gold, 3x Magnification, White LED | 250 ø | 390 |
| LS205CSMC/E | Chrome, 3x Magnification, White LED | 200×200 | 390 |
| LS205CSMCB | Matt Black, 3x Magnification, White LED | 200×200 | 390 |
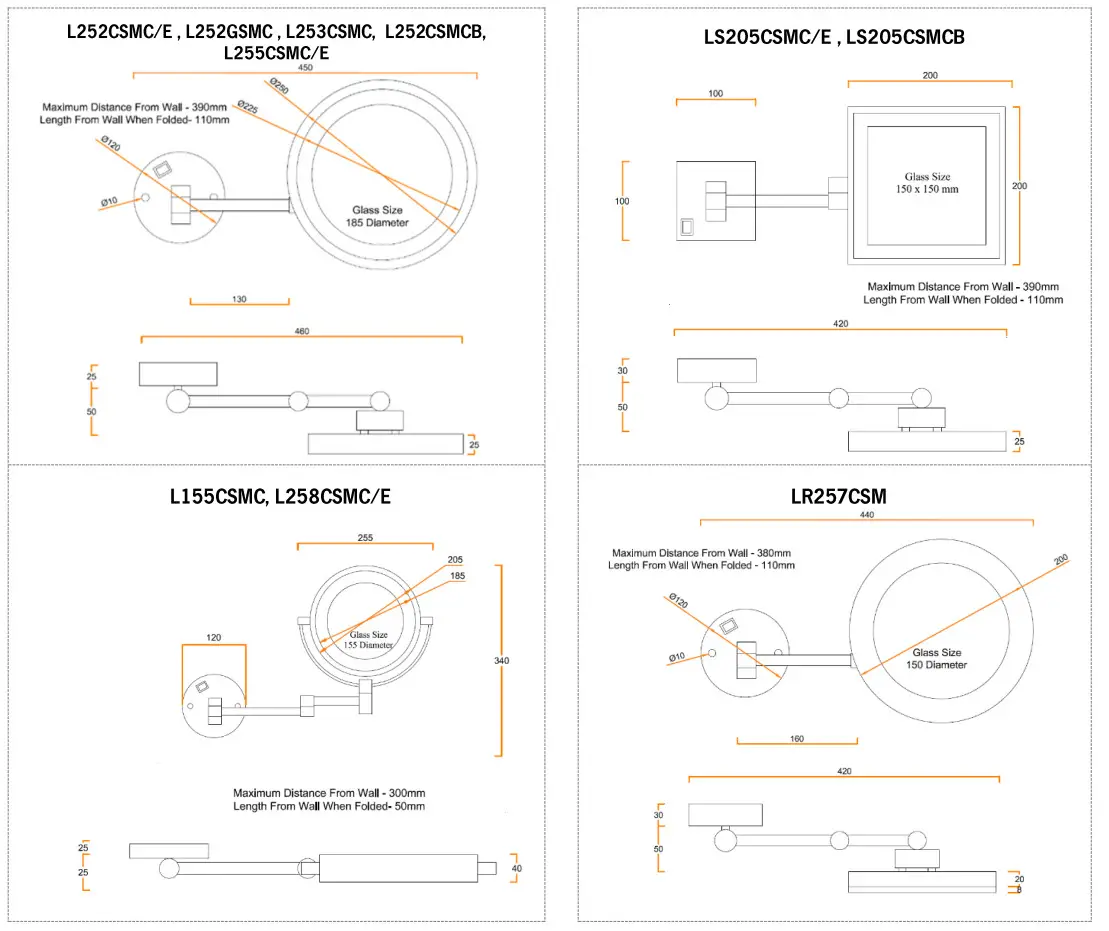
Line Drawings
Mirror Care
![]() Your mirror takes minimum maintenance for years of service. When cleaning the mirror, ensure that you have unplugged it from the power outlet or turned off
Your mirror takes minimum maintenance for years of service. When cleaning the mirror, ensure that you have unplugged it from the power outlet or turned off![]() Clean the mirror with any glass cleaner or a 70-30% water to methylated spirits mixture
Clean the mirror with any glass cleaner or a 70-30% water to methylated spirits mixture![]() Do not use any abrasive cleaner on the mirror frame
Do not use any abrasive cleaner on the mirror frame![]() Do not switch on the mirror until you are certain it is completely dry
Do not switch on the mirror until you are certain it is completely dry![]() Do not submerge mirror in water or use excessive amount of water for cleaning purposes
Do not submerge mirror in water or use excessive amount of water for cleaning purposes![]() This appliance is intended for household use
This appliance is intended for household use![]() To store the mirror, use original packaging
To store the mirror, use original packaging![]() If the mirror becomes inoperable, do not attempt to repair it yourself. Refer to a qualified electrician
If the mirror becomes inoperable, do not attempt to repair it yourself. Refer to a qualified electrician
Contact Us
![]() Thermograph AU
Thermograph AU
[email protected]
www.thermogroup.com.au
1300 368 631


