![]()
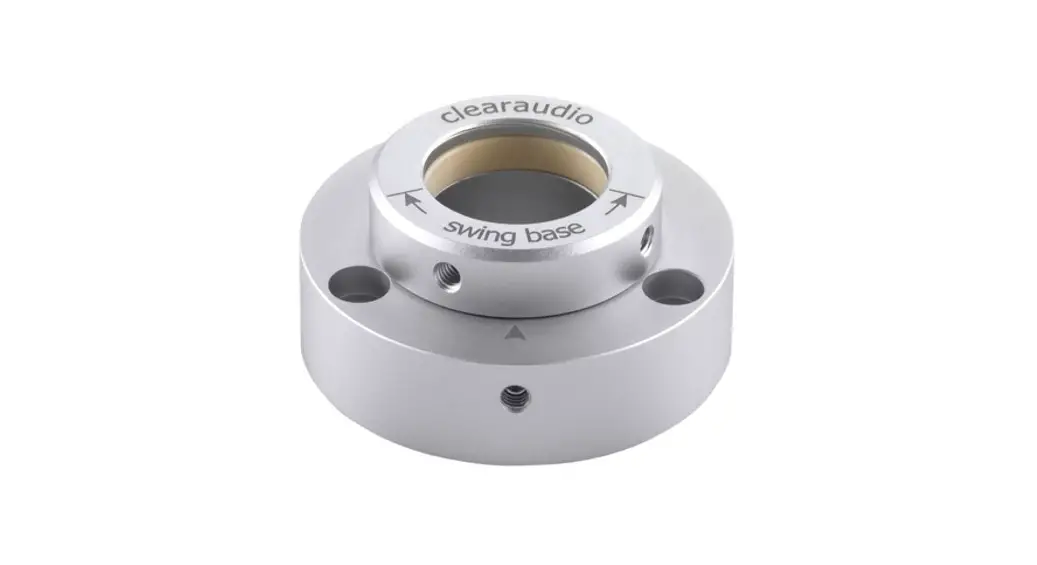
Swing base
for TT5 tonearm
User manual

Pic. similar
Dear Clearaudio customer,
Thank you for your purchase of Clearaudio’s swing base, which enables highly precise forward and backward movement of the TT5 tangential tonearm.
This product has been developed with a focus on excellent quality, functionality, and ease of use.
Please take a moment to read this product manually to ensure the correct setup and to avoid any possible damage.
Clearaudio wishes you much enjoyment with your new swing base.
Clearaudio electronic GmbH
Warning
Do not expose the equipment to rain or moisture.
No naked flame sources, such as lighted candles, should be placed on the equipment.
Never insert oil into the precision bearing as this will result in damage of the bearing.
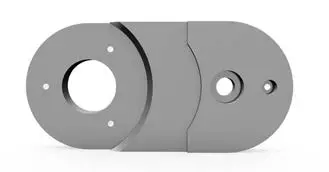
Package contents
The Clearaudio swing base is delivered in specially designed packaging to ensure safe transport.
Please retain the original packaging for any future potential transportation and shipping.
Please see the list below to check the contents of your Clearaudio swing base package.
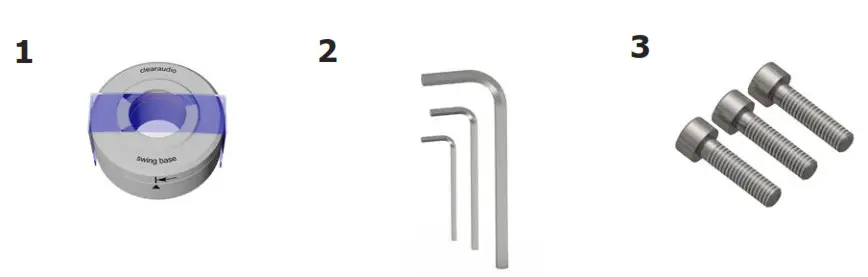
Pic. 1: Package contents
| 1. | swing base | 3. | Socket head cap screw 3 pcs. M4x16 |
| 2. | Hex wrench (Size: 1.5 / 2 / 3) | 4. | Not shown: User manual |
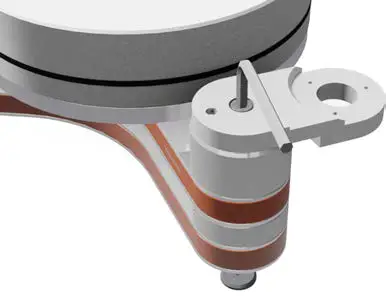
Installation on Unify round base
Please install the appropriate tonearm base on your turntable first.
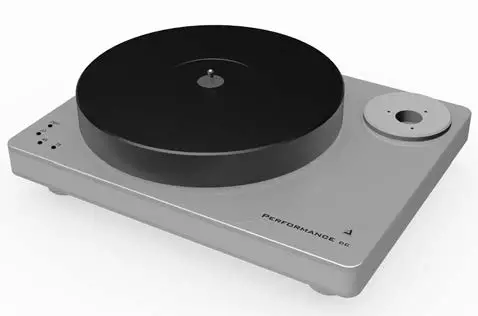
For Ovation and Performance DC turntables you will need the Unify base (Art. No. AC031-4, available from your dealer).
Ensure that you set the correct distance of 222mm between the platter spindle and the tonearm pivot.
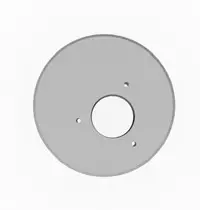
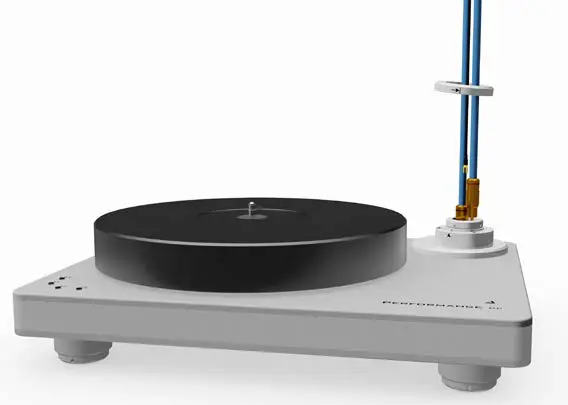
Pic. 2: Unify tonearm base
Pic. 3a: Mounting of the tonarm base
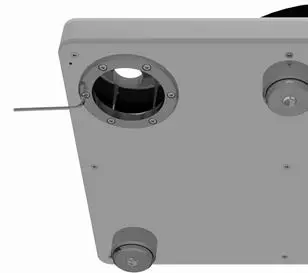
Pic. 3b: Mounting of the tonarm base on the bottom side
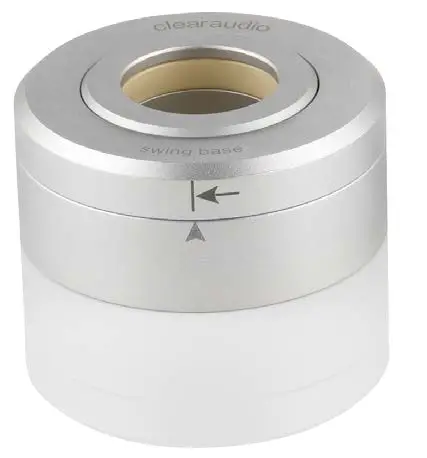
Take the swing base out of the box. Remove the adhesive tape used to secure both parts during transport.
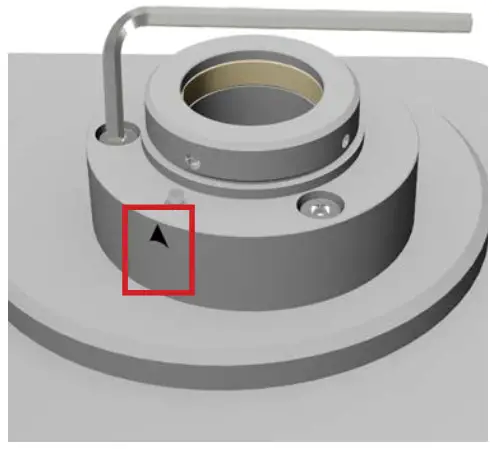
Pic. 4: Mounting of the swing base
The upper part of the swing base can be put aside for the time being.
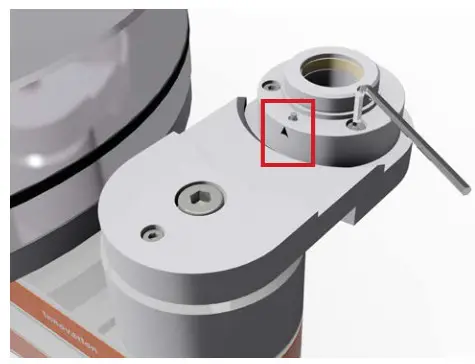
Place the lower part of the swing base on the tonearm base, such that the holes of both bases are aligned.
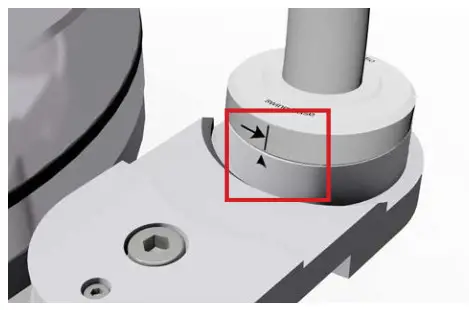
The arrow on the lower part should point towards the platter (see picture 4). Use the M4 x 16 screws and the hex wrench
#3 (provided) to tighten the lower part of the tonearm base.
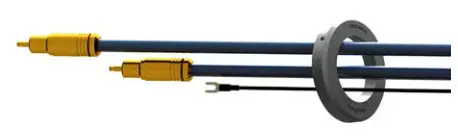
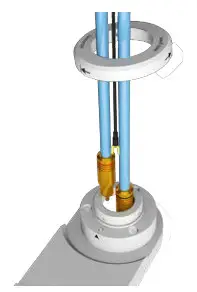
Now you can thread the tonearm cables of the TT5 tonearm through the upper part of the swing base (not yet assembled) and through the opening of the assembled lower part and tonearm hole of the chassis (see pic 5).
Insert the foot of the TT5 through both components of the swing base into the tonearm hole, allowing the upper ring to rest loosely (see pic. 6).
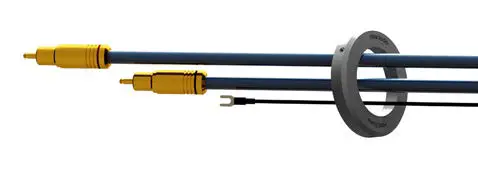
Pic. 5: Putting the cables through the swing base
Pic. 6: Inserting the cables in the tonearm base
The installation of the swing base is now completed and you are ready to mount and adjust the TT5 tangential tonearm, following the TT5 user manual.
Once the tonearm has been fully adjusted, you will need to fix the upper part of the swing base.
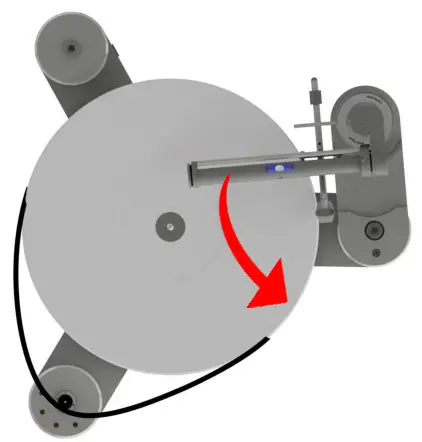
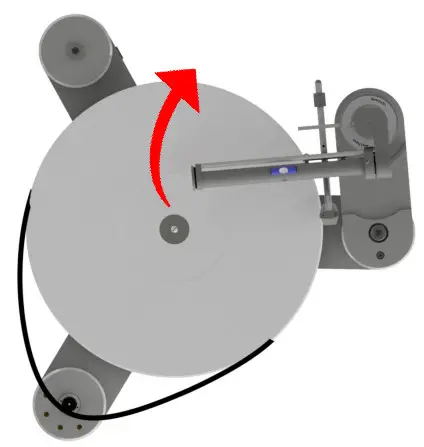
Here, you can opt for the direction in which the tonearm will swing-out.
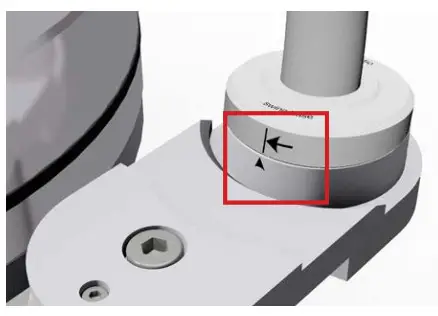
If the tonearm is to swing out counterclockwise (to the right), then the upper part of the swing base must be tightened in the position as shown in picture 7b.
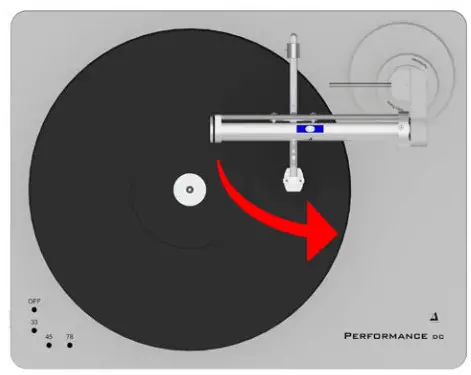
Pic. 7a: Direction of the tonearm
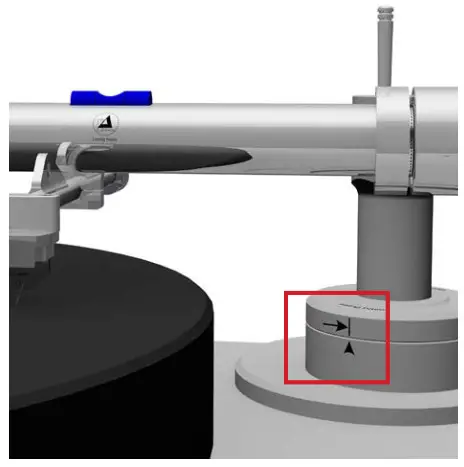
Abb. 7b: Mounting direction of the upper part (to the right)
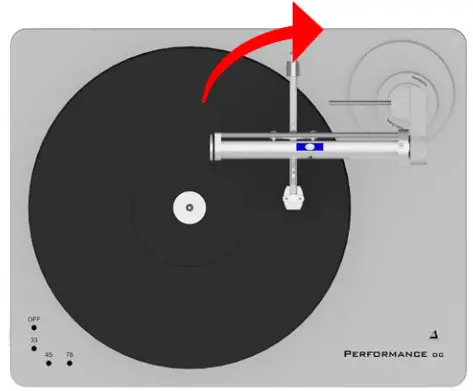
If the tonearm is to swing out clockwise (to the rear), then the upper part of the swing base must be screwed in the position as shown in picture 8b.
Pic. 7a: Direction of the tonearm
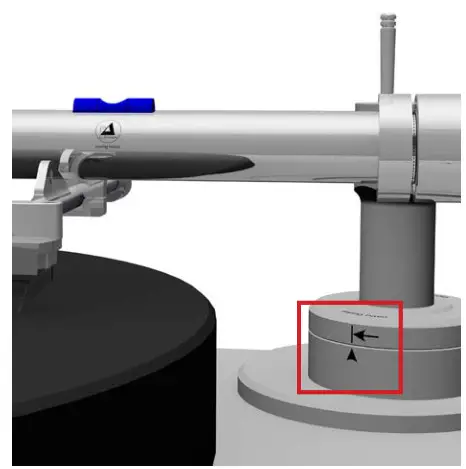
Abb. 7b: Mounting direction of the upper part (to the right)
If the tonearm is to swing out clockwise (to the rear), then the upper part of the swing base must be screwed in the position as shown in picture 8b.
Pic. 8a: Direction of the tonearm.
Pic. 8b: Mounting direction of the upper part (to the rear)
Installation on Unify level base
Please install the appropriate tonearm base on your turntable first. For a turntable of the Clearaudio Innovation series, you will need the Unify base (Art. No. AC030-4, available from your Clearaudio dealer). Ensure that you set the correct distance of 222mm between the platter spindle and the tonearm pivot.
Pic. 9: Unify level base
Pic. 10: Mounting of the Unify level base
Take the swing base out of the box.
Remove the adhesive tape used to secure both parts during transport.
The upper part of the swing base can be put aside for the time being.
Place the lower part of the swing base on the tonearm base, such that the holes of both bases are aligned.
The arrow on the lower part should point towards the platter (see picture 11). Use the M4 x 16 screws and the hex wrench #3 (provided) to tighten the lower part of the tonearm base.
Pic. 11: Mounting of the level base
Now you can thread the tonearm cables of the TT5 tonearm through the upper part of the swing base (not yet assembled) and through the opening of the assembled lower part and tonearm hole of the chassis (see pic 12).
Insert the foot of the TT5 through both components of the swing base into the tonearm hole, allowing the upper ring to rest loosely (see pic. 13).
Pic. 12: Threading the cables through the swing base
Pic. 13: Inserting the cables in the tonearm base
The installation of the swing base is now completed and you are ready to mount and adjust the TT5 tangential tonearm, following the TT5 user manual.
Once the tonearm has been fully adjusted, you will need to fix the upper part of the swing base.
Here, you can opt for the direction in which the tonearm will swing-out.
If the tonearm is to swing out counterclockwise (to the right), then the upper part of the swing base must be tightened in the position as shown in picture 14b.
Pic 14a: Direction of the tonearm
Pic 14b: Mounting direction of the upper part (to the right)
If the tonearm is to swing out clockwise (to the rear), then the upper part of the swing base must be screwed in the position as shown in Picture 15b.
Pic. 15a: Direction of the tonearm
Pic 15b: Mounting direction of the upper part (to the rear)
Now you can tighten the screws of the upper part of the swing base with hex wrench #2.
Finally, re-check all settings again. The TT5 with swing base is now ready to use.
Installation on other turntables
If your turntable does not have a replaceable tonearm base, we recommed contacting the manufacturer of the turntable, in order to get your turntable professionally prepared for the Clearaudio swing base.
Special instructions
All necessary services for any Clearaudio products should be performed by authorized personnel only.
In case of any repair, Clearaudio products should be sent to your nearest authorized Clearaudio distributor or dealer.
PLEASE RETAIN ALL ORIGINAL PACKAGING. You will need it if this product has to be transported and/or shipped. Any further questions you may have about this product should be directed to your local dealer.
Technical details
| Material: | Aluminum |
| Weight: | 136g |
| Outer diameter: | 59mm |
| Inner diameter: | 24.85mm |
| Height: | 26mm |
| Manufacturer‘s warranty: | 5 years |


