![]() Premium Portable Double
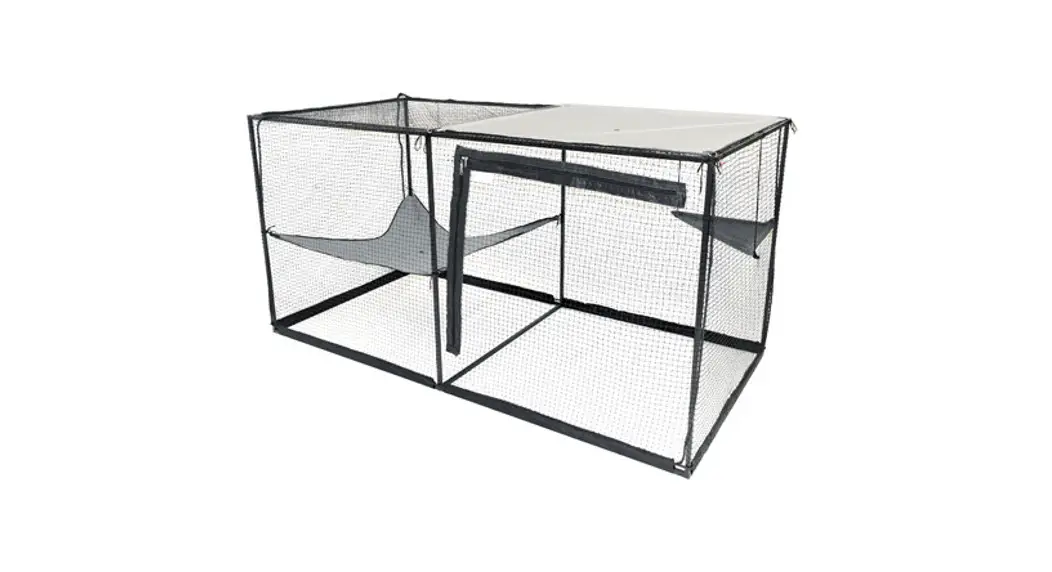
Premium Portable Double
Cat Enclosure Instructions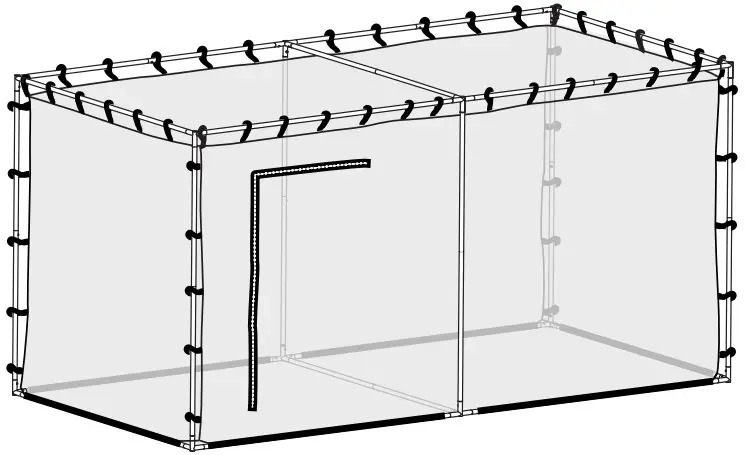

Part List
| 20x Type A Poles | |
| 20x Type B Poles | |
| 8x 3-Way Steel Connectors with Plastic Cap |  |
| 4x 4-Way Steel Connectors |  |
| 1x Enclosure Cat Netting |  |
| 1x Carabiner |  |
Preperation
Check that you have all the required parts.
Make sure to install the enclosure on a level ground surface.
Split the poles into two groups one for Type A and the other for Type B
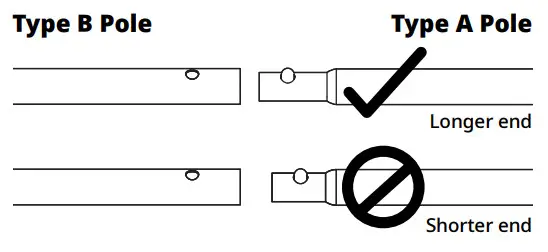
Ensure that the longer insert of the Type A (male to male) pole is inserted ONLY into the end of the Type B (male to female) pole and NOT the connectors.
Make sure to lock all connectors securely.
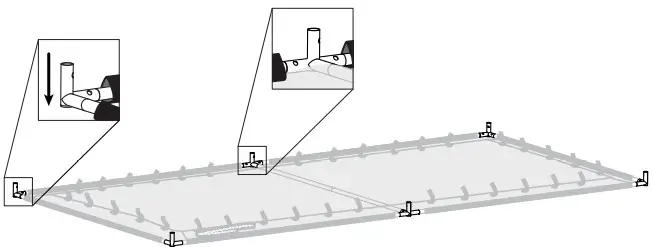
- Locate and connect the Type A Pole to the Type B Pole to form a large pole.
NOTE: Be sure to align the pin lock with the hole on the Type B pole, and make sure the poles click securely into place.
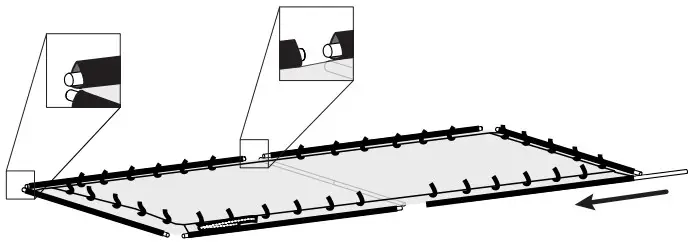
- Layout the net flat on the ground and make sure the hook and loop tabs are facing up. Slide the newly joined poles into the webbing of the net.
NOTE: Ensure the zipper is on the left of the long side of the enclosure, facing you so that the net doesn’t become twisted once attached.
- Attatch the newly joined poles to the 3-way connectors creating the corners of the frame. Use the 4-way connectors to connect the middle of the frame.
NOTE: For the 3-Way connectors, ensure the caps are facing down when attaching the poles. For the 4-Way connectors, ensure that the holes are facing inwards.
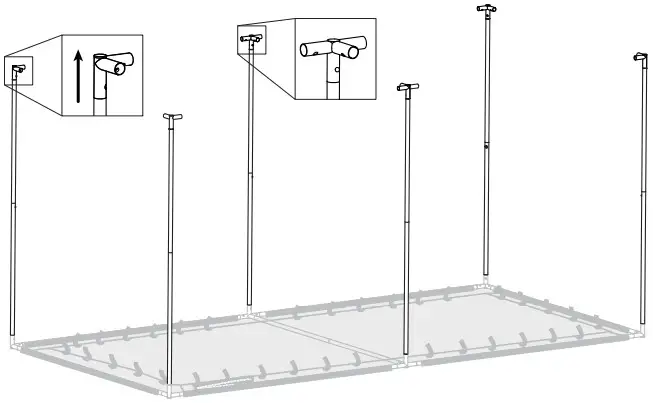
- Connect the next set of poles into the base. Then attach the remaining connectors on top in the same way as the step before.
NOTE: Ensure that the caps are all facing up when attaching to the poles.
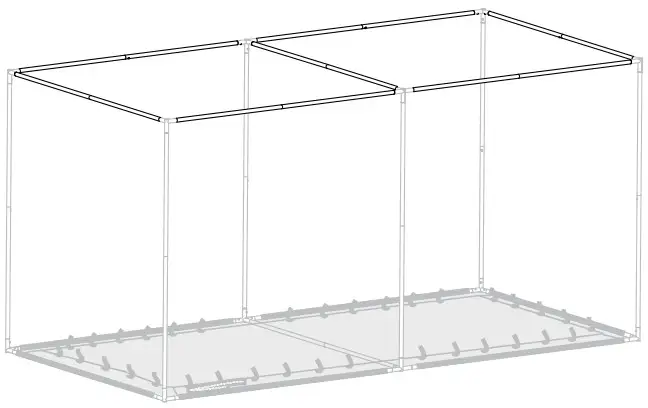
- Connect the remaining poles to complete the main frame.

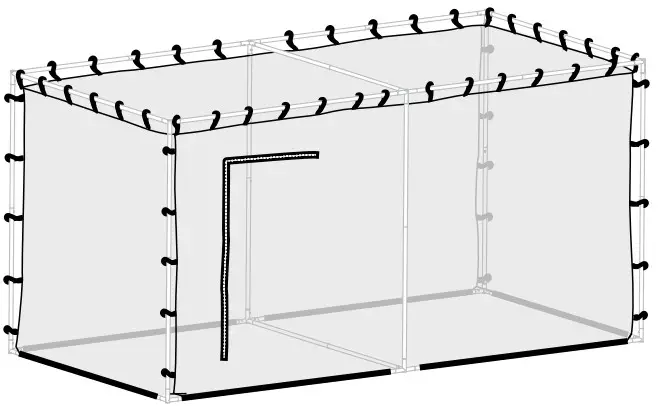
- Pull the net to the top of the frame and secure it using the pre-attached hook and loop tabs. Then secure the side of the net to complete the enclosure.

Cat Shade Sail Installation Instructions
The shade sail can be purchased as an additional accessory. It can be placed on top of the enclosure covering the whole roof or it can be set covering half the roof and half the side. Attach the shade sail by the hook and loop tabs on the shade sail onto the poles of the enclosure.
Please monitor your enclosure carefully during high winds, and adjust the positioning of your shade sail to minimise the wind catch. Do not attach a tarpaulin or a heavy-duty shade cloth (other than the Shade Sail designed for this product) directly to the Enclosure.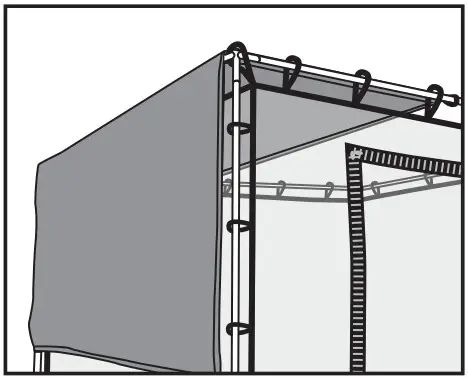 IMPORTANT CAUTION: DO NOT OVER-CLOSE ZIP BUCKLES AT F-JUNCTION
When using the zipper entry, be sure to open and close the zipper carefully and never use excessive force as this can cause damage to the slider and render the zipper ineffective. The zipper entry can be a trip hazard, so be sure to step through carefully and ensure
that you do not kick or step on the zipper track. This can also cause permanent damage to the zip. When closed, the two zippers will leave a small 2cm gap. The supplied locking carabiner should be used to secure the zipper entry as shown. 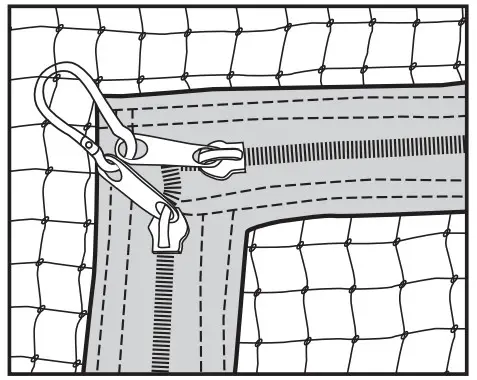
RECOMMENDATIONS:
For extra stability you can use tent pegs (not supplied) and/or rope (not supplied) to secure the frame to the ground. In most situations this is not required, however we recommend monitoring the frame during high wind periods, and secure accordingly. Tying rope from the top corners gives the best results in extremely high wind areas.
NOTICE: Upon completion of your new cat enclosure, customers are advised to closely monitor the initial behaviour of your cats’ when inside the enclosure.
Other than product warranties that cannot be excluded under law, Catnets excludes all warranties and shall not be liable for any consequential loss arising from use of its nets and related accessories. Use of nets is at your own risk. You should regularly inspect the net (and related accessories) for wear and tear or other damage. Catnets cannot guarantee that nets and accessories will not break and is not liable for any resultant damage, loss or injury. Due to the size of the netting squares, kittens (6 months and under) should not be left unattended for prolonged periods within the enclosure. This netting has been designed for use by cats only and is not covered for damage resulting from dogs or other animals housed in OR outside of the enclosure. For maintenance or installation enquiries please contact Catnets staff via 02 9772 0889 or [email protected] By use of the supplied products, the customer acknowledges the standard terms & conditions of sale which can be found here: www.catnets.com.au/pages/terms-conditions-of-service
![]() WARNING: CHOKING HAZARD SMALL PARTS. KEEP CHILDREN UNDER 3 AND PETS CLEAR OF PRODUCT DURING ASSEMBLY
WARNING: CHOKING HAZARD SMALL PARTS. KEEP CHILDREN UNDER 3 AND PETS CLEAR OF PRODUCT DURING ASSEMBLY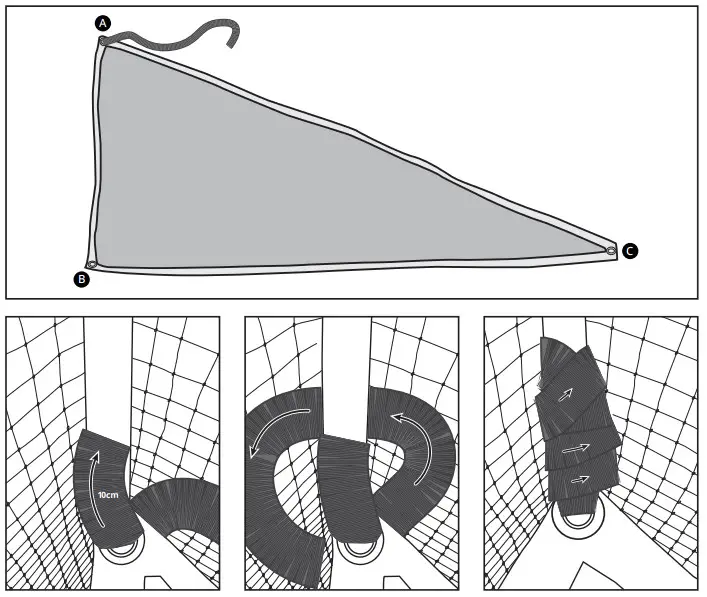
Cat Hammock Installation Instructions
Your Freestanding Cat Enclosure comes with a free hammock.
Step 1: Lay the hammock on the floor inside the enclosure to identify the three attachment points:
A: Corner with hook and loop pre-attached.
B: Right angle corner with eyelet only.
C: Corner with eyelet only.
Step 2: For corner’s B and C feed one end of the hook and loop through the eyelet leaving a 10cm tab on the top. Then feed the other end through the net mesh, around the frame pole and back through under the 10cm tab.
Step 3: Wrap this end around the 10cm tab. Make sure to press in the hook and loop together, covering as much surface area as possible as you wrap around the tab. This will help with strength when holding the cat’s weight.
Step 4: Make sure both corner’s B and C are completely tightly secured and taught before attaching corner A. Attach corner A using the same method of looping around the frame pole and wrapping around the tab.
![]() Visit our website: www.catnets.com.au
Visit our website: www.catnets.com.au
Email us: [email protected]
Give us a call: (02) 9772 0889
Follow us on:![]()


