GEEETECH 39-001-0488 GCB-1
NOTE
- For smoothly assembling the product, please read this User Manual before you access to assemble the machine.
- Ultraviolet will be produced while the curing box is working. For your protection, please apply this machine in a correct way.
- The curing box will produce an intense blue light which might hurt your eyes. So don’t stare at the curing machine for long time.
- Please be cautious when apply to use the product, or the box will be damaged if falls down!
Packing list
| 1# Unit *l | 6# Unit*l | Screw *8 (Two Different Kinds) |
| 2# Unit *l | Instruction Book *l | Nut*6 |
| 3# Unit *l | Post-sale Service Card *l | Screwdriver *l |
| 4# Unit *l | Power Adapter *l | Lever *l |
| 5# Unit *l | Control Box *l | Rubber band *20 |
Assembling Steps
Please note that there exists 6 units in the curing box, and every single unit possesses a unique number on each surface. You can follow the steps to assemble your machine according to the below moves. Please use the rubber band to fix the assembled unit when each unit is applied to be assembled with another.
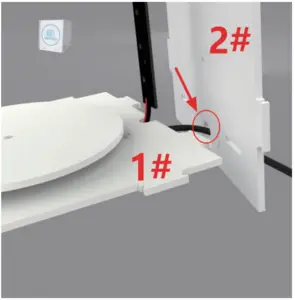
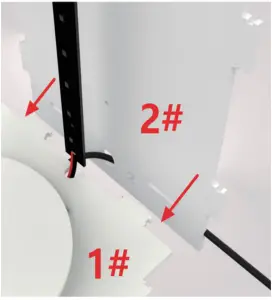
- Find out the 1# and 2# units, and insert the power adapter of the 1# unit into the hole from the bottom of the 2# unit.

- Assemble the 1# unit and the 2# unit.

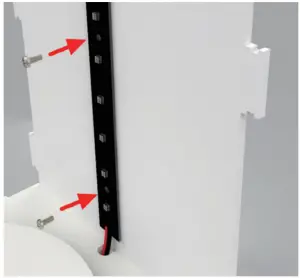
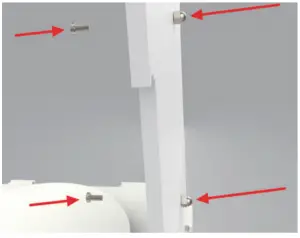
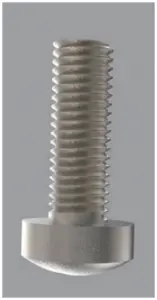
- Fix the M3*8 screws adhered on the UV Lamp Board (Distinguish the types of the screws, more details shown in the pictures below) and other tools on 1#. unit.


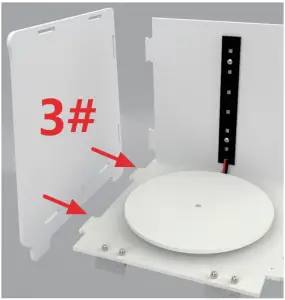
- Assemble the 3# unit.

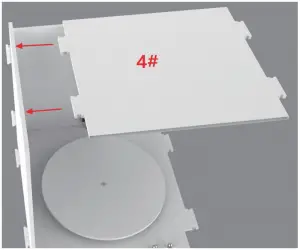
- Assemble the 4# unit.

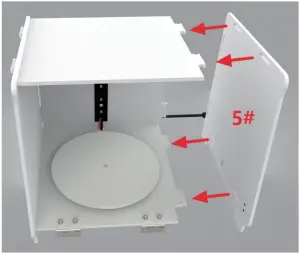
- Assemble the 5# unit.

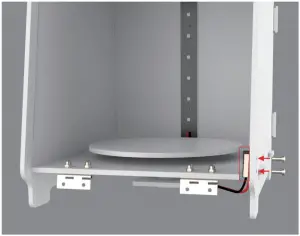
- Use the kit of screws and screwdriver to install the covering detection switch.

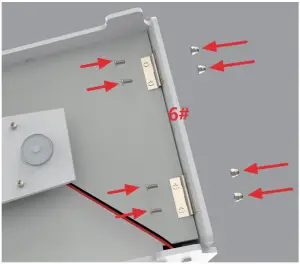
- Assemble the 6# unit. Screwdriver) lever are required in this process to screw up the nut.


- As the assembling process is done, please check out and make sure that every single assembled unit is fixed by rubber band.

Use the Product
- Power Input
- Power output

- Connect the input end of the controlling box with the power adapter.
- Connect the output end of the controlling box with the curing box’s power supply cord.
- Plug in the power adapter.
- Press the “Time+” button to set the timing, and long press it to adjust the timing.
- Once the timing is set, press the “Start/Stop” button to run the machine. As the LED light turns green, the code tube will start counting down. When the time is up, and the LED light turns red from green, UV lamp and the motor will shut down immediately.
- When the machine is working, pressing the “Start/Stop” button will reset the timing, and the machine will stop working right away, meantime the LED will turn red from green.
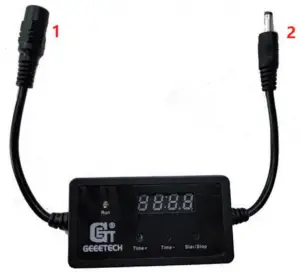
NOTE: This product is designed with Auto-protection mechanism. If you try to uncover the hood ,while the machine is working, it will automatically shut down the UV lamp and the motor. If you want the process to be continued, just cover the hood back to the machine.
Specification
| POWER INPUT | DC12V |
| POWER INDAPTER | Input: AC 100-24-0V, 50~60Hz, Output:12V |
| WAVELENGTH OF UV | 405nm |
| ROTATION RATE OF THE PLATE | 7r/min |
| CURING SIZE | ∮l85mm x 180mm |
| PRODUCT SIZE | 217(L)X204(W)X228(H)mm |
| PRODUCT WEIGHT | ~1.3kg |


