samsara ACC-CM-ANLG Camera Connector
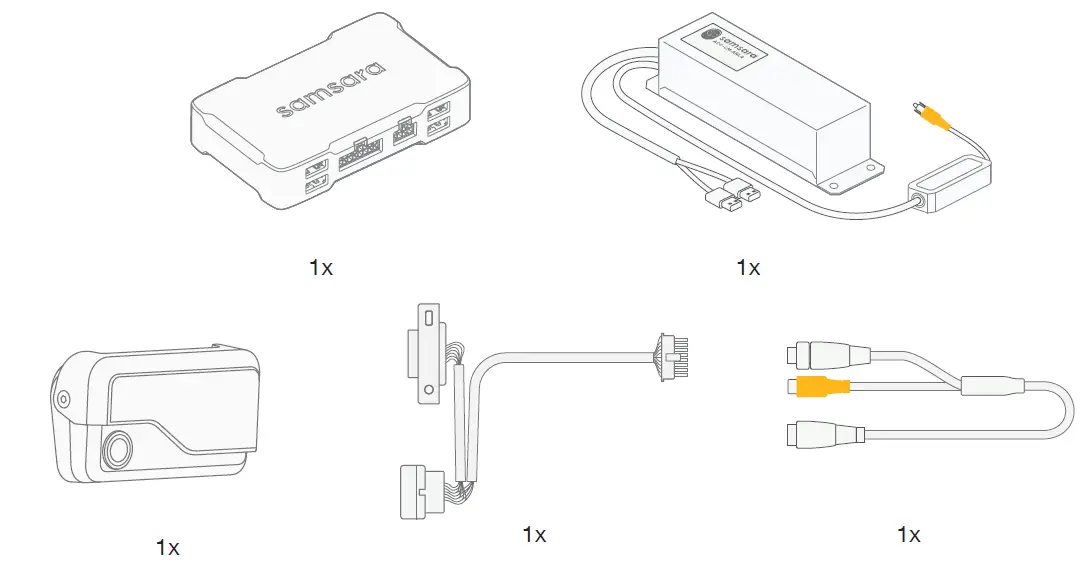
WHAT IS IN BOX
Install Tips and System Diagram
The ACC-CM-ANLG will ship with connectors for RCA and 4-pin GX12. If you have another connector, please reach out to your Samsara contact.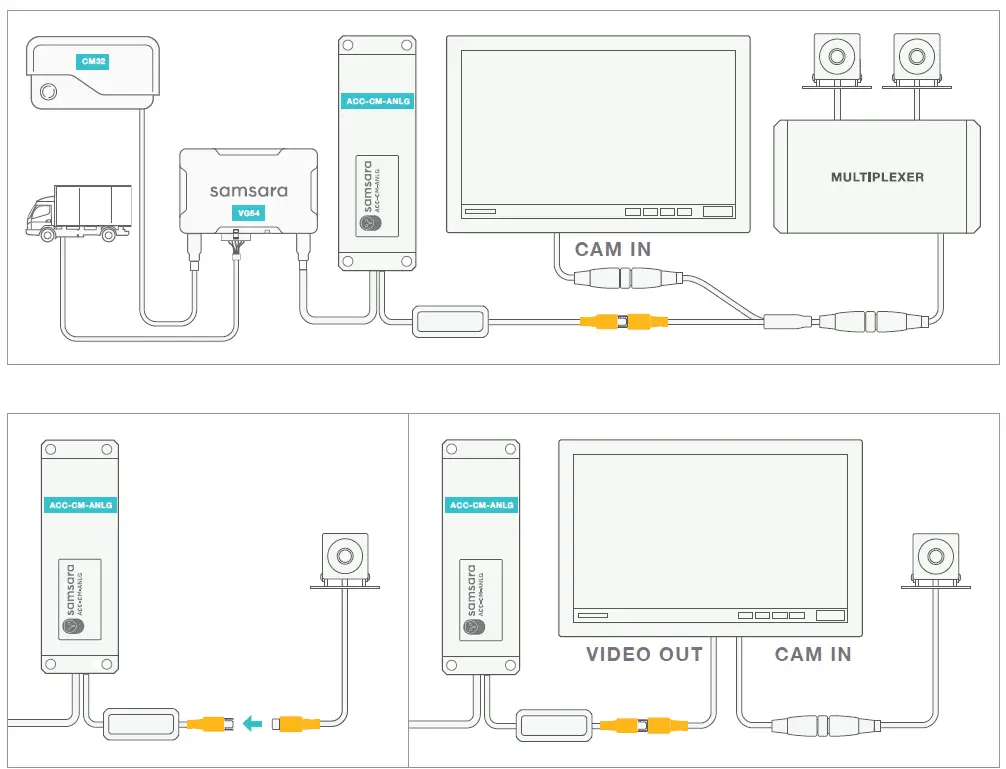
STEP1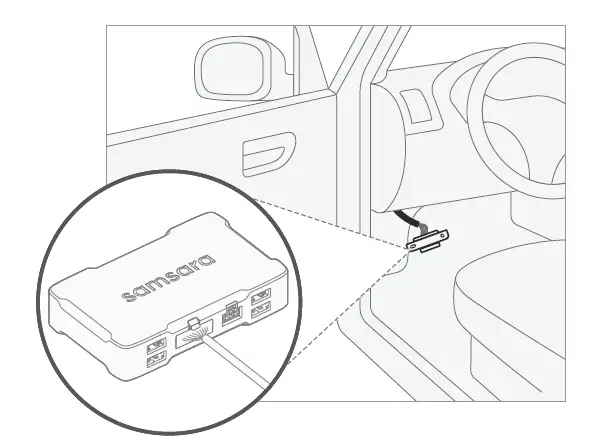 Connect the Samsara vehicle gateway to your vehicle’s diagnostic port using the provided cable.
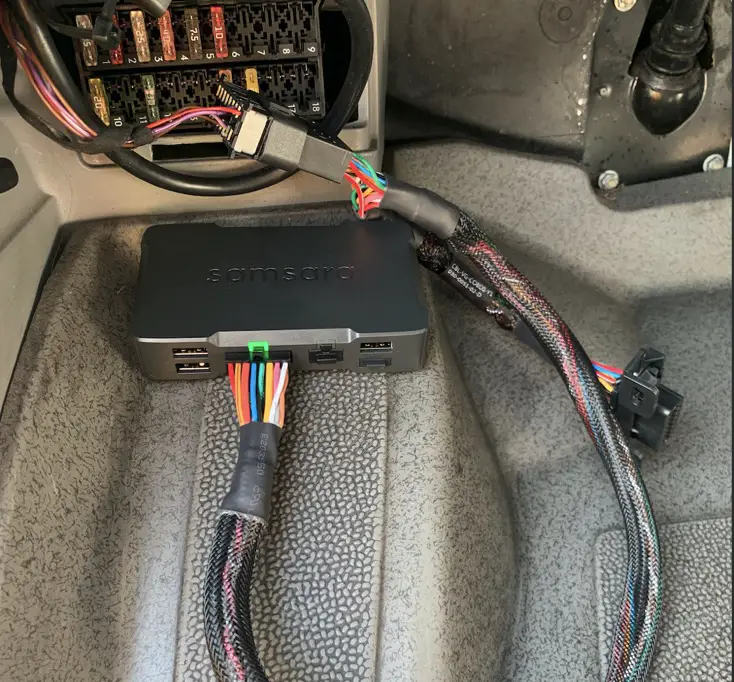
STEP2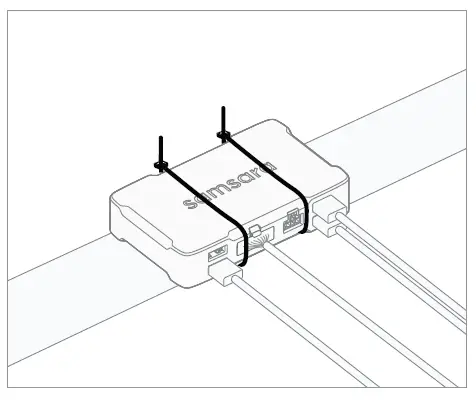 Mount the vehicle gateway in the vehicle. The vehicle gateway must be mounted rigidly in order to get the “harsh events” detection feature.
STEP3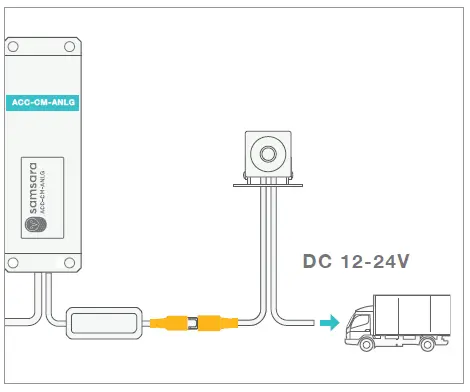 IMPORTANT: Ensure camera is connected to power per manufacturer’s instructions. Samsara system does not power third-party cameras.
STEP4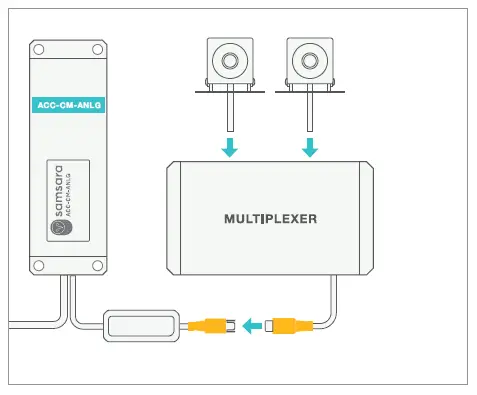 (Optional) Multiplexer
If this install includes a multiplexer, plug all cameras into the multiplexer first. Then attach multiplexer to video input.
STEP5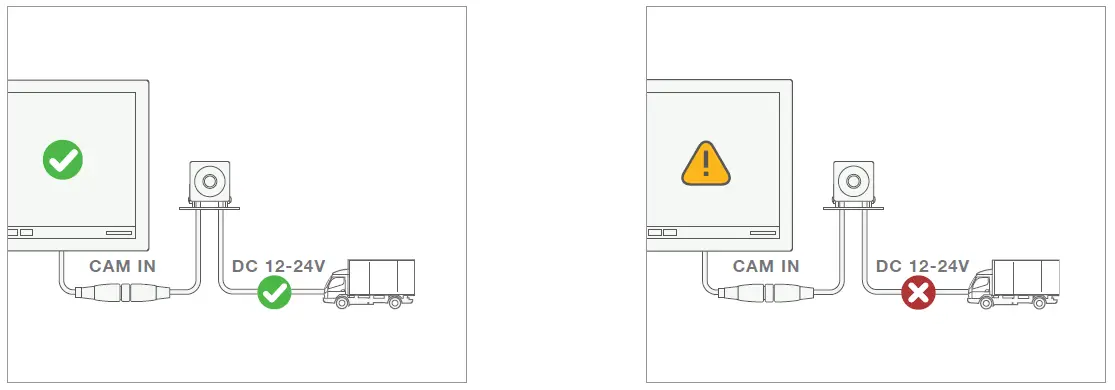 RECOMMENDED: Test camera system before attaching ACC-CM-ANLG.
Attach camera to display and turn vehicle on. With motor running, check video quality.
If video quality is poor, switch camera and display power source to different circuit. Noisy vehicle power can cause poor video quality.
STEP6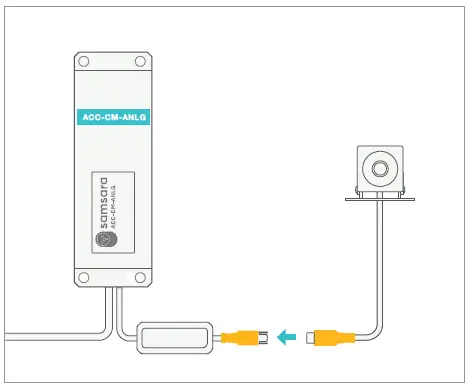 Attach analog video signal from camera system to ACC-CM-ANLG.
If this vehicle only has one camera, connect video directly to ACC-CM-ANLG.
If this vehicle has display, DVR, or multiplexer, see next step for further instructions.
STEP7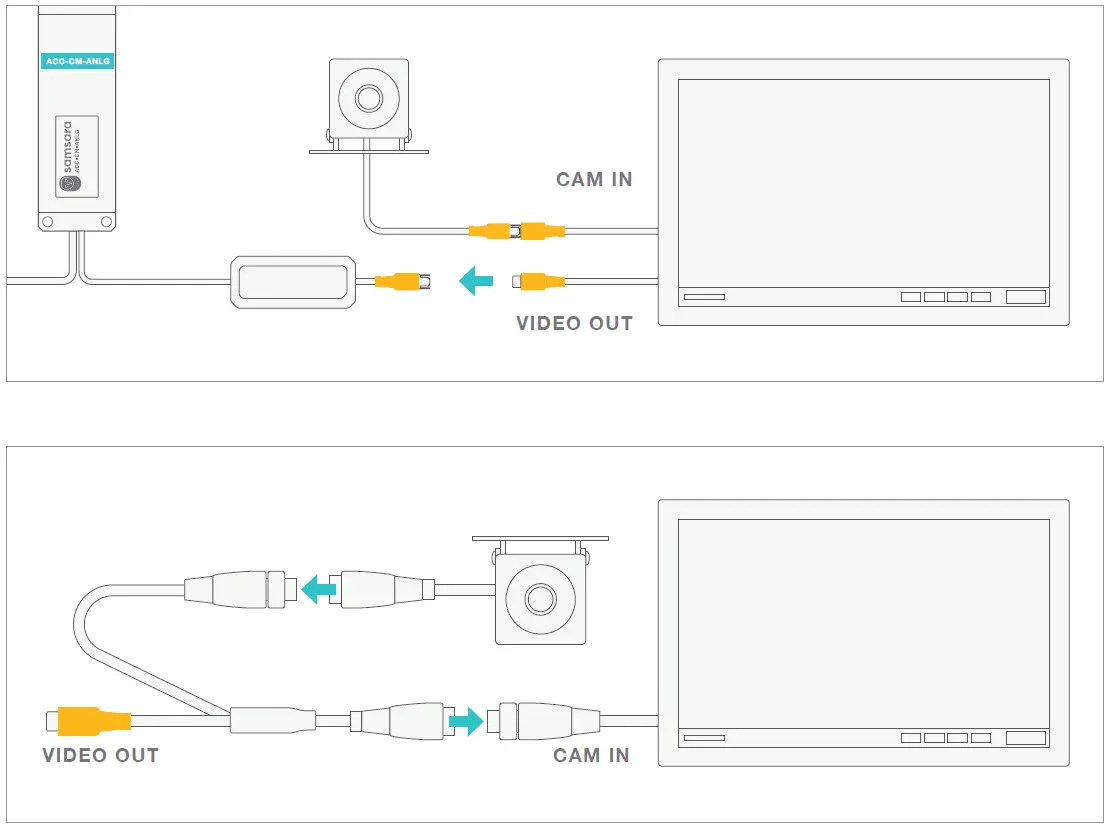 OPTIONAL: If display/DVR has camera input and video output, connect camera directly to camera input.
If display/DVR has only camera input, use provided Y-cable to split camera stream before connecting camera to camera input.
STEP8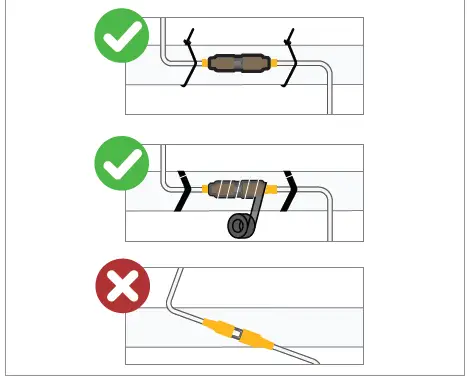 IMPORTANT: Secure all connectors using heat shrink or electrical tape, and attach firmly to vehicle.
Failure to secure connectors may cause poor video quality.
STEP9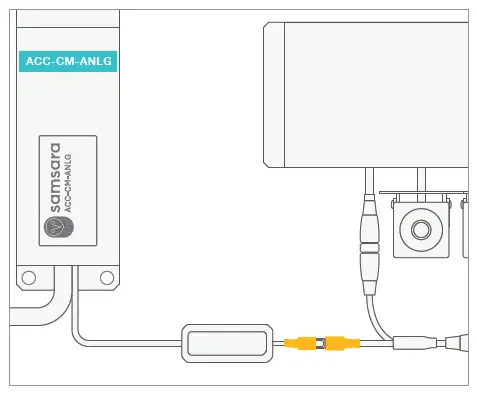 Connect ACC-CM-ANLG to video output.
STEP10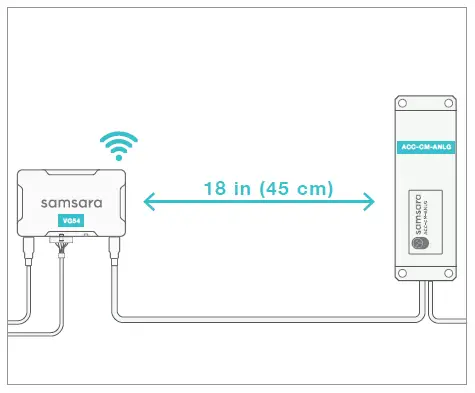 For optimal GPS performance, mount
ACC-CM-ANLG at least 18 inches (45cm) from gateway.
STEP11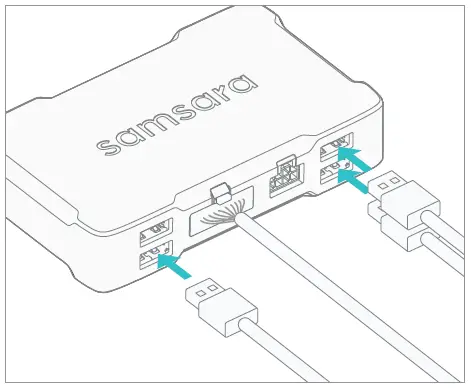 Connect USB cables from the CM dashcam and ACC-CM-ANLG to the gateway
STEP12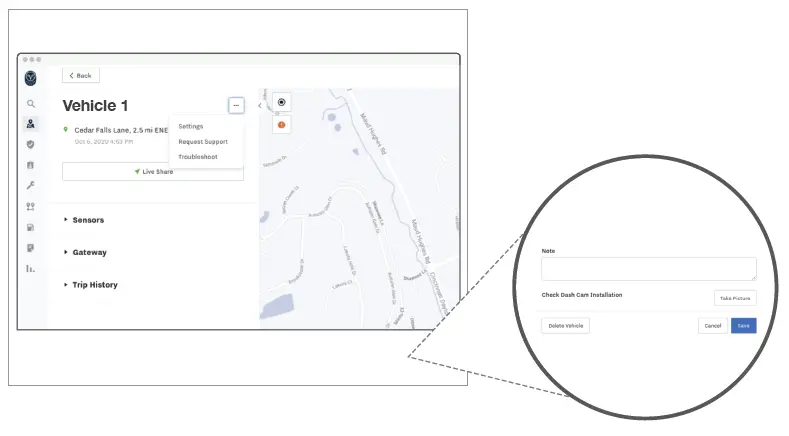 (Optional) Software Installation Validation
Once all items are wired and powered on, you can verify that the install is correct by taking a photo from the “Check Dash Cam Installation” feature in device settings.
To get to this screen, go to the vehicle that has the rear camera accessory installed, and click on settings.
STEP13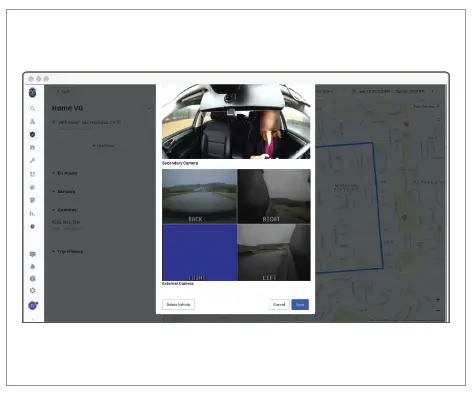 From the “Check Dash Cam Installation” feature, scroll through and verify that all camera images appear normally. Video feed from third party camera should appear in the section labelled
“External Camera”
STEP14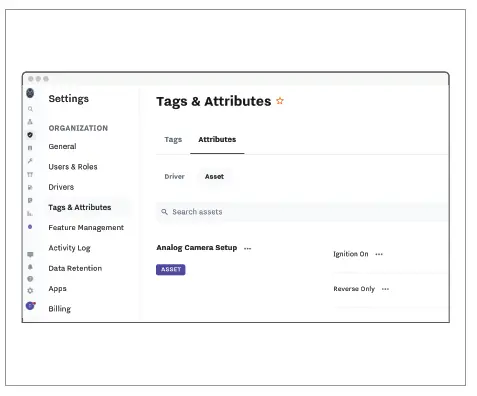 REQUIRED: Once ACC-CM-ANLG is installed, you must designate how camera is powered. If camera is always powered when vehicle is on, assign “Ignition On.” If camera is powered only when vehicle is reversing, assign “Reverse Only.” Go to Settings > Tags & Attributes > Asset to find the Analog Camera Setup attribute. Click the “…” next to the appropriate value and assign to your vehicle.
STEP15 (Optional) Retrieving a Video with Rear Camera Footage
Confirm that all components have been installed correctly before attempting to retrieve rear camera footage. Go to the dashcam footage page. If there is rear camera footage available, it will show up automatically in the video player with the rest of the camera footage.


