JBC B-iRON 210 Precision B iRON Station Instruction Manual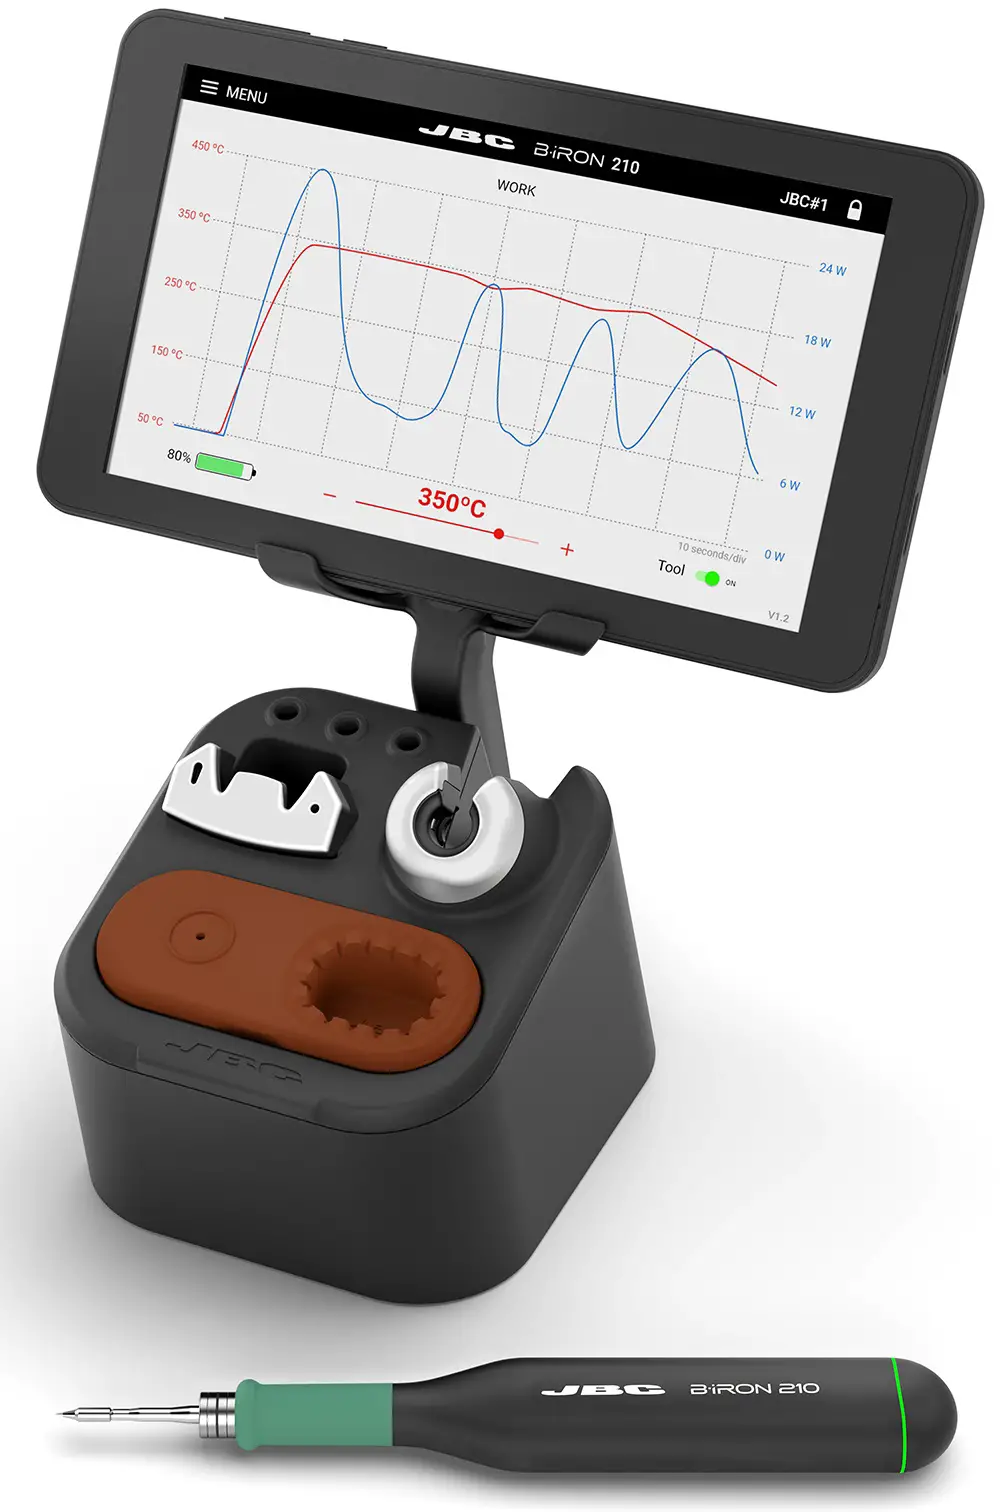
This manual corresponds to the following references:
Console included*:
BI210UA 120 V – N. America, Taiwan
BI210IA 230 V – India
BI210A 230 V – Europe
BI210KA 230 V – United Kingdom
BI210HA 230 V – China
BI210JA 100 V – Japan
Console not included*:
BI210UQA 120 V – N. America, Taiwan
BI210IQA 230 V – India
BI210QA 230 V – Europe
BI210KQA 230 V – United Kingdom
BI210HQA 230 V – China
BI210JQA 100 V – Japan
Packing List
The following items are included:
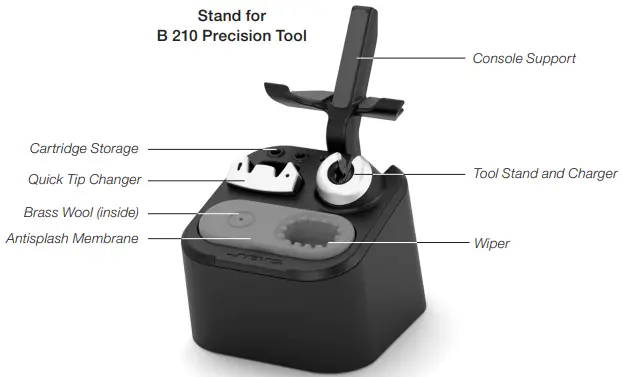
Stand for B 210 Precision Tool … 1 unit Ref. B210-SA
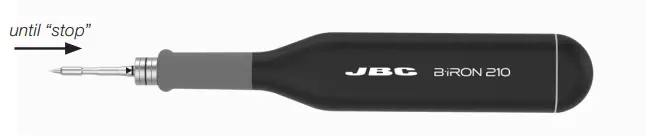
B 210 Precision Tool…1 unit Ref. B210-A
B·iRON Console …….. 1 unit*
included according purchased reference
Cable USB ………………….. 1 unit
Ref. 0028092

Brass Wool ………………… 1 unit
Ref. CL0300
already assembled in the stand

Manual ………………………… 1 unit
Ref. 0027779

Power Cord ………1 unit*
0027381 230V – India
0027382 230V – Europe
0027378 230V – United Kingdom
0027379 230V – China
0028103 100V – Japan
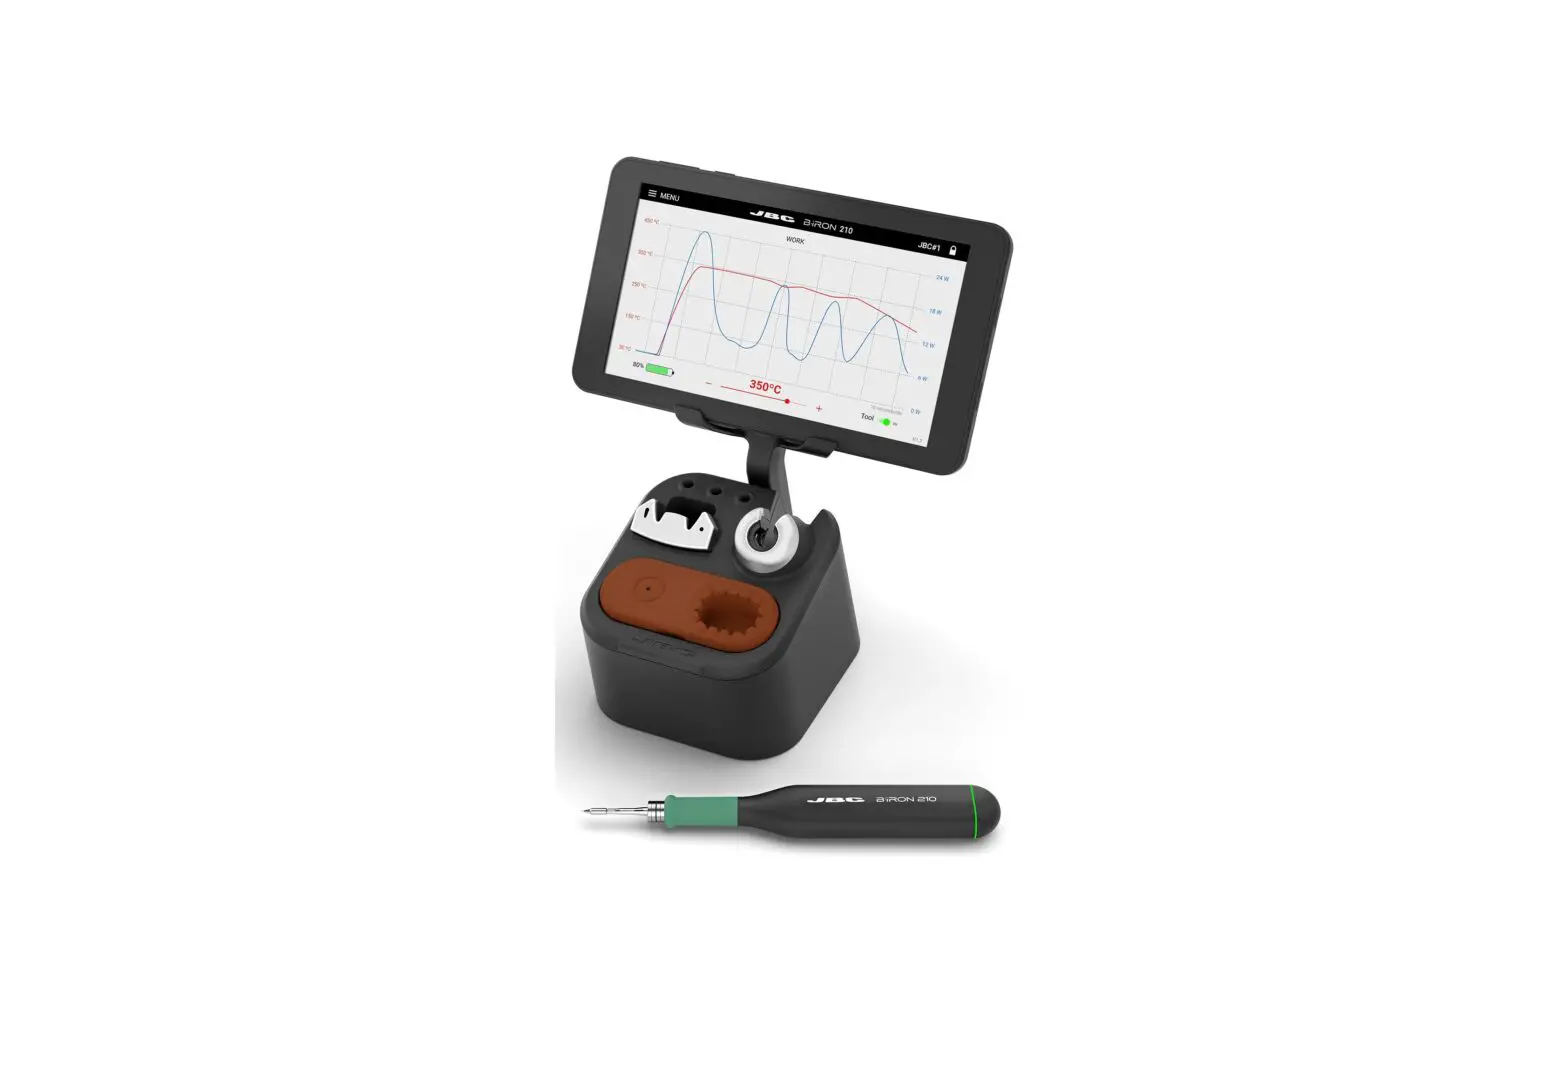
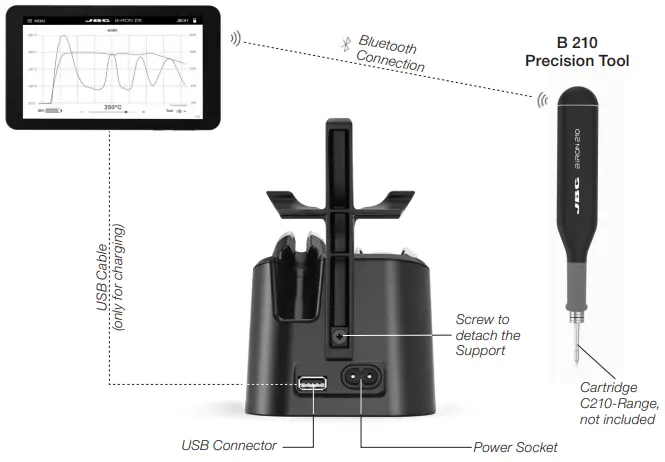
Features and Connections
B·iRON Console
Note: for references without console blue tooth device like PC or mobile can be connected.
Quick Start
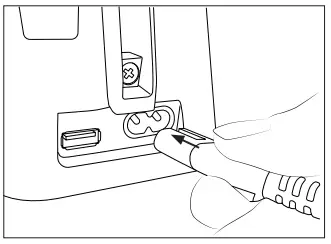
- Connection
Connect the stand to the mains (100 – 240 V).
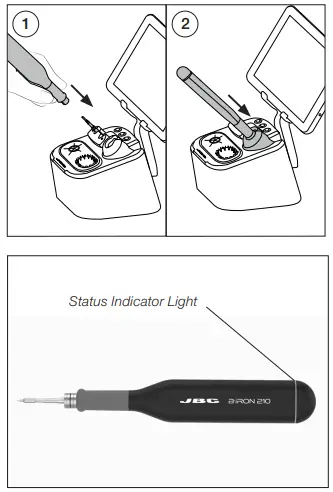
- Cartridge Insertion and Charging
Insert a cartridge into the tool (1) and place it into the charger on the stand (2).
Note: Charge the tool completely (30 min) before using for the first time.
The status indicator light idicates as follows the tool status:green working/soldering green blinking charging alternating red/green blinking low battery, less than 20% red blinking: no cartridge no color: power OFF - Switching on Console/Device
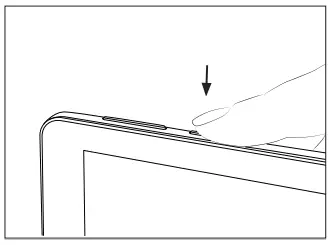
Turn on the console/device and open the B·iRON Application:

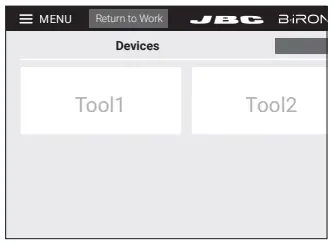
- Selecting Tool
Select the tool from the detection list.
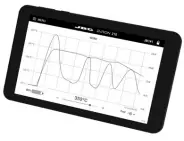
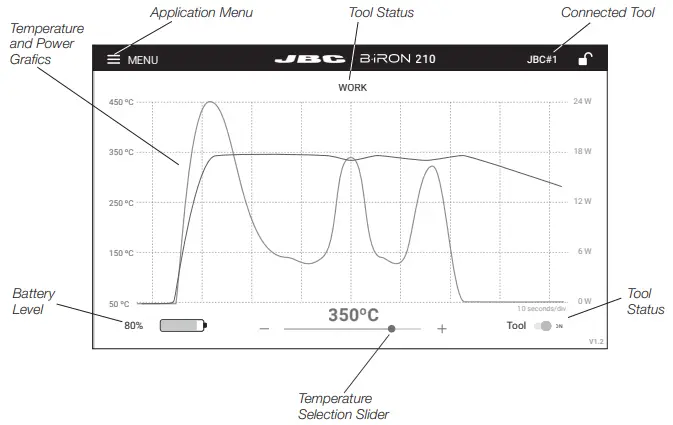
Console Work Screen
The work screen shows the graph of the current tip temperature and the power supplied to the tip by moving the graph permantely to the left.
Operation
The JBC Most Efficient Soldering System
This revolutionary technology is able to recover tip temperature extremely quickly. This allows the user to work at a lower temperature. As a result, tip life increases by 5.
Work
When the tool is lifted from the stand the tip will heat up to the selected temperature.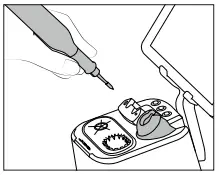
Charging and Hibernation
When the tool is in the stand enters into Hibernation Mode and cools down to room temperature.
While the tool remains in the stand, it charges.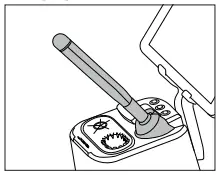
Note: When the tool is lifted from stand the Soldering System acts as follows:
Hibernation
When the tool is outside of the stand and remains inactive (no movement), the tool enters into Hibernation mode and cools down to room temperature.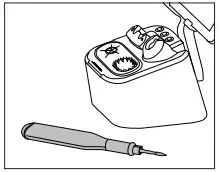
Turned Off
If the tool has been inactive for a longer period of time, it is turned off.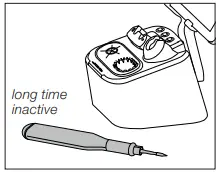
Turned On
To turn the tool on, put it back into the stand.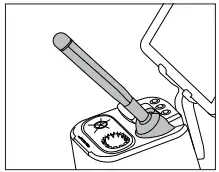
Note: If desired, the tool can be swithed off/on. Tab the Tool Power button at the tablet screen (bottom right) to switch it off/on.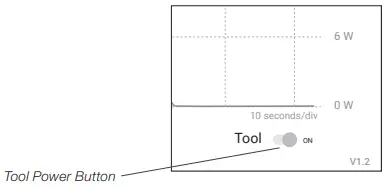
Grafics
The work screen shows the automatic recording of the temperature and power grafics.
The automatic recording can be pause by tapping the screen at the grafic area. The automatic recording stops also when the tool stops working.
While the automatic recording is stopped, you can get the temperature/power value in a concret point by tapping the graph on the tablet screen.
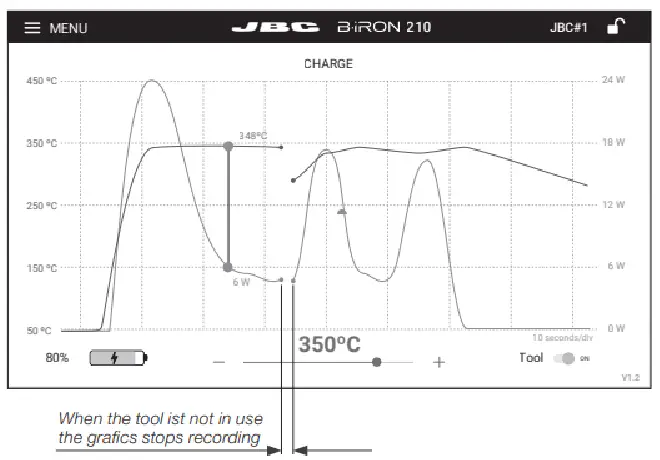
The grafic can be moved to the left and right by swiping the touch screen sideways with one finger.
The recording starts automatically as soon as the tool is removed from the stand and the graphic automatically jumps to the end of the last recording and continues with the recording.
Note: When the tool is placed in the stand and is not in use, the temperature/power recording stops. A gap can then be seen in the curve grafics.
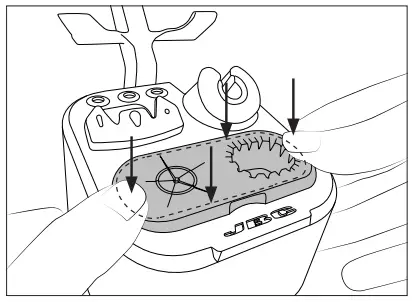
Tip Cleaner
Select the option to suit your needs and improve the thermal transfer of the tip.
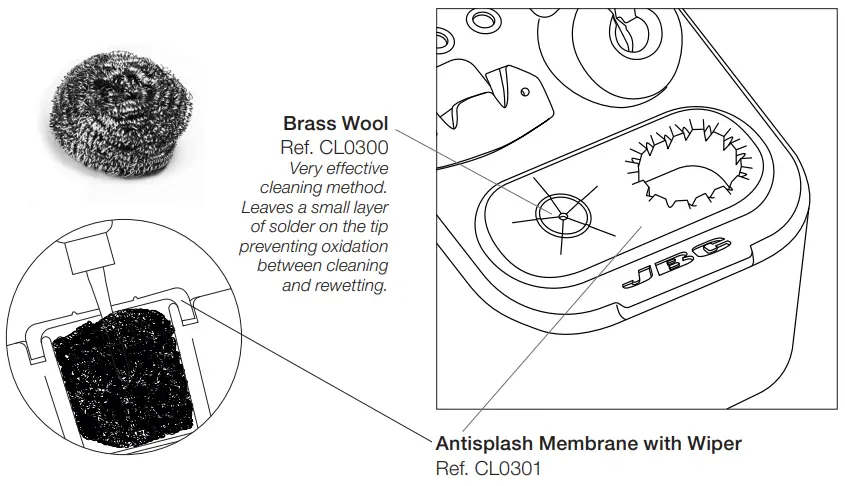
The antisplash membrane prevents splashing and keeps the work area clean.
Includes a temperature resistant wiper for removing excess solder by gently tapping or wiping the cartridge tip.
If the tip is very dirty, JBC recommends first cleaning it with the wiper to remove excess solder and then with the brass wool.
Wiper
Wiper
Tap gently to remove excess solder.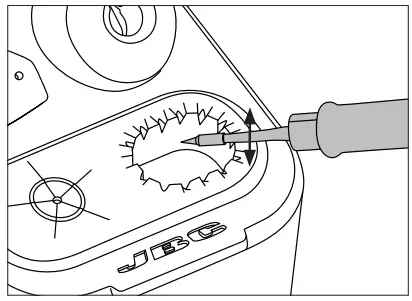
Wiping
Use the slots to remove remaining particles.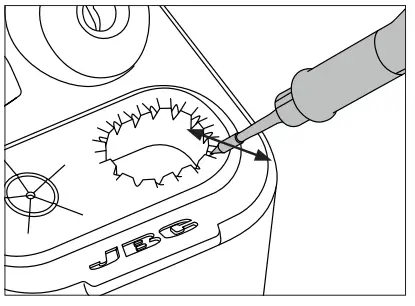
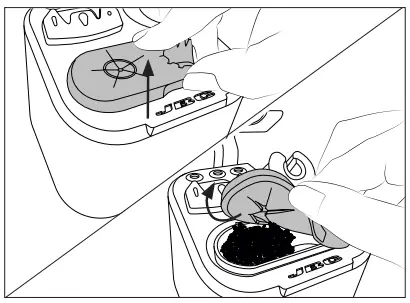
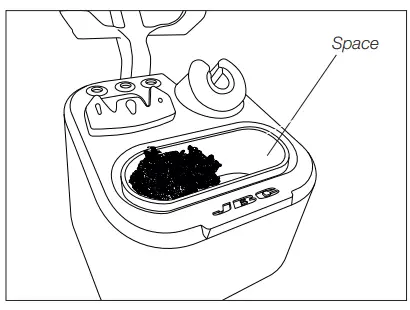
Replacing Brass Wool
- Lifting
Lift and remove the antisplash membrane.
- Replacing
Replace the brass wool with a new one. Make sure that the brass wool is on the far left and that there is space for the wiper on the right.
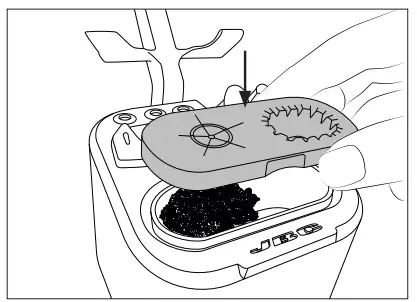
- Assembling
Assemble the antisplash membrane in vertical direction onto the stand.
- Pressing on
Press the antisplash membrane down. Make sure that the membrane is correctly inserted all around.
Note: The brass wool and the wiper position can be reversed by rotating the antisplash membrane 180 degrees
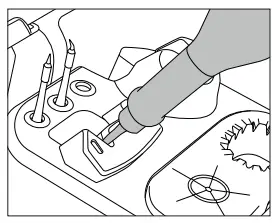
Quick Tip Changer
Save time and change cartridges safely without switching the station off.
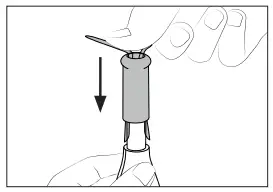
- Removing
Place the handpiece in the extractor and pull to remove the cartridge
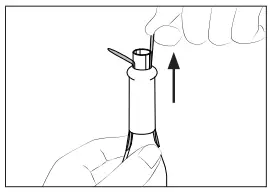
- Inserting
Place the handpiece on top of the new cartridge and press down slightly.
- Fixing
Use the holes for fixing the cartridge.

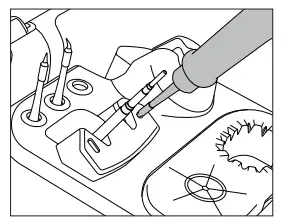
Important: Insert the cartridge up to the stop. The charging indicator light changes from red to green when the cartridge is proprely inserted.
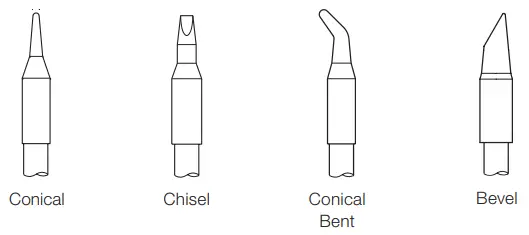
Compatible Cartridges
B 210 Pecision Tool works with C210 Cartridges.
Find the model that best suits your soldering needs in www.jbctools.com
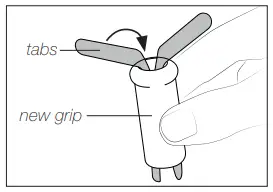
Changing the Grips
For Precision Tool Ref. B210-A and for Nano Tool Ref. B115-A foam grips Ref. 0028829 are available.
Remove the prior grip and replace the grips easily using the slip-on tabs. To change the grips do as follows:
- Inserting Tabs
Put the slide-on tabs into the new grip.
- Inserting Handle
Push the grip with the tabs onto the handle. - Removing Tabs
Hold the grip and pull the tab. Use pliers if necessary.
The B·iRON Console offers an intuitive user interface which provides quick access to station parameters.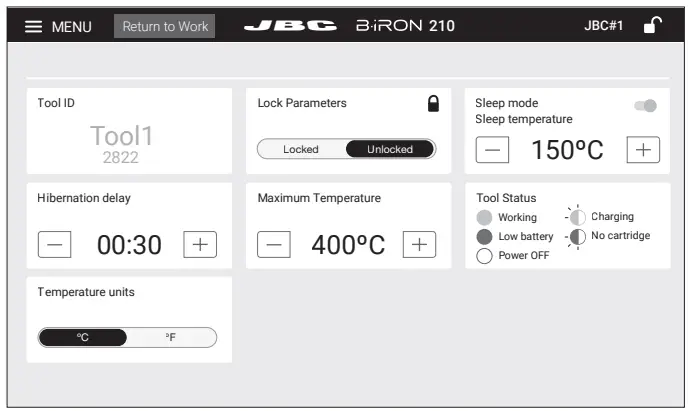
Parameters
| Parameter | Description |
| Tool ID | Allows to change the tool identifier. |
| PIN | Allows to change the PIN |
| Hibernation Delay | Set hibernation delay from 5 to 15 sec. Countdown starts when no movement ist detected. |
| Sleep Mode / Sleep Temperature | Set sleep mode ON/OFF. The tip temperature will drop to the selected sleep temperature. |
| Maximum Temperature | Allows selection of the maximum temperature that can be set for the work mode |
| Tool Status | The tool status light indicates as follows the tool status: – Green: working / soldering – Green blinking: charging – Alternating red/green blinking: low battery, less than 20% – Red blinking: no cartridge – No color: power OFF |
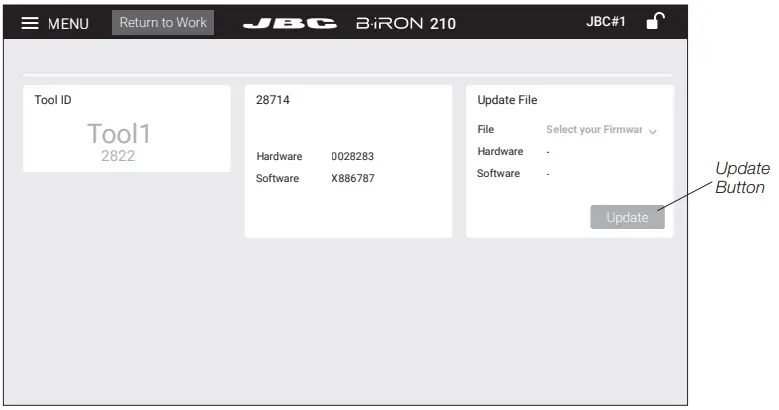
B·iRON Update
- Download the JBC update file from: https://www.jbctools.com/jbcsoftware.html
- Connect the console/device via USB connection to the PC.
- On the console/device notification bar at the top, open “USB Connection Settings” and select “MTP”.
- On the PC copy the downloaded file to “IT706/internal share storage/JBC”.
- Once copying is finished, disconnect the console/device from the PC.
- On the console/device open the Application (1) and then select “update” (2) on the Application Menu.

Use the update button of the version to be downloaded.
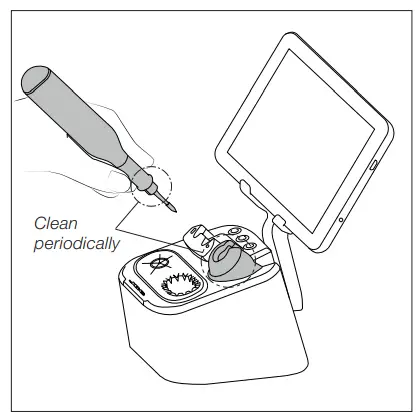
Maintenance
Before carrying out maintenance, always extract the cartridge and disconnect it from the mains.
Allow the equipment to cool down.
- Use a damp cloth to clean the casing and the tool. Alcohol can only be used to clean the metal parts.
- Periodically check that the metal parts of the tool and stand are clean so that the charging works properly.
- Maintain tip surface clean and tinned prior to storage in order to avoid tip oxidation. Rusty and dirty surfaces reduce heat transfer to the solder joint.
- Do not use liquid such as alcohol, thinner or benzene to clean the console.
- Repairs should only be performed by a JBC authorized technical service
Safety
![]() It is imperative to follow safety guidelines to prevent electric shock, injury, fire or explosion.
It is imperative to follow safety guidelines to prevent electric shock, injury, fire or explosion.
- Do not use the units for any purpose other than soldering or rework. Incorrect use may cause fire.
- The power cord must be plugged into approved bases. When unplugging it, hold the plug, not the wire.
- Do not work on electrically live parts.
- The tool should be placed in the stand when not in use in order to charge the batteries.
- The soldering tip or nozzle, the metal part of the tool and the stand may still be hot even when the station is turned off.
- Do not leave the appliance unattended when it is on.
- Avoid flux coming into contact with skin or eyes to prevent irritation.
- Be careful with the fumes produced when soldering.
- Keep your workplace clean and tidy. Wear appropriate protection glasses and gloves when working to avoid personal harm.
- Utmost care must be taken with liquid tin waste which can cause burns.
- This appliance can be used by children over the age of eight and also persons with reduced physical, sensory or mental capabilities or lack of experience provided that they have been given adequate supervision or instruction concerning use of the appliance and understand the hazards involved. Children must not play with the appliance.
- Maintenance must not be carried out by children unless supervised.
- Do not expose the console to high temperatures, humidity or dust. Avoid direct sunlight.
- Do not drop the console as it may cause damage or malfunction.
- Do not disconnect your device when it is in file transfer mode.
- Do not use the console in places were electronic devices are resticted.
Specifications
B·iRON 210
Precision B·iRON Station
Ref.: BI210UA 120 V – N. America
Ref.: BI210IA 230 V – India
Ref.: BI210A 230 V – Europe
Ref.: BI210KA 230 V – United Kingdom
Ref.: BI210HA 230 V – China
Ref.: BI210JA 100 V – Japan
Stand:
Input: 100 V – 240 V 50/60 Hz
Power: 15 W
Tool output: 12 V / 350 mA
USB output: 5 V / 1000 mA
Tool:
Output Peak Power: 24 W
Battery: Li-Ion 7.4 V / 180 mAh
Charge Time: 40 minutes
Temperature Range: 200 – 450 °C / 390 – 840 °F
Idle Temp. Stability (still air): ±1.5 °C / ±3 °F
Temp. Accuracy: ±3% (Using reference cartridge)
Connections: Bluetooth Low Energy (BLE)
Ambient Operating Temp: 10 – 50 °C / 50 – 122 °F
Tool Weight: 35 g / 0.08 lb
Total Net Weight: 1442 g / 3.18 lb
Total Package Dimensions / Weight: 265 x 223 x 160 mm / 2000 g
(L x W x H) 10.43 x 8.78 x 6.30 in / 4.41 lb
Complies with CE standards
ESD safe
Not grounded device. No ESD discharge feature.
Warranty
JBC’s 2 year warranty covers this equipment against all manufacturing defects, including the replacement of defective parts and labour.
Warranty does not cover product wear or misuse.
In order for the warranty to be valid, equipment must be returned, postage paid, to the dealer where it was purchased.
Get 1 extra year JBC warranty by registering here:
https://www.jbctools.com/productregistration/ within 30 days of purchase.

This product should not be thrown in the garbage.
In accordance with the European directive 2012/19/EU, electronic equipment at the end of its life must be collected and returned to an authorized recycling facility.
![]()


