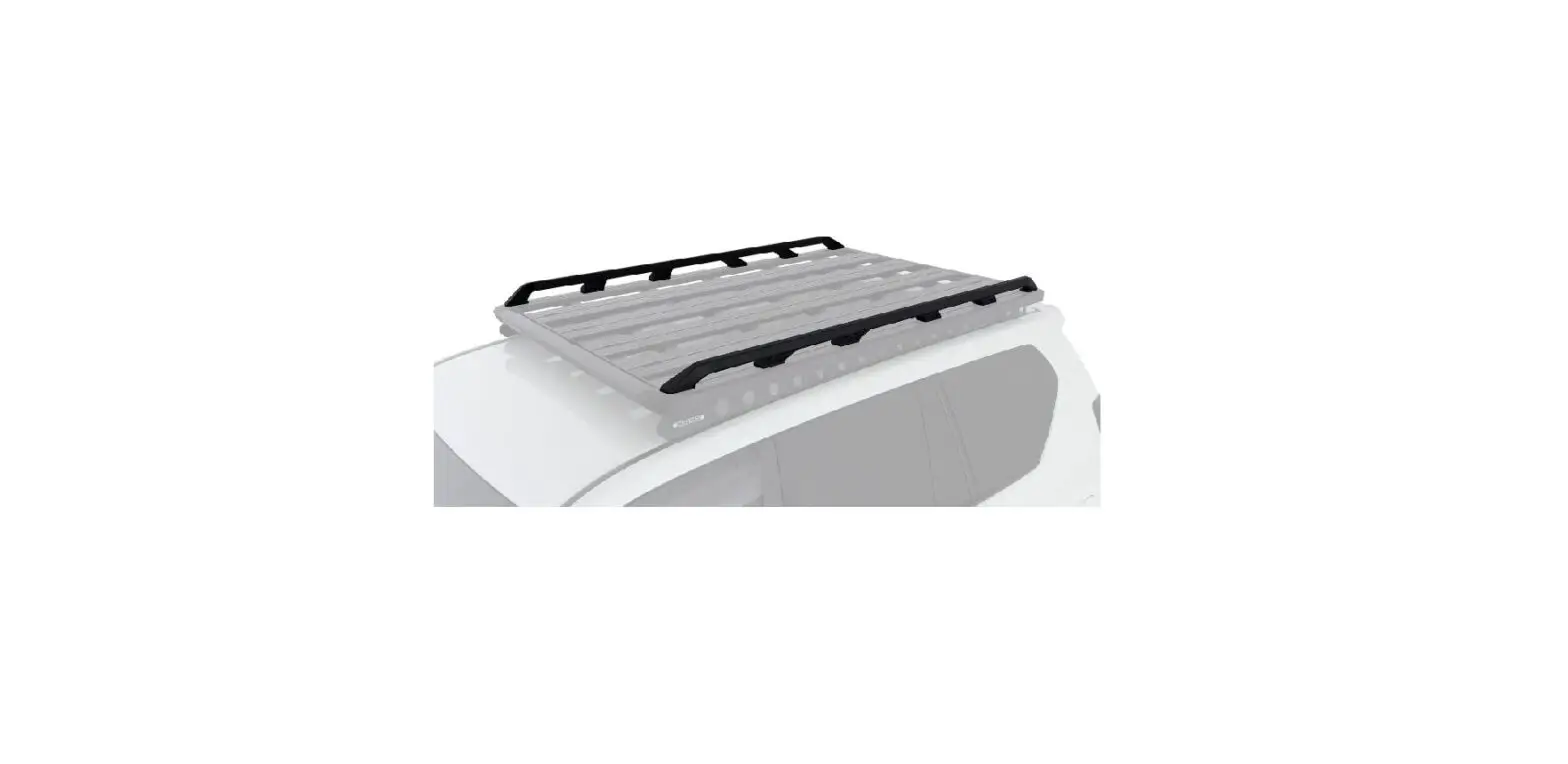
RHINO-RACK 53140 Pioneer Platform Side Rails
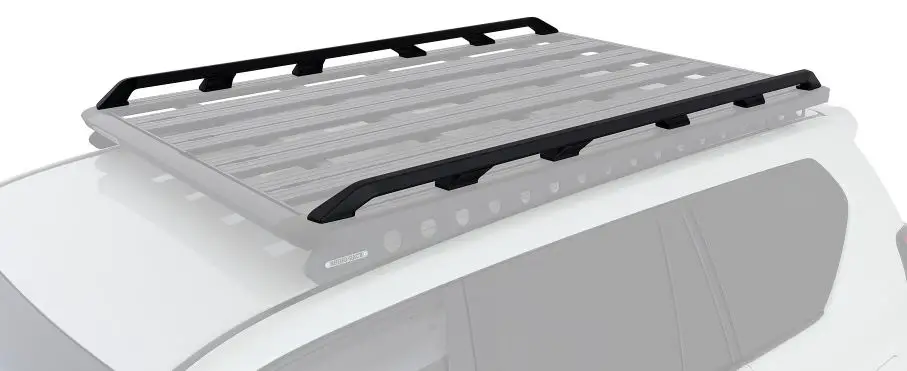
Product Information
| Product Name | Pioneer Platform Side Rails |
|---|---|
| Manufacturer | Rhino-Rack |
| Manufacturer Address (AUSTRALIA) | 22A Hanson Pl, Eastern Creek, NSW, 2766 |
| Manufacturer Address (USA) | Unit D, 2450 Airport Blvd, Aurora, CO, 80011 |
| Manufacturer Address (CANADA) | 19100 Airport Way Pitt Meadows, BC V3Y OE2 |
| Fit Time | 30mins |
| Document No | 520-RFI-00005 |
| Issue No | 02 |
| Issue Date | 16/11/2021 |
Product Usage Instructions
- Check the Rhino-Rack website to ensure you have the latest issue of these instructions.
- Refer to your fitting instruction to ensure that the roof racks are installed in the correct locations.
- Check the contents of the kit before commencing fitment and report any discrepancies.
- Place these instructions in the vehicle’s glove box after installation is complete.
- These instructions must be followed for the warranty to be upheld.
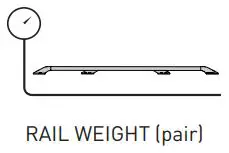
Carrying Capacity
Check your vehicle owner’s handbook for the maximum carrying capacity. Load must be evenly distributed over the system.
| Rail Model | Weight (pair) |
|---|---|
| 53140 | 2.6kg / 5.7lbs |
| 53146 | 2.4kg / 5.3lbs |
| 53147 | 2kg / 4.4lbs |
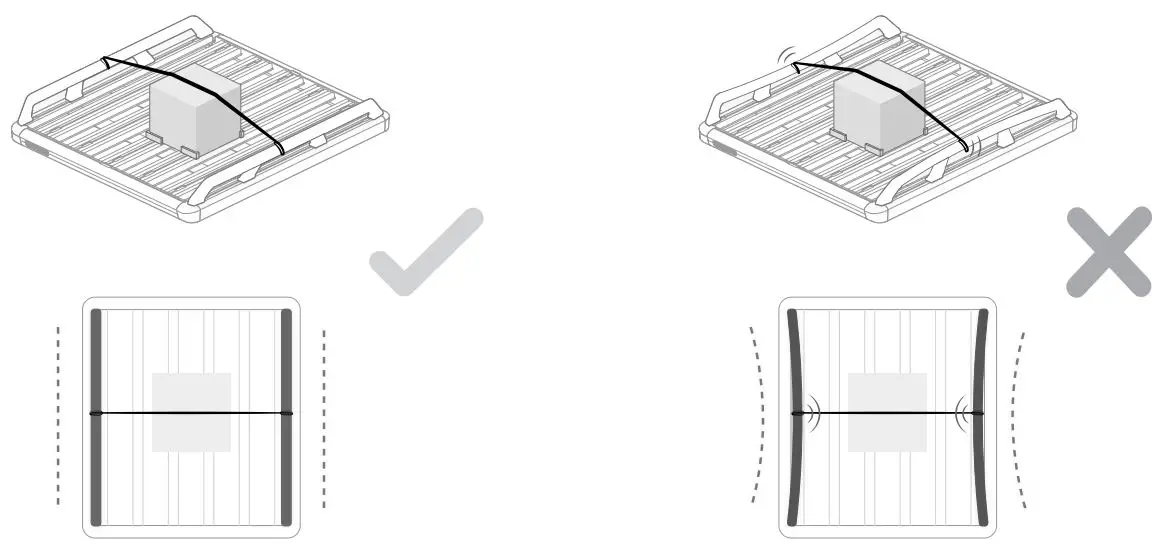
Maximum Strapping Force
- When strapping to side rails, do not overtighten straps where rail is deformed.
- If rail begins to deform, loosen the strap. Do NOT strap with ratchet straps on the side rails.
Maximum Pull Force
- When grabbing to side rails, grab the rail further apart to spread the load through different feet mountings.
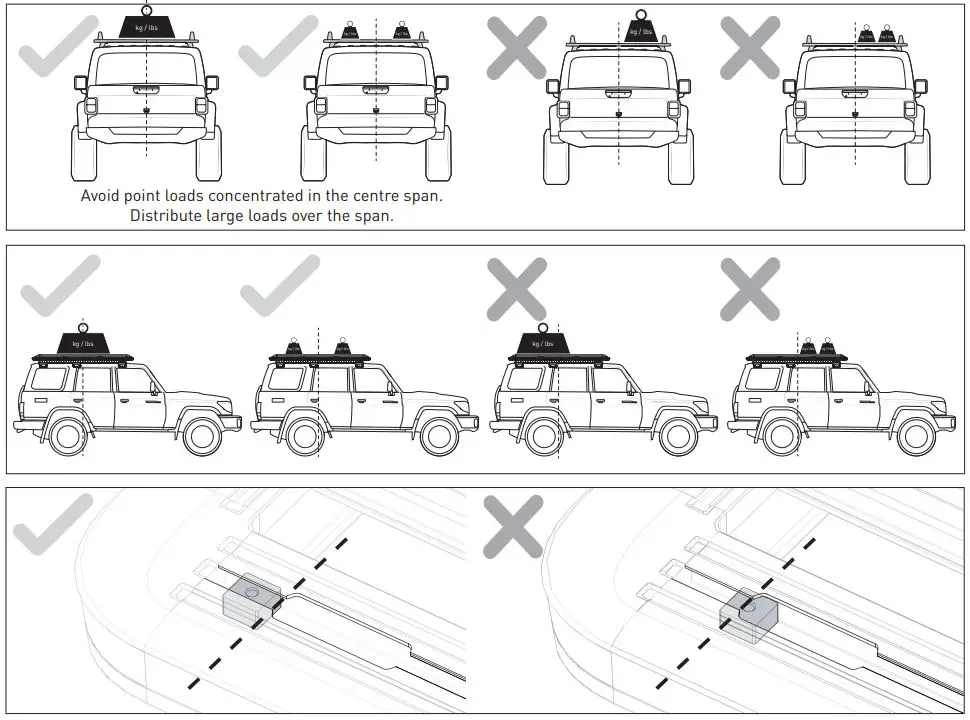
Avoid Point Loads
- Avoid point loads concentrated in the center span. Distribute large loads over the span.
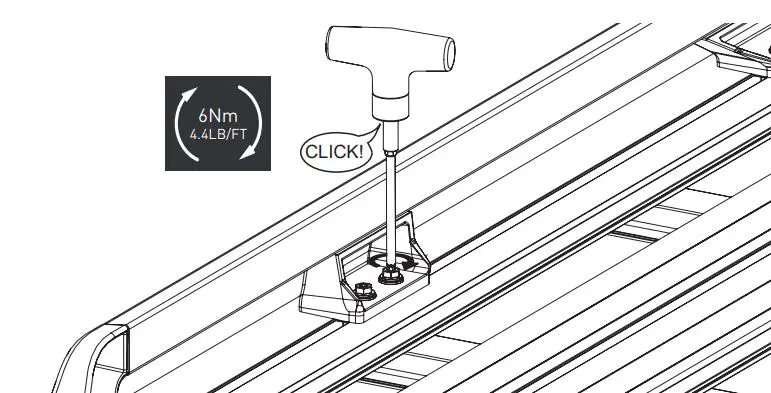
Torque Settings
Unless stated otherwise in these instructions, all fasteners should be set to the following torque settings:
- M6: 4-5Nm (3-4lbs/ft)
- M8: 8-10Nm (6-7.5lbs/ft)
- M10: 16-18Nm (12-13lbs/ft)
Notes for Dealers and Fitters
It is your responsibility to ensure these fitting instructions are given to the end user or client. These instructions remain the property of Rhino-Rack Australia Pty. Ltd. and may not be used or changed for any other purpose than intended.
Important
- Check the Rhino-Rack website to ensure you have the latest issue of these instructions.
- Please refer to your fitting instruction to ensure that the roof racks are installed in the correct locations.
- Check the contents of kit before commencing fitment and report any discrepancies.
- Place these instructions in the vehicle’s glove box after installation is complete.
- These instructions must be followed for warranty to be upheld.
Fit Time: 30mins
Carrying Capacity
Check your vehicle owners hand book for vehicle maximum carrying capacity. Load must be evenly distributed over the system.
- 53140: 2.6kg / 5.7lbs
- 53146: 2.4kg / 5.3lbs
- 53147: 2kg / 4.4lbs
- 53141: 3.7kg / 8.2lbs
- 53142: 4.4kg / 9.7lbs
- 53144: 3.5kg / 7.7lbs
- 53145: 3.4kg / 7.5lbs
Precautions
Maximum strapping force = 100kg
- When strapping to side rails, do not overtighten straps where rail is deformed. If rail begins to deform loosen strap.
- Do NOT strap with ratchet straps on the side rails.
Maximum pull force = 200kg
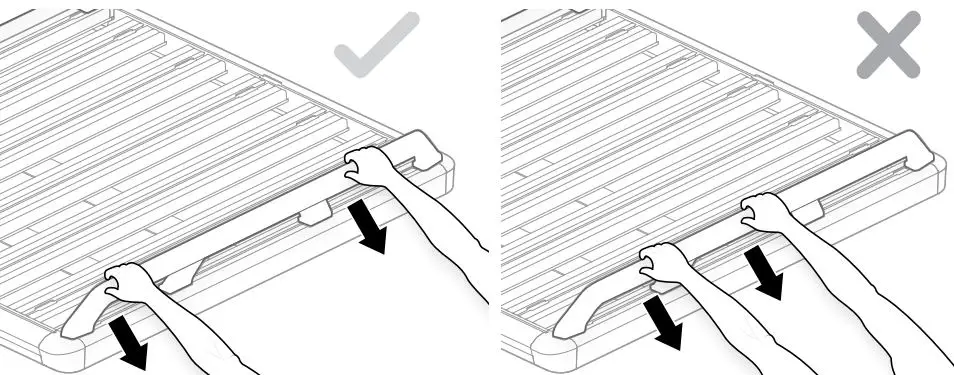
- When grabbing to side rails, grab the rail further apart to spread the load through different feet mountings.
Warning
- Check part number or kit is correct for use with your vehicle.
- Do not attempt to fit the system to your vehicle unless you fully understand these fitting instructions. Please direct any questions regarding fitting to the dealer from where the products were purchased.
- Off-road conditions can be much more rigorous. Extreme care must be taken in off road conditions.
- Roof racks must be removed when vehicle is put through an automatic car wash.
- With utility vehicles, the cabin and the canopy move independently. Roof accessories and vehicle can be damaged if the item transported is rigidly fixed at points on both the cabin and canopy. Instead, rigidly fix to either the cabin or the canopy roof racks.
- Always ensure you fasten your load securely.
- Use only non-stretch fastening ropes or straps to attach cargo to your load.
In-service maintenance checks
- All bolt connections should be checked after driving a short distance when you first install your roof racks.
- All bolted connections should be checked again at regular intervals (weekly is recommended, depending on road conditions, usage, loads and distances travelled).
- All bolted connections should be checked each time they are re-fitted.
Torque Settings
- Unless stated otherwise in these instructions, all fasteners should be set to the following torque settings – M6: 4-5Nm (3-4lbs/ft), M8: 8-10Nm (6-7.5lbs/ft) and M10: 16-18Nm (12-13lbs/ft).
Note for Dealers and Fitters
- It is your responsibility to ensure these fitting instructions are given to the end user or client.
- These instructions remain the property of Rhino-Rack Australia Pty. Ltd. and may not be used or changed for any other purpose than intended.
Parts List
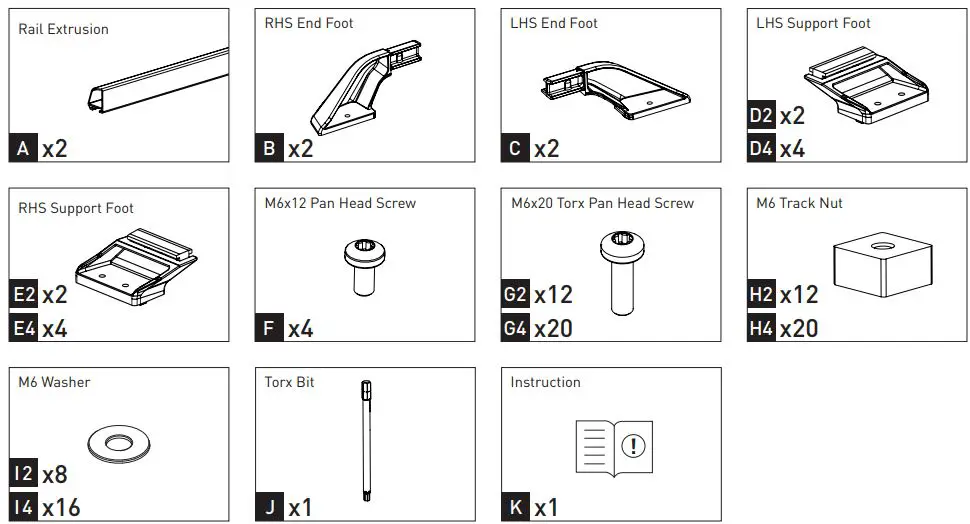
Tools Required
- T1 – Torque tool (Supplied with 5XXXX Series Pioneer Platform)
- T2 – Tape Measure
Notes

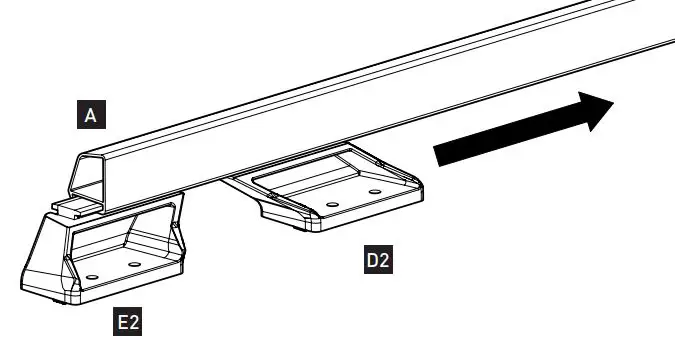
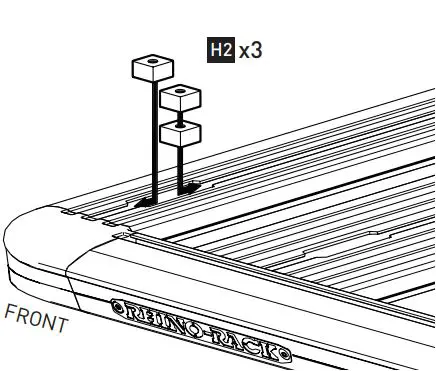
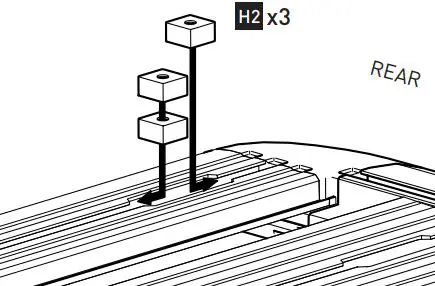
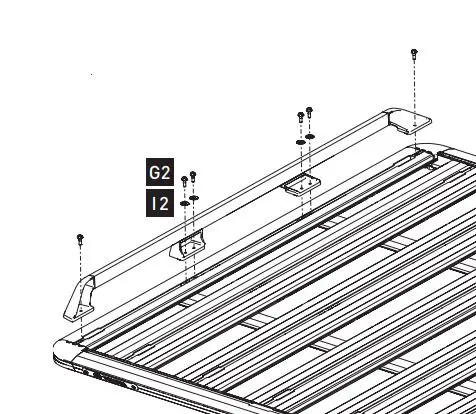
- D2 E2 G2 H2 12 Quantities are for the below set up

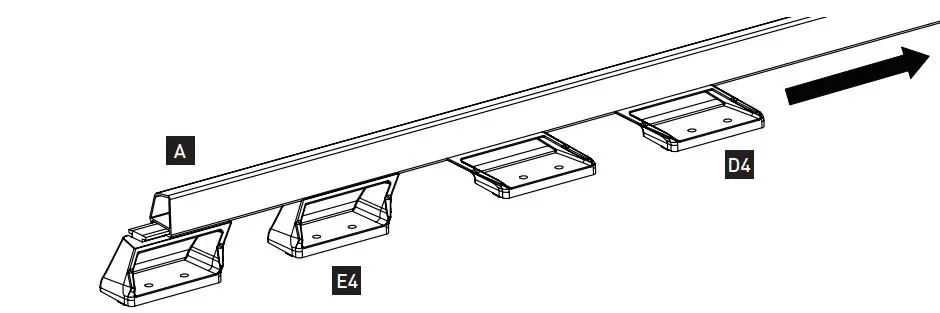
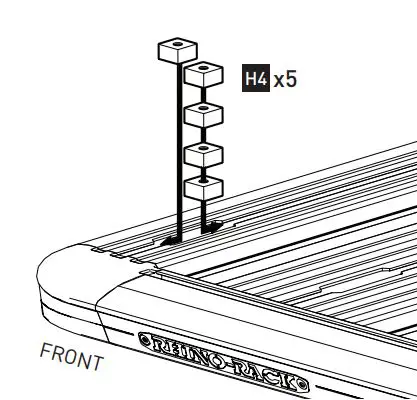
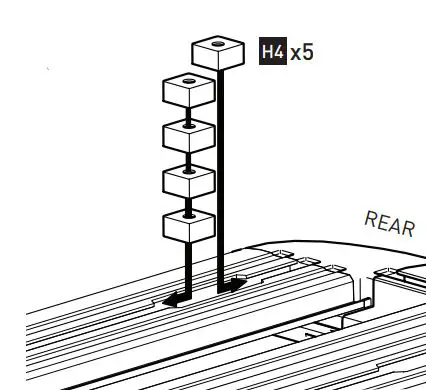
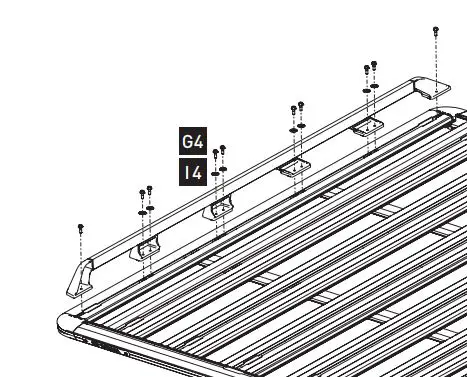
- D4 E4 H4 I4 Quantities are for the below set up

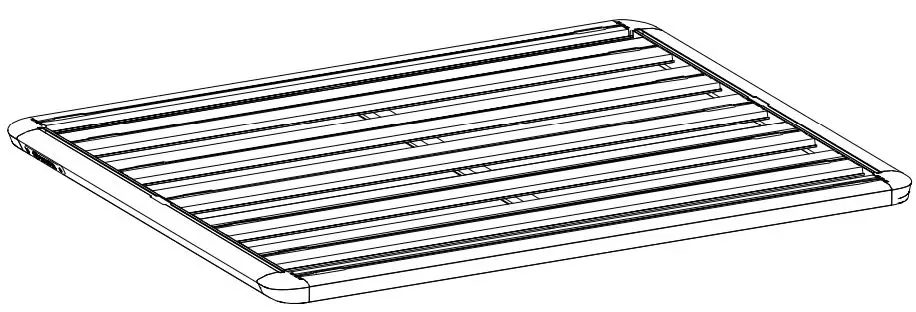
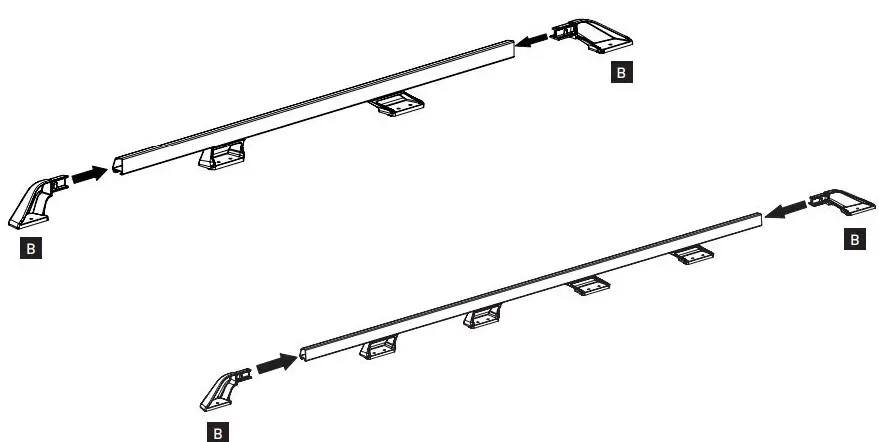
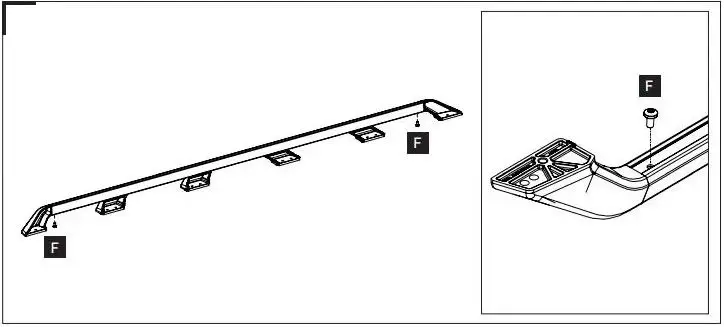
Installation Instructions
Platform must be preassembled
USE FOR SIDE RAIL KIT
- 53140
- 53146
- 53147
USE FOR SIDE RAIL KIT
- 53141
- 53142
- 53144
- 53145
USE FOR SIDE RAIL KIT
- 53140
- 53146
- 53147
USE FOR SIDE RAIL KIT
- 53141
- 53142
- 53144
- 53145
USE FOR SIDE RAIL KIT
- 53140
- 53146
- 53147
USE FOR SIDE RAIL KIT
- 53141
- 53142
- 53144
- 53145
USE FOR SIDE RAIL KIT
- 53140
- 53146
- 53147
USE FOR SIDE RAIL KIT
- 53141
- 53142
- 53144
- 53145
Dimension
- D E may be adjusted depending on accessories fitted.
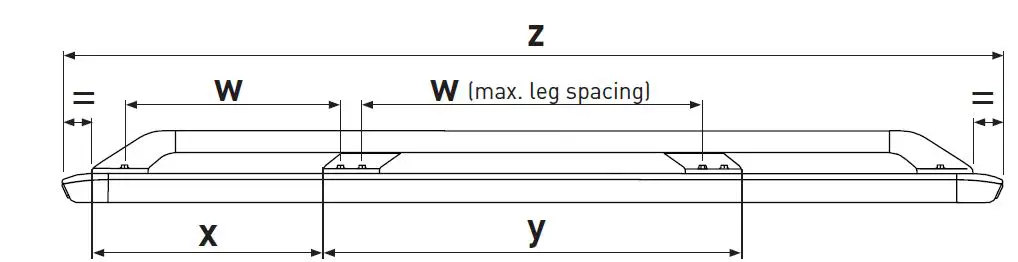
| SIDE RAIL KIT | SUITS TRAY LENGTH z (mm) | w (mm) | x (mm) | y (mm) |
| 53140 | 1528 | 600 | 414 | 602 |
| 53146 | 1328 | 339 | 552 | |
| 53147 | 928 | 214 | 402 |
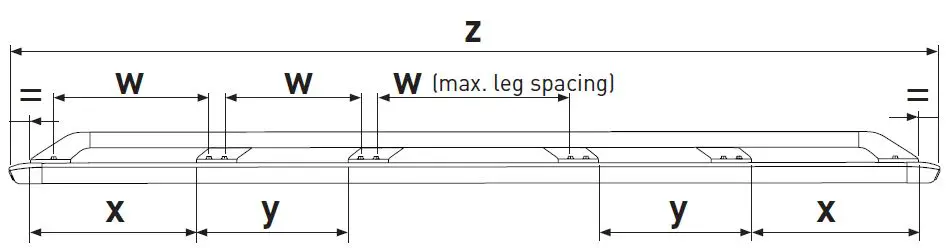
| SIDE RAIL KIT | SUITS TRAY LENGTH z (mm) | w (mm) | x (mm) | y (mm) |
| 53141 | 2128 | 600 | 344 | 390 |
| 53142 | 2728 | 449 | 500 | |
| 53144 | 1928 | 324 | 330 | |
| 53145 | 1828 | 294 | 320 |
Repeat 2-9 to opposite side
Contacts
Rhino-Rack AUSTRALIA
- 22A Hanson Pl, Eastern Creek, NSW, 2766
- (02) 8846 1900
- rhinorack.com.au
Rhino-Rack USA
- Unit D, 2450 Airport Blvd, Aurora, CO, 80011
- 877-744-6622
- rhinorack.com
Rhino-Rack CANADA
- 19100 Airport Way Pitt Meadows, BC V3Y OE2
- rhinorack.ca


