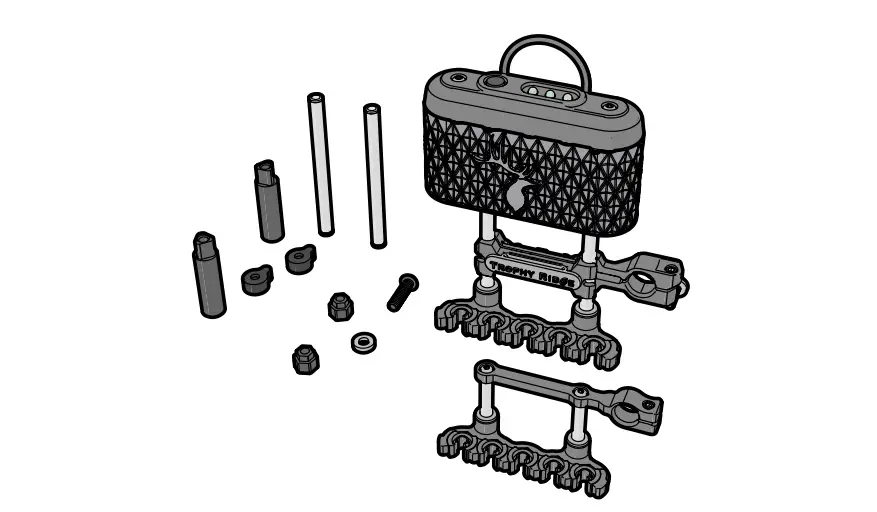
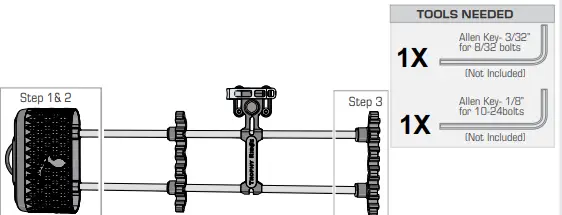
TROPHY RIDGE AQ2PCKT Quiver 2-Piece Conversion Kit
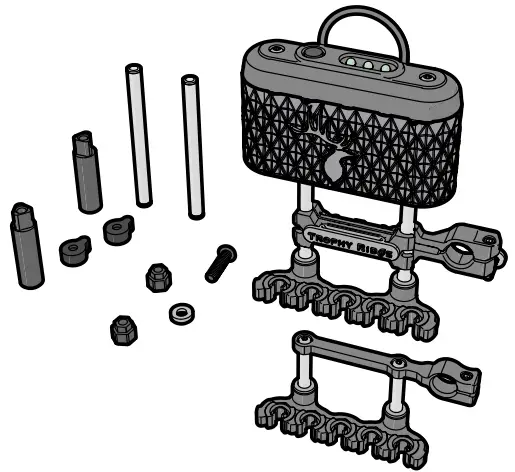
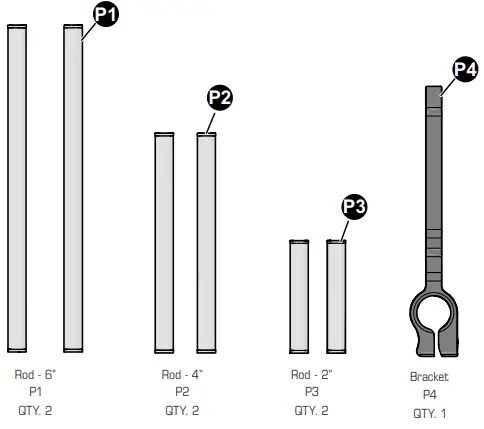
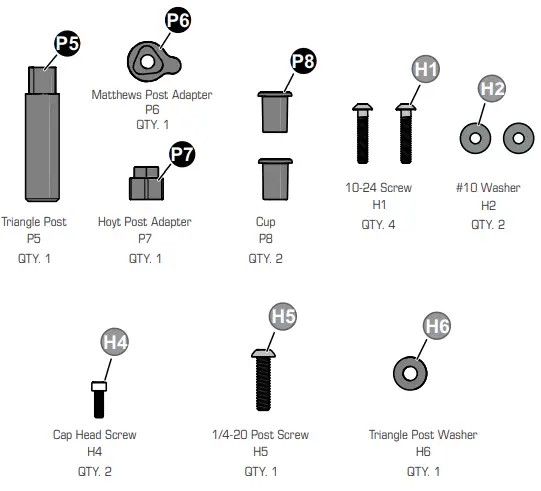
PARTS LIST – 2-PIECE QUIVER CONVERSION KIT
DISASSEMBLY OF 1-PIECE QUIVER
The following steps describe how to disassemble your 1-piece quiver. You’ll convert it into a 2-piece quiver using the conversion kit in later steps.
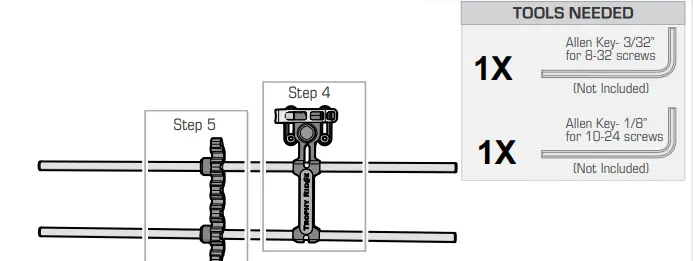
- STEP 1
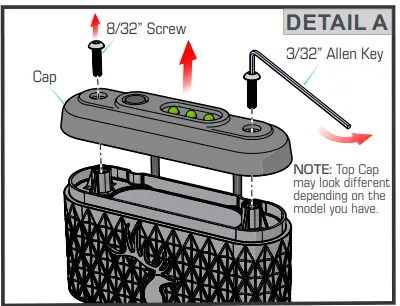
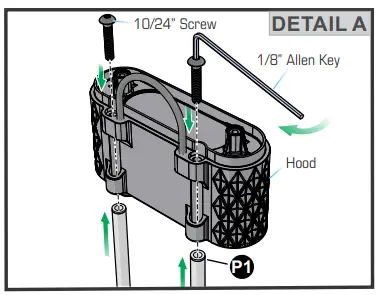
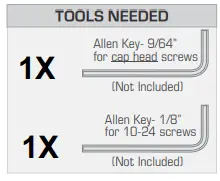
Using a 3/32” Allen Key remove the two 8-32 screws in the cap of the quiver hood. See Detail A. This will allow you to access the two additional 10-24 screws underneath.
- STEP 2
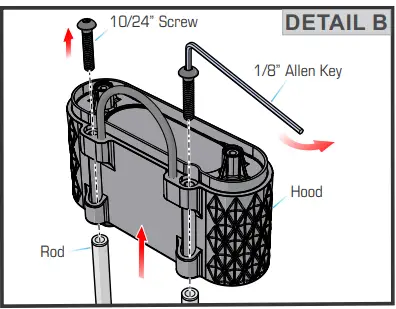
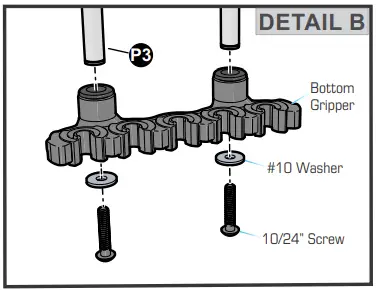
Using a 1/8” Allen Key, remove the two 10-24 screws and slide the quiver hood off the rods. See Detail B.
- STEP 3
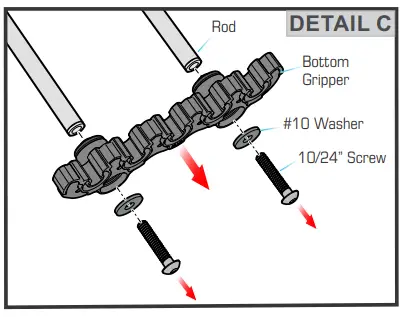
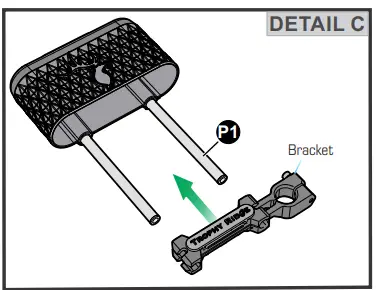
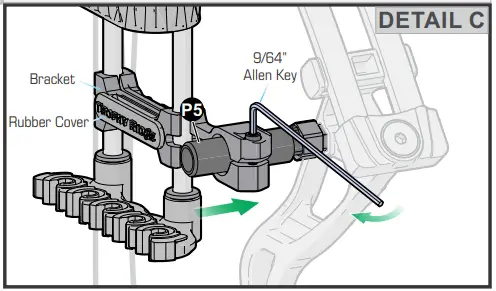
Using a 1/8” Allen Key, remove the two 10-24 screws and two metal washers from the bottom gripper. Slide the gripper off of the rods. See Detail C.
- The following steps describe how to disassemble your 1-piece quiver. You’ll convert it into a 2-piece quiver using the conversion kit in later steps.

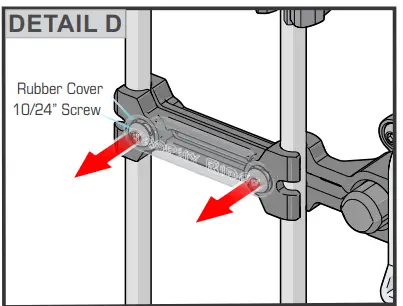
- STEP 4
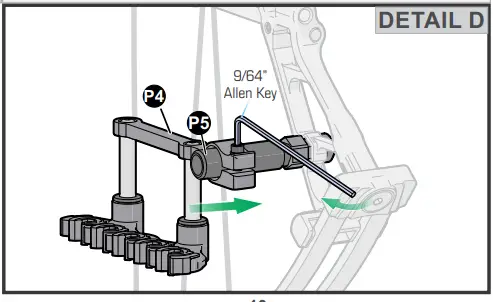
With a 1/8” Allen Key, loosen the 10-24 screws that are in the main adjustment bracket. Lift the rubber cover to access the screws, then loosen them enough to slide the bracket off the rods. See Detail D.
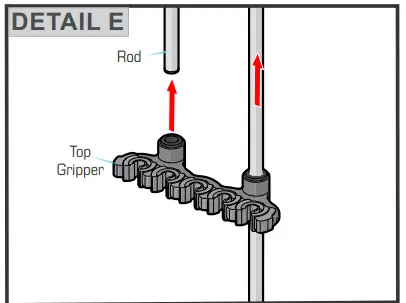
- STEP 5
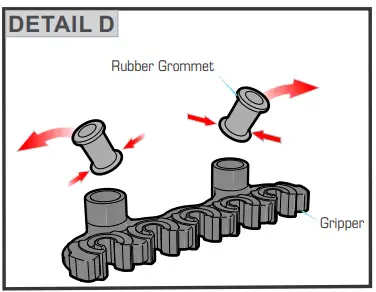
If you have the optional top gripper attached, remove it at this time as well by sliding the rods out of the rubber grommets. See Detail E.
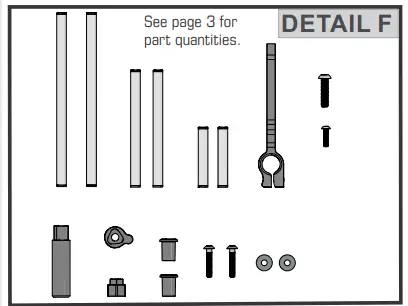
- STEP 6
At this point, your 1-piece quiver should be disassembled, set those items aside and take out the conversion kit parts, and sort. See Detail F.
HOOD ASSEMBLY FOR THE 2-PIECE QUIVER
The following steps describe how to assemble the hood section for the two piece quiver.

NOTE
Use the parts and hardware from the 1-piece quiver for steps 1-3 but switch out the rods.
- STEP 1
Slide two 6-inch rods (P1) or 4-inch rods (P2) from the conversion kit into the quiver hood and insert two 10-24 screws. Tighten with a 1/8” Allen Key until secure. See Detail A.
- STEP 2
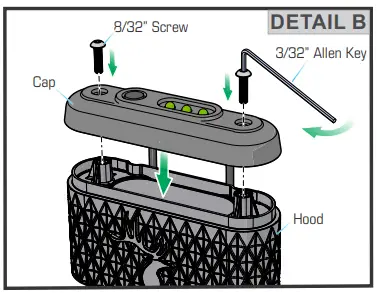
Place the cap on the hood, then insert two 8/32” screws and tighten with a 3/32” Allen Key until secure. See Detail B.
- STEP 3
Slide the clamping bracket onto the rods, but do not tighten yet. See Detail C.
- STEP 4
Locate the top gripper from the 1-piece quiver and take out the attached rubber grommets by squeezing them on one end and then pushing them down through the hole and out. See Detail B.
NOTE: These rubber grommets will be replaced by the two plastic cups (P8) from the conversion kit in the next step.
- STEP 5
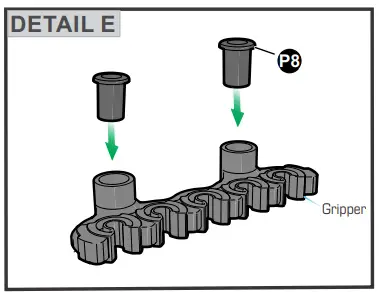
Locate and insert the two plastic cups (P8) into the gripper as shown in Detail D.
- STEP 6
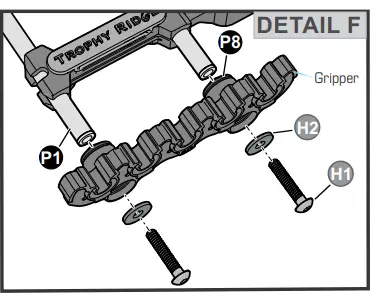
Slide the gripper with the plastic cups (P8) onto the two rods and fasten with two 10-24 screws and metal washers using the 1/8” Allen Key. See Detail E.
NOTE: Set the hood assembly aside and continue to the next page to complete the bottom section.
BOTTOM ASSEMBLY FOR THE 2-PIECE QUIVER
The following steps describe how to assemble the bottom section for the two piece quiver.
- STEP 1
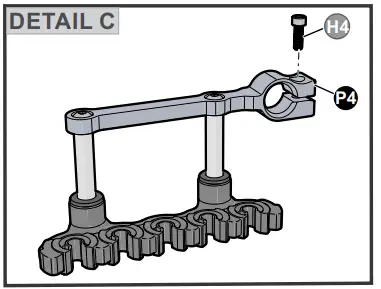
Locate the two 2-inch rods (P3) or 4-inch rods (P2) and the bracket (P4) in the conversion kit. Insert two 10-24 screws (H1) from the kit and tighten with the 1/8” Allen Key until secure. See Detail A.
- STEP 2
Slide the bottom gripper onto the 2” rods (P3) and fasten with two 10-24 screws and metal washers using the 1/8” Allen Key. See Detail B.
- STEP 3
Locate the cap head screw (H4) and insert it into the bracket (P4). Hand tighten it a few turns but do not tighten completely yet. See Detail C.

ATTACHING 2-PIECE QUIVER TO THE BOW RISER
NOTE
Two posts are required for the 2-piece quiver, one will come from your 1-piece quiver and the second is included in the conversion kit.
NOTE
Attach both posts (P5) on the riser. The conversion kit includes a Hoyt post adapter and a Matthews adapter.
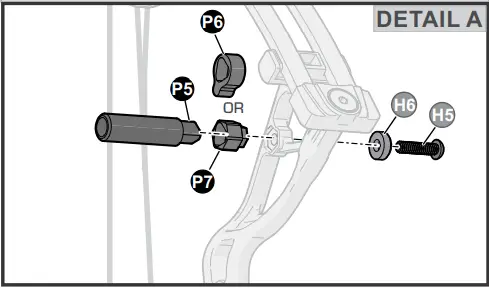
- STEP 1
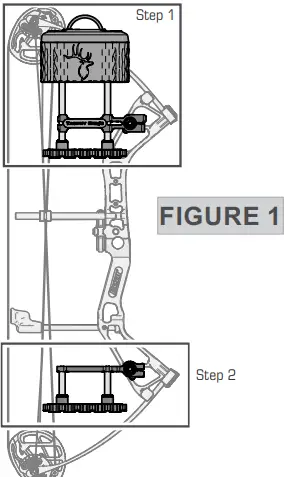
Attach the hood assembly post to the top riser hole. See Figure 1 & Detail A.
- STEP 2
Attach the bottom post to the lower riser hole. See Figure 1 & Detail B.
ATTACHING 2-PIECE QUIVER TO THE BOW RISER
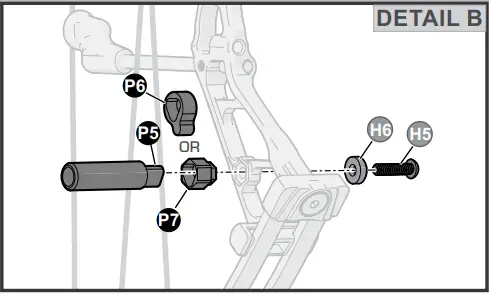
NOTE
Slide on the quiver hood assembly and lower assembly on the posts (P5) on the riser and tighten cap head screws. See Details C&D.
NOTE
After Steps 1-4 are complete tighten main adjustment bracket in the desired location on the rods. Lift the rubber cover to access the 10-24 screws. See Detail C.
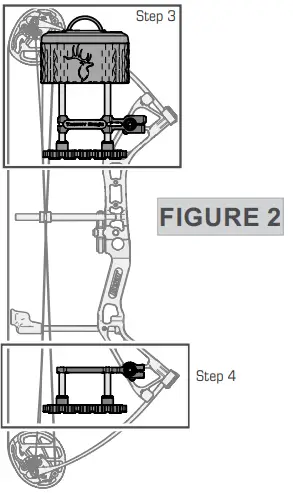
- STEP 3
Attach the hood assembly to the top riser post. See Figure 2 & Detail C.
- STEP 4
Attach the bottom assembly to the lower post. See Figure 2 & Detail D.
TROHY RIDGE WARRANTY
Trophy Ridge™ provides a Limited Lifetime Warranty on its products. All products are covered against breakage due to defects in materials, and workmanship from the date of purchase. Abuse or alteration of the product voids the warranty. In the event of breakage due to defects in materials or workmanship the liability of Trophy Ridge shall be limited to the lesser of the cost of repairing, or replacing the broken part. In any event, the cost shall never exceed the original retail price of the product. Failure to follow. all recommended installation instructions of any Trophy Ridge product may void this warranty.
ORIGINAL OWNER:
Warranty applies only to the original owner, and is not transferable.
ITEMS NOT COVERED:
Fiber optic breakage or modification is never covered under warranty. Some discontinued product models may have a warranty fee attached to rebuild, repair, or modification work done by Trophy Ridge..
DAMAGE NOT COVERED:
Although Trophy Ridge warrants all products are free from defects in materials or manufacturing, however, Trophy Ridge is not responsible for personal/property harm to you, any equipment, or others due to misuse, misapplication, improper installation, or any other form of misuse or abuse of a Trophy Ridge product. It is strongly recommended that any installation of any Trophy Ridge product is done by an experienced, qualified, and competent Pro Shop for the safety of you and your equipment.
WE STAND BY OUR PRODUCTS
In the event an item requires warranty service, please contact Trophy Ridge Customer Support at
1-800-694-9494 for a return authorization (RA) number and return shipping instructions.
Key Contact data
Dealer 800 Number: 800-694-9494 Dealer Fax Number: 812-467-1245 Web: www.TrophyRidge.com
©2022 Trophy Ridge
2L-8007-00
Visit our youtube page for set up videos.