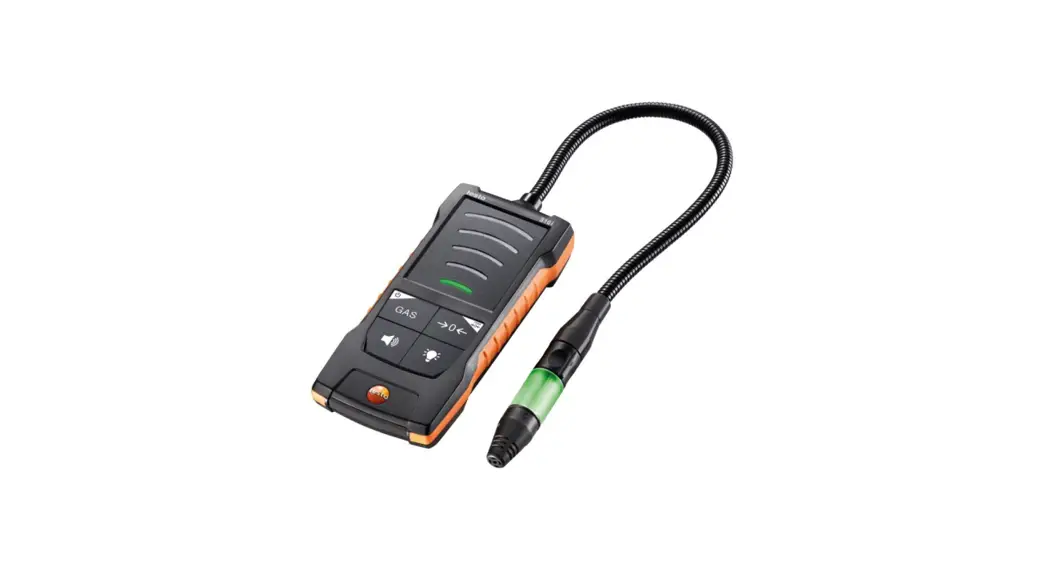
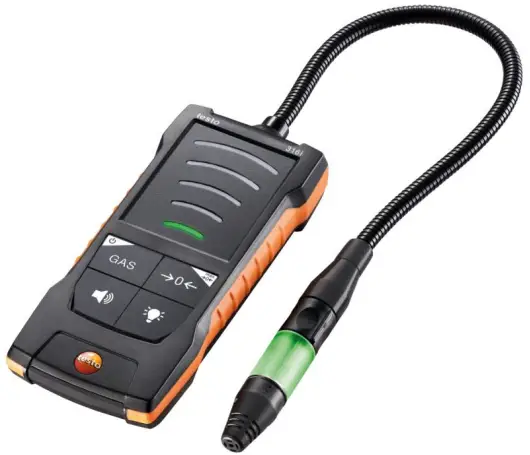
![]() testo 316i gas leak detector
testo 316i gas leak detector
0560 3161
Instruction manual
About this document
- The instruction manual is an integral part of the instrument.
- Please keep this documentation available for future reference.
- Always use the complete original instruction manual.
- Please read this instruction manual through carefully and familiarize yourself with the product before putting it to use.
- Hand this instruction manual on to any subsequent users of the product.
- Pay particular attention to the safety instructions and warning advice in order to prevent injury and damage to the product.
Safety and disposal
2.1 Security
General safety instructions
- Only operate the product properly, for its intended purpose, and within the parameters specified in the technical data.
- Do not apply any force.
- Do not operate the instrument if there are signs of damage to the housing or connected cables.
- Dangers may also arise from objects to be measured or the measuring environment. Always comply with the locally valid safety regulations when carrying out measurements.
- Do not store the product together with solvents.
- Do not use any desiccants.
- Only perform maintenance and repair work on this instrument that is described in this documentation. Follow the prescribed steps exactly when doing the work.
- Use only original spare parts from Testo. Batteries
- Improper use of batteries may cause the batteries to be destroyed, or lead to injury due to current surges, fire or escaping chemicals.
- Only use the batteries supplied in accordance with the instructions in the instruction manual.
- Do not short-circuit the batteries.
- Do not take the batteries apart and do not modify them.
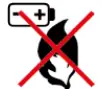
- Do not expose the batteries to heavy impacts, water, fire or temperatures in excess of 60 °C.
- Do not store the batteries in the proximity of metal objects.
- In the event of contact with battery acid: rinse affected areas thoroughly with water, and if necessary consult a doctor.
- Do not use any leaky or damaged batteries.
Warnings
Always pay attention to any information denoted by the following warnings.
Implement the precautionary measures specified!
![]() DANGER
DANGER
Risk of death!![]() WARNING
WARNING
Indicates possible serious injury.![]() CAUTION
CAUTION
Indicates possible minor injury.![]() CAUTION
CAUTION
Indicates possible damage to equipment.
2.2 Disposal
- Dispose of faulty rechargeable batteries and spent batteries in accordance with the valid legal specifications.
- At the end of its useful life, deliver the product to the separate collection point for electric and electronic devices (observe local regulations) or return the product to Testo for disposal.
 WEEE Reg. No. DE 75334352
Product-specific information
- Do not carry out measurements on live components.
- Do not operate the instrument in environments above 80 %RH (condensing).
- Observe the permissible storage and transport temperatures and the permissible operating temperature (e.g. protect the measuring instrument from direct sunlight)!
- Always carry out a function test before searching for gas leaks.
- If the instrument is misused or subjected to force, all warranty claims will be voided!
- Do not allow the sensor to come into contact with moisture or acids, as it will react cross-sensitively.
Intended use
The testo 316i is a gas leak detector for the short-term detection of leaks in gas systems.
The following substances can be detected:
- Methane CH4
- Propane C3H8
- Butane C4H10
- Hydrogen H2
The instrument is not suitable for precise measurement of the gas concentration.
ATTENTION
Restrictions on the field of use
– Do not use the instrument in potentially explosive atmospheres!
– Do not use the instrument as a monitoring instrument for personal safety! The instrument is not protective equipment!
– Do not use the instrument as a gas analyzer! The sensor detects almost all combustible gases alike.
Product description
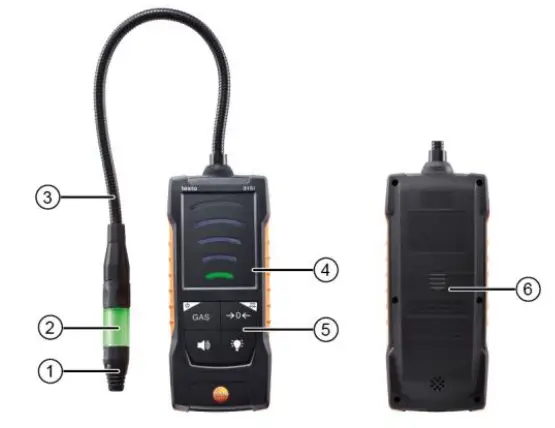
5.1 Instrument overview
| |||
| 1 | Sensor head with gas sensor | 2 | Sensor LED |
| 3 | Flexible sensor tube | 4 | Visualization of gas concentration |
| 5 | Control keys | 6 | Battery compartment (on rear) |
Symbol explanation
| Do not allow children under 6 years of age to play with batteries. | |
 | Do not throw batteries in the trash. |
 | Do not charge batteries. |
 | Do not place batteries near fire. |
 | Batteries are recyclable. |
First steps
6.1 Inserting/changing batteries
√ The instrument is switched off.
- Open the battery compartment (on the back of the instrument) via the snap lock.
- Insert batteries/rechargeable batteries (pay attention to the polarity!).
- Close the battery compartment.
![]() When not in use for a long period: Take out the (rechargeable) batteries.
When not in use for a long period: Take out the (rechargeable) batteries.
6.2 Getting to know the product
6.2.1 Switching the instrument on and off
Switching on
Only switch on the instrument in fresh air, since automatic zeroing is carried out when the instrument is switched on. The ambient temperature and ambient humidity during zeroing should correspond to the ambient conditions at the measuring location. If necessary, zero again manually at the measuring location (switch off and on again).![]() If the unit is not used for a prolonged period of time, the sensor will become contaminated. Particularly if the instrument has not been in operation for a prolonged period of time (> 2 weeks), it should be left switched on for a while before being used. The longer it has not been in operation, the longer this additional warming-up phase should be.
If the unit is not used for a prolonged period of time, the sensor will become contaminated. Particularly if the instrument has not been in operation for a prolonged period of time (> 2 weeks), it should be left switched on for a while before being used. The longer it has not been in operation, the longer this additional warming-up phase should be.
Please note that the instrument switches itself off by default after 10 min of inactivity.
1 Press and hold down (1 sec) the On/Off key.
Warm-up phase (HEAT)![]() The instrument starts up. With regular use, the warm-up period takes approx. 20 sec and is symbolized by the flashing and emptying bar display.
The instrument starts up. With regular use, the warm-up period takes approx. 20 sec and is symbolized by the flashing and emptying bar display.
As long as the sensor LED is flashing orange, the instrument is not ready for use.
Self-cleaning (CLN)![]() If the sensor is dirty, the warm-up phase is followed by the sensor cleaning phase. This usually happens when the instrument has not been used for several days. Self-cleaning is symbolized by the bar display flashing and emptying.
If the sensor is dirty, the warm-up phase is followed by the sensor cleaning phase. This usually happens when the instrument has not been used for several days. Self-cleaning is symbolized by the bar display flashing and emptying.
Switching off
CAUTION
Caution! Risk of burns due to hot sensor head after prolonged operation.
– Before touching the sensor head or packing the instrument: switch instrument off and let the sensor head cool down.
1 Press and hold down (1 sec) the On/Off key.![]() The instrument is switched off.
The instrument is switched off.
Auto OFF
After 10 minutes of inactivity (no user input, no gas concentration above the warning threshold), the instrument switches itself off. The switch-off is signalled beforehand by an alarm sound, red flashing of the sensor LED and the bar display (top element lights up red, bottom element flashes green).
You can prevent the instrument from switching off by pressing any key within 10 seconds.
Enabling/disabling the Auto-OFF function:
1 Press the Light and Sound keys simultaneously for 1 sec.![]() Disabling is confirmed: Sound (3x beeps), green LED and 2nd yellow LED on the bar display light up, sensor LED is off.
Disabling is confirmed: Sound (3x beeps), green LED and 2nd yellow LED on the bar display light up, sensor LED is off.![]() Enabling is confirmed: Sound (3x beeps), green LED, 2nd yellow LED and 1st red LED on the bar display light up, sensor LED is off.
Enabling is confirmed: Sound (3x beeps), green LED, 2nd yellow LED and 1st red LED on the bar display light up, sensor LED is off.
6.3 Establishing a Bluetooth® connection![]() The instrument can be connected to the testo Smart App via Bluetooth ® connection.
The instrument can be connected to the testo Smart App via Bluetooth ® connection.
√ The gas leak detector is switched on.
6.3.1 Establishing a Bluetooth ® connection to the testo Smart App
To establish a connection via Bluetooth® , you need a tablet or smartphone with the Testo Smart App already installed on it. You can get the App for iOS instruments in the App Store or for Android instruments in the Play Store. Compatibility: Requires iOS 12.0 or later/Android 6.0 or later, requires Bluetooth ® 4.2.

- Open the testo Smart App.
 The app automatically searches for Bluetooth ® devices in the vicinity.
 - In the Bluetooth menu, check whether the required instrument is connected. If necessary, switch the instrument to be connected off and on again to restart the connection mode.
Using the product
The gas leak detector can be used in conjunction with the testo Smart App.
7.1 Controls
√ The instrument is switched on.
√ The app is installed on the smartphone and connected to the instrument via Bluetooth ® .![]() Settings and controls are primarily carried out on the instrument and are transferred to the app. To a lesser extent, control via app is also possible (selection of gas type).
Settings and controls are primarily carried out on the instrument and are transferred to the app. To a lesser extent, control via app is also possible (selection of gas type).
With this instrument, numerical values can only be called up in the app.

| 1 | Sound key |
| 2 | On/Off / GAS key |
| 3 | LED bar for visualizing the gas concentration |
| 4 | ->0<- / max ->0<- key |
| 5 | Illumination key |
Additional symbols on the user interface of the app (not numbered)
 | One level back |
| Exit view | |
| Share measurement data/report | |
| Searching | |
| Favourite | |
| Deleting | |
| Further information | |
| Display report | |
| Multiple selection |
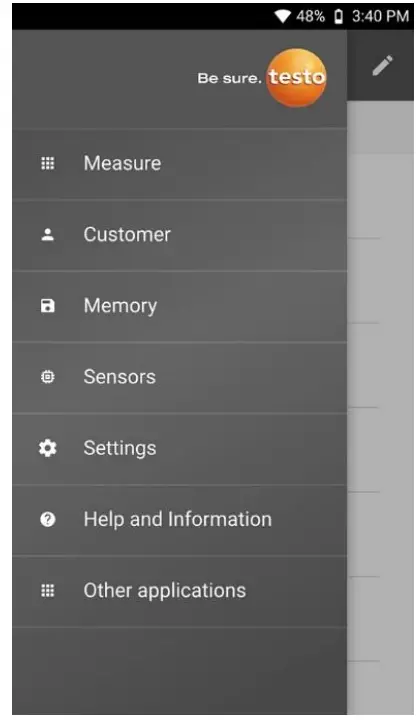
The Main menu can be accessed via the![]() icon at top left. To exit the main menu, select a menu or right-click on the guided menus. The last screen displayed is shown.
icon at top left. To exit the main menu, select a menu or right-click on the guided menus. The last screen displayed is shown.
| Measure | |
| Customer | |
| Memory | |
| Sensors | |
| Settings | |
| Help and Information | |
| Other applications |
7.1.1 Implementing settings
Selecting, opening and setting functions
1 Press the relevant key to select the functions
Secondary assignment (long press)
All keys with a white corner have a secondary assignment, which can be selected by pressing and holding the key (1 sec).![]() Adjustable functions
Adjustable functions
Ensure correct settings: all settings are transferred immediately. There is no Cancel function.
| Function | Setting options/comments |
On/Off (long press) | Switches the instrument on or off |
Measurement parameter | Cycle through CH4 (methane), C3H8 (propane), C4H10 (butane) or H2 (hydrogen) |
Sensor LED | Switch the LED on the sensor head off or on |
Alarm sound | ON (acoustic alarm on) or OFF (acoustic alarm off). The frequency of the alarm sound increases as the concentration increases. |
Max. zeroing (long press)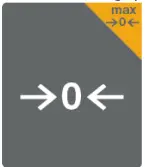 | Zero maximum reading |
| Function | Setting options/comments |
Zeroing | Zero current reading, up to 250 ppm can be suppressed. |
7.2 Carrying out a function test
1 Apply low-concentration gas to the sensor (max. 10 sec).![]() If the sensor does not respond (no alarm), the instrument is defective and must no longer be used. The instrument must be taken to the service centre for repair.
If the sensor does not respond (no alarm), the instrument is defective and must no longer be used. The instrument must be taken to the service centre for repair.![]() Due to the selectivity of the sensor, gas equivalents are not suitable for checking the function and especially not for calibrating the sensor.
Due to the selectivity of the sensor, gas equivalents are not suitable for checking the function and especially not for calibrating the sensor.
7.3 Carrying out gas detection
ATTENTION
Destruction of the sensor due to external influences!
– Do not expose the sensor to high concentrations of H2S (hydrogen sulphide), SOx (sulphur dioxides), Cl2 (chlorine), or HCl (hydrogen chloride).
– > Prevent alkaline materials or water from coming into contact with the sensor.
– > Do not expose the sensor to moisture or frost.
![]() Have the instrument serviced annually by the manufacturer.
Have the instrument serviced annually by the manufacturer.![]() Testing natural gas lines or hydrogen lines:
Testing natural gas lines or hydrogen lines:
Methane (main component of natural gas) or hydrogen are lighter than air, detection should be carried out above the pipe / suspected leak. Testing propane and butane gas lines: Propane and butane are heavier than air, detection should be carried out below the pipe / suspected leak, starting from the bottom and working upwards.
Selecting the gas to be detected
1 Select the gas types via the GAS key or the testo Smart App using the 3-point menu in the top right corner.![]() After switching on the instrument, the process of cycling through starts with methane (CH4).
After switching on the instrument, the process of cycling through starts with methane (CH4).
![]() The testo Smart App shows which gas is currently selected. The gas type can be changed both via the instrument and the app.
The testo Smart App shows which gas is currently selected. The gas type can be changed both via the instrument and the app.
Carrying out the measurement
1 Move the sensor head as close as possible and at low speed (approx. < 2 cm per second) over the components that are to be checked for leaks.![]() The surface of the sensor must not be covered.
The surface of the sensor must not be covered.
- Concentration < 100 ppm: Sensor LED and the lower elements of the bar display on the instrument light up green.
- Concentration > 100 and < 999 ppm: Sensor LED and the middle elements of the bar display on the instrument light up yellow.
- Concentration > 999 ppm: The unit changes to VOL% and the bar display increases.
- Concentration > 9999 ppm / > 0.99 VOL%: Sensor LED and the upper elements of the bar display light up red (alarm threshold). If the warning threshold (100 ppm) is exceeded, the sensor LED and the middle elements of the bar display on the instrument light up yellow. If the acoustic alarm is enabled, an additional warning sound is emitted when the warning threshold is exceeded, the frequency of which increases as the concentration increases, and changes to a continuous tone when the second alarm threshold (10,000 ppm) is exceeded.
Carrying out manual zeroing
The zero point can only be set manually if the currently detected gas concentration is below the max. 250 ppm displayed in the app (max. 250 ppm can be suppressed).
For example:
- 150 ppm (≤ 250 ppm): are completely suppressed (display: 0 ppm)
- 1000 ppm (> 250 ppm): 250 ppm are suppressed (display: 750 ppm)
![]() Gas concentrations present at the time of zeroing are suppressed by zeroing. As a result, the displayed reading no longer corresponds to the real gas concentration.
Gas concentrations present at the time of zeroing are suppressed by zeroing. As a result, the displayed reading no longer corresponds to the real gas concentration.
√ The instrument is in measurement view.
1 Briefly press [–> 0 <–].![]() The zero point for the current reading is reset or the current suppression is cancelled.
The zero point for the current reading is reset or the current suppression is cancelled.![]() The maximum reading can be zeroed using [max –> 0 <–].
The maximum reading can be zeroed using [max –> 0 <–].
After the measurement
1 Ventilate the sensor thoroughly after each use. To do this, place the instrument in fresh air for approx. 2 minutes before using it again.
Maintaining the product
8.1 Changing batteries
The instrument indicates that the battery needs to be changed via a warning tone and red sensor LED.
To change the battery, see the section “Inserting/changing batteries”.
8.2 Cleaning the instrument
1 If the housing of the instrument is dirty, clean it with a damp cloth.![]() Do not use any aggressive cleaning agents or solvents! Mild household cleaning agents and soap suds may be used.
Do not use any aggressive cleaning agents or solvents! Mild household cleaning agents and soap suds may be used.
Storage & transportation
To prevent contamination of the sensor, please do not store or transport the instrument in an environment where any tobacco smoke, foul air, oils, greases, silicones, evaporating liquids or gases are present. Any sensor that is contaminated as a result of storage or transportation must be cleaned before use, see Cleaning the sensor.
Regular inspection
Testo recommends having the gas leak detector inspected by an authorized service centre every year.
8.3 Cleaning the sensor
Tobacco smoke, dirty air, oils, greases, silicones and evaporating liquids or gases can leave deposits on the sensor surface. Possible consequences are reduced sensitivity, distorted displays of gas concentration or display of a background concentration. Clean the sensor if necessary
- Switch on the instrument, allow it to initialize and then switch it off.
Repeat this procedure several times. - If it is dirty, clean the sensor head with a soft, dry cloth.
Switching on regularly
If the instrument is used infrequently, deposits may build up on the sensor. Switching the instrument on prevents these deposits from building up on the sensor. Testo recommends switching the instrument on regularly to avoid deposits building up on the sensor.
Changing the sensor head
The instrument has a permanently installed sensor head that can only be replaced by Testo Customer Service.
Technical data for testo 316i
| Feature | Value |
| Measurement parameters | via app: ppm %LEL |
| Detectable gases | Methane, propane, hydrogen, butane |
| Lower response threshold / Measuring range | Methane (CH4): 50 ppm to 4.0 vol.% Propane (C3H8): 50 ppm to 1.9 vol.% Hydrogen (H2): 50 ppm to 4.0 vol.% Butane (C4H10): 50 ppm to 1.5 vol.% |
| Resolution (via app) | 1 ppm 1 %LEL |
| Response time | Response time < 2 sec |
| Leak alarm | 3-colour LED on sensor head Bar scale Acoustic App |
| Operating temperature | -5 to +50 °C |
| Operating humidity | 0 to 80 %RH |
| Operating altitude | ≤ 2000 m |
| Storage temperature | -20 to +50 °C |
| Battery type | 6x Alkaline 1,5 V, AA (included in scope of delivery) |
| Max. power rating | 2 W @ 9 V DC |
| Battery life | >15 h |
| Feature | Value |
| Pollution degree | PD2 |
| IP class | IP40 |
| Dimensions | 150 x 66.5 x 37.5 mm (L x W x H) Length with gooseneck arm 545 mm |
| Weight | 405 g |
Tips and assistance
10.1 Questions and answers
| Question | Possible cause | Possible solution |
| Zero point is unstable | Contamination of the sensor after a prolonged period of non-use | Leave the instrument switched on until the zero point has stabilized. |
| Instrument does not switch to measuring mode (remains in warm- up phase) | Battery voltage too low | Replace batteries. |
10.1.1 Hard Reset
1 If you encounter any problems with the firmware, press and hold the ON/OFF key for a long time (4 sec.) to perform a reset.
10.2 Accessories and spare parts
| Description | Order no. |
| VARTA Industrial Pro Alkaline LR 6/AA | 0515 0414 |
| Transport bag | 0590 0018 |
Support
You can find up-to-date information on products, downloads and links to contact addresses for support queries on the Testo website at: www.testo.com.
If you have any questions please contact your local dealer or the Testo Customer Service. You can find contact details on the back of this document or online at www.testo.com/service-contact.
![]() Testo SE & Co. KGaA
Testo SE & Co. KGaA
Celsiusstr. 1
79822 Titisee-Neustadt
Germany
Phone: +49 (0)7653 681-0
Email: [email protected]
www.testo.com
0970 3261 en 01 – 08.2022


