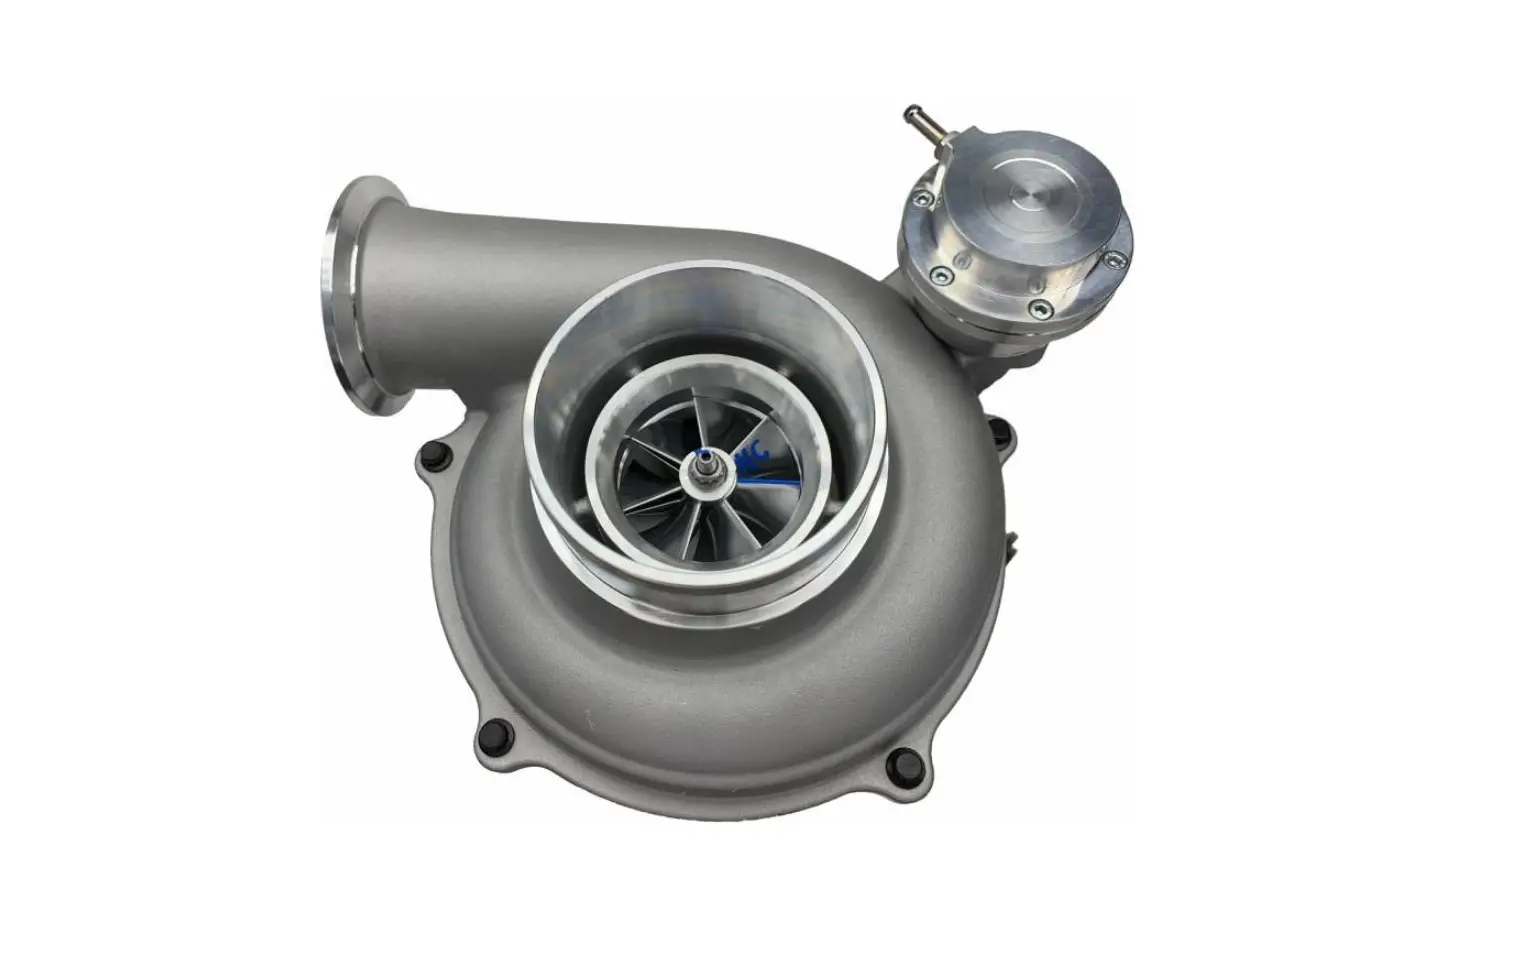
KC TURBOS KC300X Turbochargers 1999-2003 7.3 Powerstroke Instruction Manual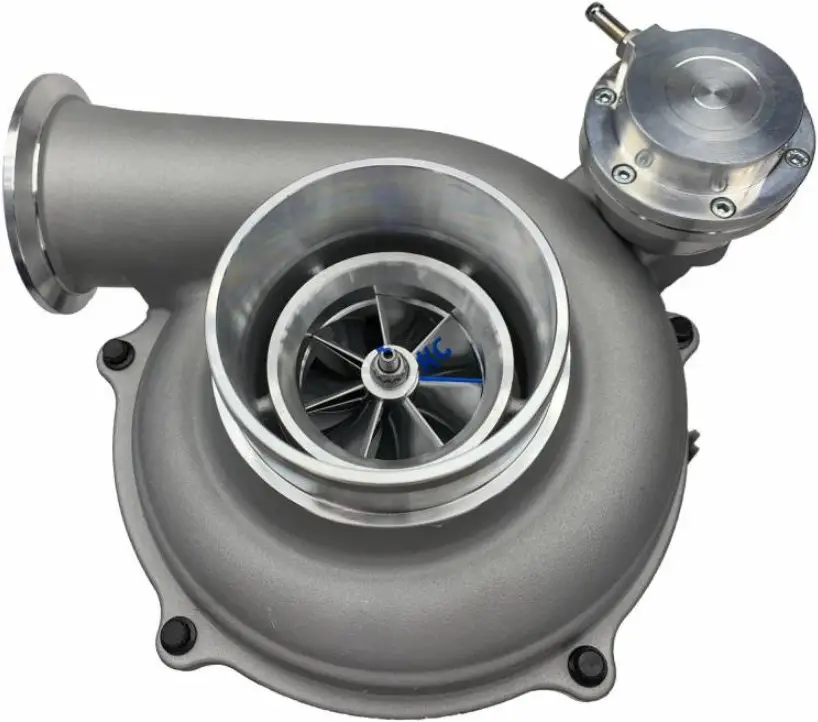
REMOVAL
- Disconnect Negative Terminal of Batteries.
- Remove the Engine Cover.
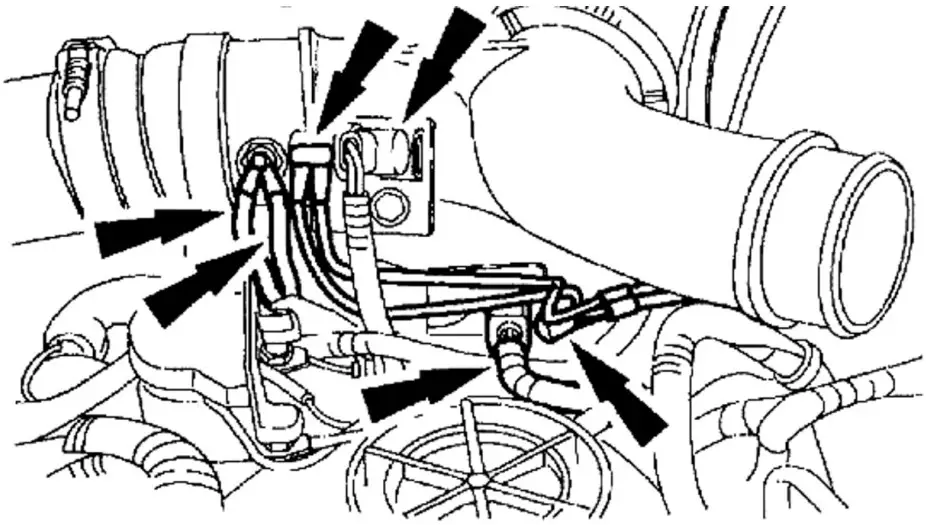
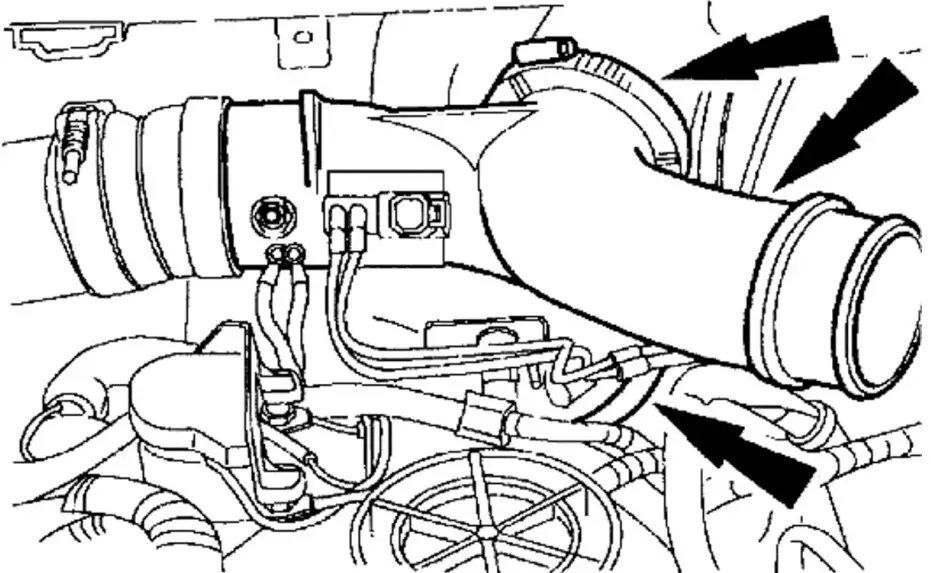
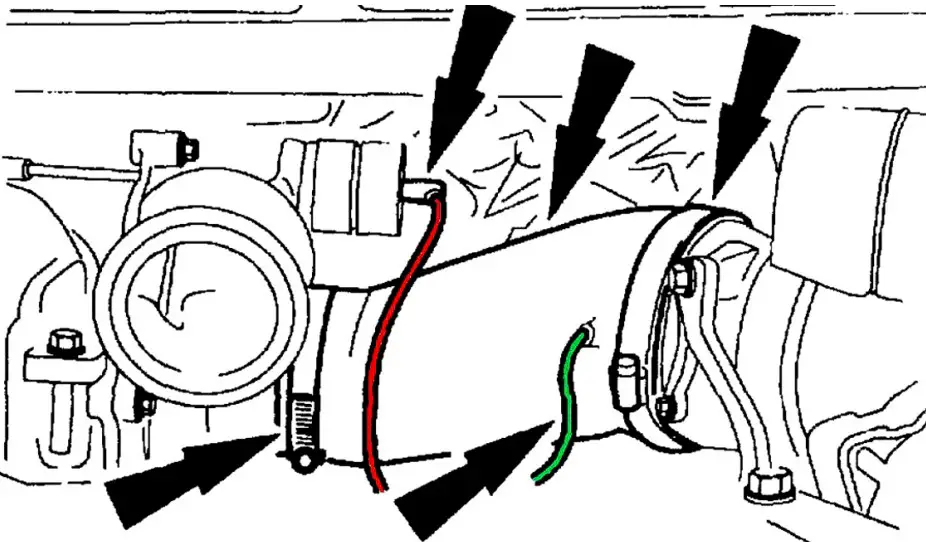
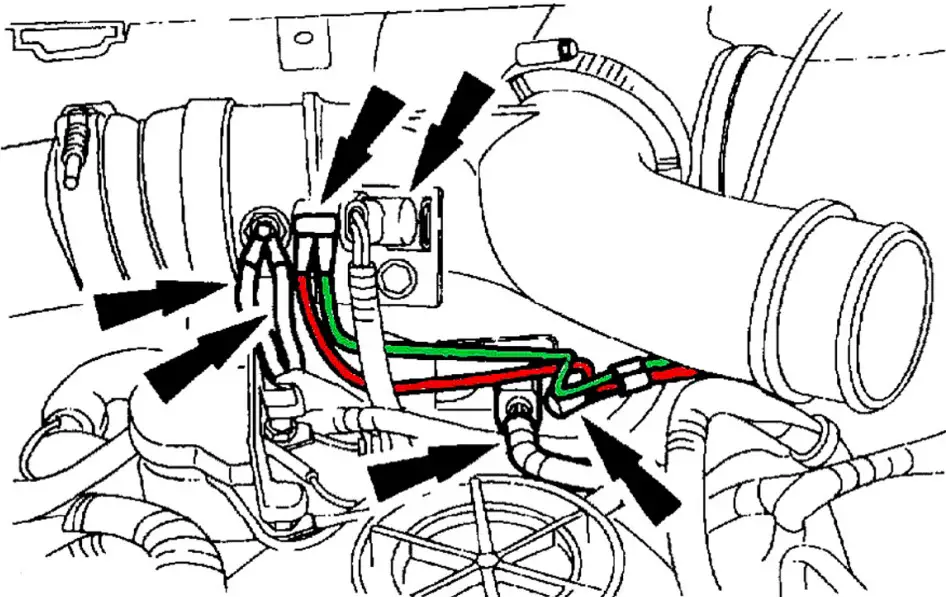
- Unplug the green hose from the compressor intake duct. Remove Intake duct and crankcase breather. Unplug and Label the red wastegate solenoid vacuum hose and pressure hose. Make sure to label each hose.
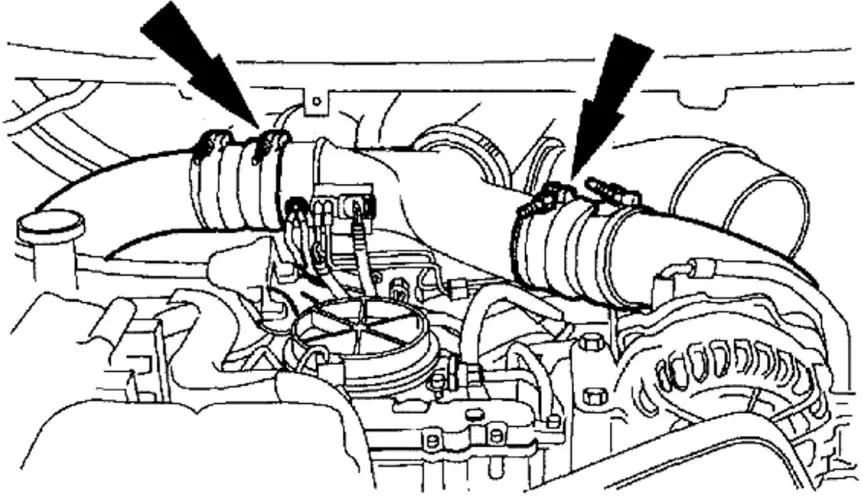
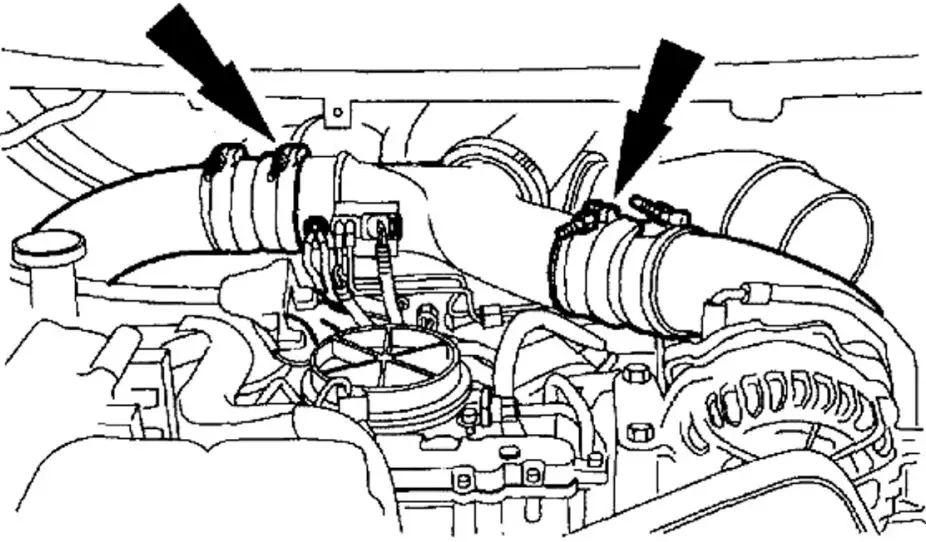
- Disconnect the charge air cooler Inlet and outlet pipes.

- Label and disconnect the intake air heater element leads, Intake Air Temperature sensor electrical connector, Manifold Absolute Temperature (MAP) sensor electrical connector and pressure hoses.

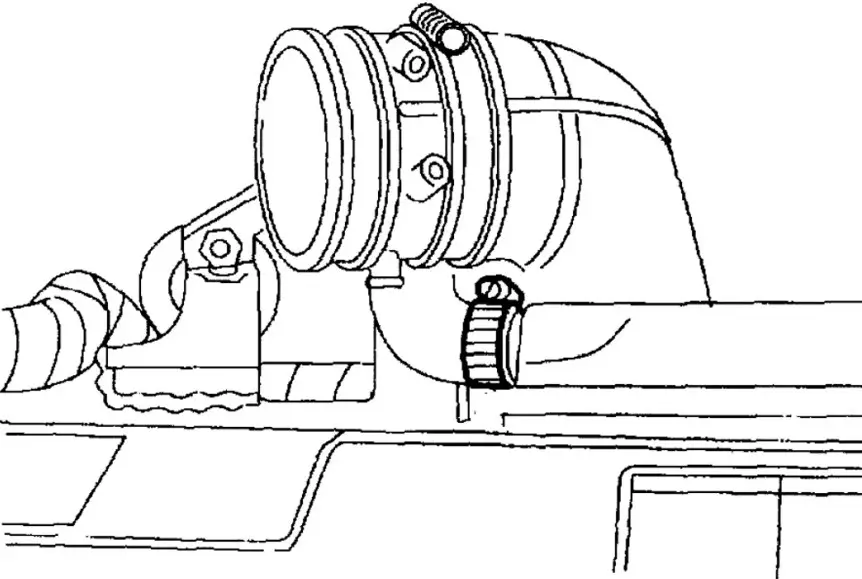
- Loosen the clamps and remove the compressor manifold. Cover intake manifold openings to prevent foreign objects from entering.

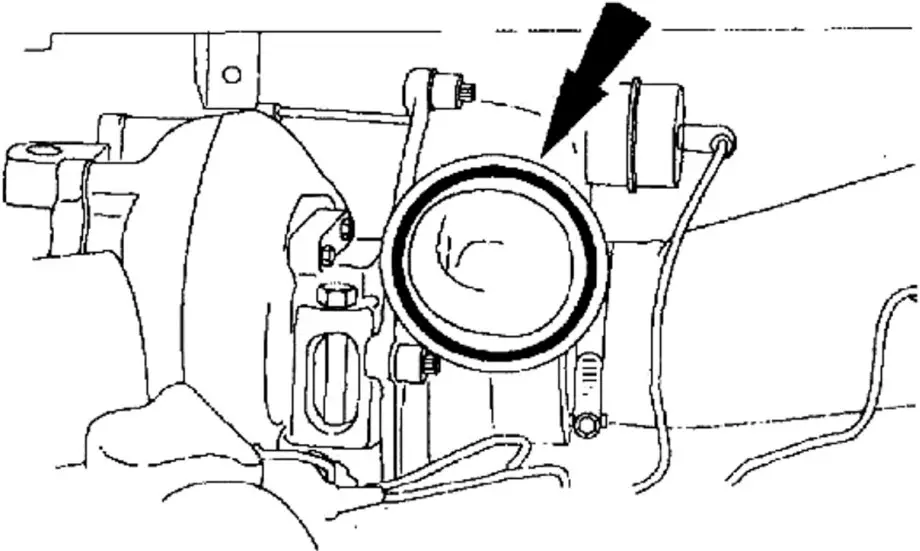
- Remove and discard compressor O-Ring.

- Loosen the Marmon Clamp and disconnect downpipe/exhaust outlet pipe.

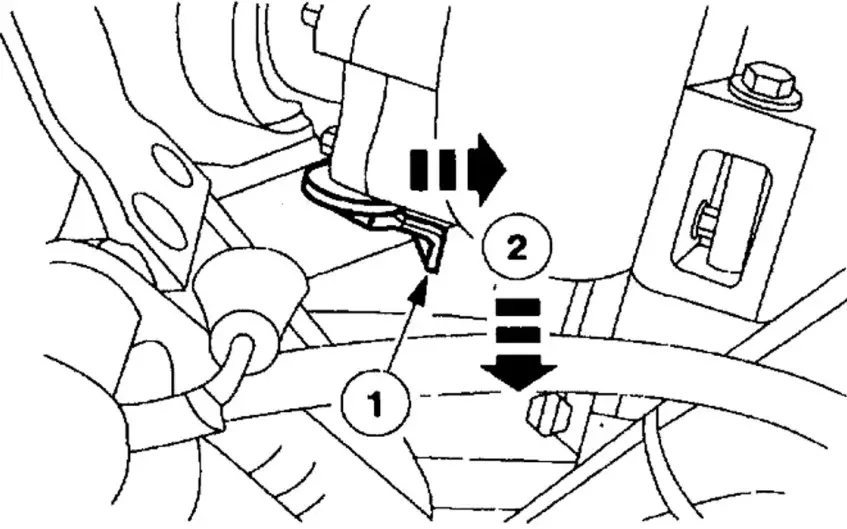
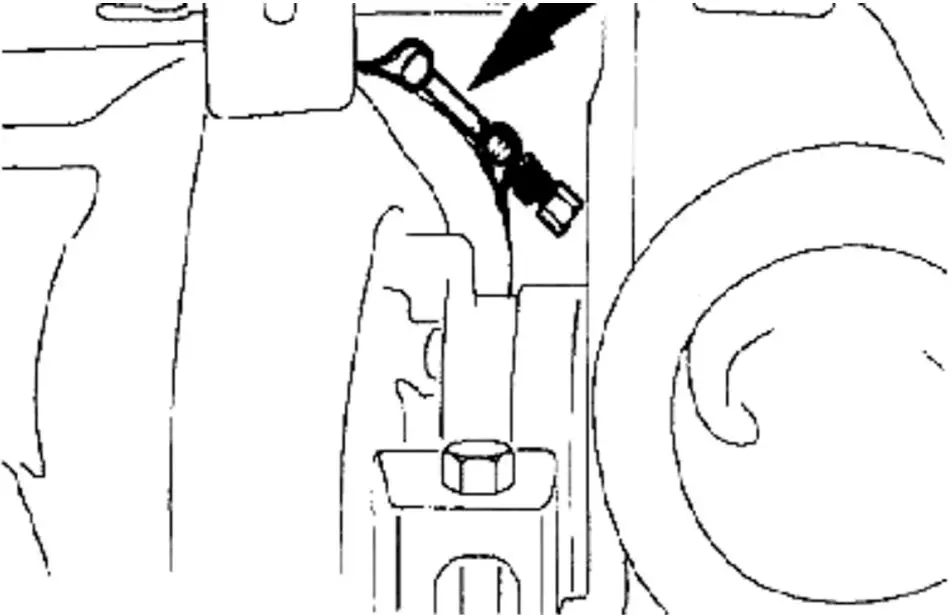
- Disconnect the exhaust back pressure valve.
- Slide the retainer clip away from the exhaust back pressure valve actuator lever.
- Detach the exhaust back pressure valve actuator rod.

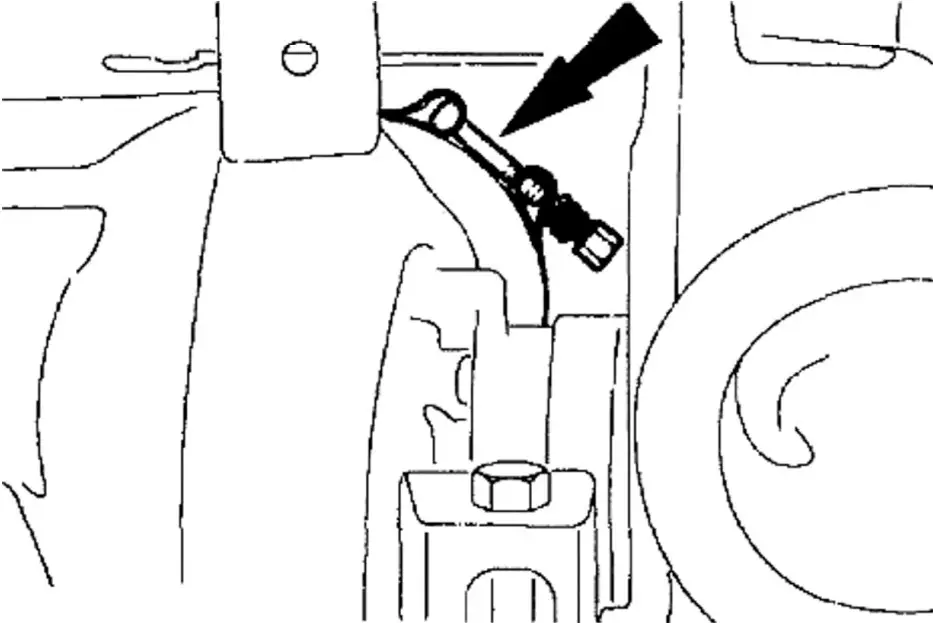
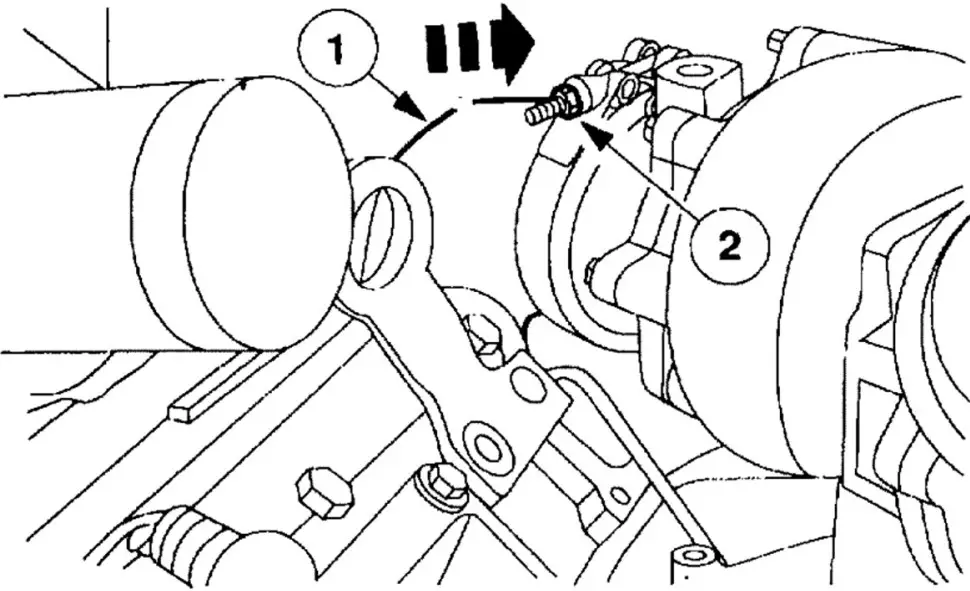
- Loosen the Marmon clamp (Cannot be removed while Turbocharger is installed)

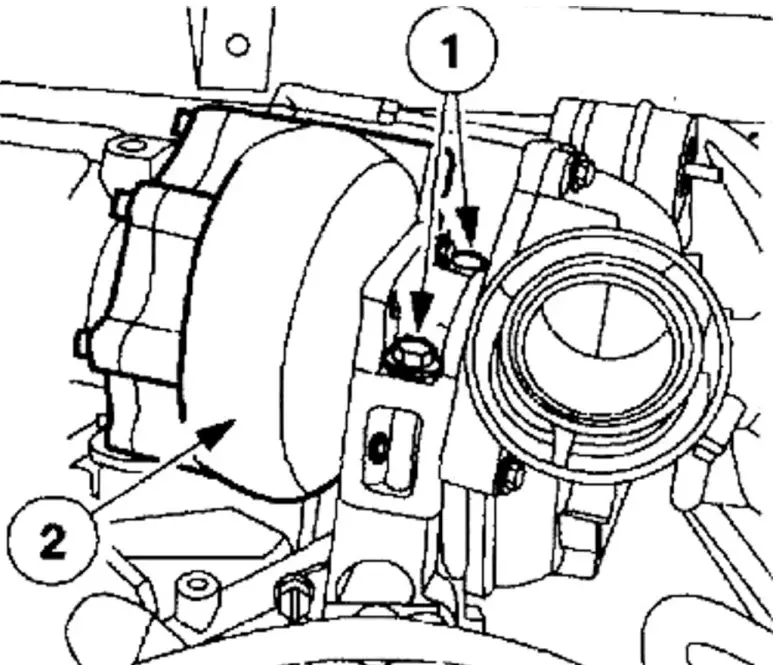
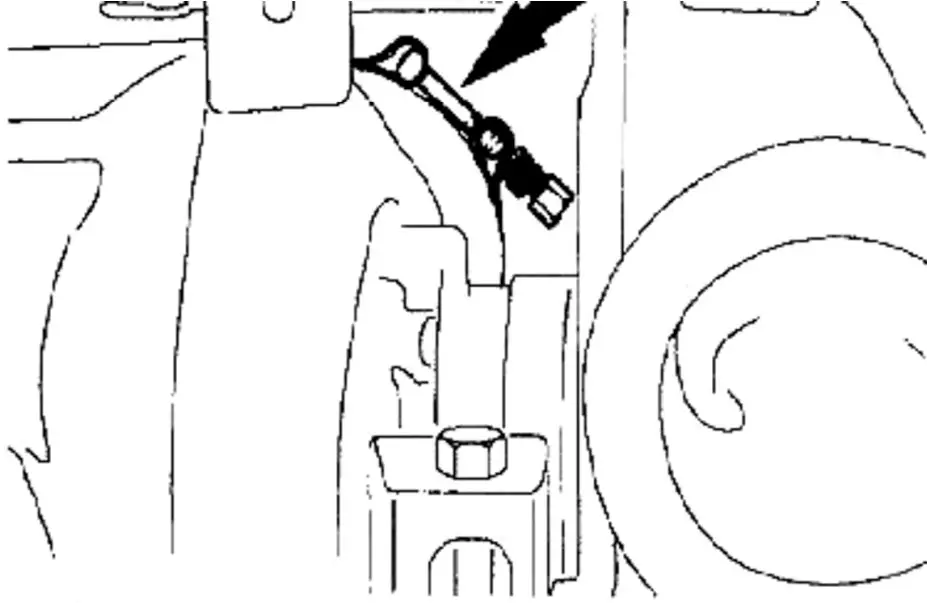
- Remove the bolts that secure Turbo on Pedestal.
- Remove the Turbocharger.

- Remove the Turbocharger.
- Remove and discard the Pedestal O-ring seals.
- Remove the backpressure valve assembly from the old turbo and install on your new KC300X. Use Anti-seize compound and torque down the bolts to 15-18 lb/ft.

- BE SURE to inspect Turbo air inlet, exhaust inlet and all other old components for foreign material.
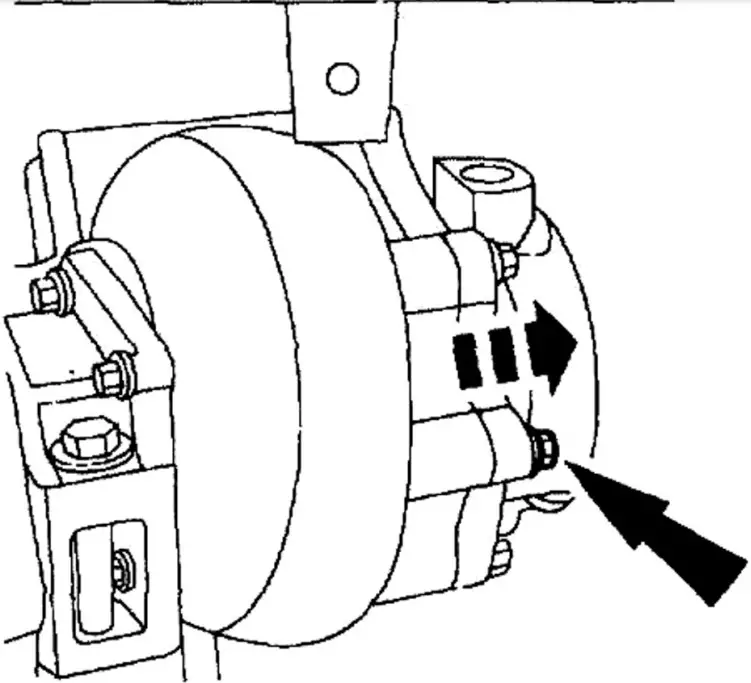
- Seat supplied pedestal O-Ring seals into pedestal, ensure these are seated properly.

- Ensure the inlet Marmon clamp is positioned on the exhaust inlet pipe before installing the Turbocharger.

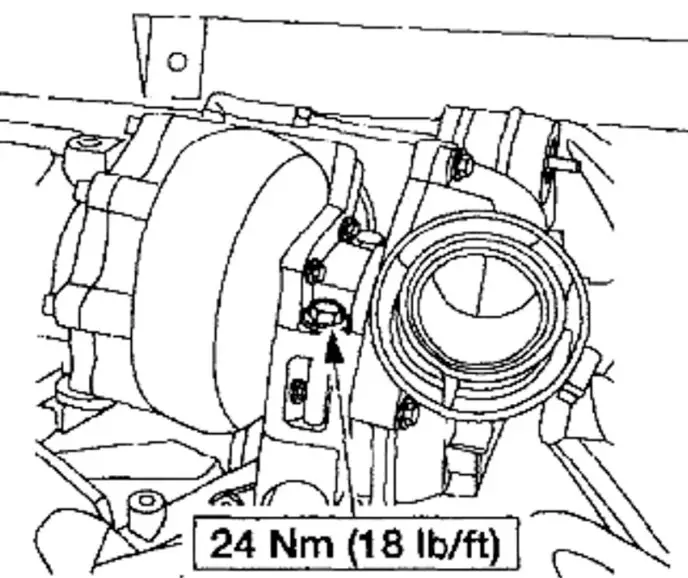
- Install KC300X Turbo onto pedestal. Tighten bolts down to 18 lb/ft. Now reverse the removal procedure.

- Tighten Exhaust Inlet / Up Pipe Clamp Marmon Clamp and Ensure it is properly seated

- Connect Downpipe and tighten clamp, ensure it is properly seated.

- Install new Compressor outlet O-Ring

- Position Intake Manifold Spider in place and re-install hoses. Tighten hose clamps.

- Re-install all labeled electrical and temperature connections. Ensure all lines and connectors are properly seated.
- Connect Red Line to Wastegate Actuator. Install supplied Air Inlet Boot to Turbocharger and CCV Assembly, tighten down clamps. Connect green line to Air Inlet Tube

- Re-Install crankcase breather assembly

- Re-Install Factory Airbox


Before Starting the Truck:
- Before start up ensure that you retrieved all tools and rags (for covering intake etc).
- Ensure air filter is clean and piping is clean so nothing other than clean air can get sucked into the Turbo.
Start THE TRUCK TO ensure and check following:
- Ensure that there is no leakage between Turbo and Pedestal
- Ensure there is no abnormal noise.
- Ensure there is no leaks between exhaust inlet and Turbocharger ( Up Pipes to Turbo)
- If everything checks out, then there is no further break in needed and you can operate your truck as usual.


