![]()
RZ-H271
Mobile Computer
Quick Start Guide
MN-004192-03EN Rev. A
Unpacking
To unpack the device:
- Carefully remove all protective material from the device and save the shipping container for later storage and shipping.
- Verify that the following were received:
• RZ-H271 (Main unit) · PowerPrecision Lithium-ion battery (Battery pack)
• Hand strap
• Regulatory Guide. - Inspect the equipment for damage. If any equipment is missing or damaged, contact Sharp Customer Support center immediately.
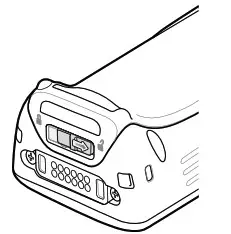
Features
Front View
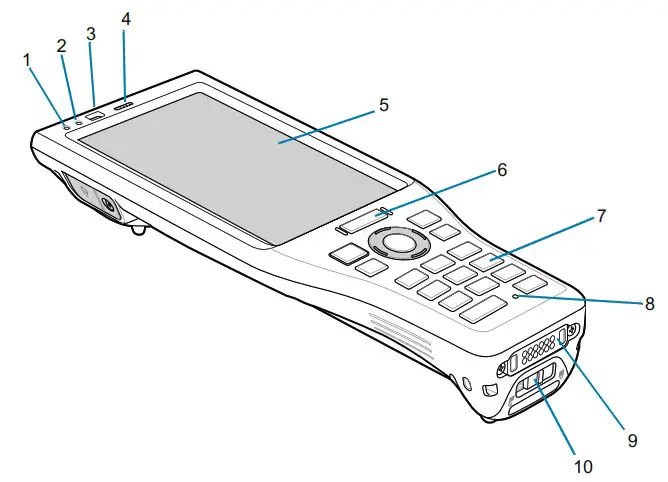 Table 1 Front View Features
| Number | Item | Function |
| 1 | Application/Notification LED | Indicates application generated notifications. |
| 2 | Charging LED | Indicates battery charging status while charging. |
| 3 | Light/Proximity sensor | Allows the device to switch between speaker and receiver mode. |
| 4 | Speaker/Receiver | Provides audio output playback (for voice communication, video and music) through speaker or receiver (if used in handset mode). |
| 5 | Touch screen | Displays all information needed to operate the device. |
| 6 | Scan button | Initiates data capture when a scan application is enabled. |
| 7 | Keypad | Use to enter data and navigate on screen functions. |
| 8 | Microphone | Use for communications in Speakerphone mode. |
| 9 | Interface connector | Provides USB host and client communications, and device charging via cables and accessories. |
| 10 | Battery door latch | Secures battery cover. |
Back View
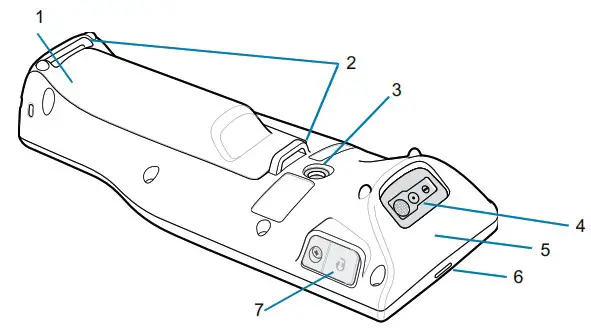
Table 2 Back View Features
| Number | Item | Function |
| 1 | Battery cover | Provides access to the battery. |
| 2 | Hand strap mounting points | Use for securing the hand strap to the device. |
| 3 | Camera | Takes photos and videos. |
| 4 | Exit window | Provides data capture using integrated imager. |
| 5 | NFC antenna | Provides communication with other NFC-enabled devices. |
| 6 | Speaker vent | Releases audio pressure when front speaker/receiver is being utilized for audio playback. |
| 7 | 3.5 mm headset jack | For audio output to a wired headset. |
Setting Up the Device
To start using the device for the first time:
- Install a micro secure digital (SD) card (optional).
- Install the battery.
- Install the hand strap.
- Charge the device.
- Power on the device.
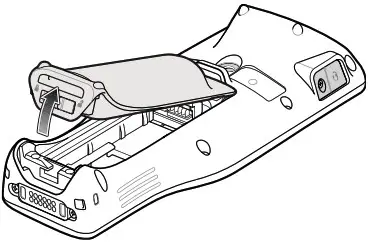
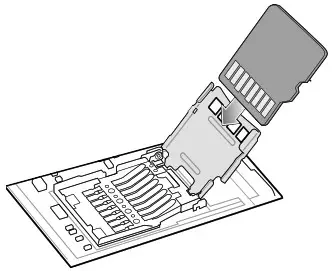
Installing a microSD Card
The microSD card slot provides secondary non-volatile storage. The slot is located under the battery pack. Refer to the documentation provided with the card for more information, and follow the manufacturer’s recommendations for use.
![]() CAUTION: Do not connect or disconnect the microSD card in a dry place where static electricity is likely to be generated. Doing so may result in malfunction.
CAUTION: Do not connect or disconnect the microSD card in a dry place where static electricity is likely to be generated. Doing so may result in malfunction.
- Slide the battery latch to the unlock position.

- Lift the battery cover. If a battery was previously installed, the microSD card holder is located under the battery.

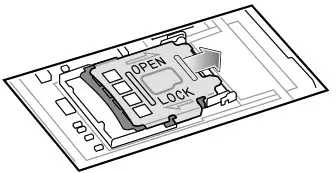
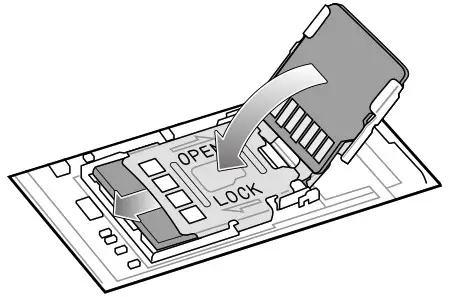
- Slide the microSD card holder to the Open position.

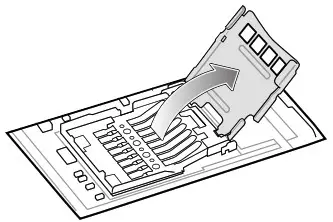
- Lift the microSD card holder.

- Insert the microSD card into the card holder door ensuring that the card slides into the holding tabs on each side of the door.

- Close the microSD card holder and slide into the Lock position.

- Replace the battery. See Installing the Battery on page 5.
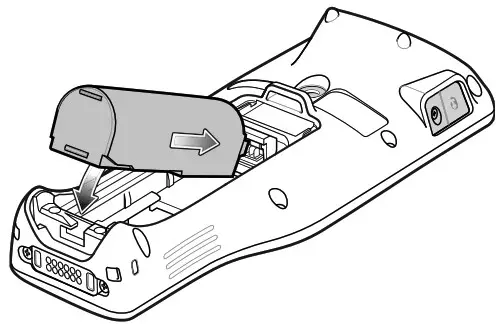
Installing the Battery
![]() NOTE: User modification of the device, particularly in the battery well, such as labels, asset tags, engravings, stickers, etc., may compromise the intended performance of the device or accessories. Performance levels such as sealing (Ingress Protection (IP)), impact performance (drop and tumble), functionality, temperature resistance, etc. could be effected. DO NOT put any labels, asset tags, engravings, stickers, etc. in the battery well.
NOTE: User modification of the device, particularly in the battery well, such as labels, asset tags, engravings, stickers, etc., may compromise the intended performance of the device or accessories. Performance levels such as sealing (Ingress Protection (IP)), impact performance (drop and tumble), functionality, temperature resistance, etc. could be effected. DO NOT put any labels, asset tags, engravings, stickers, etc. in the battery well.
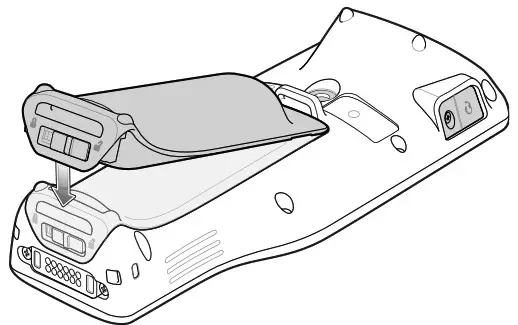
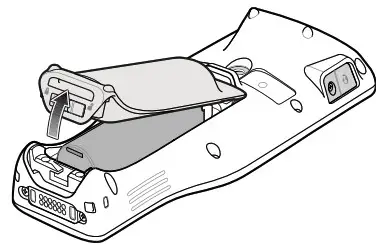
- Insert the battery, top first, into the battery compartment in the back of the device.

- Press the bottom of the battery down, into the battery compartment, until the bottom battery tab locks into place.

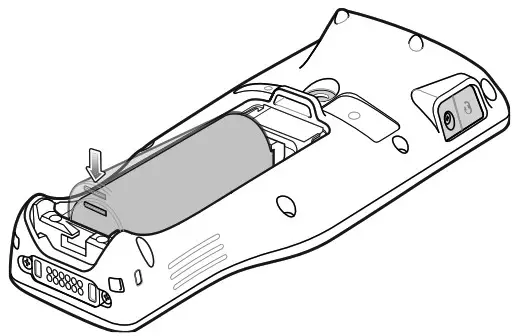
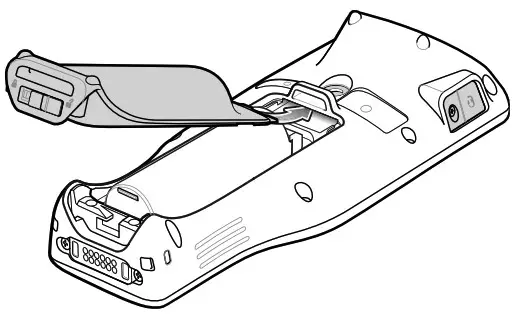
- Insert the battery cover, top first, into the battery well.

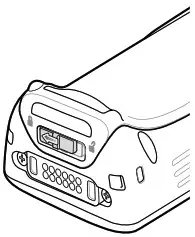
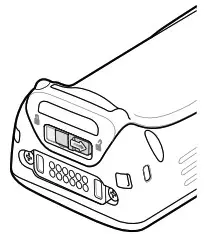
- Press down the battery cover at the bottom of the device.

- Slide the battery latch to the lock position.

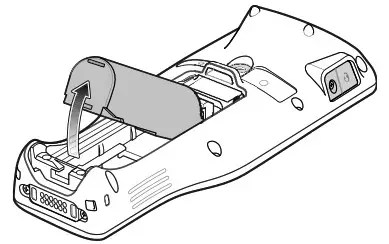
Removing the Battery
![]() NOTE: It is recommended to remove the hand strap from the mounting bar found at the bottom of the battery cover before removing or replacing the battery.
NOTE: It is recommended to remove the hand strap from the mounting bar found at the bottom of the battery cover before removing or replacing the battery.
- Press the power button until the menu appears.
- Touch Power off or Hot swap.
- Slide the battery latch to the unlock position.

- Lift the battery cover.

- Remove the battery.

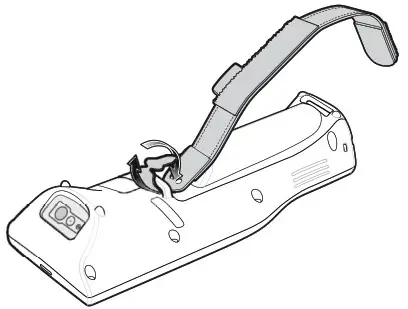
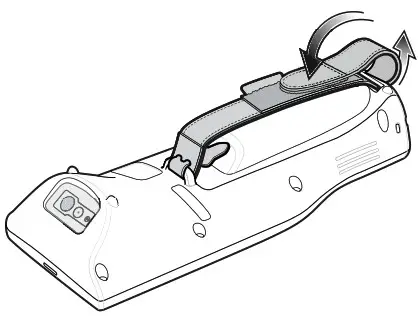
Installing the Hand Strap
To install the hand strap on the device:
- Feed the top end of the hand strap through the top mounting bar.

- Pull the end through the hand strap cut-out.

- Pull the end until the notch sits into the slot.
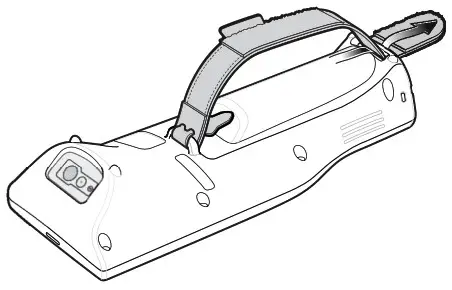
- Feed the other end of the hand strap through the slot at the bottom of the device.

- Pull the end through the slot.
- Press the hook material against the loop material.

- Place hand between device and hand strap and adjust hand strap as necessary.

Charging the Device
![]() CAUTION: Ensure that you follow the guidelines for battery safety described in the device Product Reference Guide.
CAUTION: Ensure that you follow the guidelines for battery safety described in the device Product Reference Guide.
Use one of the following accessories to charge the device and/or spare battery.
Table 3 Accessories
| Accessory | Part Number | Description |
| 1-Slot Charge Only Cradle | RZ-2CH9/RZ-2CH9B | Provides device charging. Optional power supply (EA-70S) sold separately. |
| 1-Slot Charge/Communication Cradle | RZ-2CH10 | Provides device charging and communication. Requires power supply (EA-70S) sold separately. |
| 5-Slot Charge Only Cradle | DCCS25E | Charges up to five devices. Includes power supply and AC line cord. |
| 4-Slot Battery Charger | SACMC204SCHG01 | Charges up to four spare batteries. Requires power supply (PWR-BGAl2V50WOVVW), DC line cord (CBL-DC-388A1-01), and AC line cord. |
Main Battery Charging
To charge a device:
- Insert the device into a slot to begin charging.
- Ensure the device is seated properly.
The device’s Charging LED indicates the status of the battery charging in the device. Approximate charging time: Up to about 4.5 hours (at 25°C, with the main unit turned off).
Table 4 Charging LED Indicators
| State | Indication |
| Off | Device is not charging. Device is not inserted correctly in the cradle or connected to a power source. Charger/cradle is not powered. |
| Solid Amber | Device is charging. |
| Solid Red | Device is charging but the battery is at end of useful life. Charging complete but the battery is at end of useful life. |
| Solid Green | Charging complete. |
| Fast Blinking Amber (2 blinks/second) | Charging error, for example: • Temperature is too low or too high. • Charging has gone on too long without completion (typically eight hours). |
| Fast Blinking Red (2 blinks/second) | Charging error but the battery is at end of useful life., for example: • Temperature is too low or too high. • Charging has gone on too long without completion (typically eight hours). |
Spare Battery Charging
To charge a spare battery:
- Insert the batteries into the 4-slot battery charger.
- Gently press down on the battery to ensure proper contact.
The charge LED’s on the battery charger (one for each battery slot), indicate the battery charge status. Approximate charging time: Up to about 3 hours.
Table 5 Spare Battery LED Charging Indicators
| LED | Indication |
| Solid Amber | Spare battery is charging. |
| Solid Green | Spare battery charging is complete. |
| Solid Red | Spare battery is charging and battery is at the end of useful life. Charging complete and battery is at the end of useful life. |
| Fast Blinking Red (2 blinks/second) | Error in charging; check placement of spare battery. |
| Off | No spare battery in slot. Spare battery not placed in slot correctly. Cradle is not powered. |
Charging Temperature
When charging the battery pack, do so in an ambient temperature range of 0 °C to 40 °C. The device, and charging equipment, will always perform battery pack charging in a safe and optimal manner. Charging in a high temperature environment may cause unstable charging status. The device and charging device will display an LED notification when charging is disabled due to abnormal temperature.
1-Slot Charge Only Cradle [RZ-2CH9] / [RZ-2CH9B]

Table 6 1-Slot Charge Only Cradle Features
| Number | Item |
| 1 | Power port |
| 2 | Charge LED |
| 3 | Charging slot |
| 4 | Power supply & AC line cord (EA-70S) |
1-Slot Charge/Communication Cradle [RZ-2CH10]
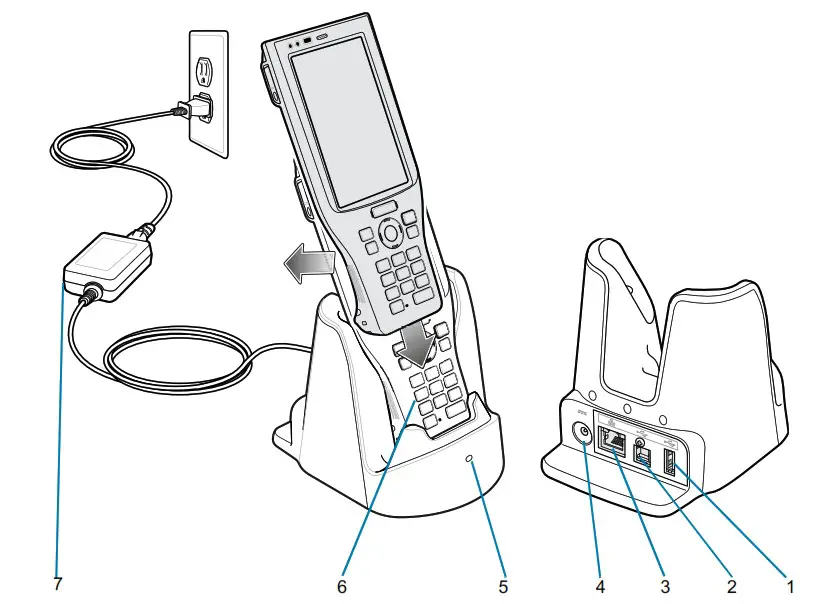
Table 7 1-Slot Charge/Communication Cradle Features
| Number | Item |
| 1 | USB-A port |
| 2 | USB-B port |
| 3 | Ethernet port |
| 4 | Power port |
| 5 | Charging LED |
| 6 | Charging slot |
| 7 | Power supply & AC line cord (EA-70S) |
5-Slot Charge Only Cradle [DCCS25E]
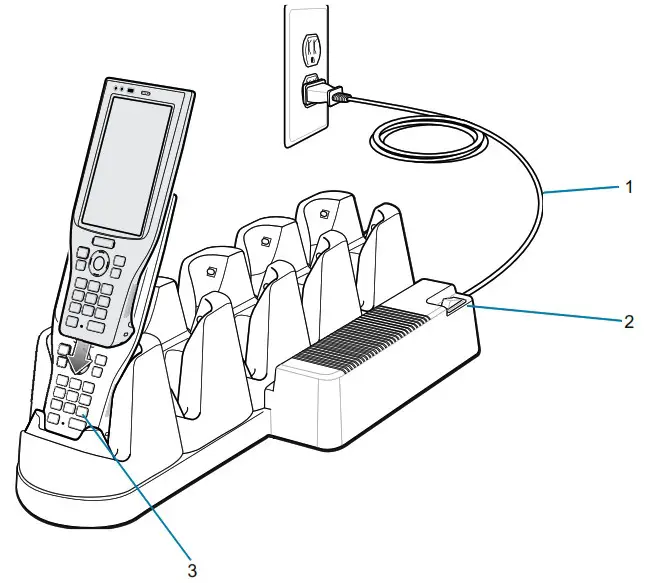
Table 8 5-Slot Charge Only Cradle Features
| Number | Item |
| 1 | AC line cord |
| 2 | Power switch |
| 3 | Device slot |
4-Slot Battery Charger [SACMC204SCHG01]
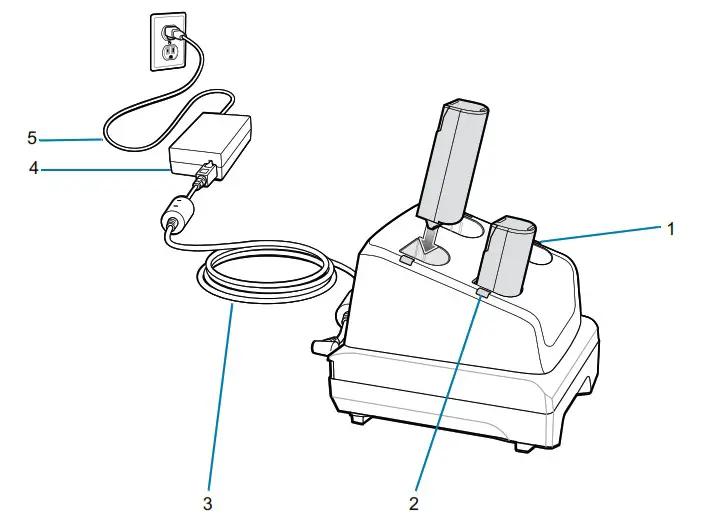
Table 9 4-Slot Battery Charger Features
| Number | Item |
| 1 | Battery slot |
| 2 | Battery charging LED |
| 3 | DC line cord |
| 4 | Power supply |
| 5 | AC line cord |
Scanning
Scanning with Internal Imager
To read a barcode, a scan-enabled app is required. The device contains the DataWedge app that allows the user to enable the imager, decode the barcode data, and display the barcode content.
To scan with the internal imager:
- Ensure that an app is open on the device and a text field is in focus (text cursor in text field).
- Point the exit window at the desired barcode.
- Press and hold the scan button.
The white laser aiming pattern turns on to assist in aiming.
 NOTE: When the device is in Picklist mode, the imager does not decode the barcode until the cross-hair or aiming dot touches the barcode.
 - Ensure the barcode is within the area formed by the cross-hairs in the aiming pattern.
Figure 1 Aiming Pattern Figure 2 Pick List Mode with Multiple Barcodes
- The Data Capture LED lights green and a beep sounds, by default, to indicate the barcode was decoded successfully.
- Release the scan button.
- The barcode content data displays in the text field.
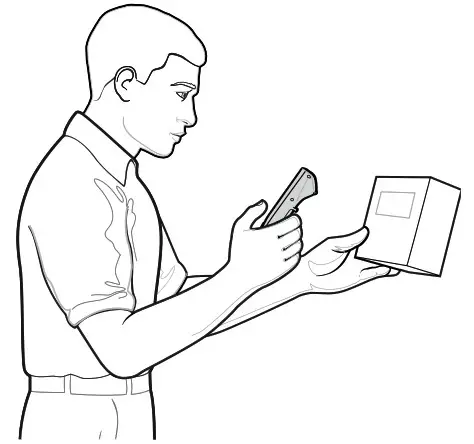
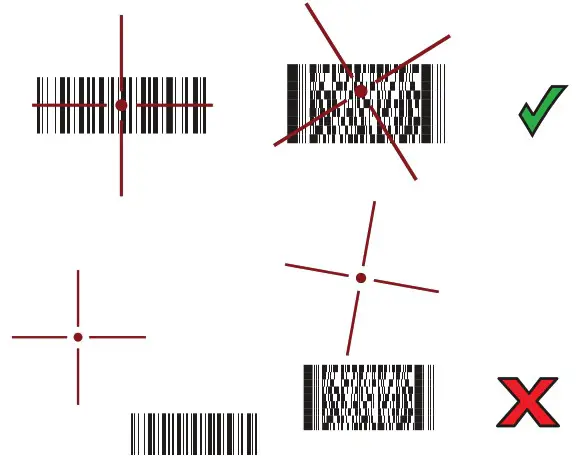 Figure 2 Pick List Mode with Multiple Barcodes
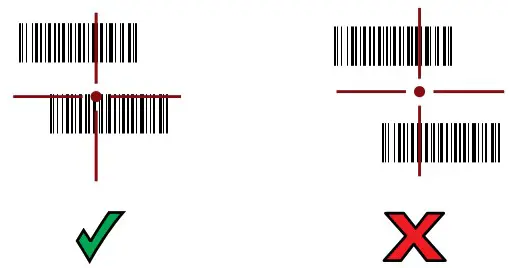
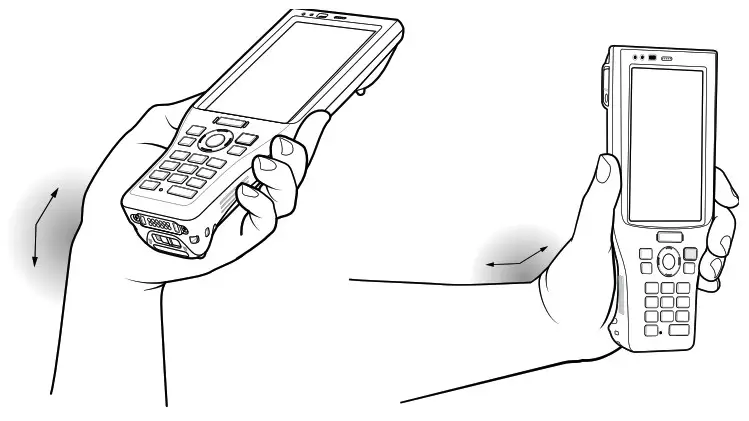
Ergonomic Considerations
When scanning barcodes, please use a comfortable posture.
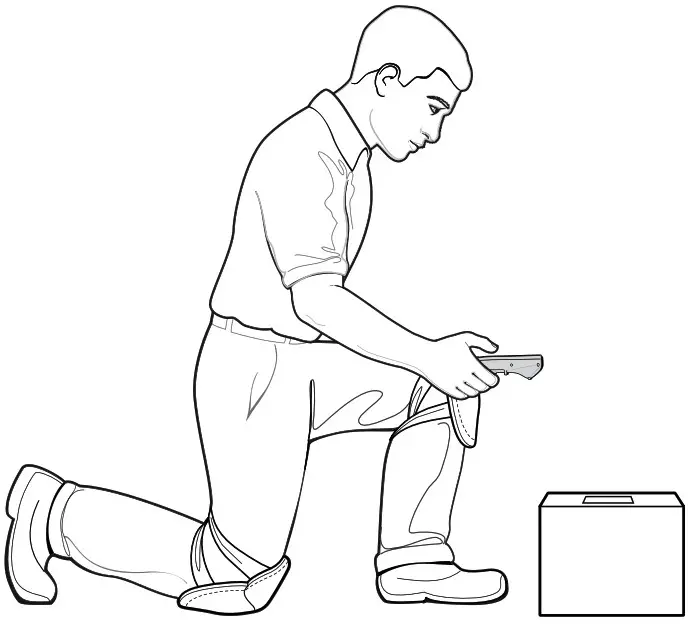
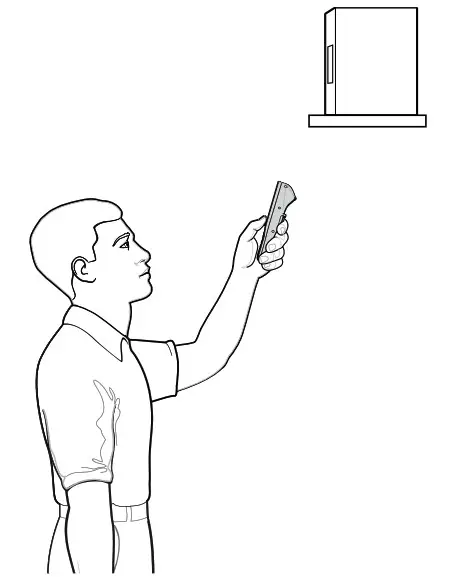
Optimal Posture
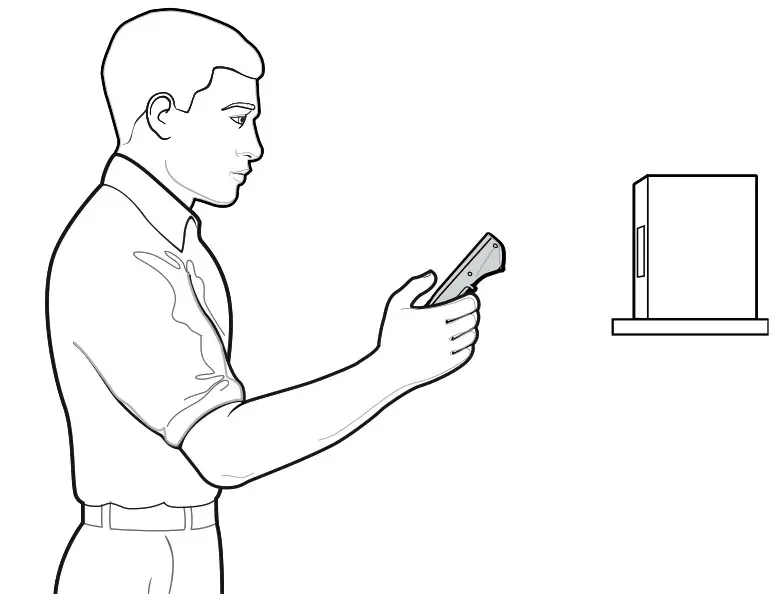
Optimize Body Posture for Low Scanning
Optimize Body Posture for High Scanning
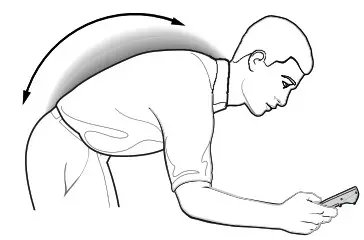
Do not bend your back or hips excessively.
Do not bend your elbows or wrists to the extreme.
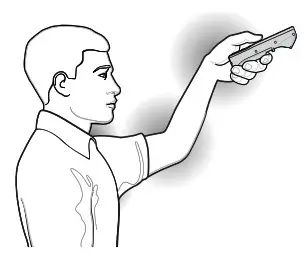
Do not bend the angle of your wrist forcibly.
MN-004192-03EN Rev. A


