![]()
MaeGo TSR100 Self Driving Robot Target Shooting Game & Coding STEM Car Toy
Warning
- Do not immerse the product or any part in water or any other form of liquid
- Do not drop, throw, or kick MaeGo and IR blaster as this may damage mechanical functions.
- Do not allow MaeGo to roam freely or leave unattended near edges from which MaeGo could fall.
- Do not allow MeeGo to work outdoor, cause the Lidar cannot work in the sunshine.
- It’s recommended to use MeeGo on a smooth surface.
Overview
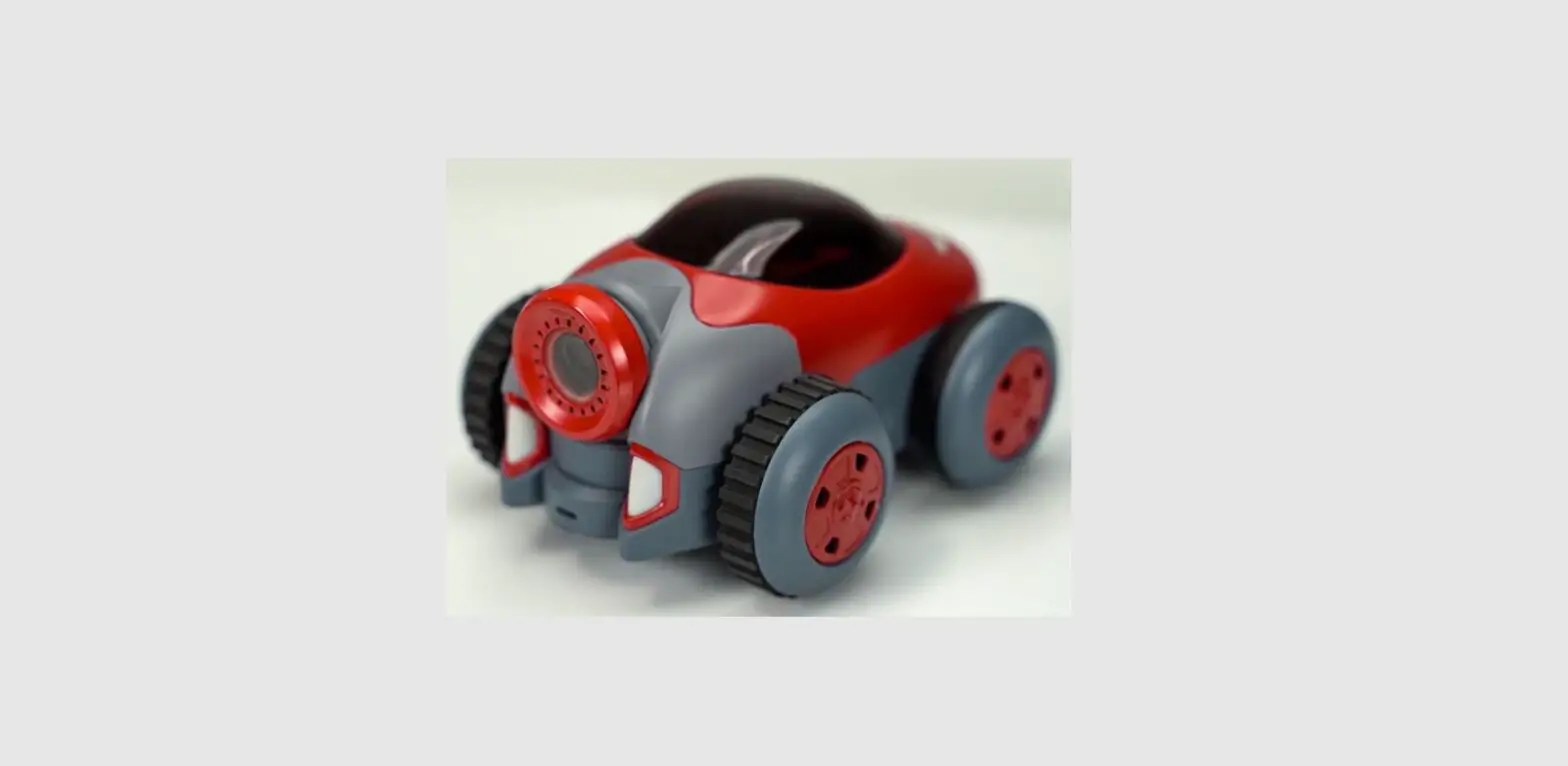
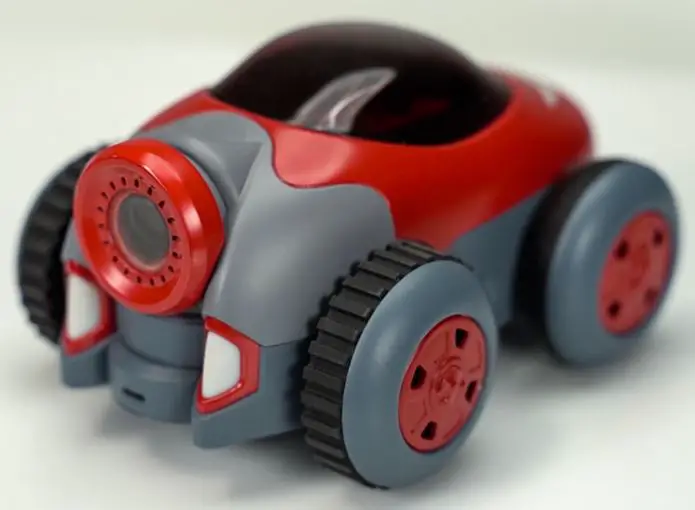
MaeGo is the world’s first AI robot car that runs, stops, turns and performs preset tasks autonomously to play FPS games with you in reality.
You can shoot infrared rays using the included guns or foam balls/darts from Nerf blasters at them in a multiplayer battle, having fun for hours with your families and friends.
MaeGo is more than an AI robot for shooting games, but also a coding platform to cultivate children’s logic and strategic thinking and prepare them for school and future careers in STEM.
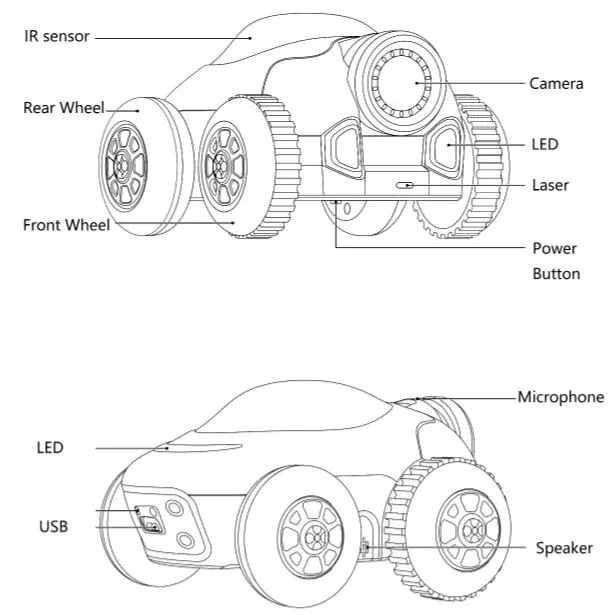
Diagram
Specifications
Robot
| Wize | 150×114×82 (mm) |
| Weight | 360g |
| Camera | Yes |
| Processor | Quadcore ARM [email protected] |
| Controller | ARM CORTEX-M4@120MHz |
| Lidar | Yes |
| IMU | Yes |
| IR | Yes |
| Microphone | Yes |
| Speaker | Yes |
| Battery | 3.8V 1100mAh LiPo |
| Charger | USB |
| Running time | About 30 minutes |
| Charging time | About 60 minutes |
| Max speed | 2m/s |
| WiFi | Yes |
| Coding | Pyhton,Blockly |
| Upgrade | OTA |
IR Blaster
| Size | 176×132×40(mm) |
| Weight | 160g (w/o battery) |
| IR | Yes |
| Max distance | 10m |
| Speaker | Yes |
| LED | Yes |
| Battery | 1.5V AAA×2 (Not lncluded) |
| Auto power off | Yes |
| Ejecting Magzine | Yes |
Usage
IR blaster Battery Installation
2 AAA battery is needed for IR blaster 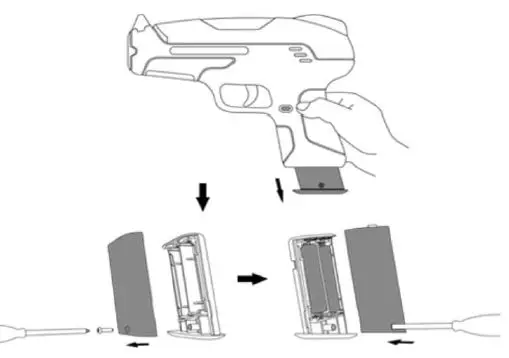
IR Blaster Load 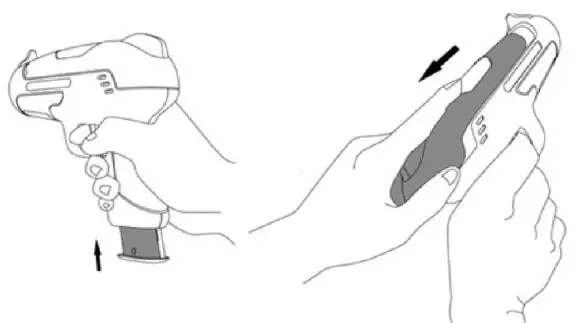
tips: ten bullets each load
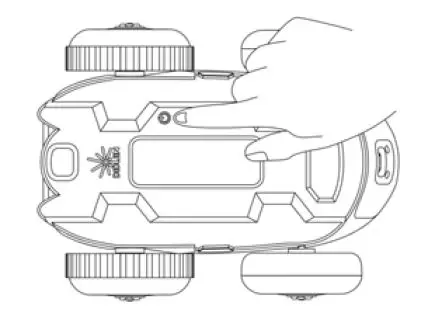
Robot Power On / Off
- Power on: press power button 1s

- Power off: press the power button 3s
- Force power off press power button 8s
- tips: LED is solid yellow during power-up. The time for system boot-up is about 15s
Game Mode
Place obstacles
In the game mode, you can place some obstacles in the field to increase the fun of the game. 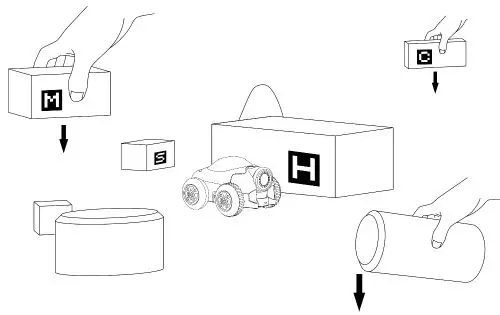
Vision Marker
Place April tag on the obstacle for MaeGo vision recognition to increase the fun of the game. Different tag present different functions. 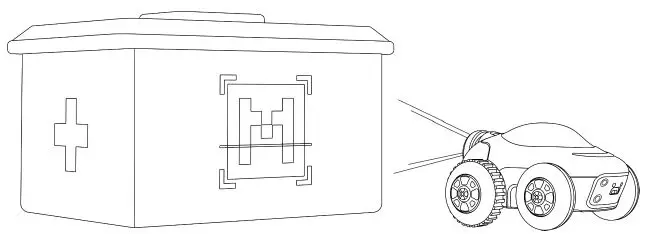
Start Game
Shooting at the red semitransparent part on the top of the robot by IR blaster can start the target shooting game. 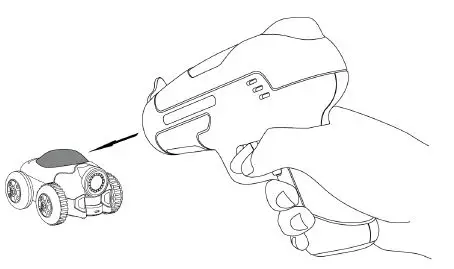
| mode | color | status | notes | |
| Mode switch | red | Blink 4 times | Swith to game mode | |
| green | Blink 4 times | Switch to coding mode | ||
| game | front | green | blink | Hp enough |
| red | blind | Hp is not enough | ||
| rear | Red/green | Blink 1 time | Be shot | |
Switch IR blaster Bullet mode
Coding Mode
Python Coding
download Python coding software on PC
Windows version:
Ubuntu version:
Notes: windows 7+ or Ubuntu 16.04+ is required to install MeeGo Python.
connect PC to MaeGo’s WiFi Access Point
open the internet access menu on the computer and connect to MaeGo’s WiFi access point MaeGo_xxxxxx(XXXX is different on different products); 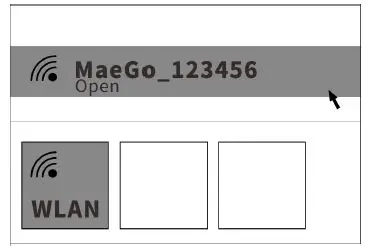
MaeGo Python 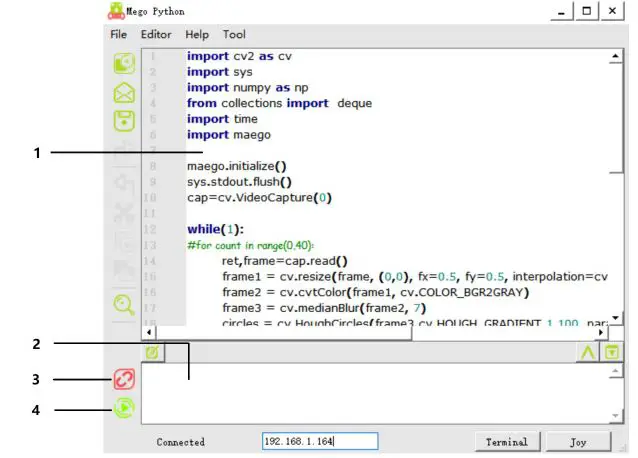
- code edit
- log display
- connect/disconnect to MaeGo 4:run code
Blockly Coding
Connect Smart Phone to MaeGo’s WiFi 
MaeGo APP 
Blockly 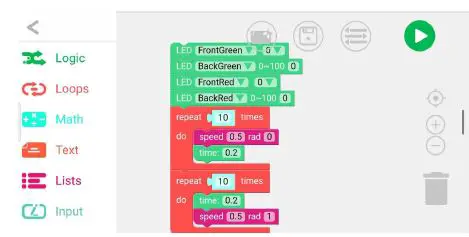
FPV control
The control function of APP can FPV control the MaeGo. 
- forward / backward
- turn left / turn right
Settings
upgrade
Connect MaeGo to PC by the USB cable attached. 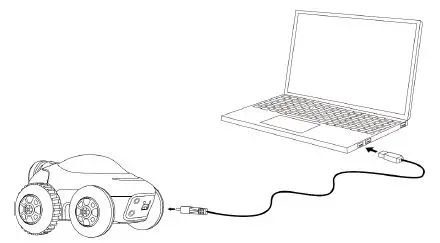
run MaeGo Python, and open the upgrade menu;
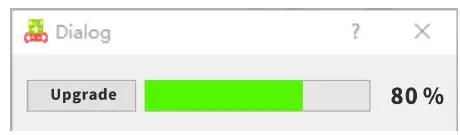
tips: led blinks yellow means the robot is upgrading.
Warning: The upgrade process cannot go on if the battery is not enough.
Charging
Connect MaeGo to a usb adapter to charge it. 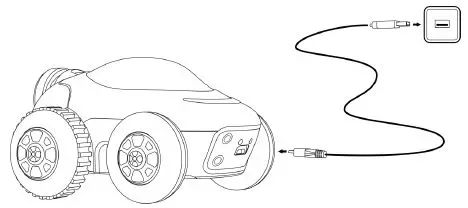
LED status description:
- LED red: charging
- LED green: full charged
Notes: charger with output current 2A+ is suggested.
FCC STATEMENT
Any changes or modifications not expressly approved by the party responsible for compliance could void the user’s authority to operate the equipment. This device complies with part 15 of the FCC Rules. Operation is subject to the following two conditions:
- This device may not cause harmful interference, and
- this device must accept any interference received, including interference that may cause undesired operation.
This equipment has been tested and found to comply with the limits for a Class B digital device,
pursuant to part 15 of the FCC Rules. These limits are designed to provide reasonable protection against harmful interference in a residential installation. This equipment generates, uses and can radiate radio frequency energy and, if not installed and used in accordance with the instructions, may cause harmful interference to radio communications. However, there is no guarantee that interference will not occur in a particular installation. If this equipment does cause harmful interference to radio or television reception, which can be determined by turning the equipment off and on, the user is encouraged to try to correct the interference by one or more of the following measures:
- Reorient or relocate the receiving antenna.
- Increase the separation between the equipment and receiver.
- Connect the equipment into an outlet on a circuit different from that to which the receiver is connected.
- Consult the dealer or an experienced radio/TV technician for help.
FCC radiation exposure Statement
This equipment complies with FCC radiation exposure limits set forth for an uncontrolled environment.
This transmitter must not be co‐located or operating in conjunction with any other antenna or transmitter.
This equipment should be installed and operated with a minimum distance 20cm between the device and your body.


