
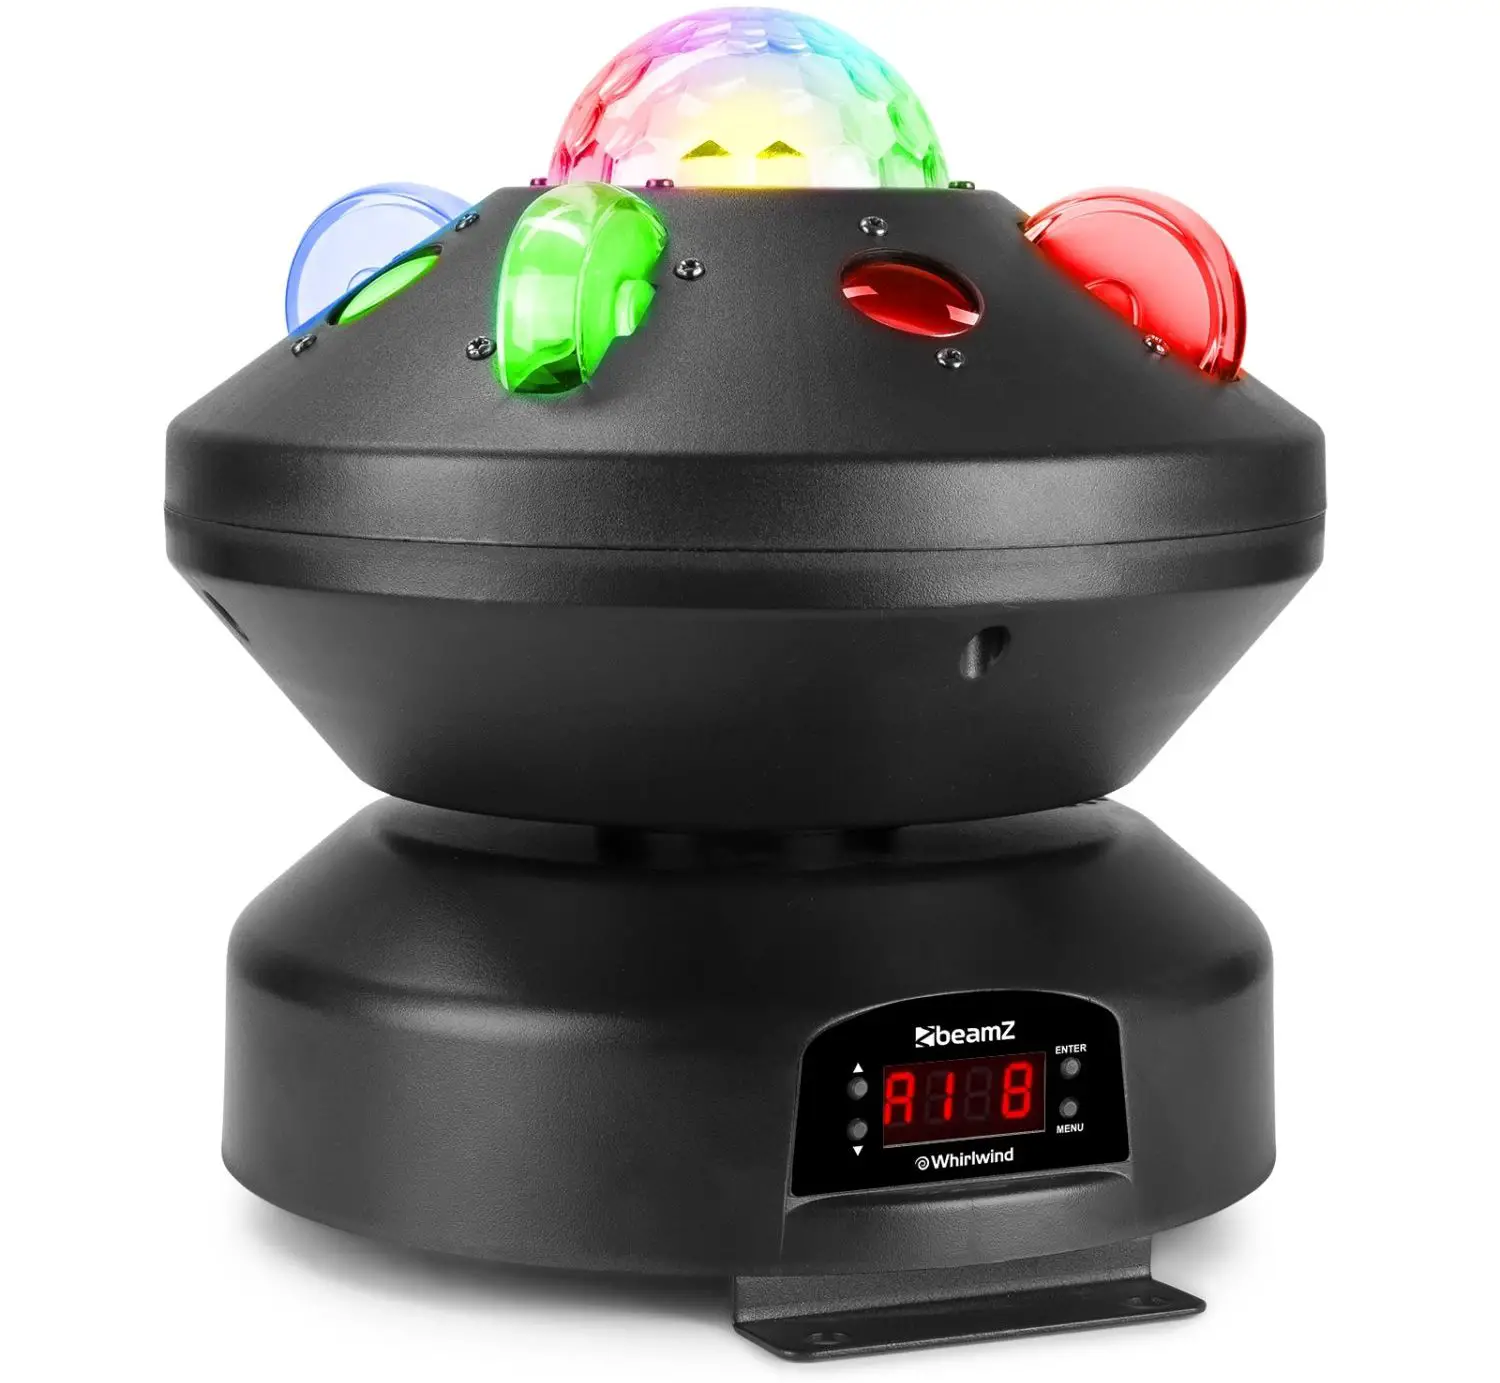
beamZ WHIRLWIND 3-in-1 LED Effect DMX
POWER SUPPLY
On the label on the backside of the unit is indicated on this type of power supply must be connected. Check that the mains voltage corresponds to this, all other voltages than specified, the light effect can be irreparably damaged. The product must also be directly connected to the mains and may be used. No dimmer or adjustable power supply.
WARNING
Always connect the unit to a protected circuit (circuit breaker or fuse). Make sure the unit has an appropriate electrical ground to avoid the risk of electrocution or fire.
RIGGING
The unit may be set up on a stable and even surface. By means of the fixing facilities of the baseplate, the unit can also be mounted upside down to a truss, see below picture. For fixing, certified clamps with correct save working load are required. According to the figure, the quick lock bolts of the omega brackets are placed into the openings provided in the base plate and turned clockwise until they lock (to the stop). The mounting place must be of sufficient stability and be able to support a weight of 10 times of the unit’s weight. Secure the unit with a safety cable so that it cannot fall down.
When carrying out any installation, always comply European and national guidelines concerning rigging, truss and all other safety issues. Always let the installation checked out by an authorized dealer !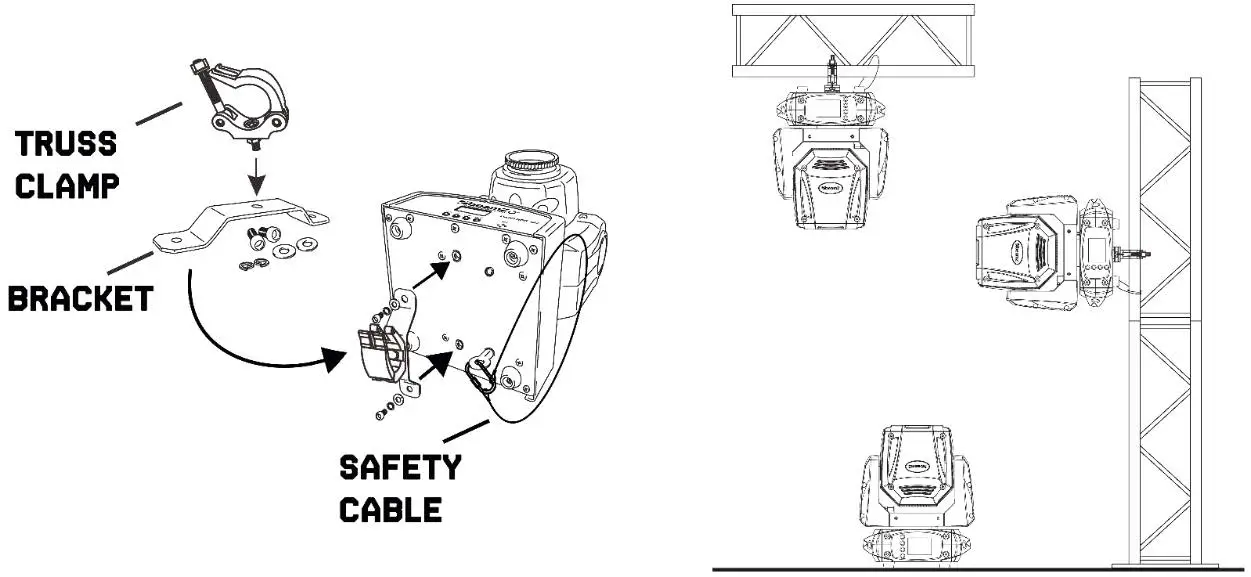
DMX512 CONTROL
If you are using a standard DMX controller, you can connect the DMX output of the controller directly to the DMX input of the first unit in a DMX chain. Always connect the output of one unit with the input of the next unit until all units are connected. 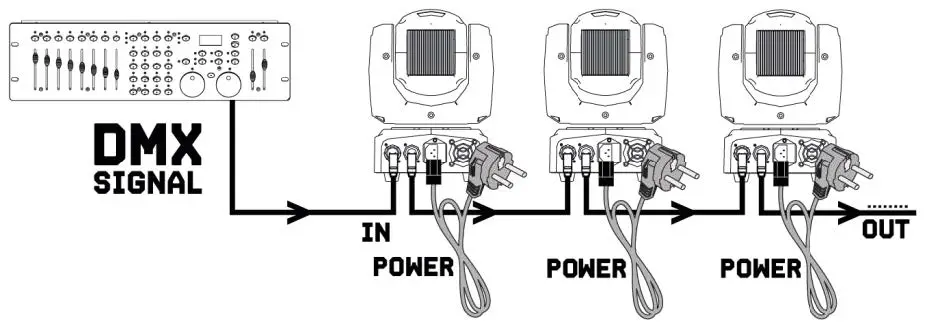
CAUTION
At the last unit, you must close the DMX line with a terminating resistor. Take an XLR connector and solder a 120 Ohm resistor between signal (-) and signal (+) and connect it to the DMX output of the last unit in the line.
REMOTE CONTROL
| BUTTON | FUNCTION | 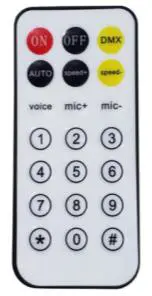 |
| ON | ON | |
| OFF | OFF | |
| OMX | DMX Mode | |
| AUTO | Auto Running Mode | |
| SPEED+ | Auto Running Speed up | |
| SPEED- | Auto Running Speed down | |
| VOICE | Sound Control Mode | |
| MIC+ | Sound Sensitive + | |
| MIC- | Sound Sensitive – | |
| 1 | Red | |
| 2 | Green | |
| 3 | Blue | |
| 4 | White | |
| 5 | UV |
| MENU | DESCRIPTION | |
| A000-AS12 | DMX address setting | |
| AL1-AL9 | Internal program 1–9 | Auto program |
| SLl- SL9 | Internal sound program | Sound program, 1–9 means sensitive |
DMX CHANNELS
| CHANNEL | FUNCTION | VALUE | DESCRIPTION |
| 1 | Pan | 000-255 | 0-540degree movement |
| 2 | Tilt | 000-255 | 0–180degree movement |
| 3 | Pan/Tilt Speed | 000-255 | Pan/Tilt Speed from fast to slow |
| 4 | Lens Wheel Rotation | 000–127 | 0-360degree rotate |
| 128–191 | Forward endless rotate from slow to fast | ||
| 192–255 | Reverse endless rotate from slow to fast | ||
| 5 | Dimmer | 000-255 | Linear dimmer from dark to brighter |
| 6 | Strobe | 000-009 | No function |
| 010–255 | Strobe from slow to fast | ||
| 7 | Red | 000-255 | Red dimmer from dark to brighter |
| 8 | Green | 000-255 | Green dimmer from dark to brighter |
| 9 | Blue | 000-255 | Blue dimmer from dark to brighter |
| 10 | White | 000-255 | White dimmer from dark to brighter |
| 11 | Mode | 000-050 | CH1–CH10 Valid |
| 051–150 | Random Auto Running | ||
| 150–255 | Sound Control | ||
| 12 | Reset | 000-250 | None |
| 251–255 | Reset after 3s |


