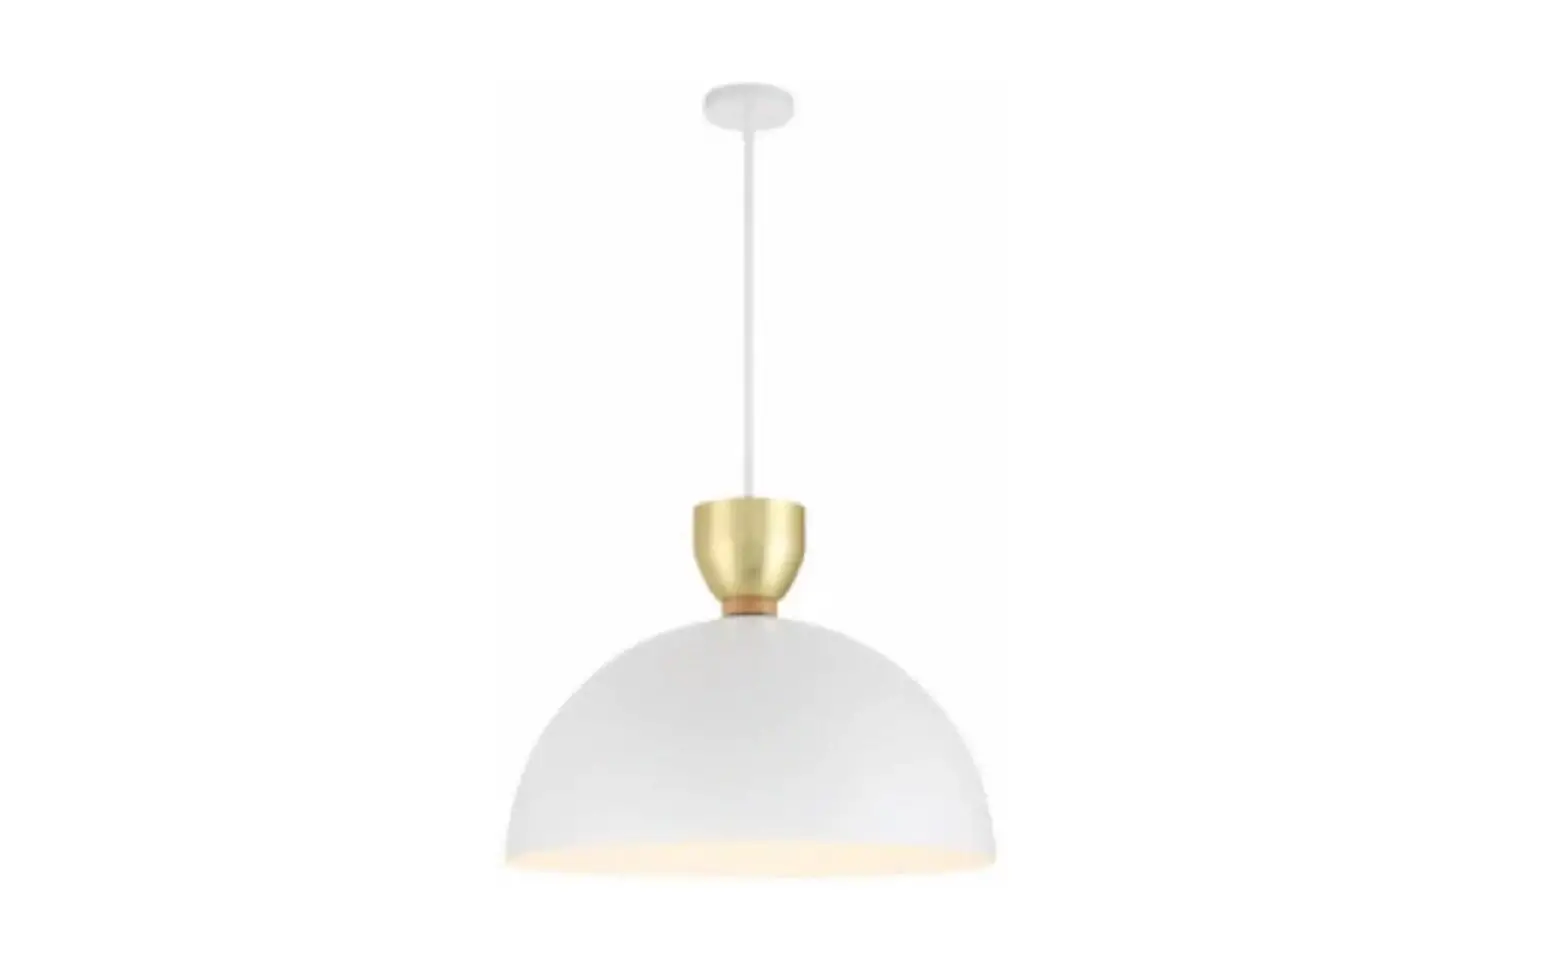
GLUCKSTEIN ELEMENTS 38689-HBC 3-Light Pendant User Guide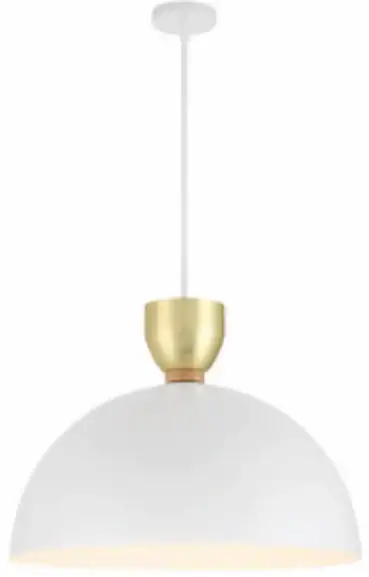
THANK YOU
We appreciate the trust and confidence you have placed in Gluckstein Elements through the purchase of this lighting fixture. We strive to continually create quality products designed to enhance your home. Visit us online to see our full line of products available for your home improvement needs. Thank you for choosing Gluckstein Elements!
Safety Information
- Read all the instructions before assembling and installing.
- Consult a qualified electrician for installation of this fixture.
- If you have any non-electrical questions about this fixture, please contact our Customer Service Team at 1-833-695-2045 or visit
WWW.HOMEDEPOT.CA /HOMEDEPOT.COM / GLUCKSTEINELEMENTS.COM. - Please reference your item number 0000 000 000 / 0000 000 000.
- Keep your receipt and these instructions for proof of purchase.
CAUTION:Before starting installation of this fixture or removal of a previous fixture, disconnect the power by turning off the circuit breaker or by removing the fuse at the fuse box.
IMPORTANT: Inspect the wire insulation for any cuts, abrasions, or exposed copper that may have occurred during shipping. If there is a defect in the wire, do not continue the assembly process. Please call our Customer Service Team at
1-833-695-2045.
IMPORTANT: Do not install this lighting system in damp or wet locations.
Warranty
LIMITED WARRANTY
WHAT IS COVERED
The manufacturer warrants this lighting fixture to be free from defects in materials and workmanship for a period of five (5) years from date of purchase. This warranty applies only to the original consumer purchaser and only to products used in normal use and service. If this product is found to be defective, the manufacturer’s only obligation, and your exclusive remedy, is the repair or replacement of the product at the manufacturer’s discretion, provided that the product has not been damaged through misuse, abuse, accident, modification, alteration, neglect, or mishandling.
WHAT IS NOT COVERED
This warranty shall not apply to any product that is found to have been improperly installed, set up, or used in any way not in accordance with the instructions supplied with the product. This warranty shall not apply to a failure of the product as a result of an accident, misuse, abuse, negligence, alteration, faulty installation, or any other failure not relating to faulty material or workmanship. This warranty shall not apply to the finish on any portion of the product, such as surface and/or weathering, as this is considered normal wear and tear. The manufacturer does not warrant and specially disclaims any warranty, whether express or implied, of fitness for a particular purpose, other than the warranty contained herein. The manufacturer specifically disclaims any liability and shall not be liable for any consequential or incidental loss or damage, including but not limited to any labor/expense costs involved in the replacement or repair of said product.
Pre-Installation
PLANNING INSTALLATION
Read all the instructions before assembly and installation. To avoid damaging this product, assemble it on a soft, non-abrasive surface, such as carpet or cardboard. Inspect each part for defects that may have occurred during shipping. Keep your receipt and these instructions for proof of purchase.
TOOLS REQUIRED
- Safety goggles

- Phillips screwdriver

- Flathead screwdriver
- Wire strippers

- Wire cutters

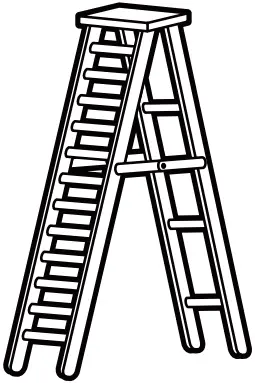
- Ladder


HARDWARE INCLUDED
NOTE: Hardware is not shown to actual size.

| Part | Description | Quantity |
| AA | Wire nut | 3 |
| BB | Junction box screw | 2 |
| CC | Ground screw | 1 |
| DD | Canopy screw | 2 |
| EE | Universal crossbar | 1 |
PACKAGE CONTENTS
| Part | Description | Quantity |
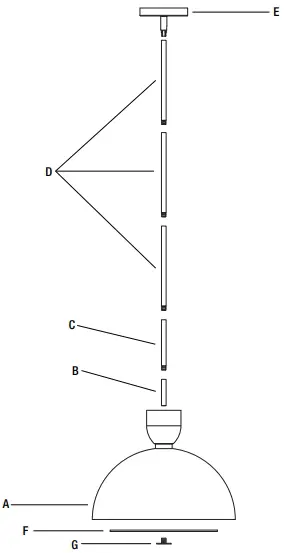
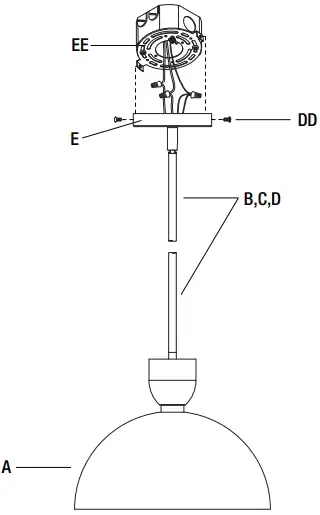
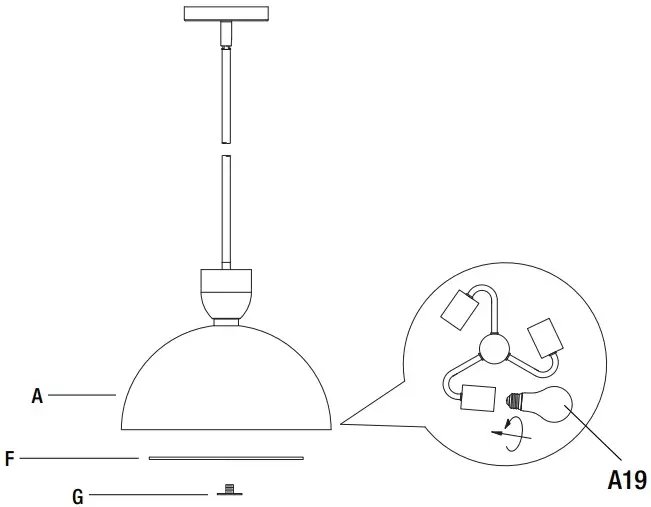
| A | Fixture body | 1 |
| B | Center rod 3 in. | 1 |
| C | Center rod 6 in. | 1 |
| D | Center rod 12 in. | 3 |
| E | Canopy | 1 |
| F | Glass sheet | 1 |
| G | Finial | 1 |
Installation
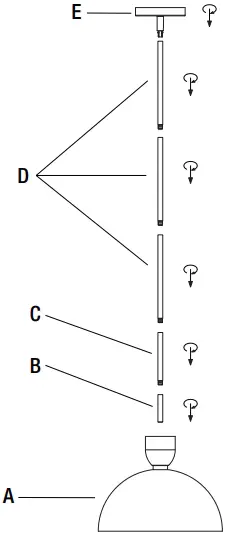
- Installing the center rod and the canopy
- Pass the wires of the fixture body (A) through the center rod (B) (C) (D), and then install the center rod (B) (C) (D) to the fixture body (A).
- Install the canopy (E) to the center rod (B) (C) (D).

- Installing the universal crossbar
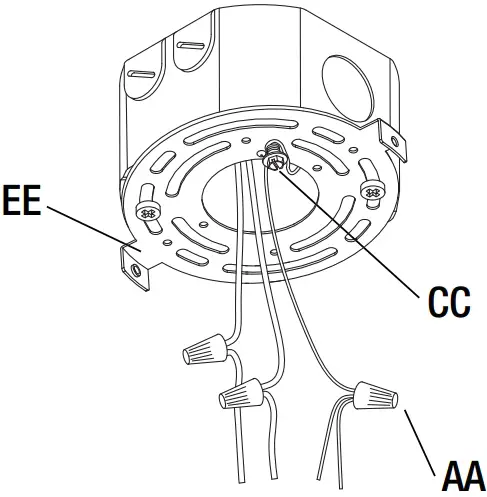
WARNING: Turn off the power at the main fuse box.- Install the universal crossbar (EE) to the junction box (not included) with the supplied junction box screws (BB).

- Install the universal crossbar (EE) to the junction box (not included) with the supplied junction box screws (BB).
- Making the electrical connections
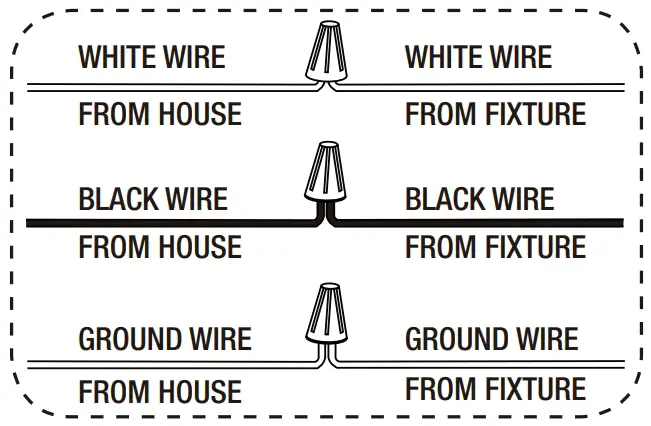
NOTE: Always use the wire nuts (AA) to connect the wires and push all the excess wires and connections back into the junction box (not included).- Wrap the ground wire from the fixture around the ground screw (CC) on the universal crossbar (EE), and then connect the ground wire from the fixture to the ground wire from the junction box.
- Connect the black wire of the power supply to the black wire of the fixture and connect the white wire of the power supply to the white wire of the fixture.

Connect the fixture wires as follows:
- Installing the fixture body
- Attach the canopy (E) to the universal crossbar (EE) and secure it with the supplied canopy screws (DD).

- Attach the canopy (E) to the universal crossbar (EE) and secure it with the supplied canopy screws (DD).
- Installing the bulb
- Install a 60W MAX A19 bulb (not included) to the socket of the fixture body (A).
- Install the glass sheet (F) to the fixture body and tighten with the finial (G).


Care and Cleaning
Clean the light fixture carefully with a soft, dry cloth. Do not use any cleaners with chemicals, solvents, or harsh abrasives.
Troubleshooting
| Problem | Possible Cause | Solution |
| The product will not light. | The bulb is burned out. | Replace the light bulb. |
| The power is off. | Ensure that the power supply is turned on. | |
| The circuit breaker is off. | Ensure that the circuit breaker is set to the ON position. | |
| The fuse blows or the circuit breaker trips when the light is turned on. | There are too many items on one circuit. |
|
Support
Questions, problems, missing parts? Before returning to the store,
call Gluckstein Elements Customer Service
8 a.m. – 7 p.m., EST, Monday-Friday, 9 a.m. – 6 p.m., EST, Saturday
1-833-695-2045
HOMEDEPOT.CA
HOMEDEPOT.COM
GLUCKSTEINELEMENTS.COM
Retain this manual for future use.


