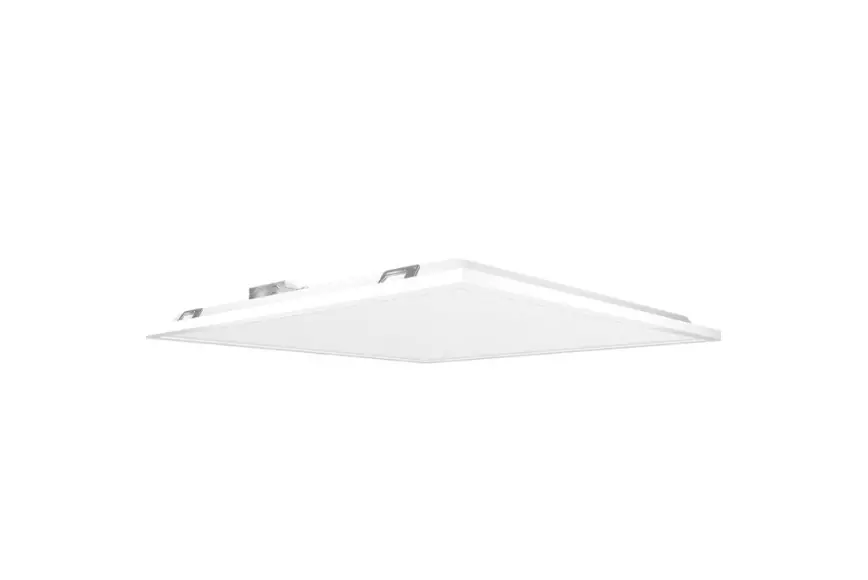
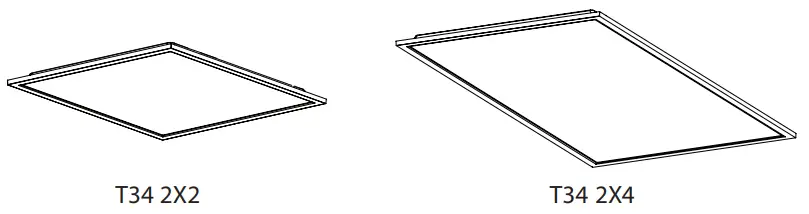
RAB T34 2X2 LED Flat Panel

INTRODUCTION
RAB Lighting is committed to creating high-quality, affordable, well-designed and energy-efficient LED lighting and controls that make it easy for electricians to install and end users to save energy. We’d love to hear your comments. Please call the Marketing Department at 888-RAB-1000 or email: [email protected]
IMPORTANT
READ CAREFULLY BEFORE INSTALLING FIXTURE. RETAIN THESE INSTRUCTIONS FOR FUTURE REFERENCE.
RAB fixtures must be wired in accordance with the National Electrical Code and all applicable local codes. Proper grounding isrequired for safety. THIS PRODUCT MUST BE INSTALLED IN ACCORDANCE WITH THE APPLICABLE INSTALLATION CODE BY A PERSON FAMILIAR WITH THE CONSTRUCTION AND OPERATION OF THE PRODUCT AND THE HAZARDS INVOLVED.
WARNING: Make certain power is OFF before installing or maintaining fixture. No user serviceable parts inside.
SAFETY INSTRUCTIONS
WARNING: Risk of fire or electric shock. Suitable for damp locations.
WARNING: Suitable for 9/16” or 15/16” Flat Tee Grid in both insulated ceilings and non-insulated ceilings. Access above ceiling required.
WARNING: Do not handle energized fixture when hands are wet, when standing on wet or damp surfaces, or in water.
WARNING: Vapor barrier must be suitable for 90° C.
WARNING: Fixture to be independently supported to building structure.
RECESSED CEILING MOUNTING
The fixture is suitable only for INDOOR RECESSED CEILING application. Above ceiling access required.
To mount in an insulated or non-insulated ceiling – 9/16” or 15/16” exposed Flat Tee Grid Ceiling follow the steps below
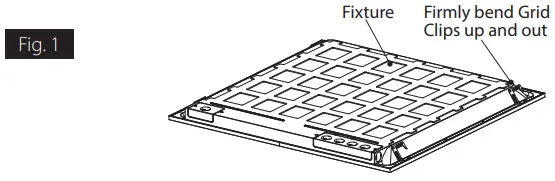
- Firmly bend the pre-installed Grid Clips (up and out as shown in Fig. 1).

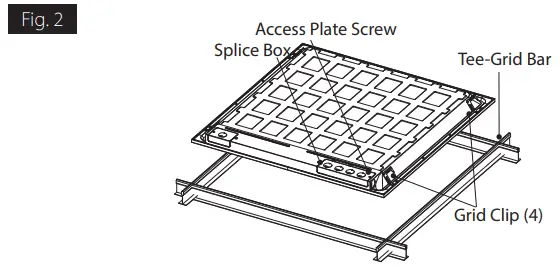
- Rotate and slide the Fixture as required to fit through the
Tee-Grid Bar and place it as indicated by the directional arrow as shown in Fig. 2. Secure the Fixture to the Tee-Grid Bar.
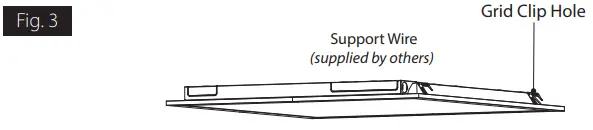
- Support wires are required by installation codes. Support the Fixture to the building structure with Support Wires (supplied by others) through the Grid Clip Hole as shown in Fig. 3.

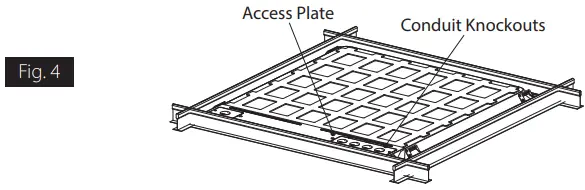
- Make sure that the orientation of the Splice Box and Access Plate faces an accessible tile to make electrical splices.
- Loosen Access Plate Screw and remove the Access Plate.
Knock out appropriate Conduit Knockouts on the Access Plate to route input conduit. Use appropriate conduit connectors as required by code (Fig. 4).
- Connect wires as shown in wiring diagram (Fig. 5). Push all wires back into the Splice Box. Use appropriate UL-approved wire connectors as required by code to complete wiring.
Be careful not to pinch wires. WARNING: To prevent wiring damage or abrasion, do not expose wiring to edges of sheet metal or other sharp objects. - Replace Access Plate and tighten Access Plate Screw.
0-10V DIMMABLE WIRING
Universal voltage driver permits operation at 120V through 277V, 50 or 60Hz. For 0-10V dimming follow the wiring directions as shown in Fig. 5.
- Connect the black fixture lead to the LINE supply lead.
- Connect the white fixture lead to the COMMON supply lead.
- Connect the GROUND wire from fixture to supply ground.
- Connect the purple fixture lead to the (V+) DIM lead.
- Connect the pink fixture lead to the (V-) DIM lead.
NOTE: Do not connect DIM V+ (purple)/ DIM V- (pink) to line voltage or supply ground.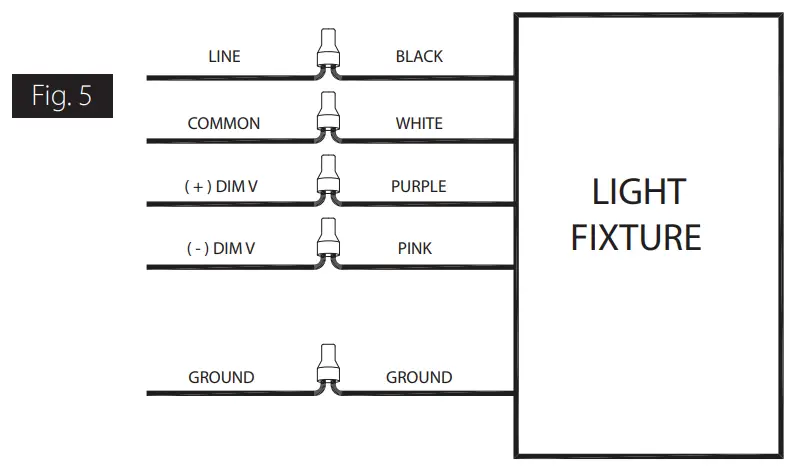
TROUBLESHOOTING
1. Check that the line voltage at fixture is correct. Refer to wiring directions.
2. Is the fixture grounded properly?
CLEANING & MAINTENANCE
CAUTION: Be sure fixture temperature is cool enough to touch.
Do not clean or maintain while fixture is energized.
- Clean frosted polystyrene lens & fixture with non-abrasive cleaning solution.
- Do not open fixture to clean the LEDs. Do not touch the LEDs.
Note: These instructions do not cover all details or variations in equipment nor do they provide for every possible situation during installation, operation or maintenance.
Customer Support
Easy Answers
rablighting.com
Visit our website for product info
Tech Help Line
Call our experts: 888 722-1000
e-mail
Answered promptly – [email protected]
Free Lighting Layouts
© 2023 RAB LIGHTING Inc. Answered online or by request