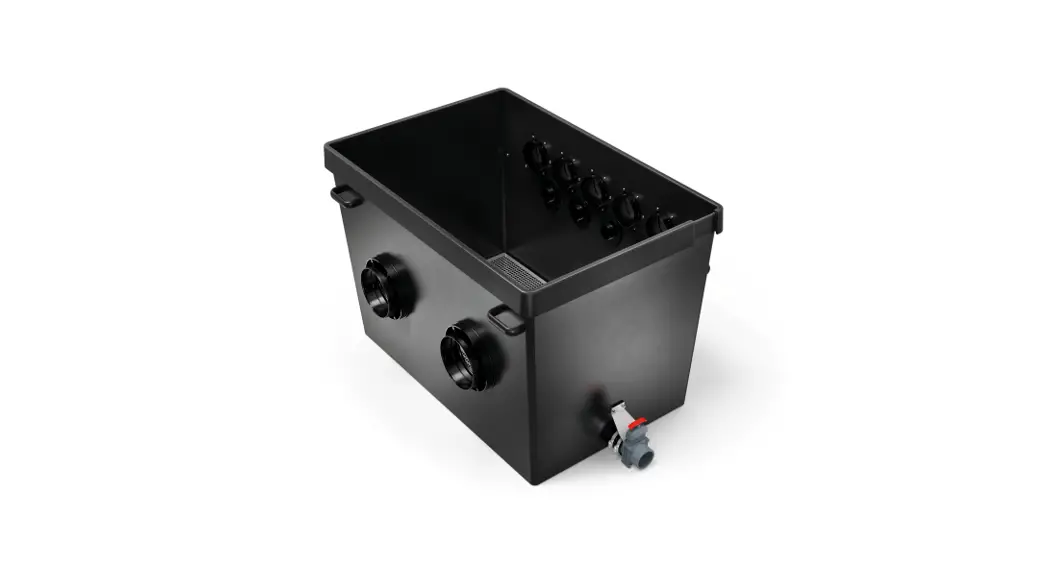
![]() SU-OPCXL ProfiClear Premium XL Standing Bed Module
SU-OPCXL ProfiClear Premium XL Standing Bed Module
Instruction Manual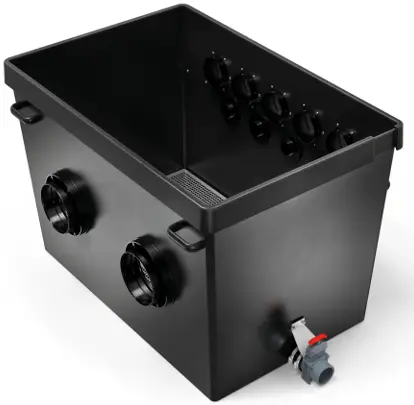
Original operating manual. This operating manual belongs with the unit and must always be handed over together with the unit.
 WARNING
- Disconnect all electrical units in the water from the power supply before reaching into the water. Otherwise, there is a risk of injuries or death by electrocution.
- This unit can be used by children aged 8 and above and by persons with reduced physical, sensory or mental capabilities or lack of experience and knowledge if they are supervised or have been instructed on how to use the unit in a safe way and they understand the hazards involved. Do not allow children to play with the unit. Only allow children to carry out cleaning and user maintenance under supervision.
Intended use
Only use the product described in this manual as follows:
- For cleaning garden ponds.
- In compliance with the technical specifications.
The following restrictions apply to the unit:
- Only operate with water at a water temperature of +4 °C to +35 °C.
- Never use the unit with fluids other than water.
- Do not use it for commercial or industrial purposes.
- Do not use it in conjunction with chemicals, foodstuff, or easily flammable or explosive substances.
A more detailed operating manual is available for download as a PDF online:

The following additional topics are addressed in the operating manual:
- Product Features
- Cleaning and maintenance, storage/winter-proofing, malfunction repair
- Technical data, spare parts, disposal
Product Description
Overview
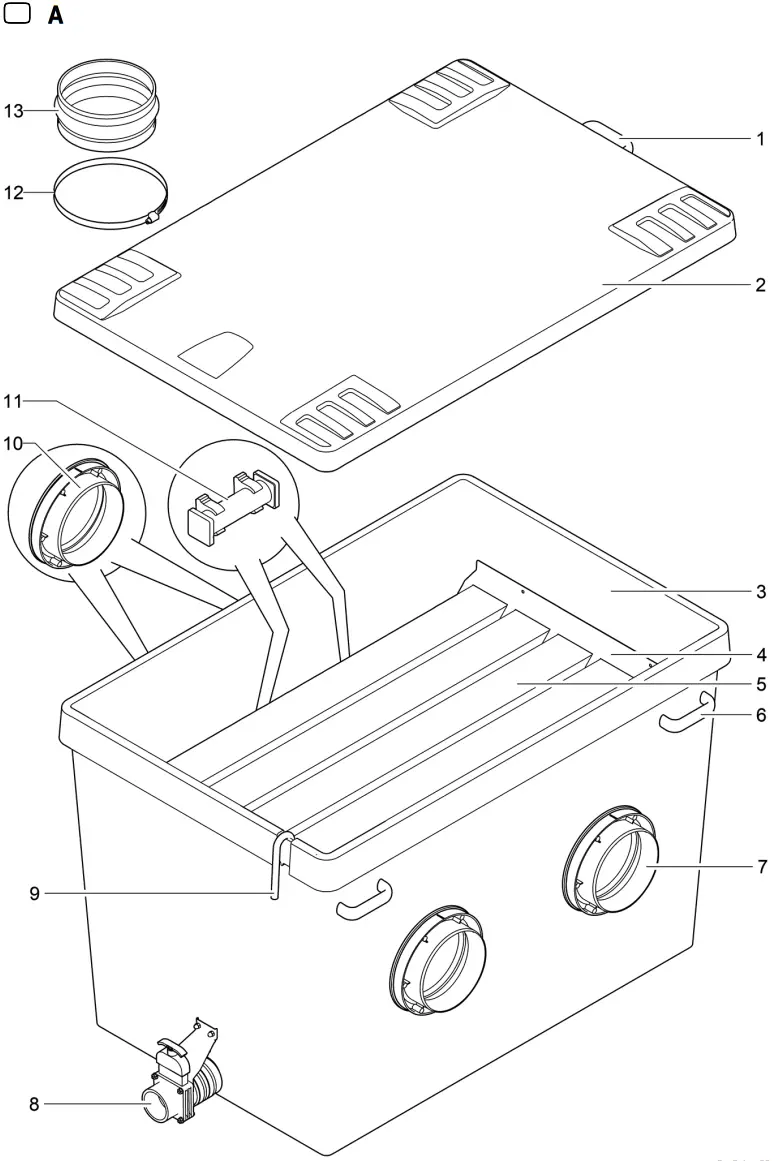
| Description | |
| 1 | 1 × handle |
| 2 | 1 × container lid |
| 3 | 1 × container |
| 4 | Holder for ClearWave filter elements |
| 5 | 5 × ClearWave filter elements |
| 6 | 4 × handle for carrying the container |
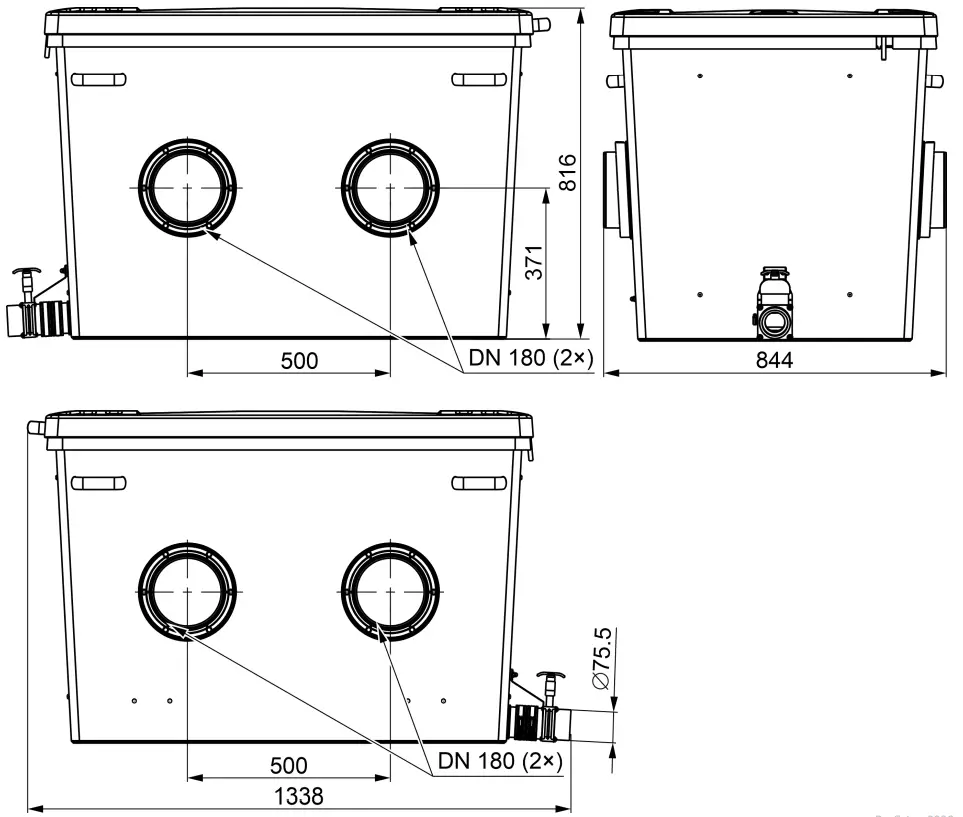
| 7 | 2 x DN 180 outlet |
| 8 | 1 × DN75 dirt outlet with slide valve |
| 9 | 1 × air connection for the aerator • Transition piece Ø 9 mm to the air hose of the aerator rods |
| 10 | 2 × DN 180 inlet |
| 11 | 2 × aerator rod • Enriches the water in the container with oxygen |
| 12 | 4 × hose clip for fastening the transition sleeve on the inlet |
| 13 | 2 × transition sleeve for connecting the container to the upstream filter module |
Transport
![]() WARNING
WARNING
Due to the high weight of the unit, spinal injuries or crushing of limbs is possible when carrying the unit. The unit weighs more than 25 kg.
- Have a minimum of four people carry the container on the handles to avoid spinal injuries.
- Protect your limbs from crushing injuries.
- Do not transport the container while it is filled with water.
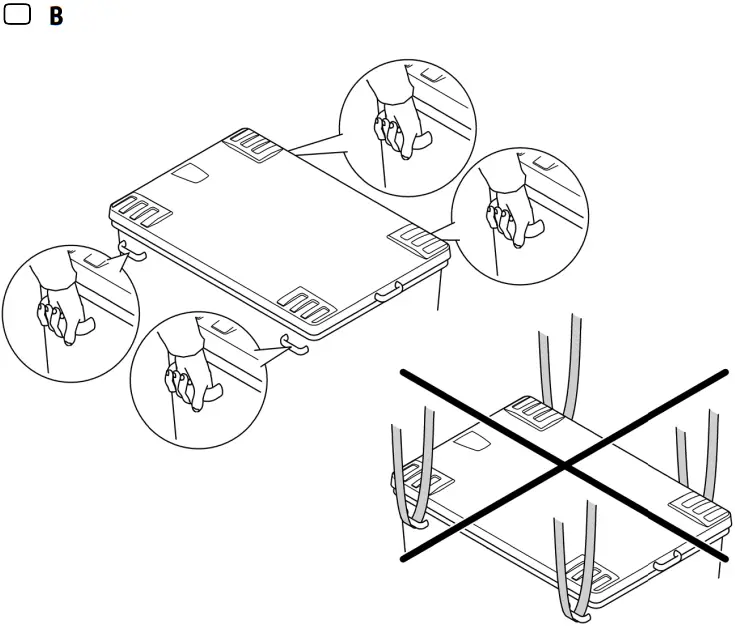
![]() B
B
The filter module is equipped with four handles for carrying. Do not use any other carrying or transport aids (e.g. transport by crane).
Installation and connection
Installing the filter module and connecting it to the upstream filter module
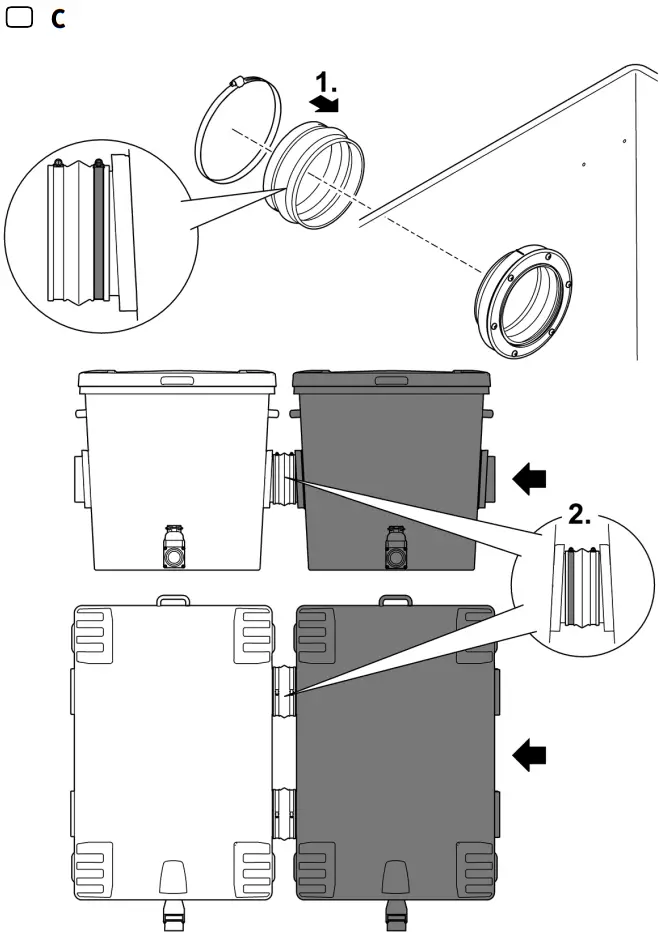
How to proceed:![]() C
C
- Push the transition sleeve onto the inlet and fasten the transition sleeve with the hose clip.
– For later installation work: Turn the hose clip so that the hose clip screw is accessible from the side. - Push the filter module up to the previous filter module so that its outlet is positioned in the transition sleeve of the filter module up to the stop.
– Ensure that the dirt water outlets of all filter modules are positioned on the same side. - Fasten the transition sleeve on the outlet of the upstream filter module using the hose clip.
– For later installation work: Turn the hose clip so that the hose clip screw is accessible from the side.
Connecting the dirt outlet![]() A
A
The water in the container can be drained via the DN 75 dirt outlet with a slide valve at the bottom of the container if required (for cleaning, repair, and overwintering).
- Connect a suitable DN 75 pipe and drain the dirty water into the sewer system.
 Connect pipe DN 75 and pipe DN 110 from the filter drum for coarse dirt to a joint pipe DN 110 and drain the dirty water into the sewer system. This makes it more convenient to flush out the pipe with sufficient pressure.
Connecting the aerator
The use of aerators promotes water circulation in the container and is ideal for ensuring even bacterial colonisation of the ClearWaves.
- Recommended aerator: AquaOxy 2500
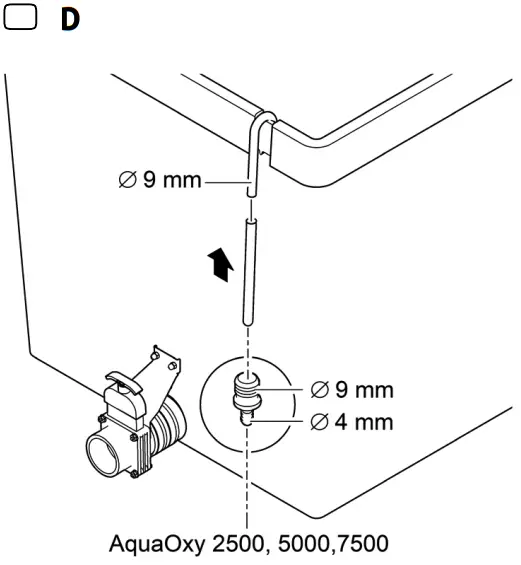
How to proceed:![]() D
D
- Connect the air hose from the aerator with the air connection and attach the air connection to the recess on the container.
– For an air hose ∅ 4 mm use the 4/9 mm adapter.
– Fasten the air hose to the connections with cable ties, if necessary.
Commissioning/start-up
How to proceed:
- Close the slide valve for the dirt outlet DN 75.
- Check that the entire filter system (pipes and hoses) is complete.
- Fill the filter modules with water.
– Pump-fed system: Switch on the filter pump.
– Gravity-fed system: Open the slide valves (supply and return) of the filter series to allow the water to flow. - Check all pipes, hoses, and their connections for leaks.
– Expansion seals may leak initially until they have fully expanded in contact with water. - Switch on all other electrical devices of the filter system as soon as all filter containers are filled with water.
– Leave the UVC clarifier switched off for at least 24 hours if you are using filter starters (e.g. OASE BioKick). Otherwise, it will impair the colonization of the filter materials with microorganisms.
![]() OASE GmbH
OASE GmbH
Tecklenburger Straße 161
48477 Hörstel, Germany![]() +49 (0) 5454 80-0
+49 (0) 5454 80-0![]() +49 (0) 5454 80-9353
+49 (0) 5454 80-9353![]() [email protected]
[email protected]


