
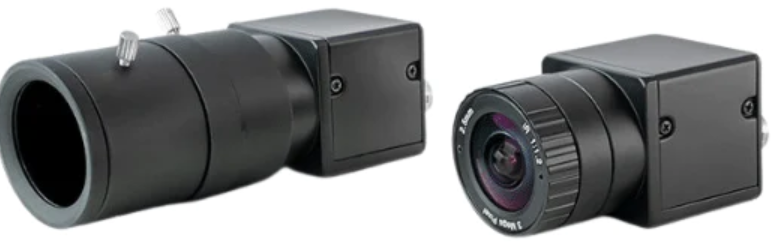
UNEEKOR Swing Optix Camera
Product Information
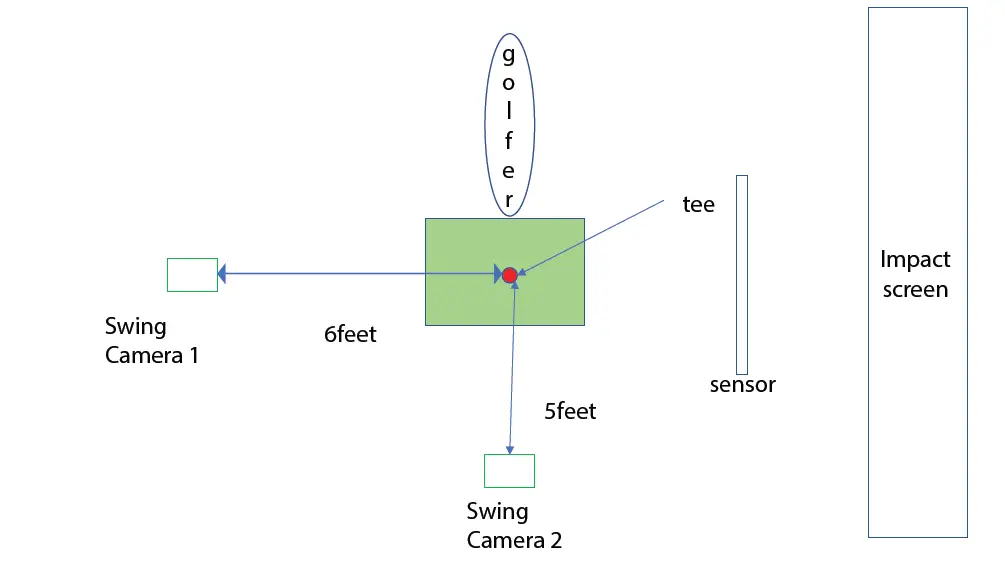
The product is Swing Optix, a golf simulator camera system that provides accurate swing and ball flight analysis. The package includes two cameras, two camera lenses, a USB 3.0 cable, and accessories. The cameras need to be installed on a tripod stand with the help of a bracket and four screws. The USB 3.0 cable needs to be connected to a USB 3.0 port on the PC. The product requires additional lighting for optimal performance.
Product Usage Instructions
- Make sure all the items in the package are present and accounted for.
- Install the cameras by screwing in the four screws through the bracket onto the camera, attaching the camera with the bracket to the tripod stand, and connecting the USB 3.0 power cable to the camera.
- Connect the other end of the USB 3.0 power cable directly to a USB 3.0 port on your PC.
- Download and install the Uneekor Launcher from the Uneekor Resources page, and create a Uneekor account to register and manage products.
- Select Devices on the left navigation bar and register the cameras you want to add to your account.
- Select the registered cameras to ensure they will be available in-game.
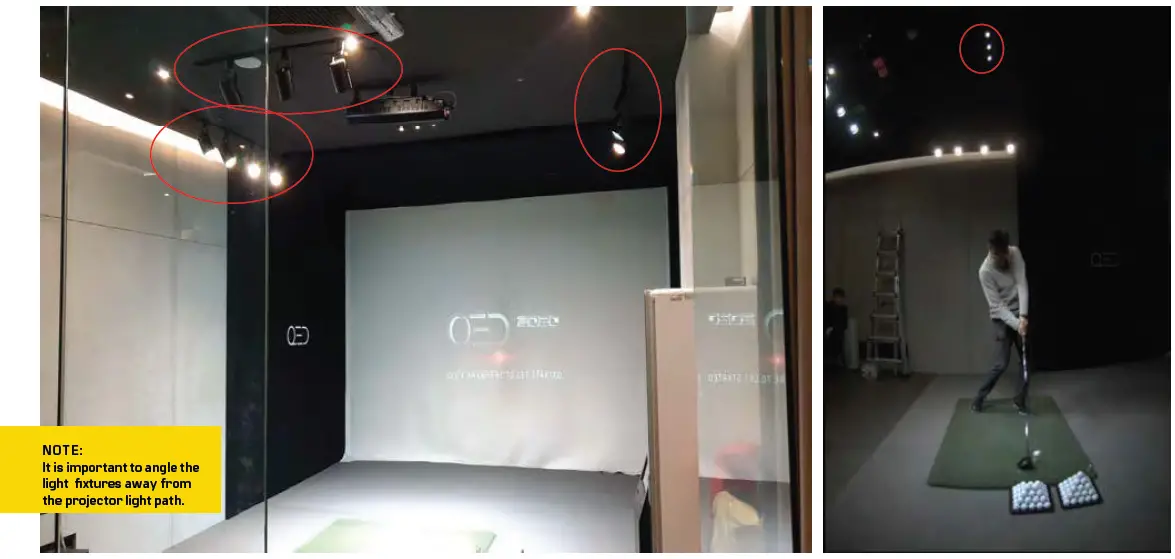
- Add additional lighting to optimize the Swing Optix by adding a minimum of eight non-flickering LED light bulbs on a track rail with fixtures, angled away from the projector light path.
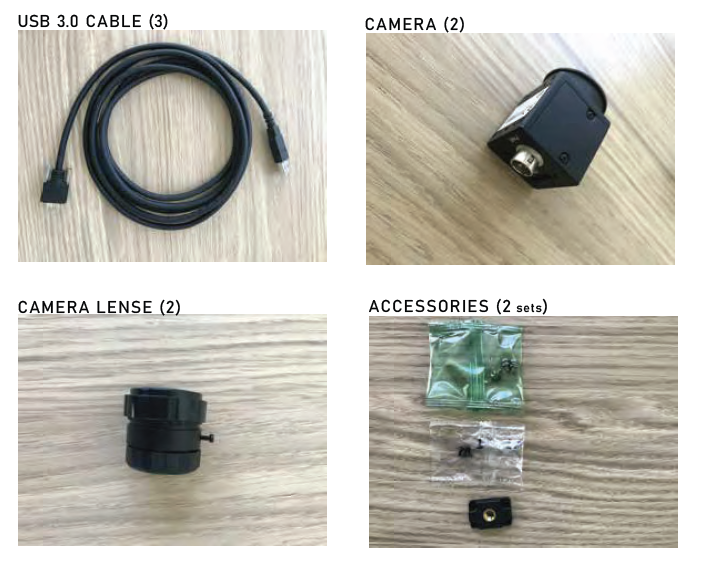
INCLUDED ITEMS
The following items are included in the package. Please make sure they are all present and accounted for.
NOTE:
If any part is missing, please contact support.
CAMERA INSTALLATION
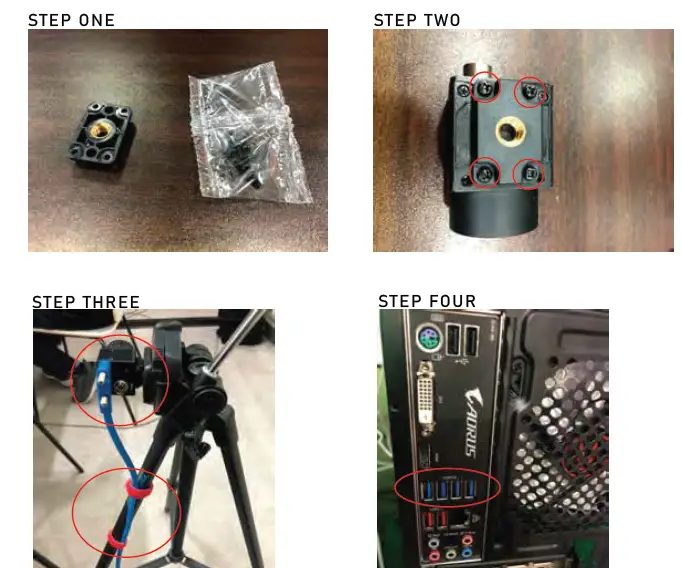
- STEP ONE
Please find the camera, bracket, and the 4 screws that came with the package. - STEP TWO
Screw in the 4 screws through the bracket onto the camera. - STEP THREE
Attach the camera with the bracket to the tri pod stand. The camera will need to be rotated 90 degrees as shown in the photo. Attach the USB 3.0 power cable to the camera. It is recommended to tie the USB 3.0 power cable to one of the legs of the tri pod. - STEP FOUR
Connect the other end of the USB 3.0 power cable directly to a USB 3.0 port on your PC. Please confirm you see the light blinking next to the “Power” text on the cameras.
NOTE:
The cameras will heat up to 43 – 46 degree Celcius. This is normal operating temp.
INSTALL UNEEKOR LAUNCHER
*If Uneekor Launcher is installed. Skip this section
- STEP ONE
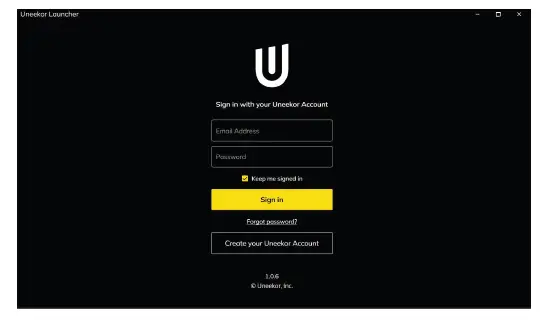
Download and install the Uneekor Launcher from the Uneekor Resources page linked HERE
- STEP TWO
Create a Uneekor account to register your products and manage your products. You can create an account from the link in the Uneekor Installer or from the link HERE

REGISTER AND SELECTION
- STEP ONE
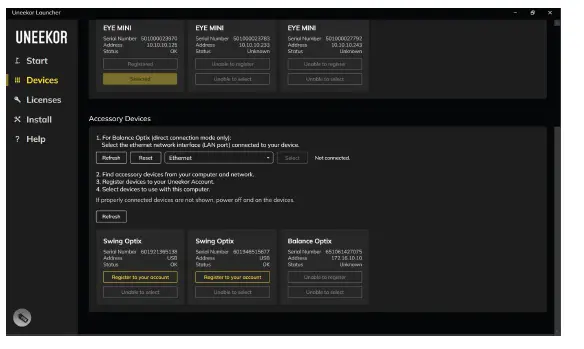
Select Devices on the left navigation bar
- STEP TWO
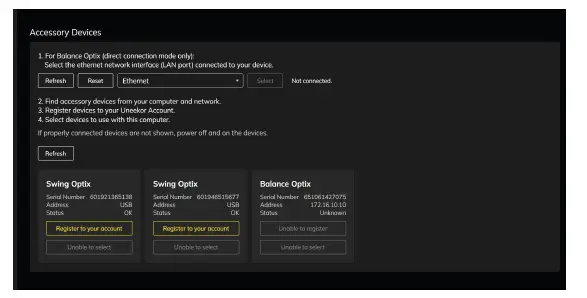
Select Register your account in the Accessory Devices section for the cameras that you would like to add to your account
- STEP THREE
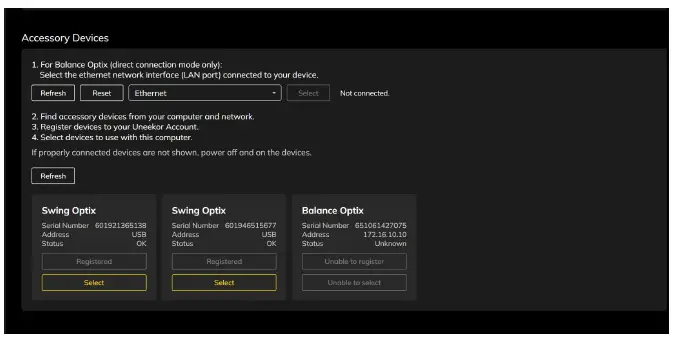
Once the cameras have been registered, make sure to select the cameras to ensure they will be available in game
- STEP FOUR
Once the cameras have been selected, navigate to the Start tab and your cameras will be on the top of the screen letting you know that they are ready for use

LIGHTING ENVIRONMENT
Besides your normal background room lighting, additional lighting is required to optimize the Swing Optix. It is recommended to add a minimum of 8 15W or higher, non flickering LED light bulbs on a track rail with fixtures. This will help with exposure and eliminating blurring of the club.
Ex: 11 non flickering LEDs were used in the environment below.
LED Bulb Recommendations
| #
1 | Brand | Where to Buy? | Model | LED Wattage | Wattage Rep. | Lumens | Light Appear. | Dimmable |
| Philips | Amazon | 5967531U0 | 8.5W | 65W | 750 | 2700K | Y | |
| 2 | Philips | Amazon | 9290023277 | 8.5W | 60W | 800 | 2700K | Y |
| 3 | Philips | Amazon | 9290011531A | 7W | N/A | 500 | 2700K | Y |
| 4 | Philips | Amazon | 9290013221 | 10W | 75W | 850 | 3000K | Y |
| 5 | Touchstar | Amazon | PAR30S | 12W | 75W | 840 | 3000K | Y |
Note: The LED bulbs on this list have been tested with Uneekor Swing Optix cameras under a 15’ x 10’ enclosure using Uneekor QED and EYE XO hardware. These bulbs demonstrated minimal flickering during operation to not impeed Swing Optix cameras performance. If you’re still experiencing issues with the selected bulbs on this list, please contact [email protected] for further assistance. Thank you.
Projectors
The follwing compatible projectors have been approved by Uneekor to function properly with Swing Optix cam-eras. If you experience issues with the selected projector(s) on this list, please contact [email protected] for further assistance. Thank you.
| Compatible Models | Type | Lumens | Throw Ratio |
| Panasonic PT-VZ590U | WUXGA 3LCD | 5000 | 1.09 – 1.77:1 |
NOT Compatible
- BenQ MH530FHD
- BenQ LK953ST
- BenQ LK953ST
- Optoma ZU606TST-W
- ViewSonic PRO8800WUL
SWING OPTIX CONFIGURATION
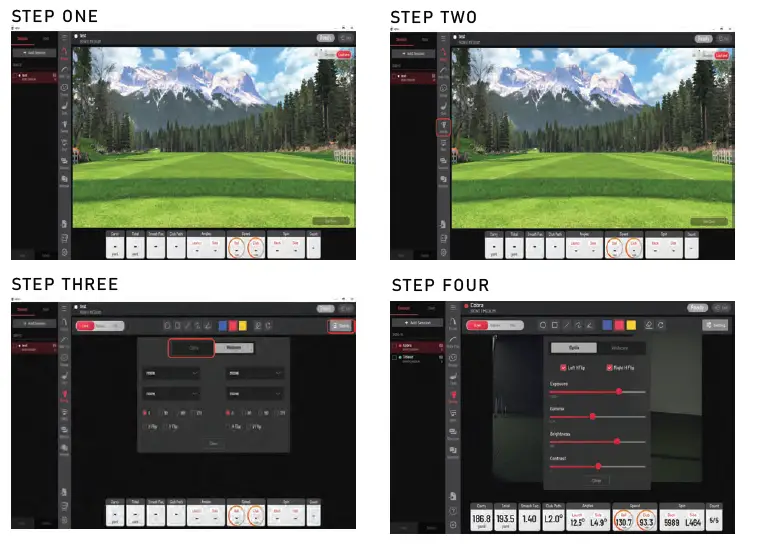
- STEP ONE
Open the View software. Proceed onto the main home screen of the View software. - STEP TWO
Click on the “Swing” tab in the navigation column on the left side. - STEP THREE
Inside the “Swing” tab, click on the “Settings” button on the top right of the screen. Next, click on the “Optix” tab to open the Swing Optix cameras. - STEP FOUR
You can make adjustments to the camera’s Exposure, Gamma, Brightness, and Contrast in this menu. This is dependent on your lighting environment. You are now finished.
MASTER YOUR PASSION
Uneekor, Inc
15770 Laguna Canyon Road, Unit 100 Irvine, CA 92618
[email protected]
[email protected]
Uneekor © 2023 All Rights Reserved
References
 my.uneekor.com/register
-
Eye XO and QED Installation Resources | Uneekor
-
Amazon.com
-
Philips LED Flicker-Free A19 Light Bulb, Dimmable Warm Glow Effect, EyeComfort Technology, 800 Lumen, 2700-2200K, 8.5W=60W, E26 Base, Title 20 Certified, 8-Pack - - Amazon.com
-
Philips LED Flicker Free 5"/6" Dimmable Recessed Downlight, EyeComfort Technology, 750 Lumen, Soft White Light (2700K), 8.5W=65W, E26 Base, Title 20 Certified, 6-Pack - - Amazon.com
-
Philips LED Classic Glass Dimmable PAR30L 40-Degree Spot Light Bulb: 850-Lumen, 3000-Kelvin, 10-Watt (75-Watt Equivalent), E26 Base, Bright White, 4-Pack - - Amazon.com
-
Amazon.com


