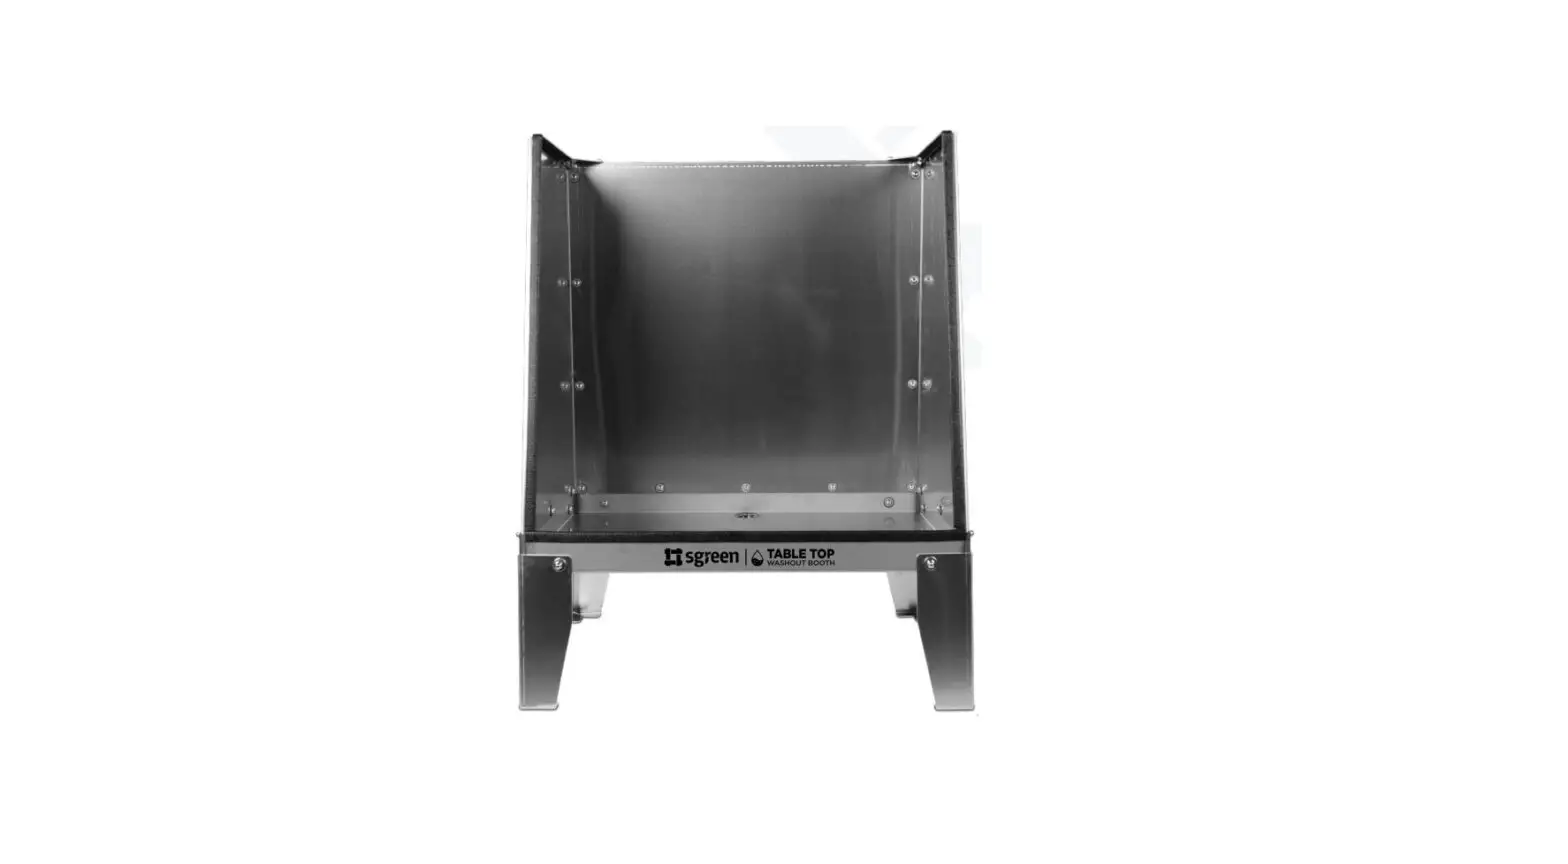
sgreen 1669056572 Table Top Washout Booth Instruction Manual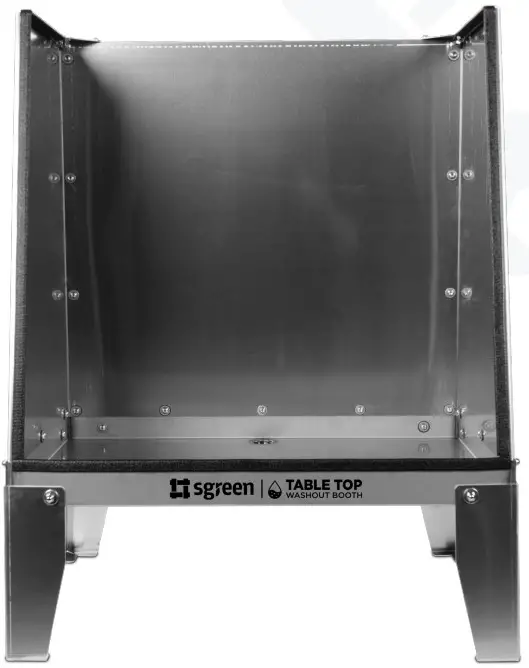
Tools Required:
- Two 7/16” wrenches
- One 5/32” Hex wrench
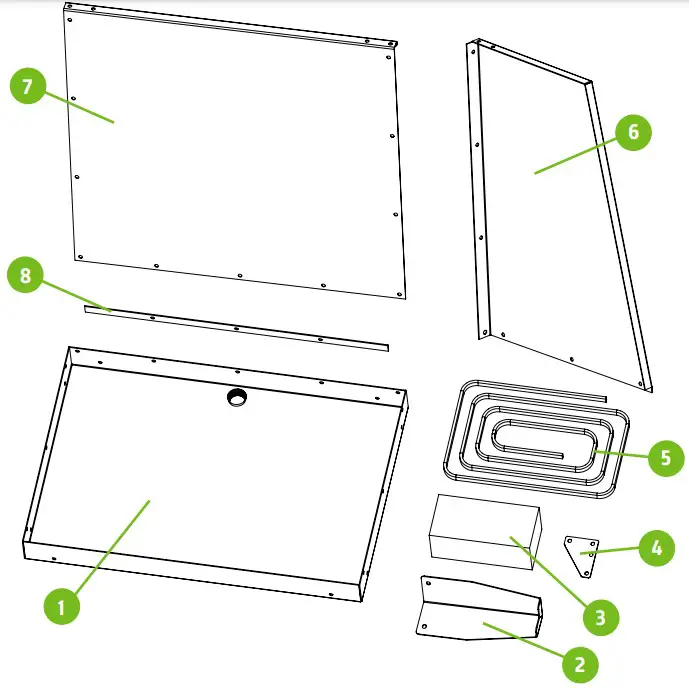
What’s in the box
| Tag | Item | Qty. |
| 1 | MFWD-TABLEWASBDY | 1 |
| 2 | MFPB-TABLEWASHFOOT | 4 |
| 3 | MFSA-TABLEWASHDW | 1 |
| 4 | MFLS-TABLEWASHGST | 2 |
| 5 | MFCO-EDGETRIM | 7 |
| 6 | MFPB-TABLEWASHSID | 2 |
| 8 | MFPB-TABLEWASHSPCR | 1 |
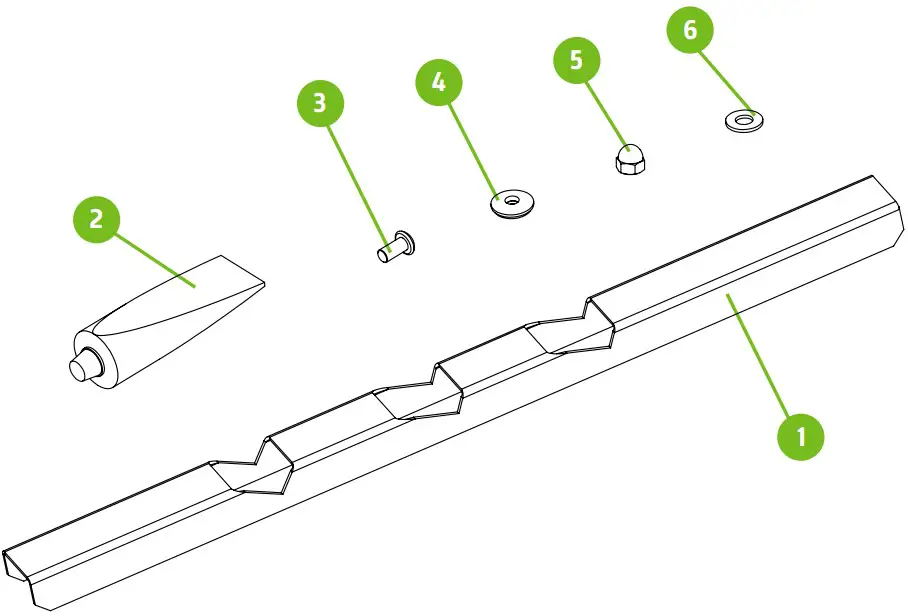
Parts Required:
What’s in the box
| Tag | Item | Description | Qty. |
| 1 | MFPB-TABLEWASHSTOFF | Table top Washout booth Screen | 2 |
| 2 | MFCO-SGWASHCAULK | Clear Caulk, Acrylic, 5.5 oz. Tube | 1 |
| 3 | PRHD-BTN1/4NC1/2SS | 1/4-20 x 1/2 Button Head Allen | 33 |
| 4 | PRHD-WA1/4NEOBONDSS | 1/4” Neobond Stainless steel | 25 |
| 5 | PRHD-ACN1/4NCGR5ZC | 1/4-20 Acorn Nut Nickel | 33 |
| 6 | PRHD-WA1/4USSGR5ZC | 1/4” USS flat washer | 33 |
Step 1
Install the side panels (1) to the main sink body (2). Fully tighten the hardware. Neobond washers inside of the sink and standard flat washers outside of the sink..
Note: Refer to page 2 for hardware detail.
Step 2
Slide the rear panel on the inside of the side panel flap and align the hole patterns to each other. You will need to place the spacer in between the rear panel and the rear of sink before attaching the hardware.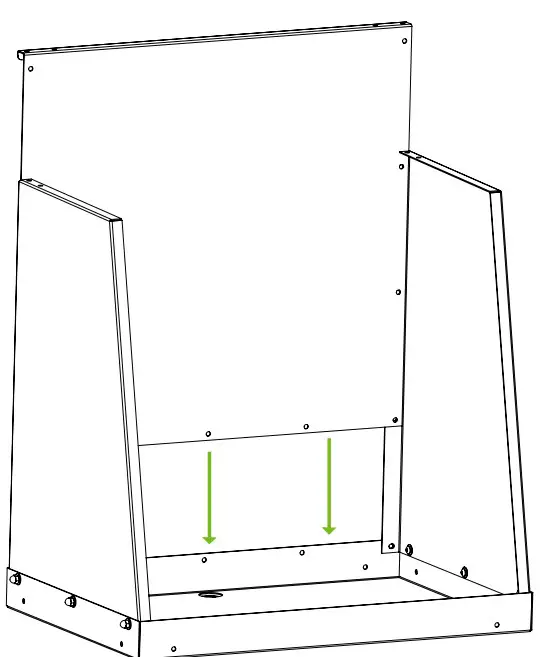
Step 3
Install Rear panel (1) to the side panels (2) to the main sink body. Fully tighten the hardware. Neobond washers inside of the sink and standard flat washers outside of the sink.
Note: Refer to Page 2 for hardware detail.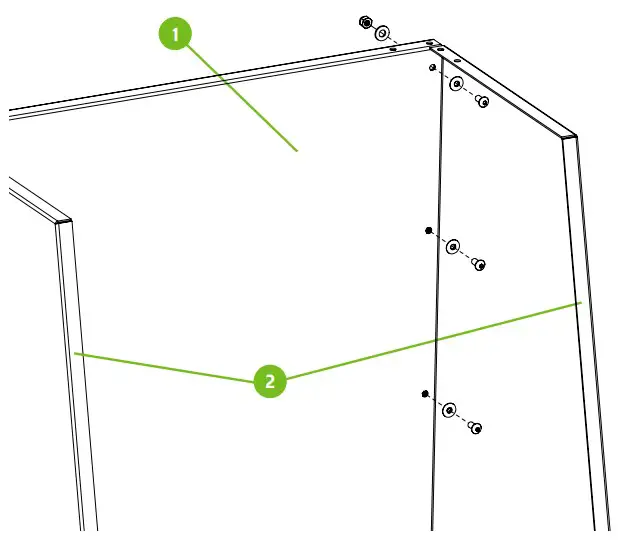
Step 4
Install Legs (1) to the side panels to the main sink body (2). Fully tighten the hardware. Neobond washers inside of the sink and standard flat washers outside of the sink.
Note: Refer to Page 2 for hardware detail.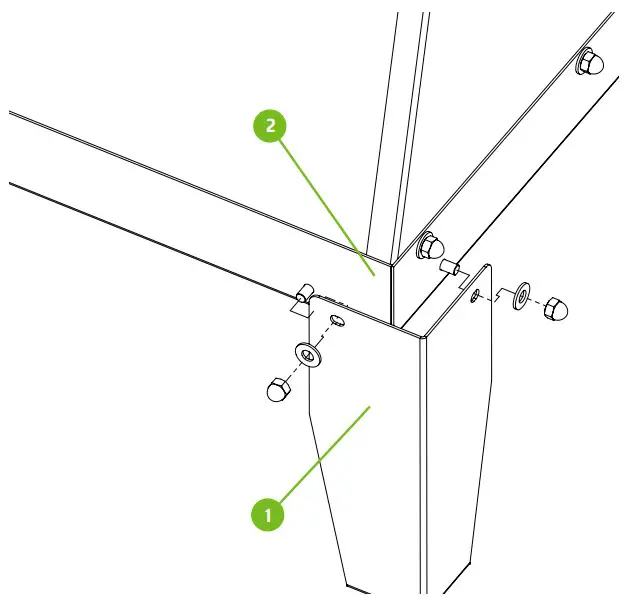
Step 5
Install edge trim (1) to the side panels (2) and front lip of sink Body (3). Some trimming may be needed for this step.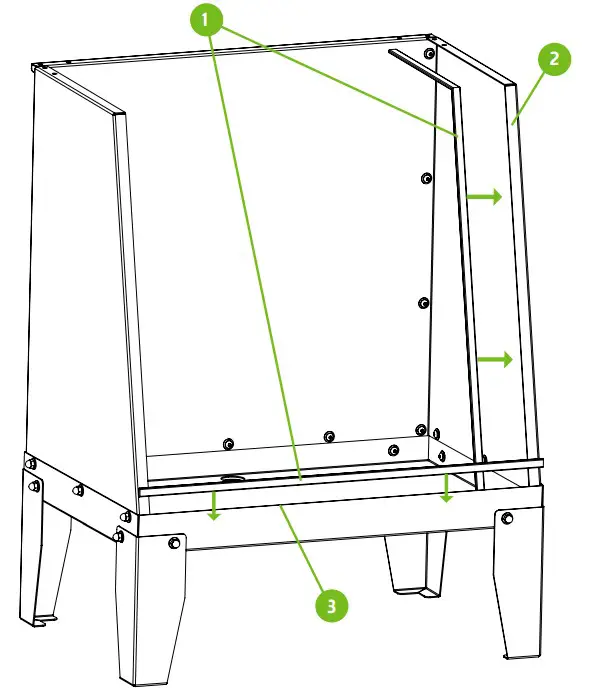
Step 6
Install Gussets (1) to the side panels (2) and the rear panel (3). Fully tighten the hardware. No Neobond washers used in this step. Finally, use supplied caulk to seal all seams where water could leak. Allow to dry per caulking instructions.
Note: Refer to Page 2 for hardware detail.
NOTE: Logos, graphic elements and or photo images contained in this document may not be reproduced without the written consent of Ryonet
12303 NE 56th ST | Vancouver. WA 98662 | 360-576-7188