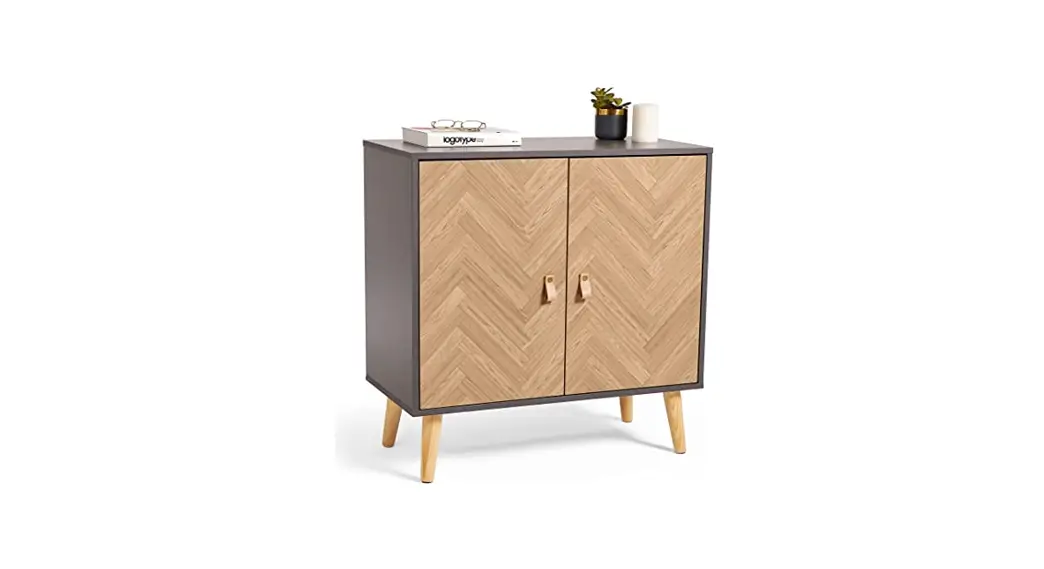
![]() Oak Effect 3-Door Sideboard
Oak Effect 3-Door Sideboard
Instruction Manual
Maximum | |
 40min Estimated assembly time 40min Estimated assembly time | |
![]() INTENDED USE
INTENDED USE
This product is not intended for outdoor use. This product is not intended as a climbing structure and it is not a toy. Children should be supervised to ensure that they do not play with the product.
Follow each step of the assembly as outlined by the steps in this Instruction Manual.
Assemble close to the products intended position.
Locate the product in a suitable area where it will not create an obstruction. Locate away from sources of combustion.
GENERAL SAFETY The assembly pack may contain small parts which can pose a choking hazard to children and pets. Place on solid and even ground. Only use in an upright stable position. Do not overload the product as this may result in damage to the product or personal injury.
CLEANING & MAINTENANCE Do not clean the product with any abrasive cloths or chemicals. Solvents or detergents can cause damage to the surface. Periodically check and re-tighten fittings where applicable. Re-tighten all fittings after the first week following assembly. To clean, sponge down with warm water, a soft cloth, and mild detergent. ensure ou has all the pieces listed. If you are missing any components, contact our customer services department at s[email protected] |
Do not proceed with assembly if ny components are missing.
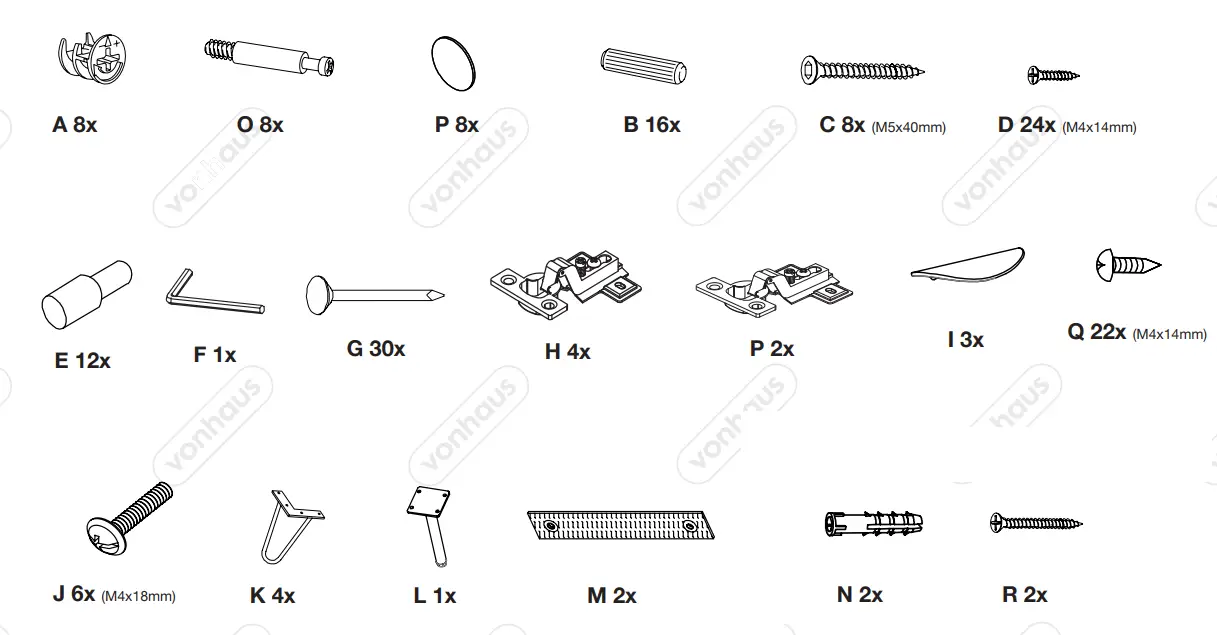
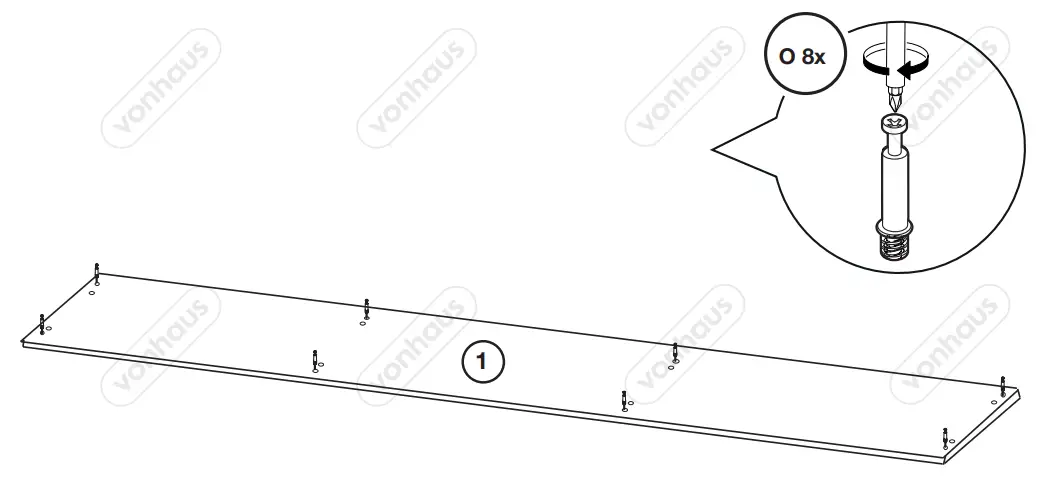
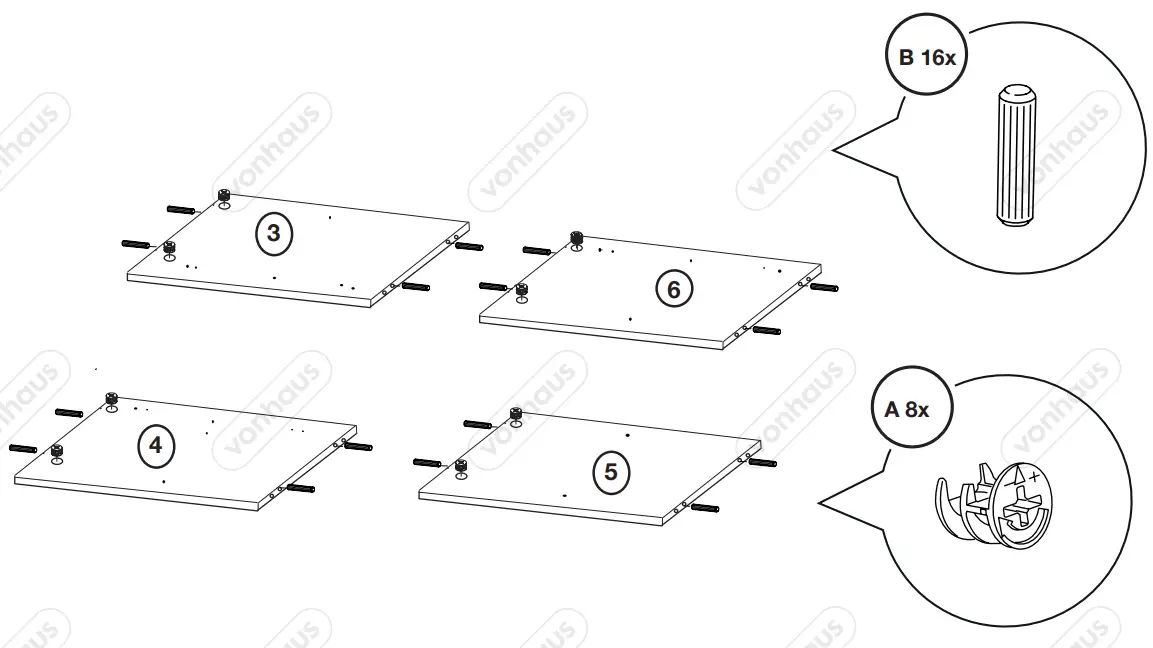
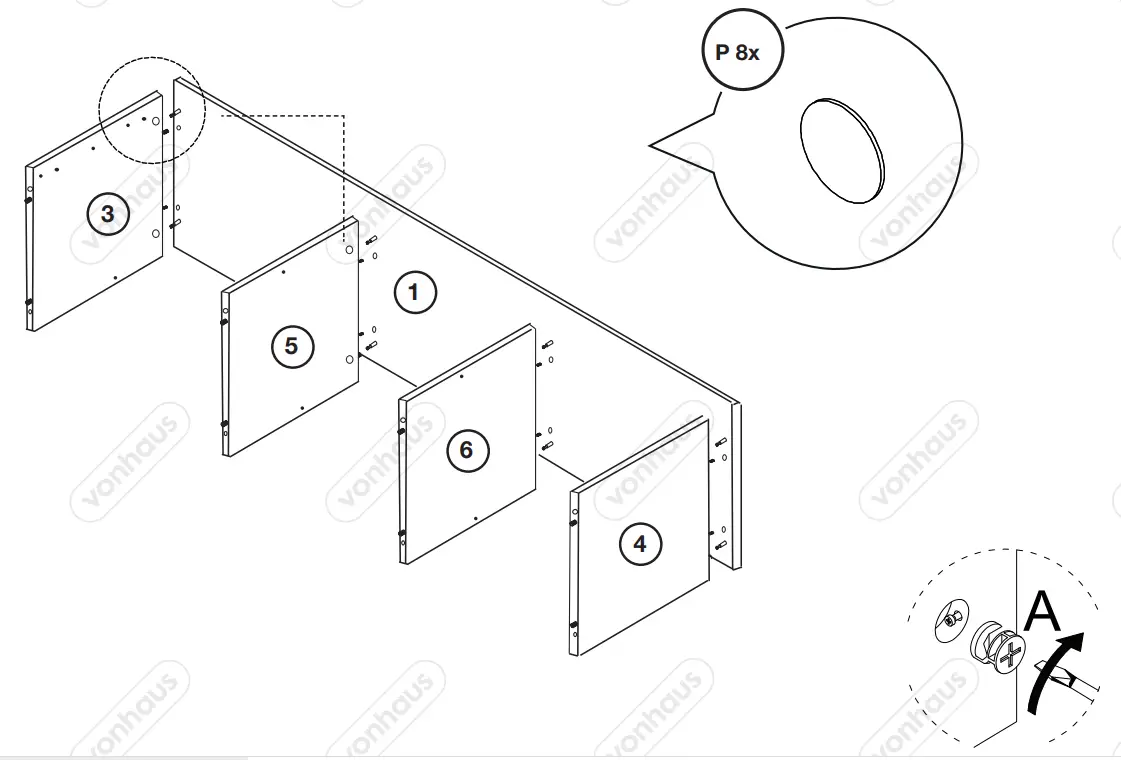
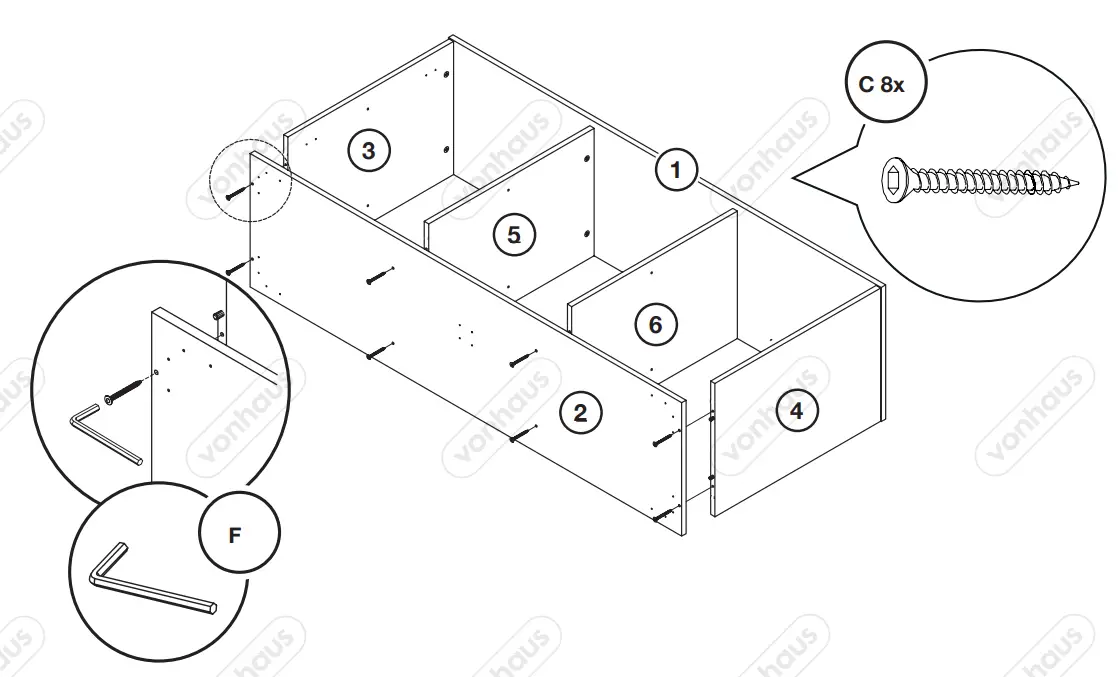
COMPONENTS

HARDWARE
NOTE! Components N and R are NOT supplied. Please ensure you purchase the correct hardware to safely attach the Unit to the wall.
 |  |
 |  |
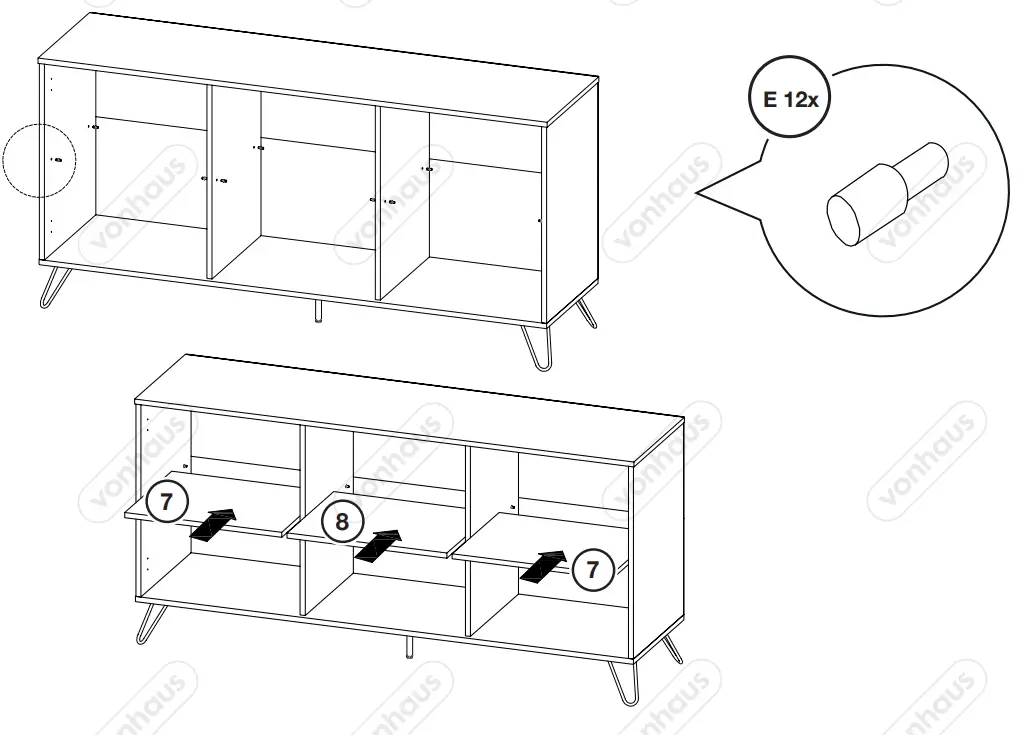
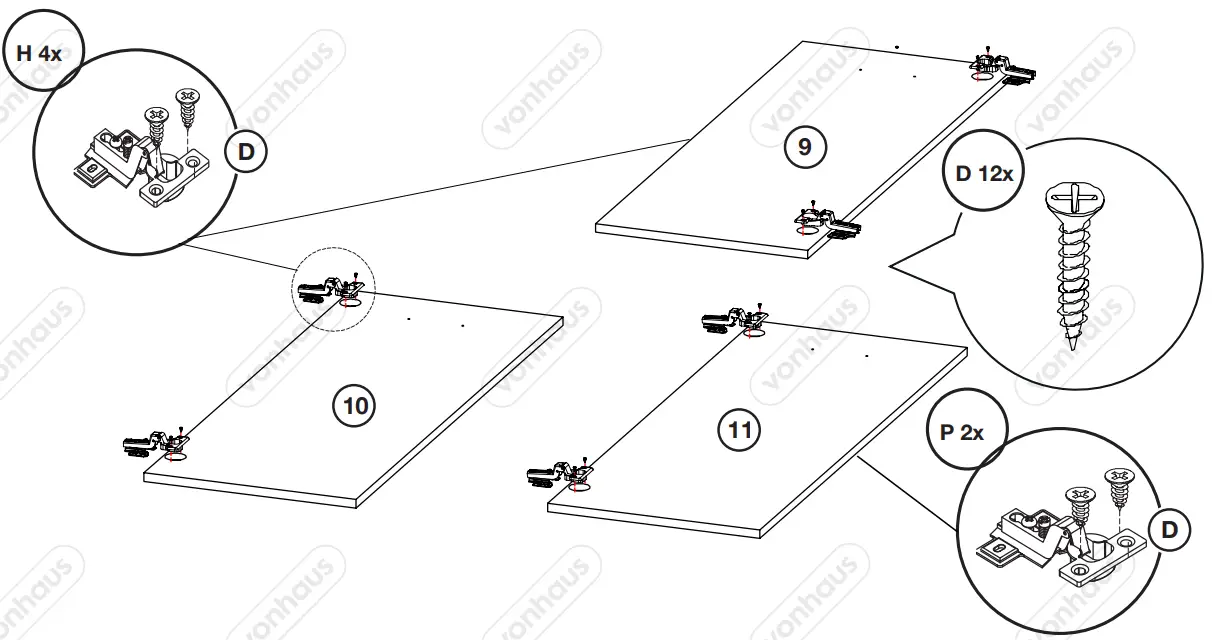
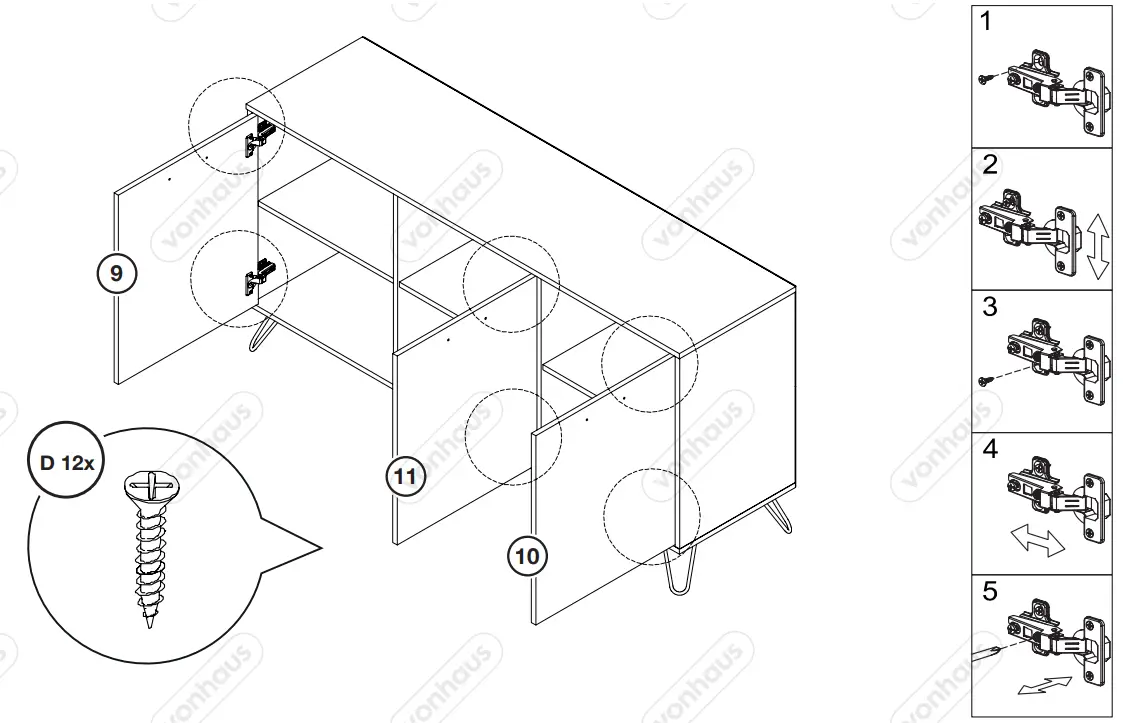
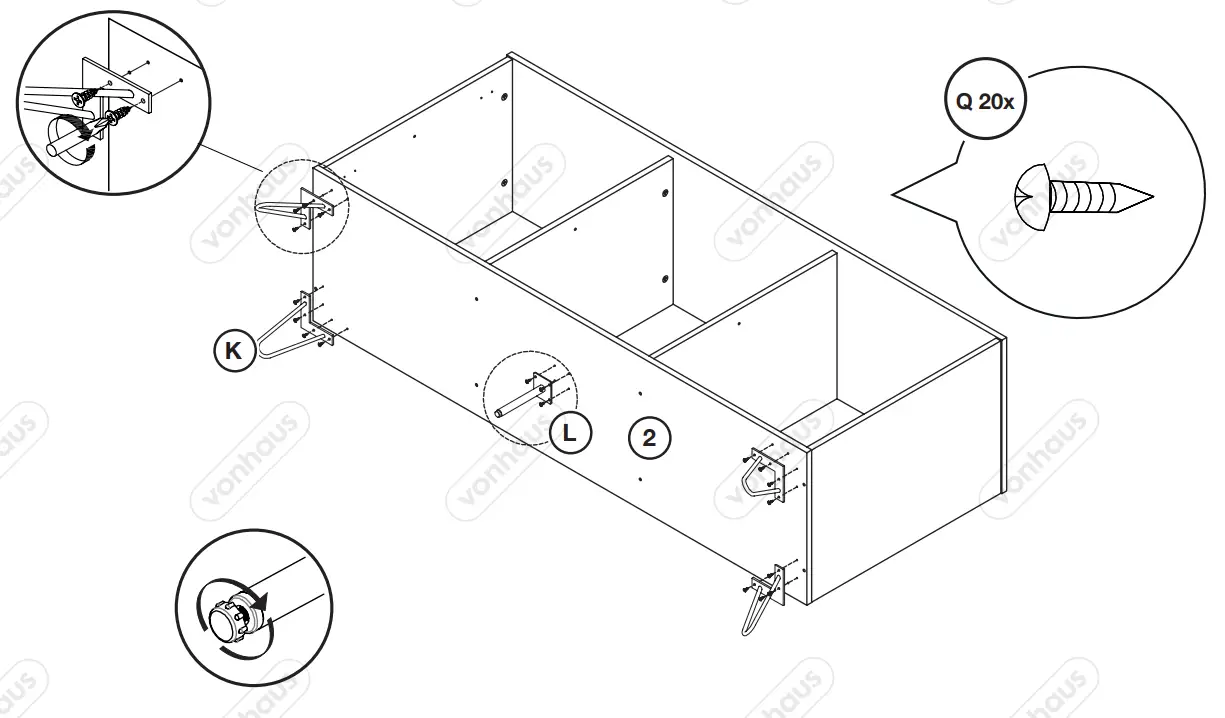 PLEASE NOTE! Component L has an adjustable foot. Unscrew to just the height to prevent the Unit from dipping in the center. PLEASE NOTE! Component L has an adjustable foot. Unscrew to just the height to prevent the Unit from dipping in the center. | 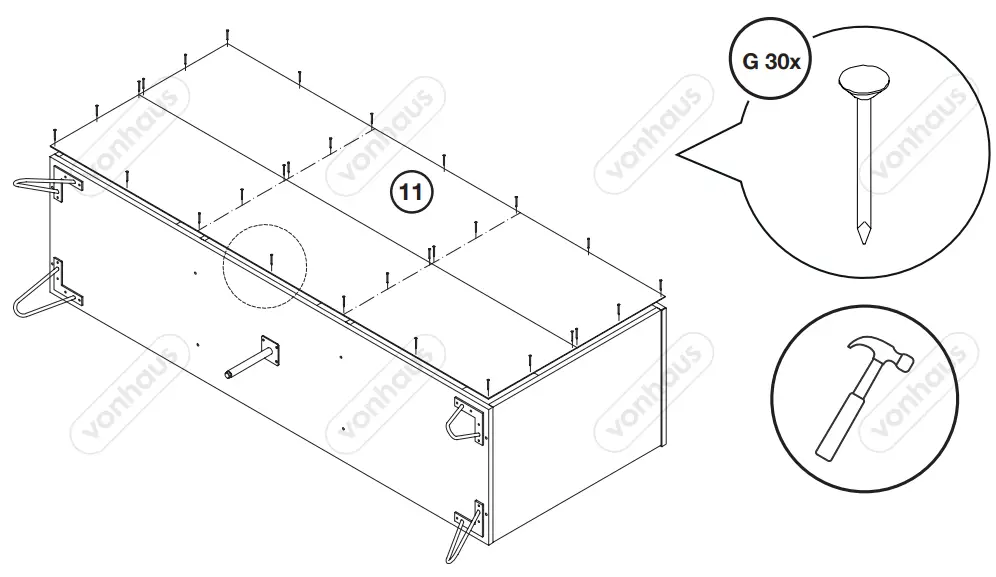 |
 |  |
 |  |
WALL MOUNTING GUIDE
IMPORTANT When drilling into walls always check that there are no hidden wires or pipes.
Ensure that the screws and wall plugs being used are suitable for supporting the unit to be installed.
If you are unsure it is recommended you contact a suitably qualified tradesperson.
TIPS Ensure you use a recommended drill bit to match the wall plug and hole size.
Take extra care when drilling high walls, ceilings, and ceramic tiles, ensure the wall plug is fitted below the ceramic tile to avoid splitting or cracking. Ensure the wall plugs are well fitted and are a secure fit to the drilled hole.
The guide below will help to determine the most suitable wall plug type for your application.
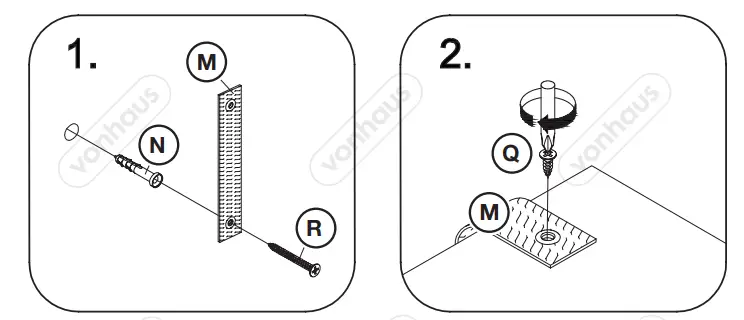
NOTE! Components N and R are NOT supplied. Please ensure you purchase the correct hardware to safely attach the Unit to the wall.

DISPOSAL INFORMATION Please recycle where facilities exist. Check with your local authority for recycling advice.
CUSTOMER SERVICE If you are having difficulty using this product and require support, please contact [email protected]
WARRANTY To register your product and find out if you qualify for a free extended warranty please go to www.vonhaus.com/warranty. Please retain a proof of purchase receipt or statement as proof of the purchase date. The warranty only applies if the product is used solely in the manner indicated in the warnings page of this manual, and all other instructions have been followed accurately. Any abuse of the product or the manner in which it is used will invalidate the warranty. Returned goods will not be accepted unless re-packaged in its original packaging and accompanied by a relevant and completed returns form. This does not affect your statutory rights. No rights are given under this warranty to a person acquiring the appliance second-hand or for commercial or communal use. COPYRIGHT All material in this instruction manual is copyrighted by DOMU Brands.Any unauthorized use may violate worldwide copyright, trademark, and other laws.
THANK YOU
Thank you for purchasing your product/appliance.
Should you require further assistance with your purchase,
you can contact us at
[email protected]
VonHaus is a registered trademark of DOMU Brands Ltd.
Made in China for DOMU Brands. M24 2RW.


