![]() QUICK OPERATION GUIDE
QUICK OPERATION GUIDE
Castle Automatic Feeder
Model: FT70 & FT70 Plus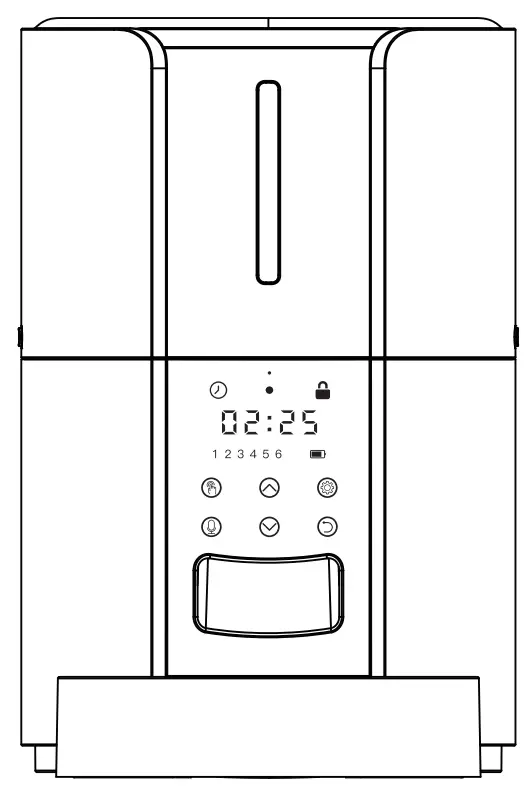
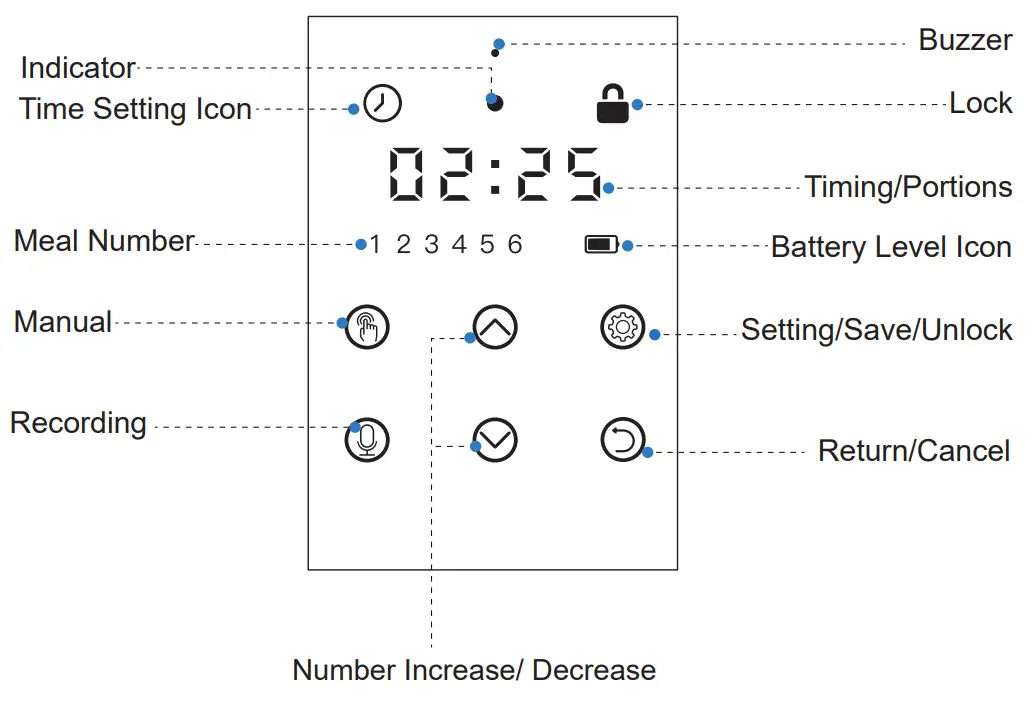
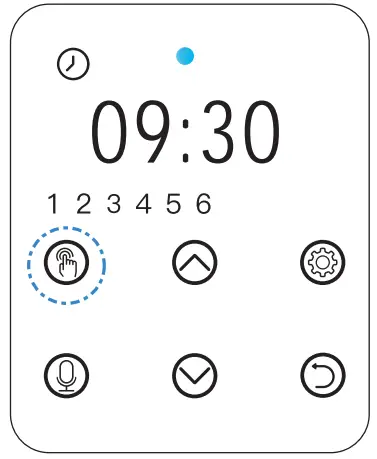
DISPLAY OVERVIEW:
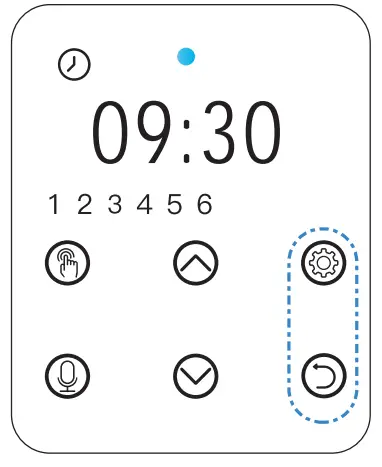
NOTE: Will lock automatically after 2 min of inactivity. Hold ![]() for 2s to unlock.
for 2s to unlock.
| Button | Description | Operable Mode Function |
| Set /Save Unlock button | Press to save and move to the next step. Press and hold for 2s to lock/unlock other buttons and screen. | |
 | Return /Cancel button | Return to the previous step. Return to interface after setting up. |
| Number Increase button | Press to increase the value. | |
| Number Decrease button | Press to decrease the value. | |
 | Manual button | [Must be Unlocked] Press to feed 1 portion. |
 | Recording button | [Must be Unlocked] Hold for 3s and start recording after a beep is heard {max 10s}. Recoding saved after a double beep is heard. |
SCREEN PANEL INTRODUCTION:
| ICON | Function of ICON |
| Locks automatically after 2 min of inactivity. Hold | |
| Flash Indicates: Powered by adapter or battery. Note: when flashing, press | |
| Local time. | |
| Number of meals. | |
| Lights up when running on battery power. Turns red to indicate low battery. |
INSTRUCTION MANUAL:
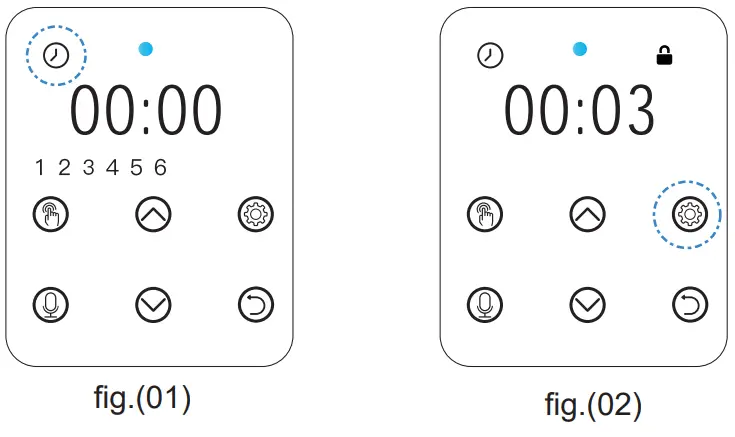
STEP 1 — Setting Current Time
Note:
Clock icon flashes when powered as shown in fig.(01).
[If Screen is Locked]
Press ![]() and hold for 2s to unlock screen as shown in fig.(02).
and hold for 2s to unlock screen as shown in fig.(02).
TIP: Please note the conversion between 24-hour format and 12-hour format.
Example: 9:00AM = 9:00; 10:00PM = 22:00 More as below:
12-hour Clock ![]() 24-hour Clock Comparison Chart
24-hour Clock Comparison Chart
| 00:00 (Midnight) | 00:00 (Beginning of the day) | 00:00 (Midnight) | 00:00 (Beginning of the day) |
| 01:00AM | 1:00 | 01:00PM | 13:00 |
| 02:00AM | 2:00 | 02:00PM | 14:00 |
| 03:00AM | 3:00 | 03:00PM | 15:00 |
| 04:00AM | 4:00 | 04:00PM | 16:00 |
| 05:00AM | 5:00 | 05:00PM | 17:00 |
| 06:00AM | 6:00 | 06:00PM | 18:00 |
| 07:00AM | 7:00 | 07:00PM | 19:00 |
| 08:00AM | 8:00 | 08:00PM | 20:00 |
| 09:00AM | 9:00 | 09:00PM | 21:00 |
| 10:00AM | 10:00 | 10:00PM | 22:00 |
| 11:00AM | 11:00 | 11:00PM | 23:00 |
| 12:00AM (noon) | 12:00 | (Midnight) 12:00PM | (End of the day) 24:00 |
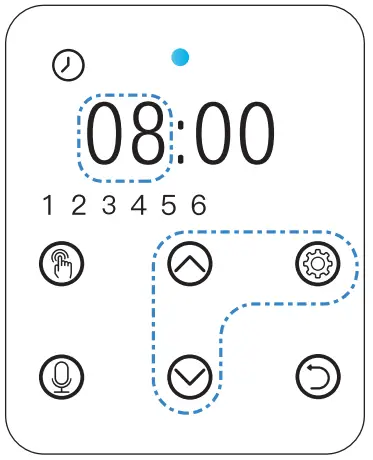
STEP 1.1— HOUR SETTING
[ Must be Unlocked ]
Press ![]() to set the “hour”of the time.
to set the “hour”of the time.
The two hour digits flash, press ![]() /
/![]() to set the “hour”.
to set the “hour”.
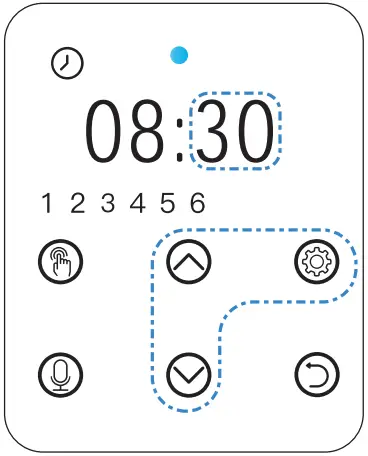
STEP 1.2— MINUTE SETTING
[ Must be Unlocked ]
After setting hour, press ![]() to move to set the “minute” of the time. press
to move to set the “minute” of the time. press ![]() /
/![]() to set the “minute”. Press
to set the “minute”. Press ![]() to save.
to save.
Note:
Press ![]() to modify if needed.
to modify if needed.
STEP 2 —Setting Meal
STEP 2.1
Press ![]() then “1” flashes to set up the first meal.
then “1” flashes to set up the first meal.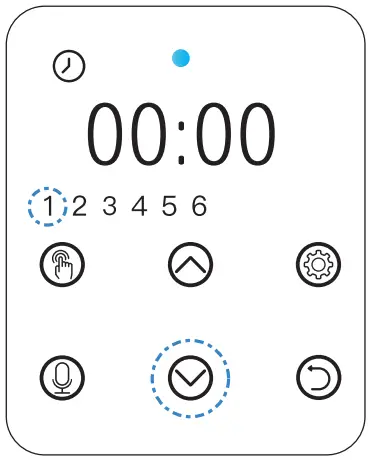
STEP 2.2
Press ![]() to set the “hour” of the time, Press
to set the “hour” of the time, Press ![]() /
/![]() to set the “hour”. Press
to set the “hour”. Press ![]() to move to set the“ minute” of the time. Press
to move to set the“ minute” of the time. Press ![]() to save.
to save.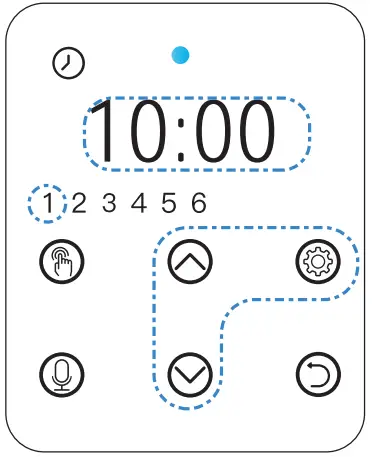
STEP 2.3
Press ![]() /
/![]() to set up portion then press
to set up portion then press ![]() button to save.
button to save.
Note:
Press ![]() to modify if needed.
to modify if needed.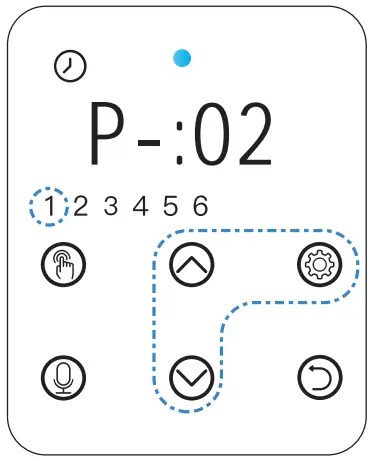
STEP 2.4
Press ![]() to move to set other meals.
to move to set other meals.
Repeat above step to set up meal time and portion.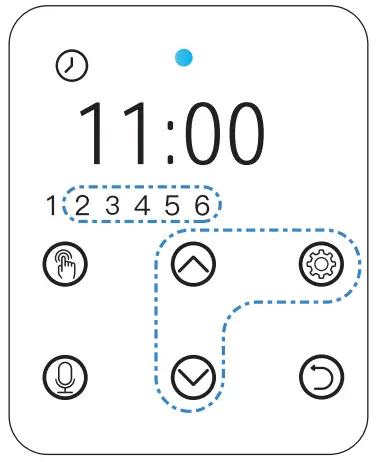
STEP 3 —Return to Interface
STEP 3.1
Press ![]() to return to interface when setting up as shown in fig.(01).
to return to interface when setting up as shown in fig.(01).
(Numbers NOT displayed when portion set to 0 as shown in fig.(02)).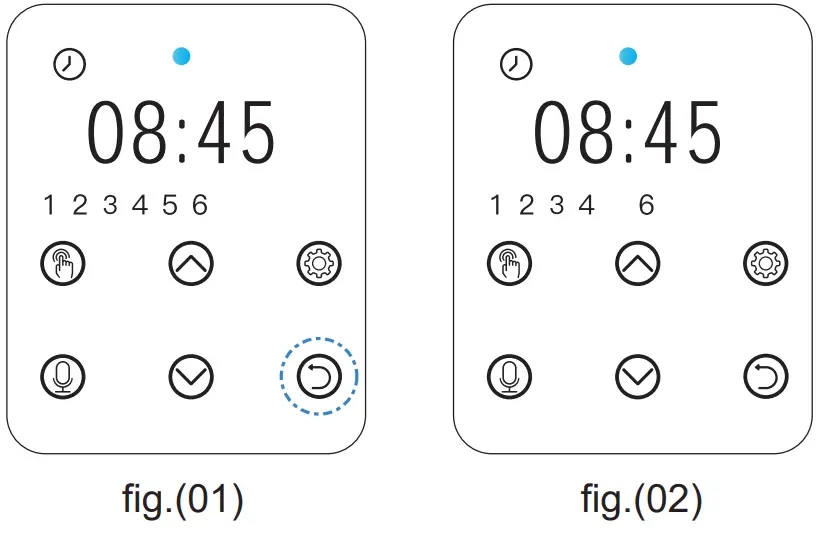
STEP 3.2
Press ![]() to modify local time, feeding time and portion if needed.
to modify local time, feeding time and portion if needed.

STEP 4 — Locking & Unlocking
Lock:
Press ![]() to return to interface when setting up, press
to return to interface when setting up, press ![]() for 2s to lock the screen, the lock icon will display.
for 2s to lock the screen, the lock icon will display.
(Note: Locks automatically after 2 min of inactivity).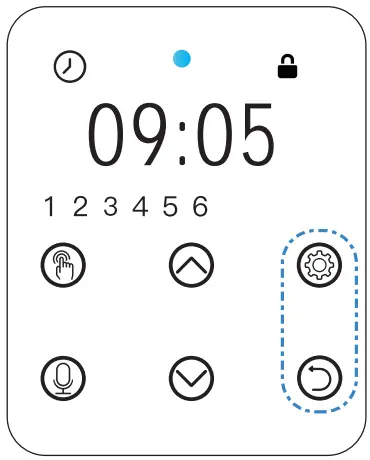
Unlock:
Press and hold ![]() for 2s to unlock the screen, the lock icon will disappear.
for 2s to unlock the screen, the lock icon will disappear.
STEP 5 —Recording
[ Must be Unlocked ]
Hold ![]() for 3s and start recording after a beep is heard (max 10s).
for 3s and start recording after a beep is heard (max 10s).
Double beep indicates recording is saved.
STEP 6 —Manual Feed
[ Must be Unlocked ]
Press ![]() to feed 1 portion.
to feed 1 portion.
STEP 7 —Reset to Factory Default
[ Must be Unlocked ]
Press and hold ![]() and
and ![]() at the same time for 3s until a beep is heard.
at the same time for 3s until a beep is heard.