Armacost TriVue LED Puck Light User Manual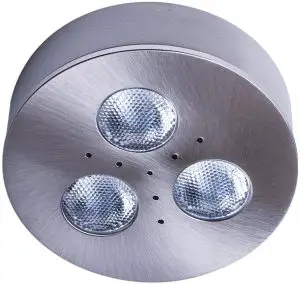
Practical configuration, easy to install
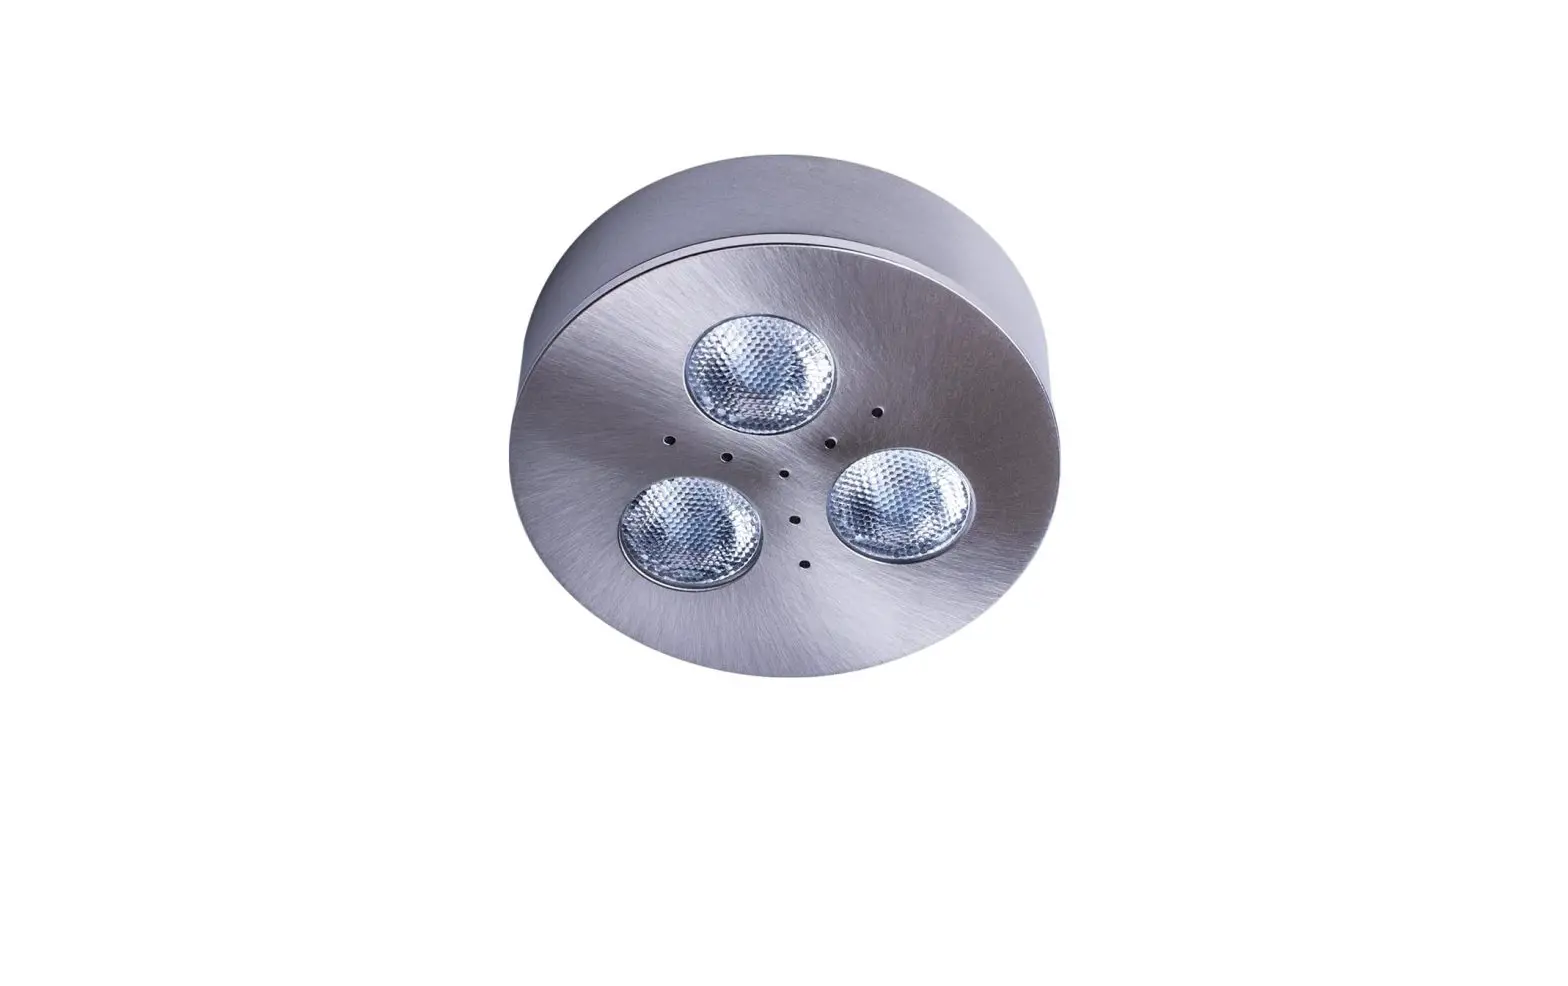
TriVue LED Puck Lights can be a surface-mounted puck or a sleek recessed light. High quality all metal construction, each fixture comes prewired with a 36 in. color-coded power lead for easy direct wire connections. Low voltage safe, simply cut or extend cables to meet any installation need. Lights can be installed individually, linked together, or combined with Armacost LED tape lighting in the same circuit. The number of lights installed is limited only by the output rating of the power supply.
Bright and highly efficient, cool to the touch
LEDs emit little heat and won’t overheat an enclosed space. Integrated diffusers soften the light and reduce glare on adjacent surfaces. High quality, energy-efficient LEDs are rated for 50,000 hours and require a 12 volt DC power supply (sold separately) with enough wattage to suit the application.
Fully dimmable
Enjoy smooth, soft-start and fade-to-dark professional dimming with any standard, in-wall AC dimmer when TriVue Puck Lights are used with Armacost Lighting’s Universal Dimming LED Drivers. TriVue Puck Lights are also compatible with Armacost Lighting’s line of 12-volt dimmers. Wireless dimming controls can eliminate the need to run wires from the LED lighting to the remote dimmer location, useful in situations where installing new cabling can be difficult. Visit armacostlighting.com/ dimming to learn more about your dimming options.
Requires a 12-volt DC power supply. Each LED cabinet down light uses about 3.2 watts. Choose an adequately rated power supply based on the number of installed lights.
IMPORTANT
CAUTION: For use only with low voltage 12-volt DC power source. Do not connect to 120V AC current. For dry location only.
Disconnect all power before installing.
Wire runs inside walls must be installed in accordance with national and local electrical codes, low voltage Class 2 circuit. Use properly certified CL2 or better cabling. Do not install low-voltage wiring in the same wire run as AC power. If AC and low-voltage wires cross, keep them at 90-degree angles. If you are unclear as to how to install and wire this device, contact a qualified electrician.
- Use only insulated staples, plastic ties or clips to secure wires.
- Route and secure wires so they will not be pinched or damaged.
- Failure to observe polarity or shorting of wires may damage the LED lights.
INSTALLATION GUIDELINES
First, remove trim ring by grasping ring and then firmly pushing on back side of LED light.
Flush mount
Cut a 2-1/2 in. diameter hole at desired location and insert light. Tension clips will hold the light in place. No trim ring required.
Surface mount
Keeping power cable threaded through trim ring, install ring using supplied screws. Insert light into trim ring until secure.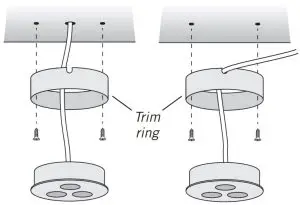
Feed power cable through cabinet surface or through notch in trim ring
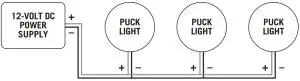
Typical connection
Simply connect LED lights to the low voltage output of your 12-volt DC power supply as shown. Always maintain polarity, red (+) to red, black (–) to black. Splice and extend power lead cables to meet installation needs. For RV and boat applications, power the lighting directly by 12-volt battery.
Be sure to use a 12-volt DC power supply with sufficient wattage to power the total number of LED lights connected to your system. At 100% brightness, each LED light uses about 3.24 watts or 0.27 amps.
On very large, multi-LED light installations, be aware of possible voltage drop, which only becomes undesirable if you notice the brightness in one area of your lighting is objectionably different than in another area. Do not coil wire; shorter lengths and thicker wire will mean less voltage drop and higher brightness. For an online voltage drop calculator, visit armacostlighting.com/voltagedrop.
Planning for a dimmer
Use only Armacost Lighting LED dimmers or an Armacost AC dimmable LED power supply with a compatible Lutron® or similar style in-wall AC dimmer. Be sure to visit armacostlighting.com/dimming to learn about the types of dimmers that will work with Armacost LED lighting and power supplies.
Works with other Armacost component-based lighting
Lights can be linked together or combined in the same 12-volt low voltage circuit with other Armacost lighting products, including white RibbonFlex Pro® LED tape lighting and 1 watt mini lights.

SPECIFICATIONS
| SPECIFICATIONS | SOFT WHITE | BRIGHT WHITE |
| Input Voltage | 12-volt DC | 12-volt DC |
| Power Consumption | ~3.2 watts | ~3.2 watts |
| Color Temperature Option | ~2700K | ~4000K |
| Light Output (Lumens) | 240 | 280 |
| Color Accuracy (CRI) | 80+ | 80+ |
| Beam Angle | 60 | 60 |
WARANTY
Limited 3-year warranty. This product is for dry location use only. Improper installation, improper powering, abuse, or failure to use this product for its intended purpose will void warranty. Proof of purchase is required for all returns. Questions? Email [email protected].
armacostlighting.com
© 2012-21 Armacost Lighting. All rights reserved.


