
NESLING Roller blind 2.48 meters wide x 2.4 long
PARTS LIST
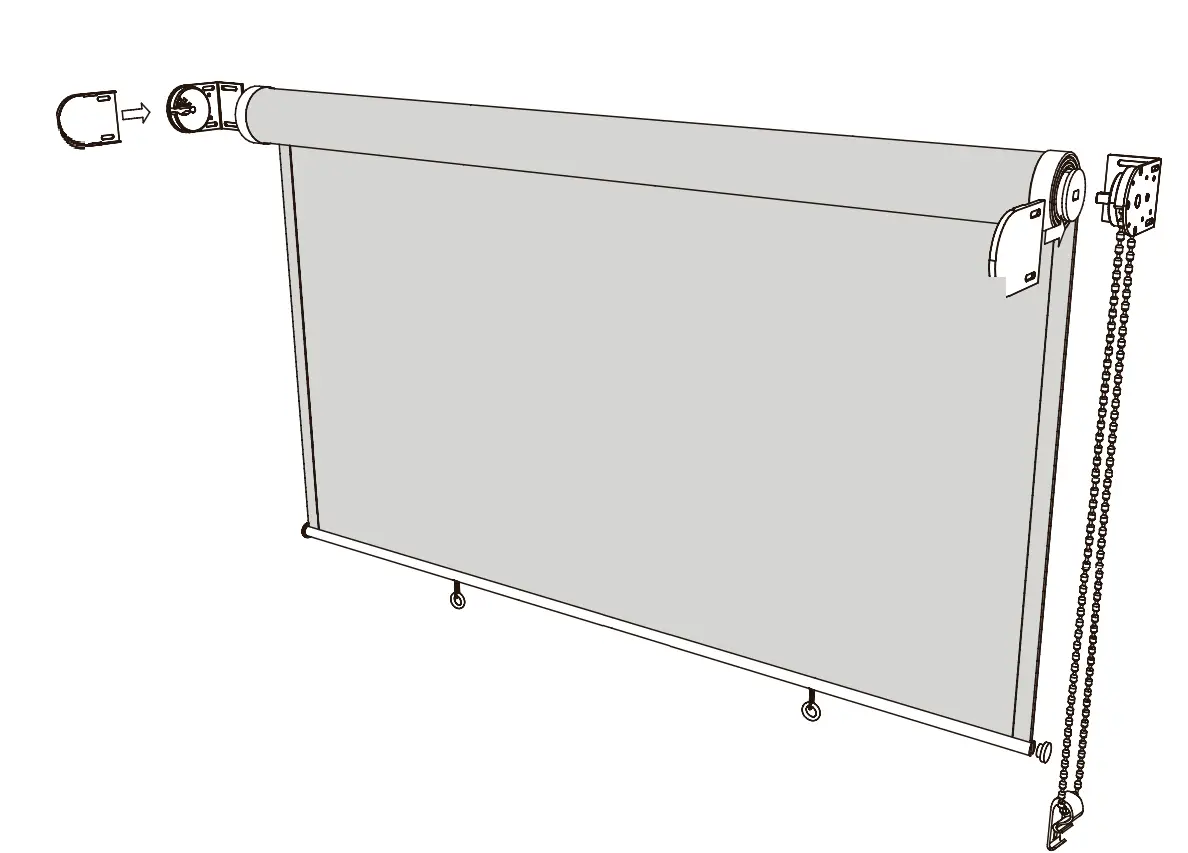
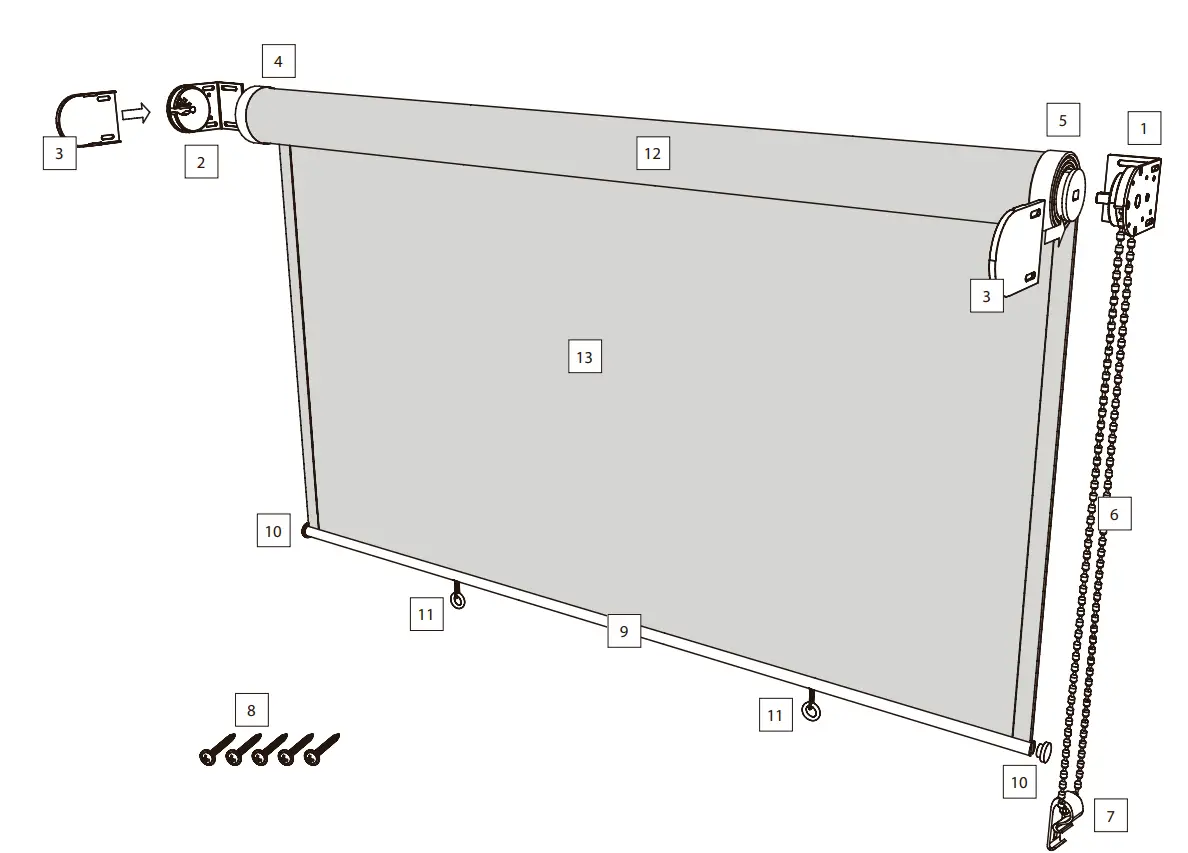
The following is a complete listing of the parts needed to install your Nesling Coolfit Roll-Up blind. Please inspect before beginning installation and contact us if any parts are missing.
| REF. NO. | PART DESCRIPTION | QTY. REQUIRED |
| 1 | Clutch | 1 |
| 2 | Idle End Unit | 1 |
| 3 | Bracket Covers | 2 |
| 4 | Idle End Plug | 1 |
| 5 | Clutch Plug | 1 |
| 6 | Chain | 1 |
| 7 | Tension Device | 1 |
| 8 | Wood Screws | 5 |
| 9 | Bottom Rail | 1 |
| 10 | Bottom Rail Caps | 2 |
| 11 | Tie Downs | 2 |
| 12 | Aluminium Tube | 1 |
| 13 | Shade | 1 |
The first step is to mark the holes where you are going to put your screws.
Determine how far apart your holes should be.
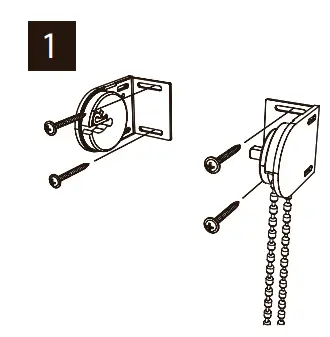
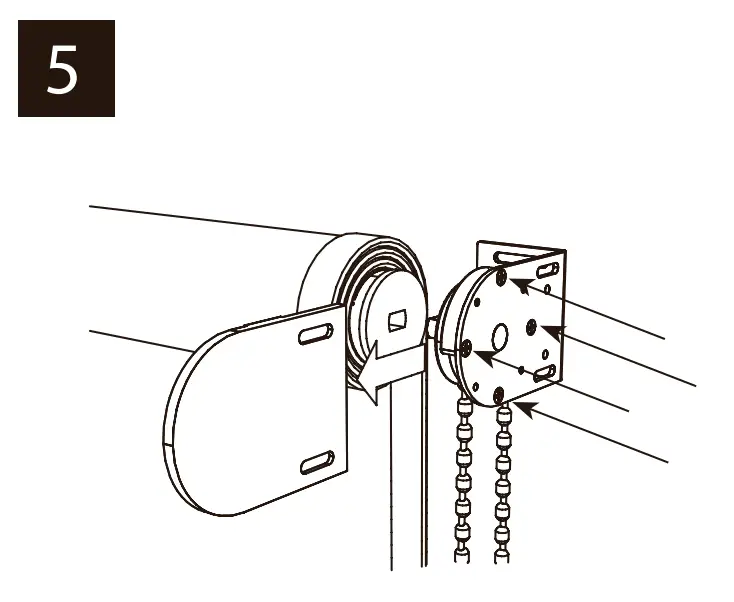
- Install Brackets
Install the Clutch an Idle End Brackets.
The Clutch Unit Bracket will be on the right side and the Idle End Unit Bracket should be on the left for standard installation. Do not tighten screws completely yet.
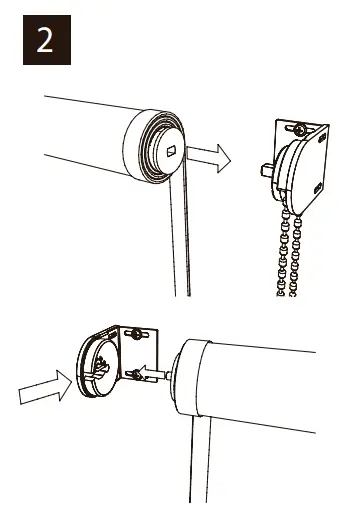
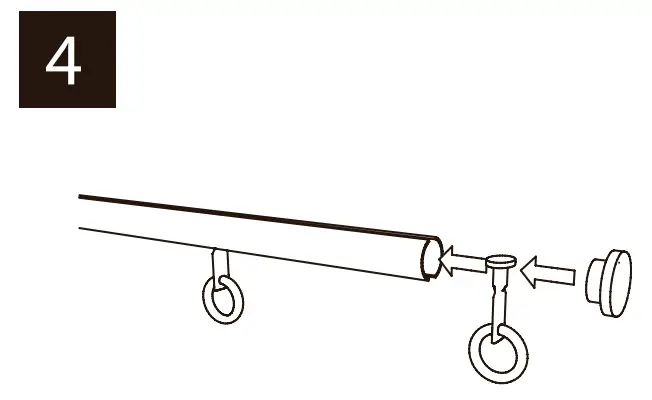
- Install the Shade
First, insert the Clutch Plug into the Clutch Unit.
Then insert the Idle End Plug into the Idle End Unit, and snap the Idle End Plug securely into place. With the shade in place, adjust the brackets so they fit snugly on each end of the shade.
IMPORTANT:
Now go back an tighten the Bracket screws completely. - Install Tension Device
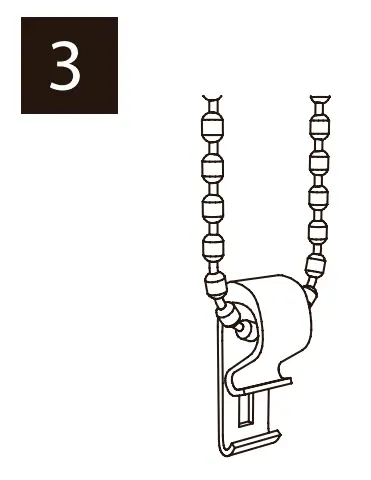
The Tension Device reduces potential hazards associated with having a loose chain hanging from the shade.
First hold the Tension Device so the warning tag hangs beneath it.
Then, position the Tension Device on a flat surface (window frame, wall, etc.) so the tension Device and chain do not interfere with raising and lowering for any slack.
Do not twist, cross or slant the chain.
Holding the Tension Device upright, secure with screw. Use a screwdriver to lift the
front lip and slide chain thru.
- Install Tie Downs (IF DESIRED)
Tie Downs have been provided to secure your Coolfit Roll-up blind in mild to moderate wind conditions.
NOTE:
If you choose to use the Tie Downs, you will need to install something to anchor them to. Many customers have used: u- shaped hooks, s-shaped hooks or screws.
- Adjusting Chain Tension
You can adjust chain tension if needed.
If chain tension is to tight (chain is difficult to pull), slide off bracket cover and loosen four (4) screws: turn counter clockwise. If chain tension is too loose (chain pulls too easily), slide off bracket cover and tighten four (4) screws: turn clockwise.
In severe wind or prolonged exposure to wind, Coolfit Roll-up blinds should be rolled up to prevent damage. First, remove the End Caps from either end of the Bottom Rail. Then, slide the Tie Downs into the channel/groove. Reinstall the End Cap.
Customer Support

Also see the instruction film on our website: www.nesling.com
You are now ready to enjoy the many benefits of your Nesling Coolfit Roll-Up blind!


 10004081-13x Manual")


 10005081-13x Manual")

