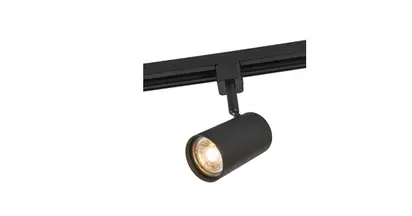
QAZQA 104853 Cavalux Jeana SL3 Gold Rail System Instruction Manual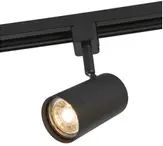
Package Contents

Product Overview

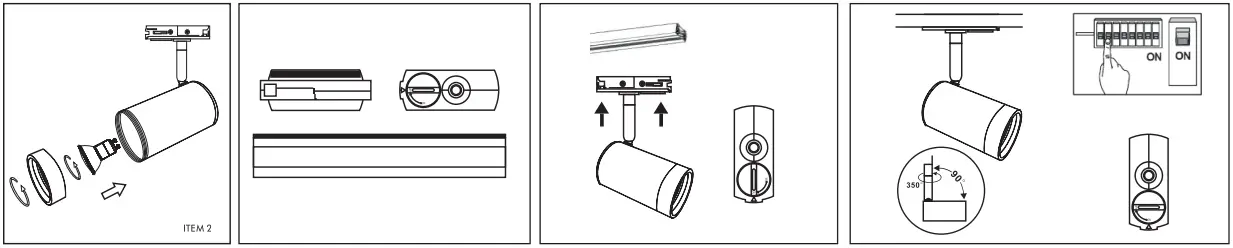
Installation
TO INSTALL (ITEM 1)
- Align arrows on spotlight track adaptor with the polarity groove on the track.
- Push up into track and rotate CLOCKWISE 90–while gently pulling back on the sliding cover until it locks into place.
TO REMOVE: Hold the spotlight and gently pull down on the track adaptor and rotate ANTI-CLOCKWISE 90%

TO INSTALL (ITEM 2)
- Ensure that the adaptor’s Line is facing with the Line in the track rail.
- Turn the switch on the adaptor to “OFF “. Then push the adaptor into the track.
- Then turn the switch on the adaptor to “ON”.
TO REMOVE: Turn off the switch to unlock the adaptor on the track rail. Removing the adaptor by reversing the above sequence
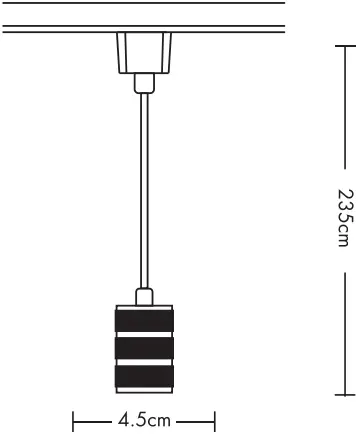
Product Dimension

SAFETY INSTRUCTION
Please study the instruction manual and below information carefully before installing or using this product. Please keep this user manual for further reference
- The luminaires may only be installed by authorized and qualified technicians according the valid regulations for electrical installation.
- Maintenance of the luminaires is limited to their surfaces. During maintenance no moisture can come into contact with any areas of the terminal connections or voltage control parts.
- The electrical supply must be switched off at the outset, preferably by means of a switch in the distribution box, before any installation, maintenance or repair work is undertaken.
- Exterior lighting must not be installed during rain.
- Take account of the minimal separation distance from other objects and the room required around the fitting.
- If in any doubt, consult a professional, taking local installation requirements into account. Some countries stipulate that lighting may be installed only by registered installers.
- Clamping screws in electrical connections must be adequately tightened. This is particularly the case with 12V low voltage conductors.
- Clean with a clean, dry cloth or brush, use no solvents or abrasives. Avoid dampness on all electrical components
- Take account of all available technical information.
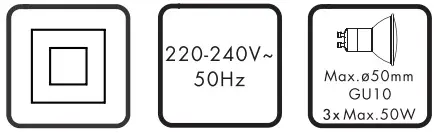
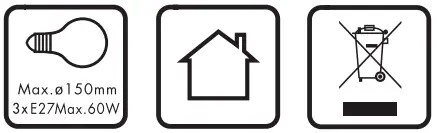
- Meaning of symbols:
 For indoor use only, where direct contact with water is impossible This icon indicates the level of water-proof and dust-proof Protection Class I: the fitting must be earthed Protection Class II: the fitting is doubled insulated and does not require earthing Protection Class III: the fitting is low voltageMinimum distance from lighted objects (meters)The type of lamp and maximum size and wattage indicated in each lighting unit must not be exceed; different items require different kind of light sources with different bulb iconsThe armature is designed to work only with the indicated voltage. Different items require different working voltage. The luminaire can be used in combination with a dimmerThe reference light angle and light space of the luminaireThis luminaire cannot be disposed together with normal domestic waste in standard rubbish can, but you have to bring it to a staging area for electrical waste
 For indoor use only, where direct contact with water is impossible
 This icon indicates the level of water-proof and dust-proof
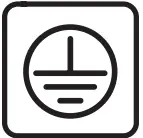 Protection Class I: the fitting must be earthed
 Protection Class II: the fitting is doubled insulated and does not require earthing
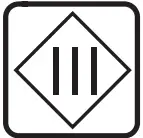 Protection Class III: the fitting is low voltage
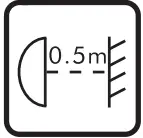 Minimum distance from lighted objects (meters)
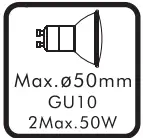 The type of lamp and maximum size and wattage indicated in each lighting unit must not be exceed; different items require different kind of light sources with different bulb icons
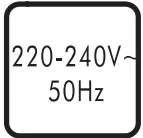 The armature is designed to work only with the indicated voltage. Different items require different working voltage.
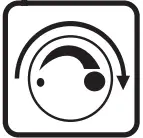 The luminaire can be used in combination with a dimmer
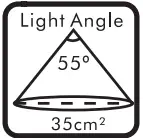 The reference light angle and light space of the luminaire
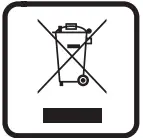 This luminaire cannot be disposed together with normal domestic waste in standard rubbish can, but you have to bring it to a staging area for electrical waste
Take note of the symbols when connecting wires: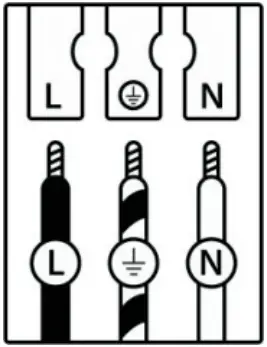
| L | Live conductor |
| Earth conductor | |
| N | Neutral conductor |
For Customer Service
FittinQ B.V.
Smaragdweg 52, 5527 LB Hapert,
The Netherlands
www.qazqa.n1