Anthogyr 063EMPR-TRAD_NOT Axiom Traditional Impression Components Instructions
Product description
| Device | Range | Supplied with a screw | Material | |
| Analogs | Implant analogs | Axiom® BL | Yes | Titanium (Ti6Al4V ELI) |
| Axiom® TL | No | |||
| Axiom® 2.8 | / | |||
| Abutment analogs | Axiom® BL | / | ||
| Axiom® 2.8 | / | |||
| Multi-Unit | Yes | |||
| Pop-in impression transfers | Implant Pop-in transfers | Axiom® BL | Yes | Titanium (Ti6Al4V ELI) |
| Axiom® TL | Yes | |||
| Axiom® 2.8 | / | |||
| inLink® | / | |||
| Abutment Pop-in transfers | Axiom® BL | / | Polyetheretherketone (PEEK) | |
| Axiom® 2.8 | / | |||
| Multi-Unit | / | Titanium (Ti6Al4V ELI) | ||
| Pick-up impression transfers | Implant Pick-up transfers | Axiom® BL | Yes | Titanium (Ti6Al4V ELI) |
| Axiom® TL | ||||
| inLink® | ||||
| Abutment Pick-up transfers | Multi-Unit | |||
| Impression rings | Axiom® BL | No | Polypropylene (PP) | |
Axiom® traditional impression components include analogs, impression transfers and impression rings. These instructions for use are valid for the following Axiom® traditional impression components:
- Analogs
- Pop-in impression transfers
- Pick-up impression transfers
- Impression rings
Intended use
Axiom® traditional impression components are intended to be used during conventional impression procedures in order to transfer implant or abutment position from the patient’s mouth to the master model after oral implantation.
Analogs are intended to be placed in a master model to represent the clinical situation of an implant or abutment in mouth for use in extra-oral restoration design and/or manufacturing.
Impression transfers are intended to be fitted on the corresponding dental implant or abutment for intra-oral use to transfer the position, axis and orientation of the implant or abutment from the patient’s mouth to a master model, using open or closed traybv impression methods.
Impression rings are intended to be fitted only on Axiom® BL Pick-up Impression transfers for intra-oral use to record the precise healed gingival profile.
Indications
Axiom® traditional impression components are part of Axiom® implant systems, the indications of which are given in the respective implant IFUs.
Patient type and intended user
Axiom® traditional impression components are intended for adults requiring a single-unit or multiple-unit tooth restoration and who do not present any of the conditions mentioned in the “Contraindications” section.
Axiom® traditional impression components must be used by a surgeon or dental laboratory personnel trained in dental implantology
Contraindications
Allergy or hypersensitivity to chemical components in the materials used and mentioned in the “Product description” section.
Warning
Implant surgery is a complex dental procedure. Incorrect techniques can cause implant failure and/or loss of bone support.
Appropriate training and qualification and a good knowledge of surgical techniques with Anthogyr products are required. Anthogyr offers specific training.
Caution/Precaution
Clinical use:
- Single-use devices: do not reuse or re-sterilise. Risk of contamination and risk of alteration of the functional surfaces.
- As far as possible, the devices must be firmly fastened to avoid the inhalation or swallowing of parts during intraoral use.
- Analogs should be used only once to guarantee the integrity and precision of the component design and specifically the connection.
- The Axiom® TL indexed Pick-up transfers should not be used to take multiple impressions: there is a risk that the impression cannot be removed.
- The inLink® Pop-in transfers should not be used if there is an axis divergence above 20° between 2 implants: there is a risk that the impression cannot be removed.
Component rework:
Components must not be reworked in any way.
Safety information regarding magnetic resonance imaging (MRI):
The safety and compatibility of Anthogyr devices that remain in the patient’s body have not been evaluated in the magnetic resonance (MR) environment. They have not been tested for heat build-up, migration or artefacts in MR environments. The safety of Anthogyr devices in an MR environment is unknown. Performing an MRI examination on a patient wearing such a device may result in injury.
Residual risks and side effects
The clinical outcome of dental treatment is influenced by multiple factors. The following residual risks and possible side effects are related to the use of Axiom® traditional impression components and may lead to additional dental treatment at the dental practice:
Residual risks:
- additional treatment at dentist’s office
- bite/mastication/phonetic problems
- bleeding
- bone damage
- damage to adjacent/opposing tooth
- discomfort
- hypersensitivity/allergic reaction
- injuries of gingiva
- irritation/inflammation
- local or systemic infection (including peri-implantitis, periodontitis, gingivitis, fistula)
- local pain
- longer recovery/healing time than expected
- loss of implant
- nerve damage possibly resulting in chronic pain
- poor aesthetic outcome
- possibility of prolongation of surgery
- possibility of surgical implant explantation
- possibility to swallow/inhale small parts during the procedure
- recall to the dentist’s office
Side effects:
- swelling
- local inflammation
- bruising
- resorption of maxillary/mandibular ridge bone
- local infection
- minor bleeding
Compatibility information
Anthogyr implants and prosthetic components are available in a wide variety of configurations. Only Anthogyr parts that are compatible with the implant connection are suitable for use. For more information, please refer to the manuals listed in the “Further information” section
| ANALOG | TRANSFER | |||
| Connection | Implant/ abutment analog | Associated analog screw | Pick-up transfer | Pop-in transfer |
| Axiom® Bone Level | Axiom® BL implant analog | OPTS161 | Axiom® BL pick-up transferImpressionring | Axiom® BL pop-in transfer |
| Axiom® Bone Level | Axiom® BL Standard abutment analog | / | / | Standard abutment transfer |
| Axiom® Tissue Level M1.6 | Axiom® TL implant analog | / | Axiom® TL indexed pick- up transfer | Axiom® TL indexed pop- in transfer |
| Axiom® Tissue Level inLink® | / | inLink® pick- up transfer | inLink® pop- in transfer | |
Axiom® 2.8 | Axiom® 2.8 implant analog | / | / | Implant pop- in transfer |
Axiom® 2.8 | Axiom® 2.8 abutment analog | / | / | Abutment pop-in transfer |
| Multi- Unit | Multi-Unit abutment analog | MU141 | Multi-Unit pick-up transfer | Multi-Unit pop-in transfer |
Cleaning and disinfection
Impression transfers and impression rings are supplied non-sterile in white packaging. Before treatment, remove the components from their packaging. Do not use the components if the packaging is opened or damaged. They must be cleaned and decontaminated before use and after each use for reusable components. Anthony recommends following the protocol described in the “cleaning and sterilization” manual available at ifu.anthogyr.com or on request from Anthony at the above address. For sterilization, see the “Sterilization” section.
Sterilisation
Impression transfers and impression rings delivered non-sterile must be sterilized before use. Anthony recommends following the protocol described in the cleaning and sterilization manual available at ifu.anthogyr.com or on request from Anthony at the above address. After the sterilization was done, asepsis rules must be followed.
Protocol for use
Refer to the brochures listed in the “Further information” section for detailed step-by-step instructions.
Axiom® BL
A. Impression-taking on the implant Impression taking:
- Clean and sterilise (See Cleaning and disinfection and Sterilisation) the implant transfer.
- In case of use of impression rings, apply the impression ring (corresponding to the emergence profile selected) on the Pick-up transfer. The impression ring must be in contact with the first transfer groove.
- Insert the Pick-up or Pop-in transfer into the implant and tighten the transfer screw with a hexagonal wrench (moderate manual tightening < 10 N.cm).
- Take a closed-tray impression (Pop-in technique) or open-tray impression (Pick-up technique).
- Unscrew the Pop-in or unscrew the Pick-up transfer screw from the implant.
Preparation of the master model:
- Place the analog on the transfer:
- Pick-up: Tighten the Pick-up transfer screw manually (moderate manual tightening < 10 N.cm). Tighten the screw whilst keeping the analog at the level of the flat spot.
- Pop-in: Tighten the Pop-in transfer manually (moderate manual tightening < 10 N.cm) into the analog. Re-position the assembly in the impression material.
- Prepare the master model.
B. Impression-taking on the standard abutment Impression taking:
- Clean and sterilise (See Cleaning and disinfection and Sterilisation) the abutment transfer.
- Place the impression transfer on the top of the standard titanium abutment.
- Maintain slight pressure, applying rotation to index the transfer with the abutment.
- Once the indexation is in place, press the transfer onto the non-re-worked abutment until it clicks.
- Take a closed-tray impression (Pop-in technique).
Preparation of the master model:
- Insert the abutment analog in the transfer into the impression intrados (until a click is heard) after visualising the relative position of the transfer in the impression.
- Check that the analog is correctly fixed in the impression (if necessary, repeat the procedure).
- Prepare the master model.
Axiom® TL
A. Impression-taking with indexed transfers Impression taking:
- Clean and sterilise (See Cleaning and disinfection and Sterilisation) the indexed transfer.
- Screw the Pop-in or Pick-up transfer on the implant with a hexagonal wrench (moderate manual tightening < 10 N.cm).
- Take a closed-tray impression (Pop-in technique) or open-tray impression (Pick-up technique).
- Unscrew the Pop-in or unscrew the Pick-up transfer screw from the implant.
Preparation of the master model:
- Choose the analog corresponding to the transfer platform between the 2 diameters available (N: Ø 4.0 mm and R: Ø 4.8 mm).
- Place the analogs on the transfers:
- Pick-up: Tighten the Pick-up transfer screws manually (moderate manual tightening < 10 N.cm). Tighten the screw whilst keeping the analog at the level of the flat spot.
- Pop-in: Tighten the Pop-in transfer manually (moderate manual tightening < 10 N.cm) into the analog. Re-position the assembly in the impression material.
- Prepare the master model
B. Impression-taking with non-indexed inLink® transfers
Impression taking:
- Clean and sterilise (See Cleaning and disinfection and Sterilisation) the non-indexed inLink® transfers.
- Screw a Pick-up transfer or a Pop-in transfer on ach inLink® connection with a hexagonal wrench (moderate manual tightening < 10 N.cm).
- Take an open-tray impression (Pick-up technique) or closed-tray impression (Pop-in technique).
- Unscrew the Pop-in or unscrew the Pick-up transfer screw from the implant.
Preparation of the master model:
- Choose the analogs corresponding to the transfer platforms between the 2 diameters available (N: Ø 4.0 and R: Ø 4.8).
- Place the analogs on the transfers:
- Pick-up: Tighten the Pick-up transfer screws manually (moderate manual tightening < 10 N.cm). Tighten the screws whilst keeping the analog at the level of the flat spot.
- Pop-in: Tighten the Pop-in transfers in the analogs manually (moderate manual tightening < 10 N.cm) and re-position the assemblies in the impression material.
- Prepare the master model.
Axiom® 2.8
A. Impression-taking on the implant Impression taking:
- Clean and sterilise (See Cleaning and disinfection and Sterilisation) the implant transfer.
- Insert the transfer into the implant, press slightly.
- Take a closed-tray impression (Pop-in technique).
- Remove the Pop-in transfer from the implant using dental forceps.
Preparation of the master model:
- Place the analog on the transfer. Re-position the assembly in the impression material.
- Perform the master model with the implant analog.
B. Impression-taking on the abutment Impression taking:
- Clean and sterilise (See Cleaning and disinfection and Sterilisation) the abutment transfer.
- Position the transfer on the impacted abutment paying attention to place it on the flat surface of the abutment.
- Once the index is in place, press the transfer on the non-reworked abutment.
- Take a closed-tray impression (Pop-in technique).
Preparation of the master model:
- Insert the abutment analog (there is only 1 for all angulations) in the transfer into the impression intrados, after visualising the relative position of the transfer in the impression.
- Check that the analog is correctly fixed in the impression (if necessary, repeat the procedure).
- Prepare the master model.
Multi-Unit
Impression taking:
- Clean and sterilise (See Cleaning and disinfection and Sterilisation) the abutment transfers.
- Screw the Pop-in or Pick-up transfers on the top of the Multi-Unit abutments with a hexagonal wrench (moderate manual tightening < 10 N.cm).
- Take a closed-tray impression (Pop-in technique) or open-tray impression (Pick-up technique).
- Unscrew the Pop-in or unscrew the Pick-up transfer screw from the abutment.
Preparation of the master model:
- Place the Multi-Unit abutment analogs on the transfers:
- Pick-up: Tighten the Pick-up transfer screws manually (moderate manual tightening < 10 N.cm). Tighten the screws whilst keeping the analog at the level of the flat spot.
- Pop-in: Tighten the Pop-in transfers in the Multi-Unit abutment analogs manually (moderate manual tightening < 10 N.cm) and re-position the assemblies in the impression material.
- Prepare the master model.
Further information
For more information on the use of Anthogyr products, please contact your local Anthogyr sales representative or contact Anthogyr customer service or visit ifu.anthogyr.com and www.anthogyr.com. For more specific information on Axiom® traditional impression components, please refer to:
- Axiom® Multi Level® Prosthetic user guide (AXIOM-MLP_NOT)
- Axiom® 2.8 user guide (AXIOM2-8_NOT)
Storage
Store these products in a clean, dry area, at room temperature. Improper storage may compromise the essential characteristics of the materials and design, which may lead to device failure.
Waste treatment
Waste resulting from the intervention (packaging, part extracted, etc.) must be handled as medical waste under the responsibility of the user.
Patient information
Patients must accept regular medical follow-ups and should consult their doctor in the event of any unexpected change in the performance of the prosthetic reconstitution.
Patients must be informed of the need to ensure regular oral hygiene.
Patient must be advised to remain cautious for the first few weeks after surgery.
Notes
The practitioner must have the necessary knowledge to practice dental implantology and must be familiar with the handling instructions for Anthogyr products as described in this document in order to use Anthogyr products safely and in accordance with their instructions for use. Anthogyr products must be used in accordance with the manufacturer’s instructions for use. The dental surgeon is solely responsible for the proper use of Anthogyr products in accordance with their instructions for use and to determine whether the product is suitable for the individual patient’s situation. Anthogyr products are part of a complete range and must be used in combination with the corresponding original components and instruments distributed by Anthogyr, its parent company and any affiliates or subsidiaries of the parent company (“Straumann”). The use of third-party products not distributed by Anthogyr voids any warranty or other obligation, express or implied, of Anthogyr. Any product-related issues must be reported to the local Anthogyr organisation together with the product in question. In the event of a serious incident, the user must file a report with the local Anthogyr organization and the appropriate competent authority in accordance with local regulations. Anthogyr also offers an online complaint service in the countries concerned.
Validity
The publication of this document supersedes and replaces all previous versions. Anthogyr all rights reserved. Anthogyr® and/or other trademarks and logos of Anthogyr® mentioned herein are trademarks or registered trademarks of Anthogyr.
Availability
Some components of the Anthogyr implant system are unavailable in certain countries.
Symbols
The following table describes the symbols that may be printed on the packaging label. Please refer to the label on the packaging for the applicable product symbols.
| Symbol | Description of symbol | Source of symbol |
 | Manufacturer | NF EN ISO 15223-1 |
 | Date of manufacture | NF EN ISO 15223-1 |
 | Catalogue number | NF EN ISO 15223-1 |
| Batch code | NF EN ISO 15223-1 | |
| Serial number | NF EN ISO 15223-1 | |
 | Consult instructions for use or consult electronic instructions for use | NF EN ISO 15223-1 |
| Medical Device | NF EN ISO 15223-1 | |
 | CE marking – compliance with current regulations | Directive 93/42/CEE——————MDR (EU) 2017/745 |
 | FDA certification logo | 21 CFR 801.109(b)(1) |
 | Use-by date | NF EN ISO 15223-1 |
 | Single sterile barrier system | NF EN ISO 15223-1 |
| Single sterile barrier system with protective packaging inside | NF EN ISO 15223-1 | |
| Sterilised usingirradiation | NF EN ISO 15223-1 | |
 | Do not resterilise | NF EN ISO 15223-1 |
 | Non-sterile | NF EN ISO 15223-1 |
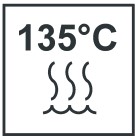 | Sterilisable in a steam steriliser (autoclave) at temperature specified | ISO 7000 – 2868 |
 | Non sterilisable in a steam steriliser (autoclave) attemperature specified | Anthogyr |
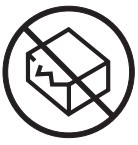 | Do not use if packaging is damaged and consult instructions for use | NF EN ISO 15223-1 |
 | Keep away fromsunlight | NF EN ISO 15223-1 |
 | Do not re-use | NF EN ISO 15223-1 |
 | Caution | NF EN ISO 15223-1 |
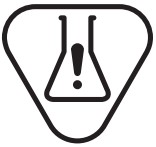 | Contains hazardoussubstances | NF EN ISO 15223-1 |
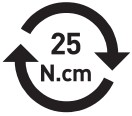 | Screwing torque | Anthogyr |
| Axiom® BL implant analog + prosthetic screw | Anthogyr | |
| Axiom® Multi-Unit abutment analog + prosthetic screw | Anthogyr | |
| Axiom® Multi-Unit Pacific analog + prosthetic screw | Anthogyr | |
| Axiom® BL Pop-in transfer + Pop-in screw | Anthogyr | |
| Axiom® BL Pick-up transfer + Pick-up short and long screws | Anthogyr | |
| Axiom® TL indexedPop-in transfer + Pop-inscrew | Anthogyr | |
| Axiom® TL indexedPick-up transfer +Pick-up short and longscrews | Anthogyr | |
| inLink® Pick-up transfer+ Pick-up short andlong screws | Anthogyr | |
| Axiom® Multi-Unit Pick- up transfer + Pick-up short and long screws | Anthogyr |
0459
Anthogyr 2237 Av. André Lasquin 74700 Sallanches – France
www.anthogyr.com
E-mail: [email protected]
Phone: +33(0)4 50 58 02 37
Validity Date : 2022-02
REF: 063EMPR-TRAD_NOT
Indx: B