![]()
E102 Router Quick Start Guide

Introduction
This document provides a brief overview of the E102 SOHO Branch Router, discusses what’s inside the box, and provides basic setup and installation instructions.
E102 Router Models
This document applies to the following E102 models:
CRADLEPOINT E102-C7C MODEL: S5A135A
CRADLEPOINT E102-C7D MODEL: S5A136A
Before You Begin
Read the following before setting up the Cradlepoint E102 router.
Location Considerations
To ensure the E102 operates efficiently, the following is recommended:
- Ensure the device is positioned to receive optimal Avoid positioning near concrete walls, metal or reflective surfaces, or any other objects that may interfere with RF reception.
- Ensure plenty of Avoid installing the device in enclosed spaces.
- Do not install the device in direct exposure to the extreme heat or cold can and will impact the router’s performance.
Refer to the E102 Safety, Regulatory, and Warranty Guide (included with your hardware) for more information about location considerations.
SIM Card for Wireless Connectivity
A wireless broadband data plan must be added to your Cradlepoint E102 series branch router for wireless broadband connectivity. Wireless broadband data plans are available from network operators. The SIM card must be activated and provisioned by the network operator. Contact your network operator for details about selecting a data plan and about the process for provisioning your SIM
Required Tools for Setup
- #0 Philips-head screwdriver (for SIM door cover)
- Recommended for optional wall mounting (hardware not included):
- #2 Philips-head screwdriver
- A drill with 5 mm (or equivalent) drill bit and wall anchors (depending on mount location)
- Recommended minimum wall mount screw size: M3/#6
Setup
The following instructions walk through the basic setup of the Cradlepoint E102 router. For more advanced setups, contact a professional installer.
STEP 1: Check box contents
Refer to the following to ensure you received all items included with the E102 hardware.
- [1] Cradlepoint E102
- [1] Power supply with interchangeable plugs
- [2] LTE antennas
- [1] Ethernet cable
- [1] SIM door screws
- [4] Rubber desk mount feet
- [1] Getting Started reference sheet
- [1] Safety, Regulatory, and Warranty guide
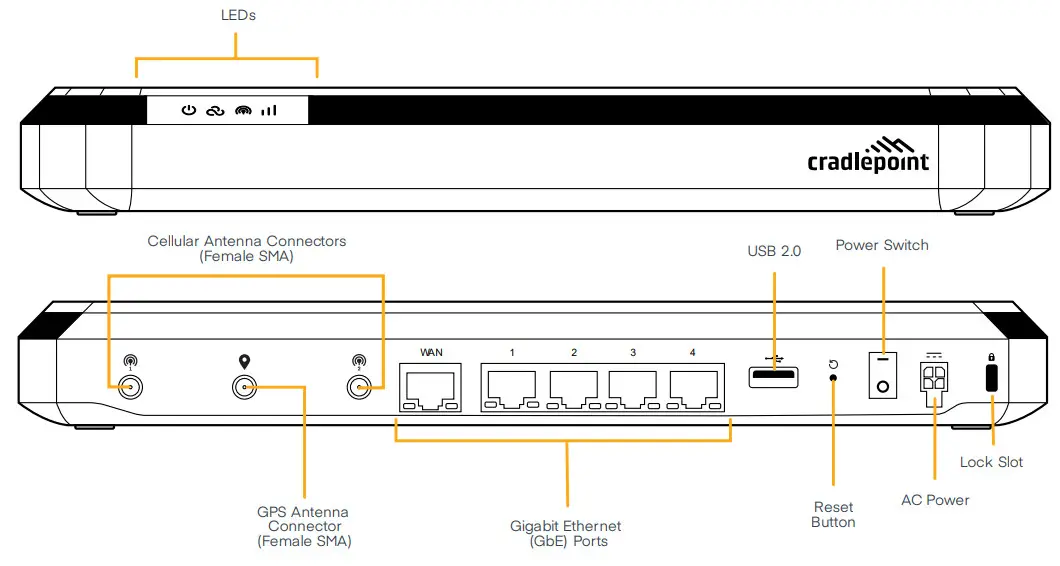
Parts of the E102
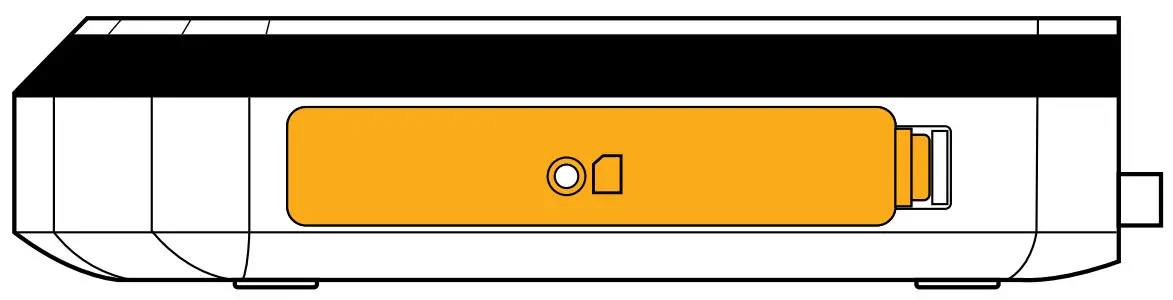
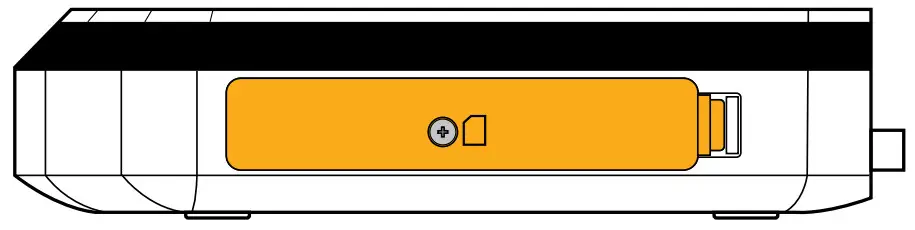
STEP 2: Remove the SIM door
Unclip and remove the SIM door.
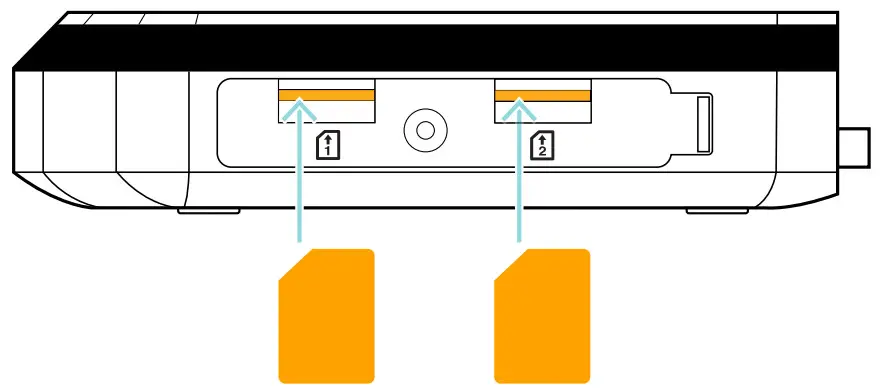
STEP 3: Insert an activated 2FF-sized SIM
Insert an activated 2FF-sized SIM card into the SIM1 slot (contacts down, a notch in). The SIM card will click into place. Optionally, you can insert a second 2FF-sized SIM card into the SIM2 slot in the same manner.
STEP 4: Reinstall the SIM door
Replace the SIM door and use the door screw to secure it.
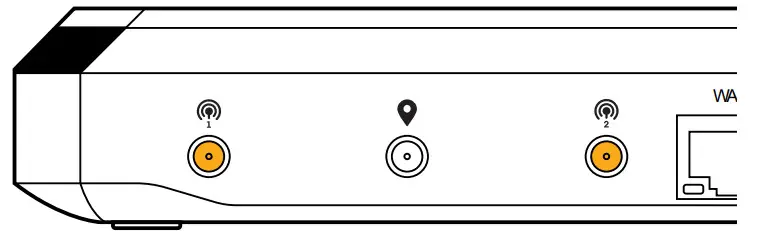
STEP 5: Attach the LTE cellular antennas
Install the 2 paddle antennas on the antenna ports marked with and
STEP 6: Mount the router
The E102 router may be mounted in a number of ways, including placed on a desk, affixed to a wall, or mounted on the ceiling. Refer to the following for best practices:
DESKTOP
- Install the rubber feet (included) on the bottom of the router
- Place the router on a flat surface away from objects that cause RF interference, including concrete, reflective and metal surface, microwaves, and so on.
WALL & CEILING
- Mark the desired mounting location on the ceiling or wall using a pen or marker.
- Ensure the mounting location is away from objects that cause RF interference, including concrete, reflective and metal surface, microwaves, and so on.
- Pre-drill holes for mounting screws (not included).
- Use wall anchors (not included) to ensure the endpoint is securely mounted.
STEP 7: Connect the Ethernet cable
Connect the Ethernet cable to the port marked WAN on the back of the E102. Connect the other end to your cable modem.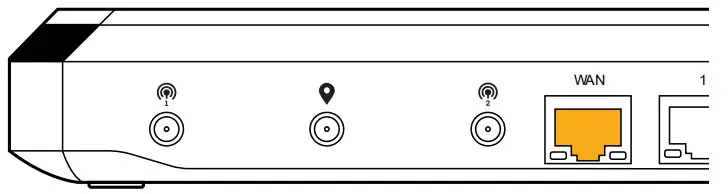 STEP 8: Power up the router
- Connect the power supply to the router and then plug the other end into an electrical outlet.
- Switch the device to the ON position (0 = Off, – = On).
- Verify that the Power LED lights up.
- Allow 1 minute for the router to run through its bootup sequence.
Refer to the Understanding LEDs section of this guide for information about LED indicator status.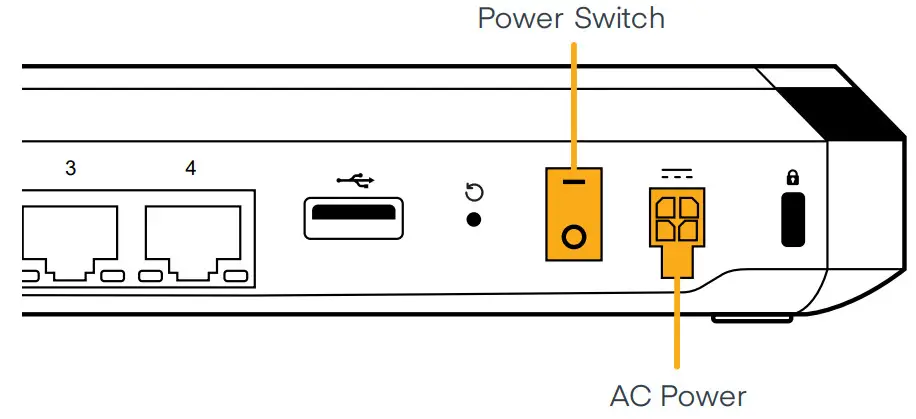 Step 9: Activate the router in NetCloud Manager
Activating your Cradlepoint router requires logging into your NetCloud Manager account. Refer to Getting Started with NetCloud Manager for more information.
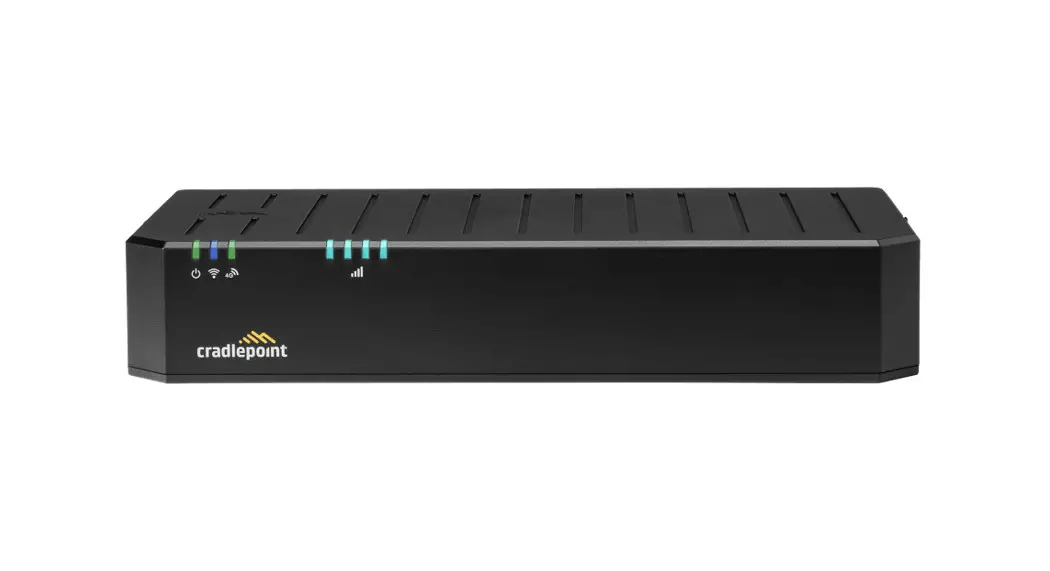
Understanding LEDs
The E102 router uses LED lights on the front panel to communicate various status conditions. Use the table below to verify the status of your router after the 1-minute bootup cycle.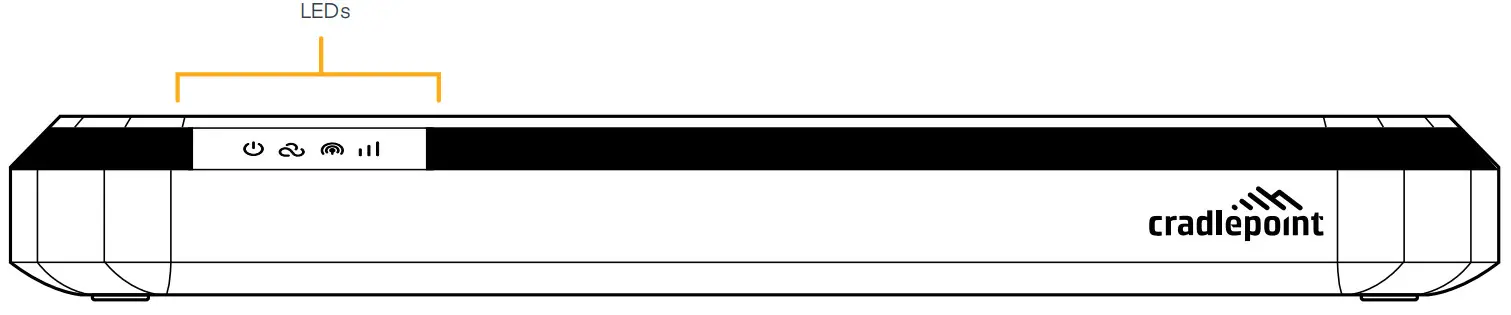
| BEHAVIOR | ||
| POWER: Detects that the unit has power. | ||
| No Light = Not receiving power. Check the power switch and the power source connection. | ||
| Solid White = Powered on | ||
 | NCM STATE: Detects whether the device is able to connect to NCM. | |
| No Light = Unable to connect to NCM | ||
| Solid White = Connected to NCM | ||
 | EMBEDDED MODEM STATE: Indicates connection status for the embedded (internal) modem. | |
| Solid Green = Modem has established an active connection | ||
| Flashing Green = Modem is connecting | ||
| Solid Yellow = Data connection error | ||
| Flashing Yellow = Modem is in the process of resetting | ||
| Solid Red = Carrier reject | ||
| Flashing Red = No SIM or SIM Door Open | ||
 | CELLULAR HEALTH: Indicates the health of the primary cellular modem’s signal. | |
| No Light = No cellular connection | ||
| Solid Green = Cellular health is excellent/good | ||
| Solid Yellow = Cellular health is fair | ||
| Solid Red = Cellular health is poor |
Troubleshooting
If the device takes longer than 5 minutes to connect to the Internet, log into the local UI of the device to make configuration changes or to start the troubleshooting process. You must be physically co-located with the device in order to do this. Refer to No Internet or Connection Issues for additional help.
Resources
- E102 Data Sheet
Help and Support
- Cradlepoint Customer Connect Community
- Cradlepoint Support Services
- Contact Us
Terms of Service
- Cradlepoint Terms of Service & License Agreement
- Privacy Policy
- GDPR Privacy Policy
Regulatory Requirements
Refer to the Safety, Regulatory, and Warranty guide included with your hardware for specific regulatory requirements.


