![]() Trilogy 100 Patient Leaflet
Trilogy 100 Patient Leaflet
User Manual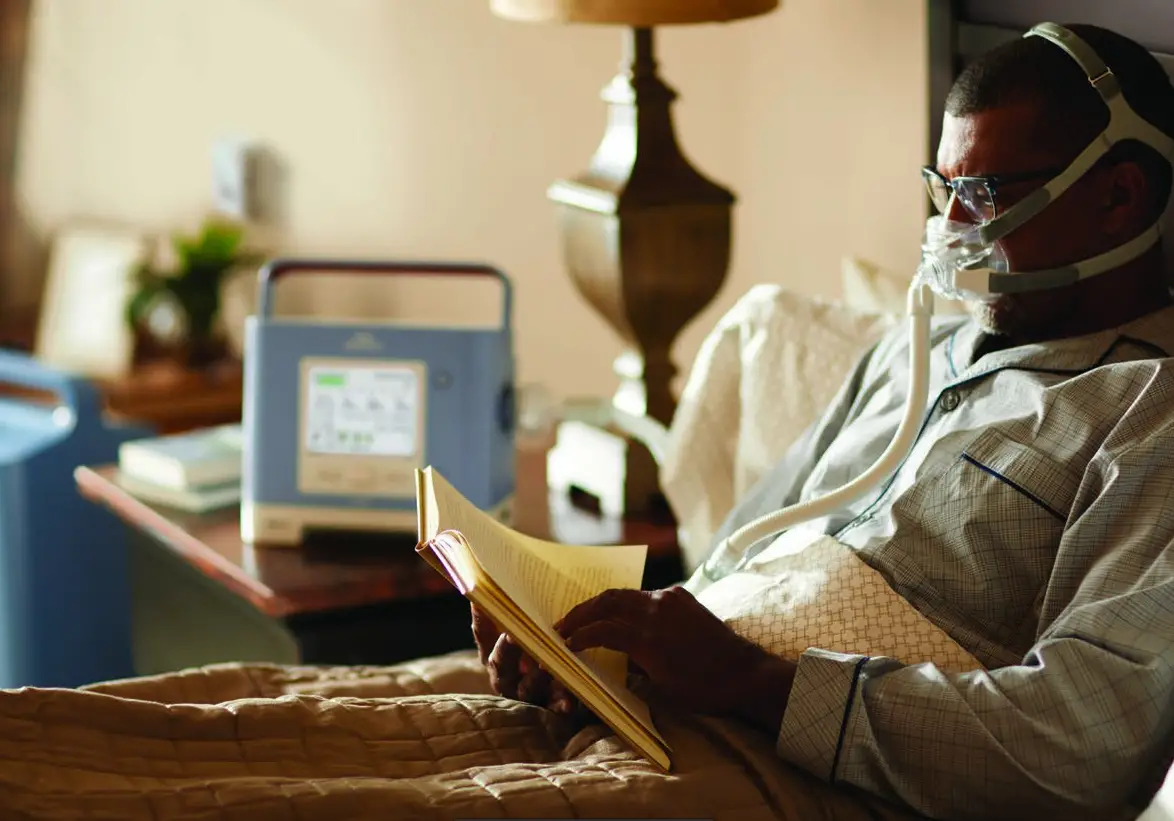
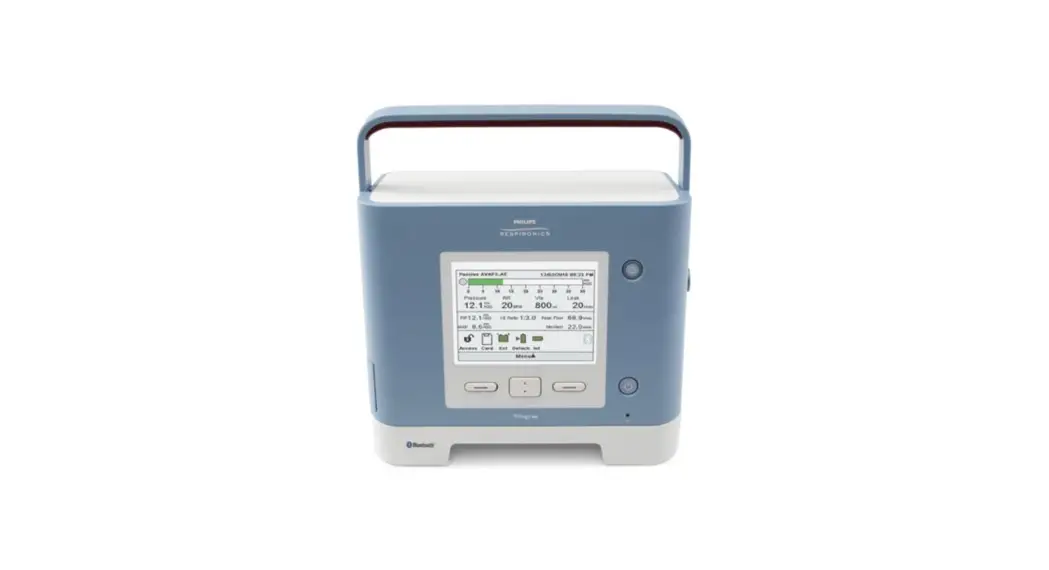
Your ventilator
The Trilogy ventilator will continuously support you wherever you go
Philips Trilogy provides respiratory support to meet your prescribed needs, up to 24 hours a day. Trilogy is portable with internal, hot-swappable detachable, and external batteries to provide greater freedom and mobility with continuous ventilation.
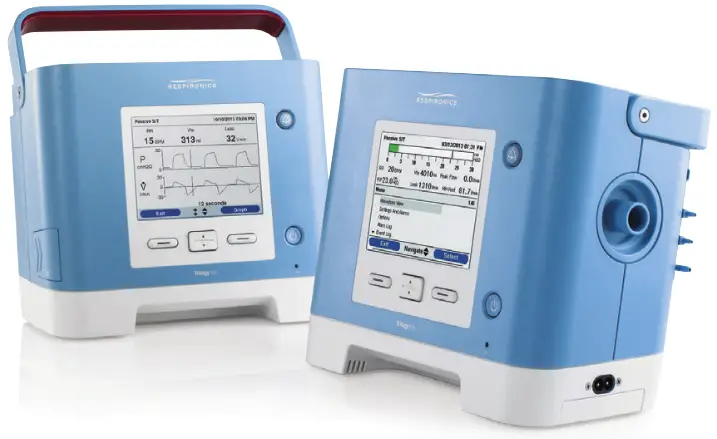
The Trilogy ventilator will allow your clinician to have a close look into your ventilator therapy
Trilogy is able to wirelessly connect to the Philips Care Orchestrator patient management system and also has an SD card providing access to your therapy data so that your care team can have a complete view into your therapy at home.
Set-up
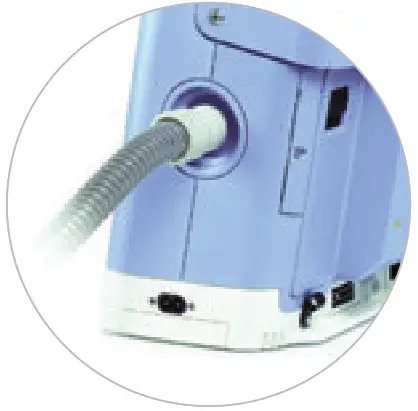
- Connect your circuit to the air outlet
Passive circuit If you have a single tube, you simply need to connect the tube to the air outlet. An exhalation port will need to be connected directly to your tracheostomy tube or mask (unless your mask already has an integrated leak*).
* It is important to make sure that the leak hole is not blocked off to allow exhalation. Active circuit
 If using the circuit with a valve:
• Connect tube A to the air outlet
• Connect pressure line B to the top connector
• Connect valve line C to the bottom connector
• Connect to the valve and to your mask or tracheostomy tube Active flow circuit
 If using the valve circuit with flow sensor:
• Connect tube A to the air outlet
• Connect flow lines B and C to the top connectors (white striped flow line on top)
• Connect exhalation valve line D to the bottom connector
• Connect to the valve, to the flow sensor, and then to your mask or tracheostomy tube
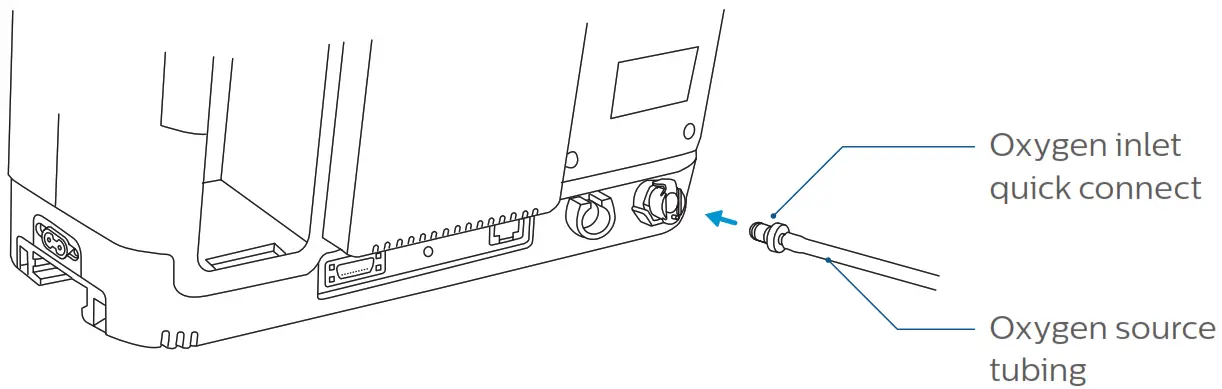
- Connect your oxygen supply
If you have been prescribed supplemental oxygen, connect the oxygen source to the oxygen inlet located at the back of the ventilator.
Turn on the oxygen source to the prescribed flow rate.*
 If you have a single tube, you simply need to connect the tube to the air outlet. An exhalation port will need to be connected directly to your tracheostomy tube or mask (unless your mask already has an integrated leak*).
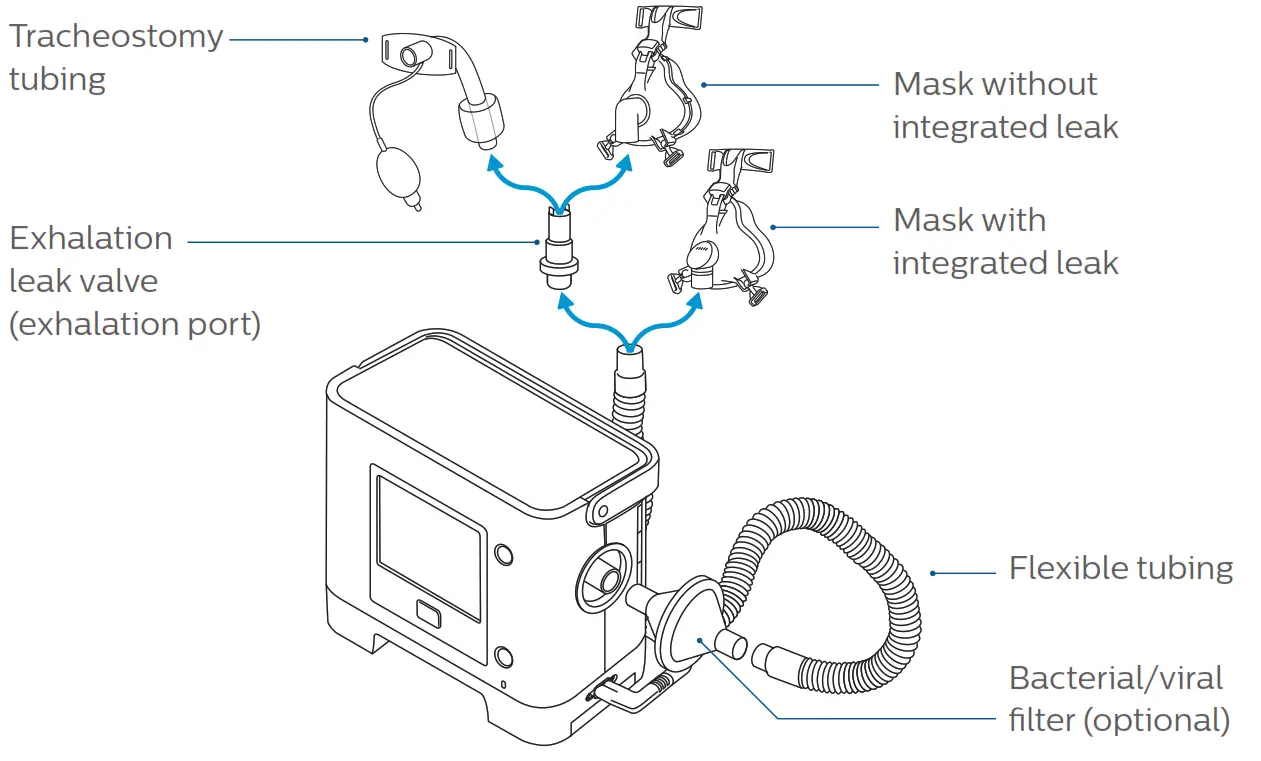 Active circuit
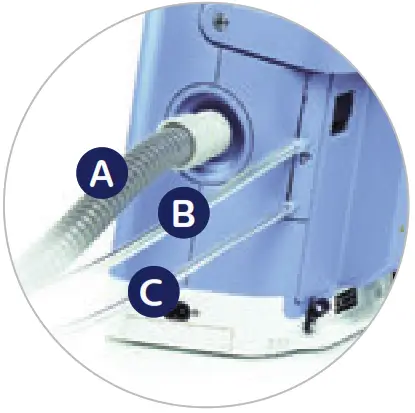 If using the circuit with a valve:
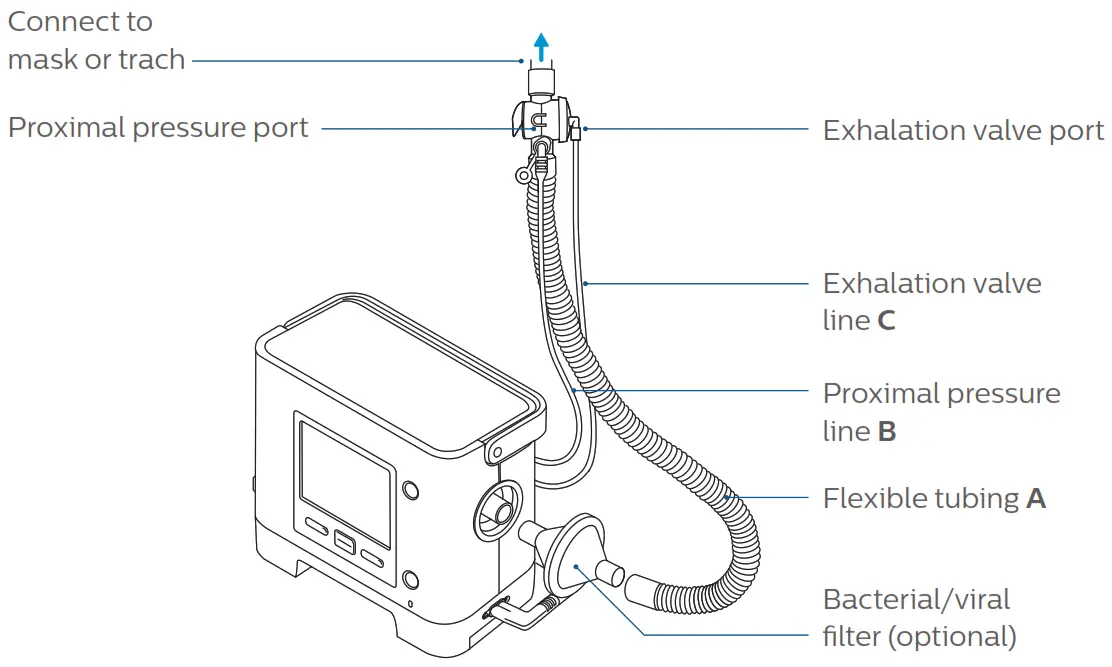 Active flow circuit
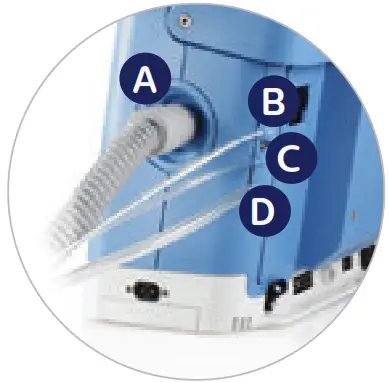 If using the valve circuit with flow sensor:
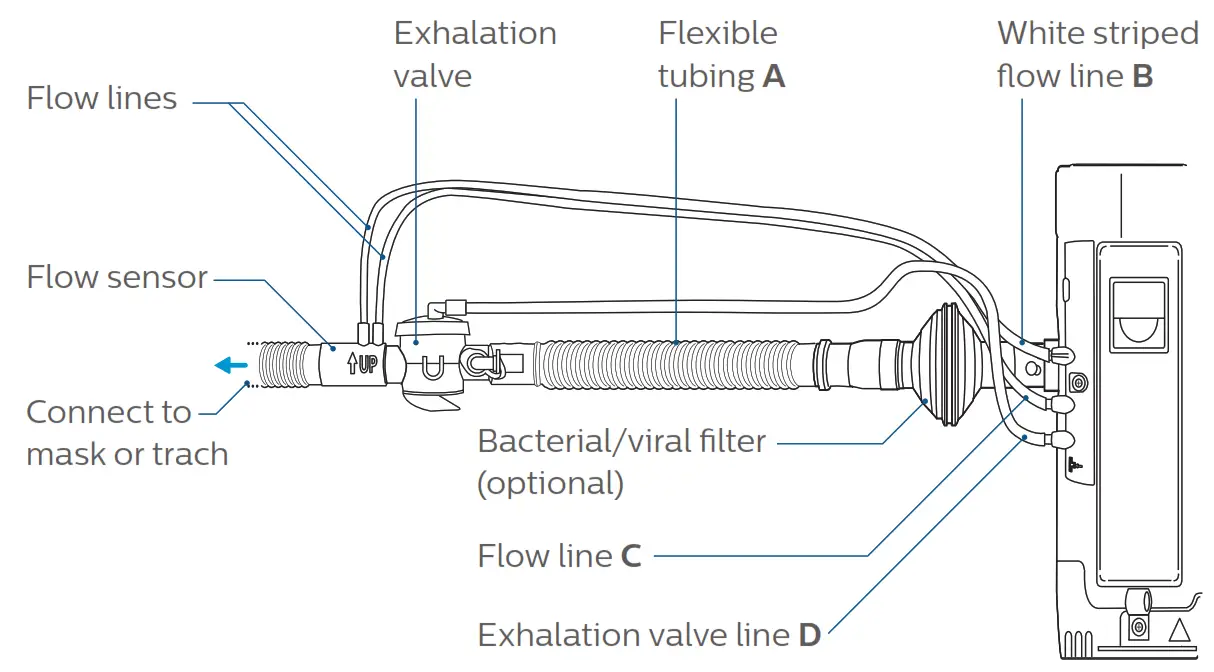
Getting started
To start your ventilation
- Press the on/off
 key to start ventilation.
 - Always check the power supply.
Make sure the internal battery is charged and the detachable battery is at least partially charged, or plug the ventilator to AC power.

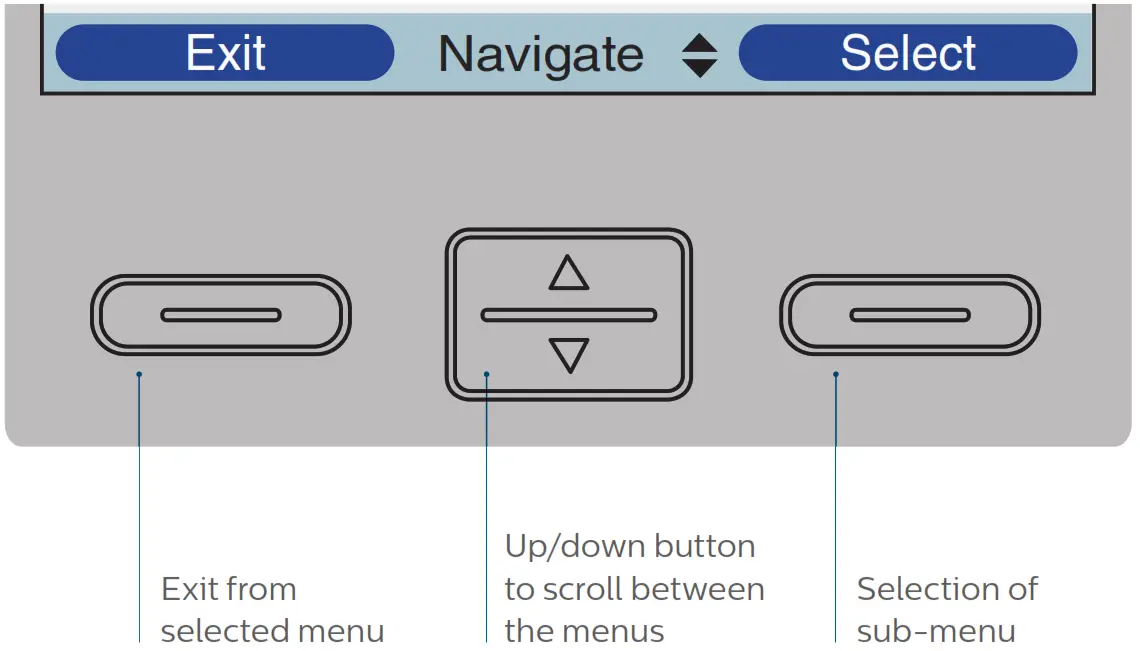
To navigate between the different menus
- Press
 to go back to main screen.
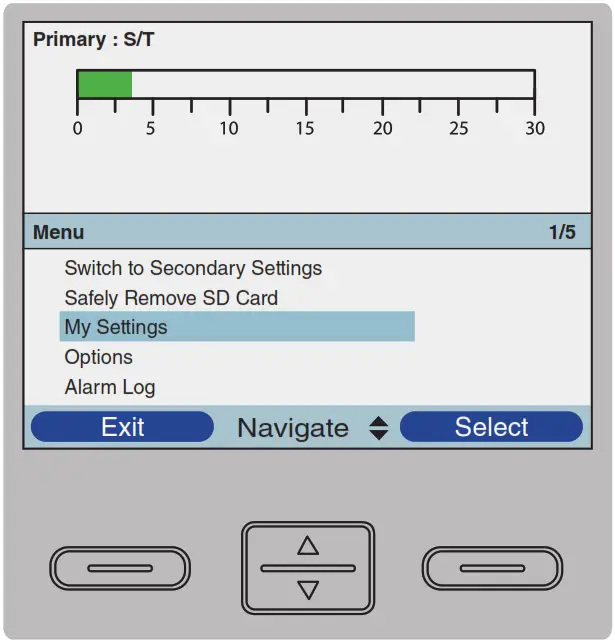
 - Primary: S/T Scroll up or down
 to go through sub-menus or change settings.
 - Press
 to enter a sub-menu and confirm settings.
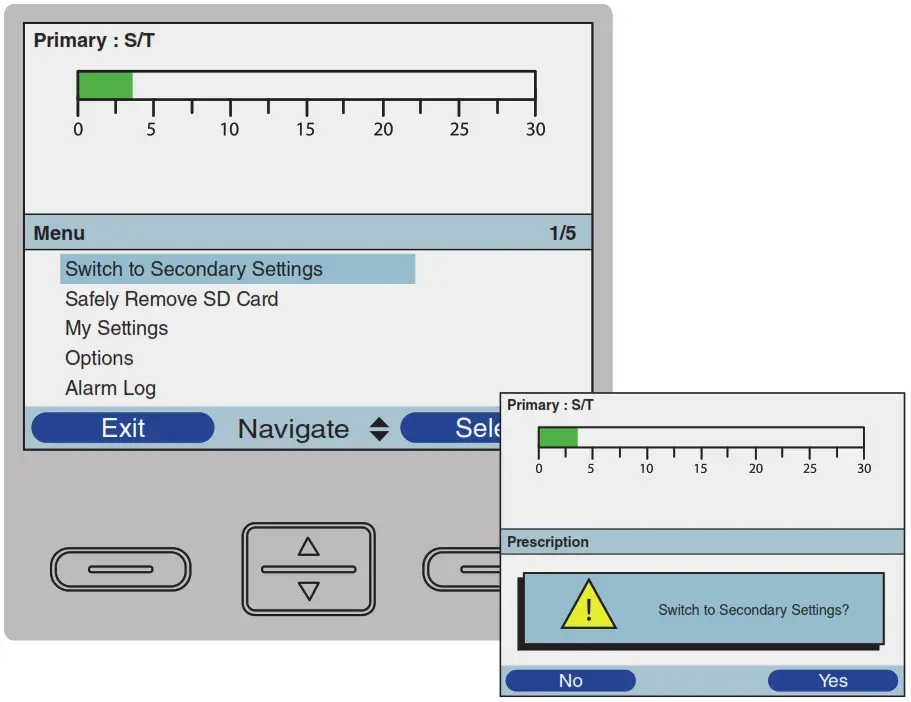
Change settings
To switch to secondary settings
- If you have a dual prescription*, navigate to “switch to primary/secondary settings” to switch from one ventilation mode to another.
- Confirm your selection when prompted.

To modify my settings
- The “My Settings” sub-menu gives you access to comfort settings.*
 * Do not modify comfort settings without the advice of your clinician.
Configure your ventilator
To modify the options of your ventilator
The Options menu allows you to configure your Trilogy according to your needs and preferences.
- Alarm volume can be set to loud or soft.
- Keypad lock allows you to disable the front keys panel during operation to avoid inadvertently changing the settings when the unit is on.
- Keypad backlight can be enabled or disabled.
- LCD brightness can be set from dim (1) to bright (10).

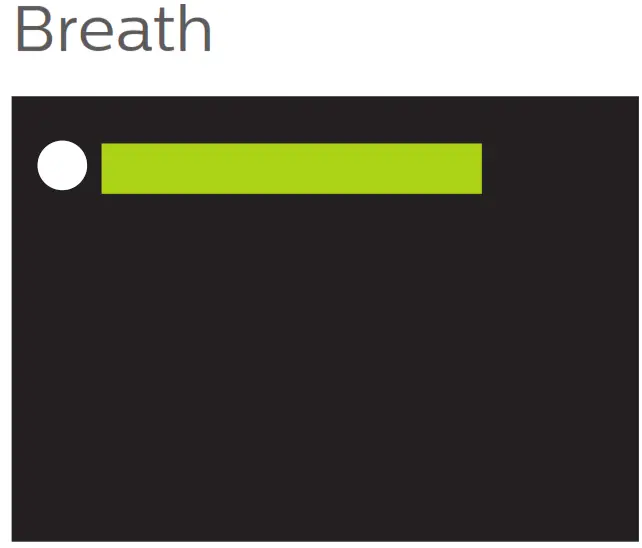
- Screen saver (active after 5 minutes of no keypad activity):
 – Off (no screen saver)
– Breath (only the bar graph appears, as shown here)
– Black (black screen)
– Dim (dimmed screen)

 – Off (no screen saver)
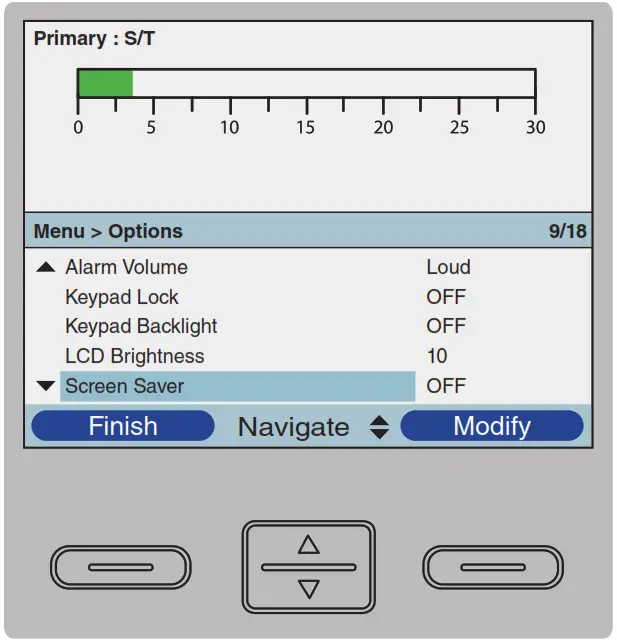
SD card
To remove your SD card
If your homecare provider or clinician asks you to send your SD card to review your therapy, carefully follow the next steps:*
- Navigate through the menu to “safely remove the SD card”.
- Confirm your selection when prompted.

- Open the door at the left side of the ventilator and remove the SD card.
- Place the SD card in a protected mailer and return to your homecare provider or clinician.

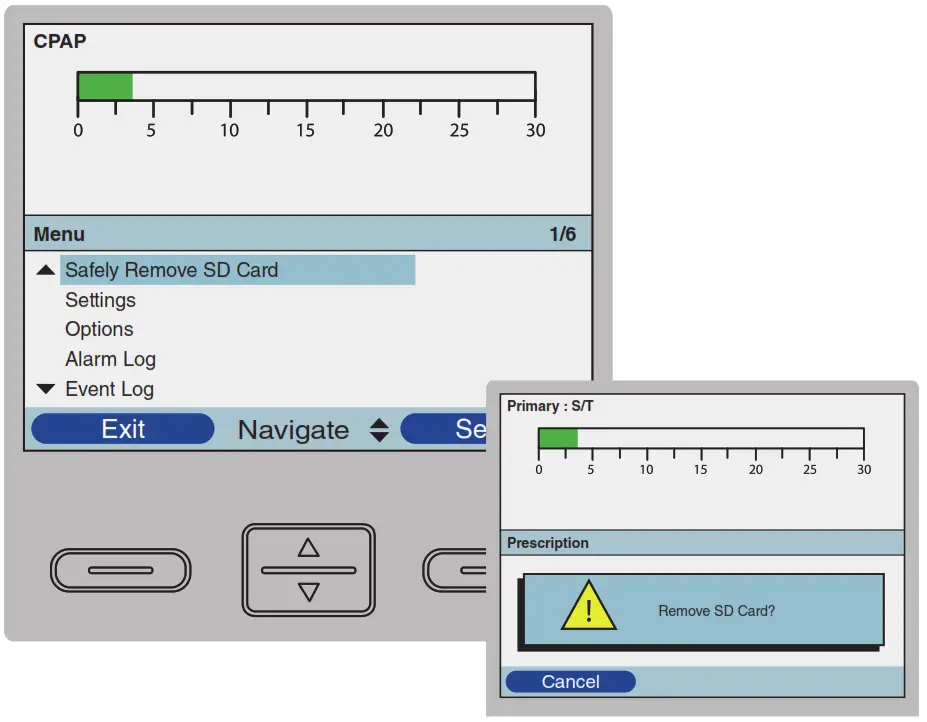
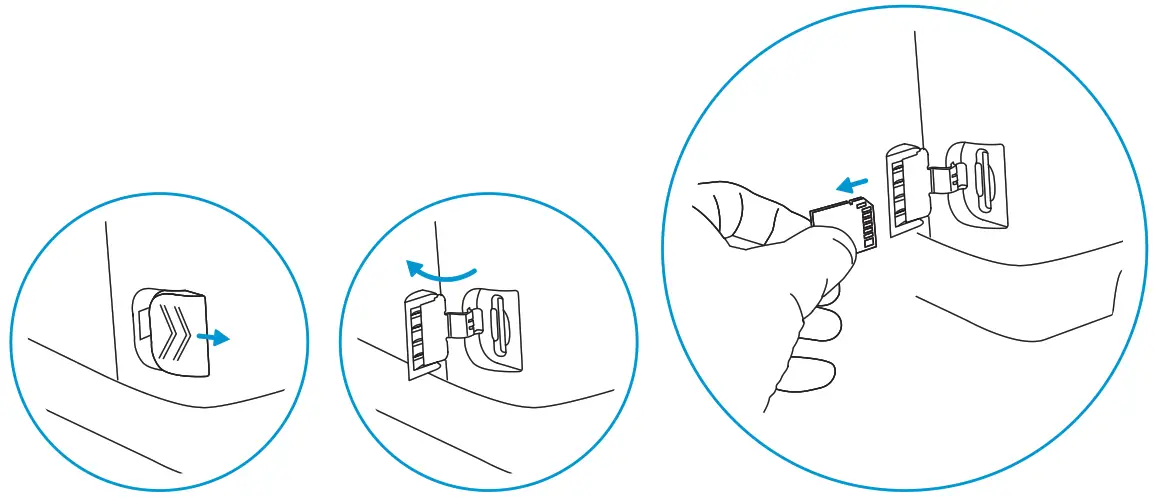
* A SD card must be in the device at all times to prevent data loss.
Cleaning
To clean your Trilogy
Make sure the device is unplugged before cleaning it.
- Use a damp cloth and one of the following cleaning agents to clean the front panel and exterior of the device:
– Mild detergent
– 70% Isopropyl alcohol
– DisCide towelettes
– 10% Chlorine bleach solution - Do not allow any liquid to drip into the ventilator case or detachable battery pack.
- After cleaning, use a soft, dry cloth to remove any residual cleaner.
- Use extra care when cleaning the display as abrasive cleaners can scratch the display.
- Allow the device to dry completely before plugging in the power cord.
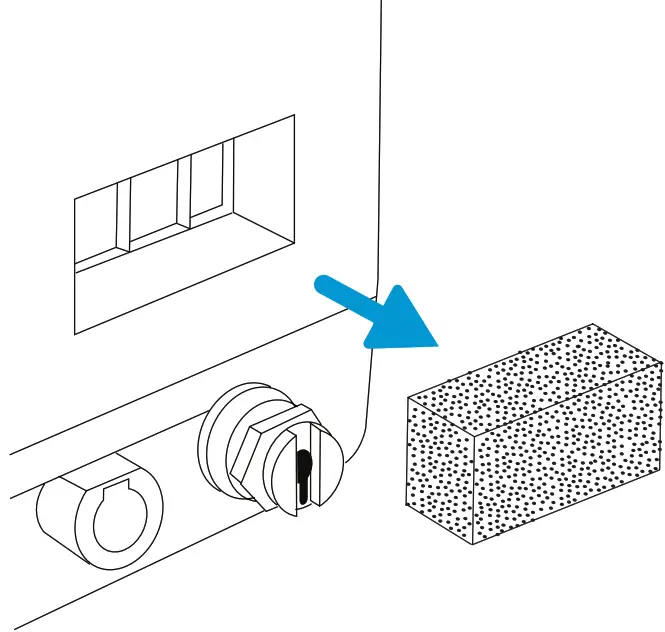
Caring for your filter
- Remove the filter from the enclosure.
- Examine the filter for cleanliness and integrity.
- Wash in warm water with a mild detergent.
- Rinse thoroughly to remove all detergent residue.
- Allow the filter to air dry completely before reinstalling it.
- If the foam filter is torn or damaged, replace it.

Alarms
To silence alarm, press alarm indicator/audio pause button ![]() or press left (reset) button to reset alarm.
or press left (reset) button to reset alarm.
| Screen display or error | User action |
| Loss of power Device shuts down | Press start/stop button. If using AC power, try plugging device into alternate AC power source. If loss of power continues, connect a fully charged detachable or external battery to the device or connect patient to an alternate source of ventilation while contacting homecare provider or healthcare specialist. |
| Low battery | Switch to an alternate battery, or switch to AC power source and recharge low battery. |
| Ventilator inoperative | Select right button to shut off device and silence alarm. Connect patient to alternate source of ventilation and contact homecare provider or healthcare specialist. |
| Ventilator service required | The machine has to be serviced. Connect patient to alternate source of ventilation and contact your healthcare professional as soon as possible. |
| High temperature, or battery not charging due to high temperature | Make sure tubing is not under any bedding. Check inlet filter and clean or replace it if needed. Make sure cooling vents are not blocked. If the ventilator is running off of the internal or detachable battery, move to a cooler location and/or power the device with AC power or a lead-acid battery. |
| High or low expiratory pressure | Make sure tubing is not kinked or pinched. If alarm continues, clinician should verify patient status. |
| High Vt or low Vt | Press left (reset) button to reset alarm. If alarm continues, clinician should verify patient status. |
| Apnea | If using an active circuit, check proximal pressure line to ensure it is not pinched or has water condensation. If alarm continues, clinician should verify patient status. |
| Check circuit | Check patient circuit to make sure it is set up as your healthcare professional specified (check circuit set-up section). Make sure there is no kinked or pinched tubing. Make sure tubing is properly attached. Make sure all tubing and exhalation devices are clean and free of condensation. If using active exhalation circuit, make sure diaphragm is inserted correctly and is not wrinkled or kinked. |
| Low Circuit Leak | If using a mask with integrated leak port, check to make sure leak holes are not obstructed. If using a mask without integrated leak or a trach, make sure the circuit is correctly set up and the exhalation port is well connected. Make sure exhalation device is clean and functioning properly. |
| Circuit Disconnect | Check breathing circuit and reconnect it if it has become disconnected, check mask seal or tracheostomy connection, or fix the leak. |
| High Internal Oxygen | Disconnect supplemental oxygen from device. Check external oxygen connection; reconnect. If alarm continues, disconnect supplemental oxygen and contact your homecare provider or healthcare specialist. |
If the alarm continues, contact homecare provider or healthcare specialist.
When you hear or see a high priority alarm, respond immediately, as a high priority alarm alerts you to critical issues with the patient’s breathing or the ventilator’s operation. Always look at the patient before attending to the equipment to ensure that he or she is being properly ventilated. When you are sure the patient is stable, turn your attention to the ventilator.
How to reach us
www.philips.com/healthcare
www.philips.com/respironics
[email protected]
| Asia +49 7031 463 2254 Europe, Middle East, Africa +49 7031 463 2254 Latin America +55 11 2125 0744 North America +1 724 387 4000 800 345 6443 (toll free, US only) Philips Respironics 1010 Murry Ridge Lane Murrysville, PA 15668 USA | Philips Respironics Asia Pacific +65 6882 5282 Philips Respironics Australia +61 (2) 9947 0440 1300 766 488 (toll free, Australia only) Philips Respironics Canada +1 724 387 4000 +1 800 345 6443 Philips Respironics China +86 400 828 6665 +86 800 828 6665 Philips Respironics Deutschland +49 8152 93 06 0 | Philips Respironics France +33 2 51 89 36 00 Philips Respironics Iberia +34 91 566 90 00 Philips Respironics Italy +39 039 203 1 Philips Respironics Sweden +46 8 120 45 900 Philips Respironics Switzerland +41 6 27 45 17 50 Philips Respironics United Kingdom +44 800 1300 845 |
![]() © 2017 Koninklijke Philips N.V. All rights reserved.
© 2017 Koninklijke Philips N.V. All rights reserved.
Specifications are subject to change without notice.
Trademarks are the property of Koninklijke Philips
N.V. or their respective owners.
RRDPGH RB 5/23/17 MCI 4107936 PN 1134797


