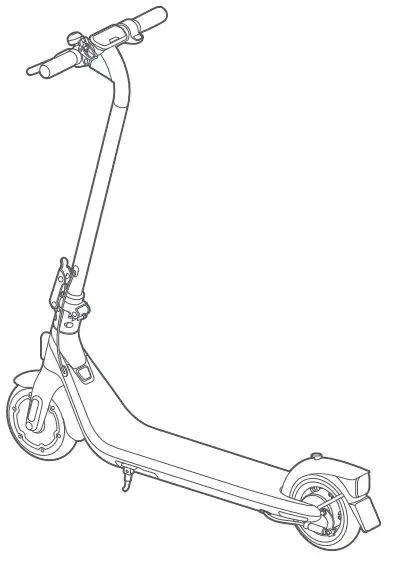
ninebot E2 KickScooter
 Welcome
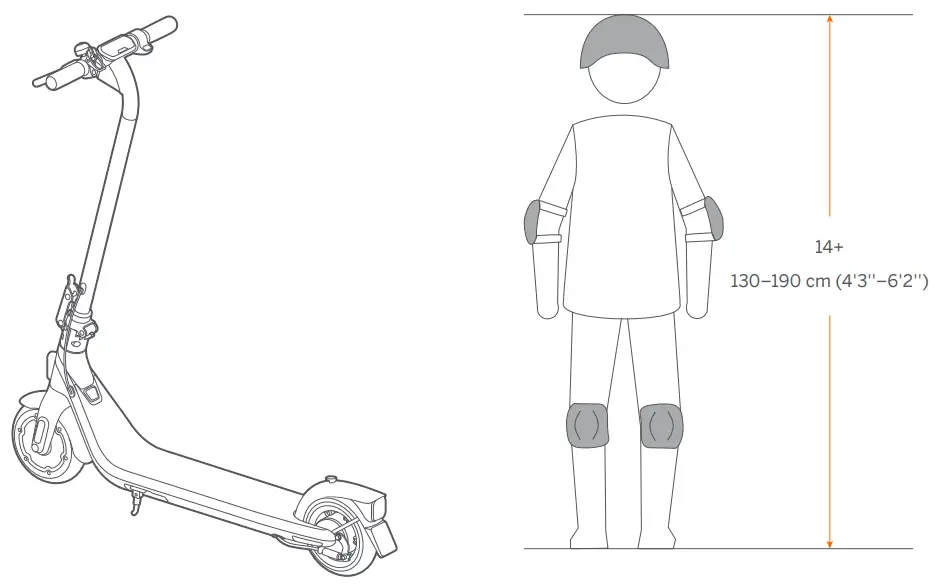
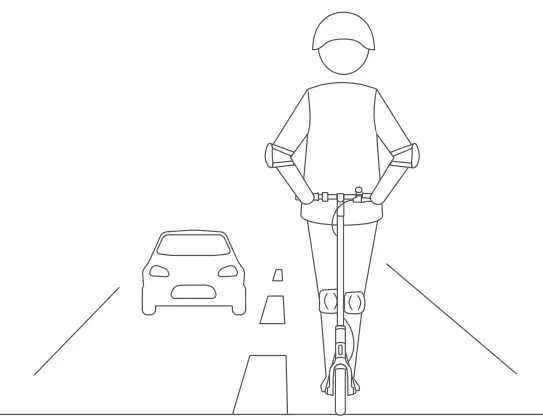
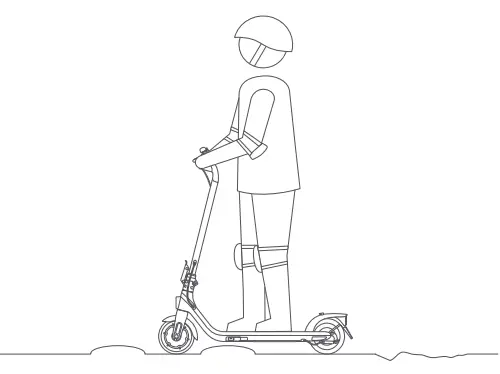
![]() Always wear a helmet, elbow pads and knee pads when riding.
Always wear a helmet, elbow pads and knee pads when riding.
Packing List
For 051401D only
Accessories
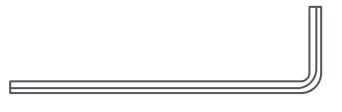
- 5 mm (3/16) L-shaped Wrench × 1

- Battery Charger


 Assembly
 Assembly
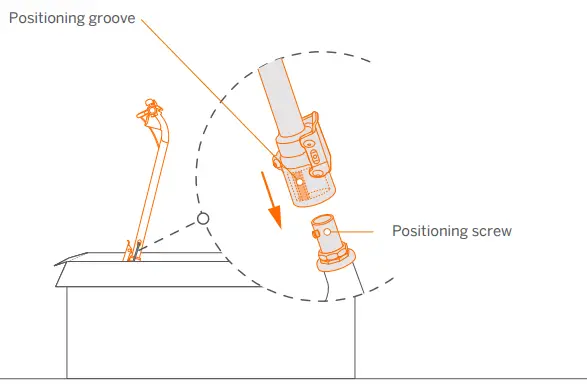
- Align the positioning groove with the positioning screw, then slide the screw into the groove and insert the stem to the bottom.

- Place the scooter on the ground and unfold the kickstand.

- Tighten the two screws alternately several times.
*Once tightened, attempt to wiggle the handlebar to ensure it is safely secured.
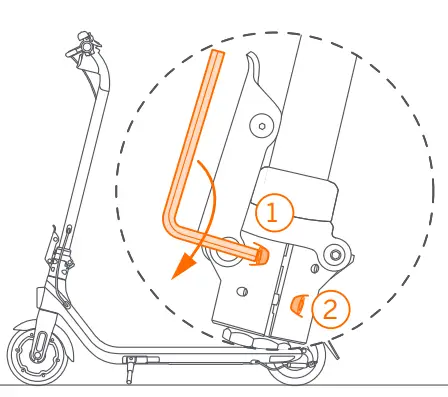
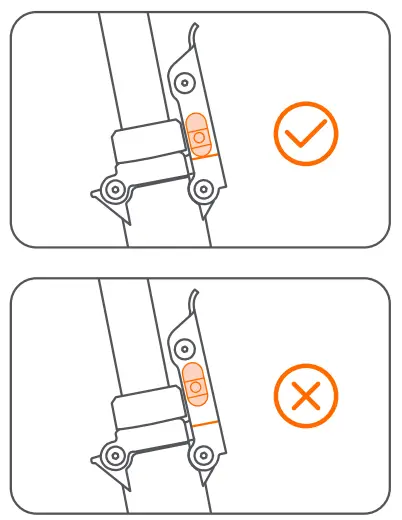
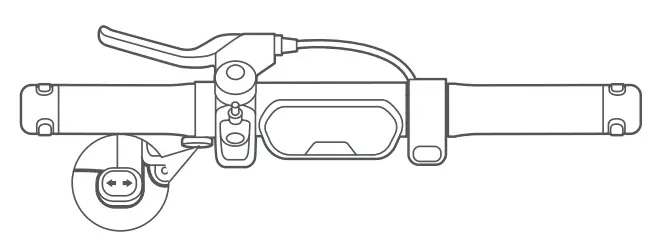
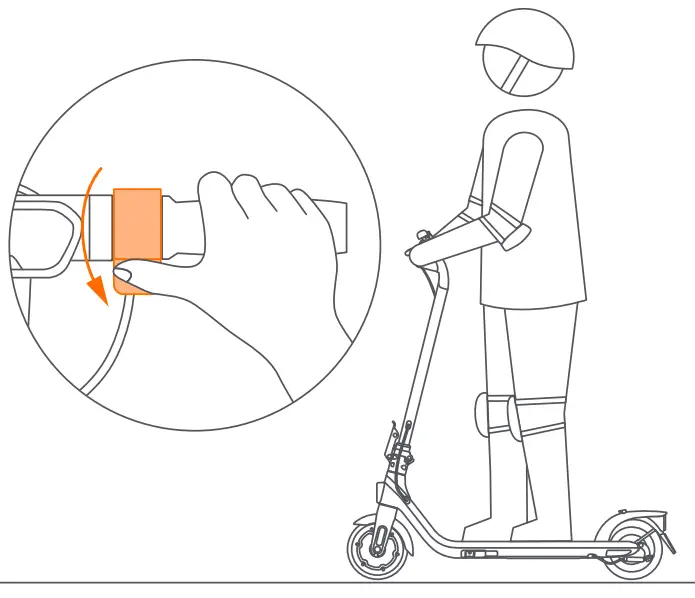
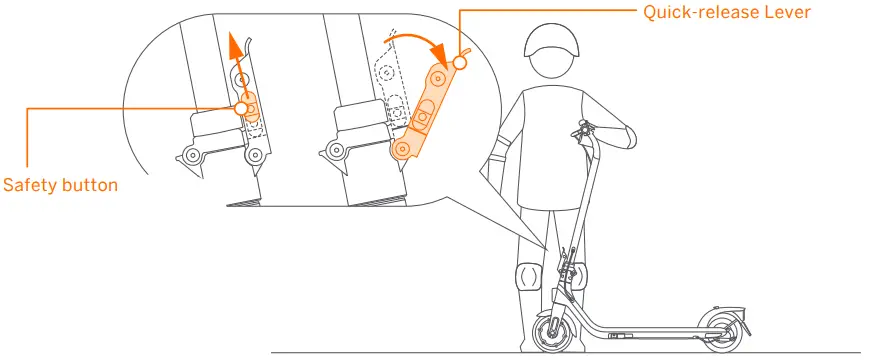
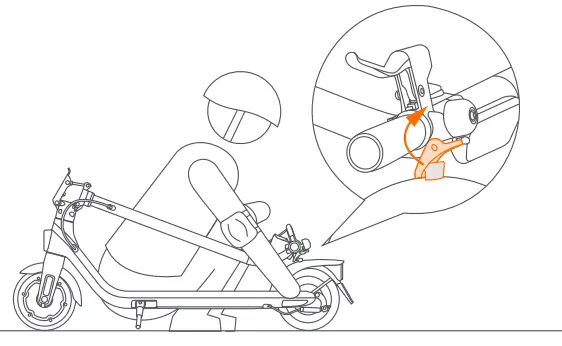
Open: Push and hold the safety button to the top and then open the quick-release lever.
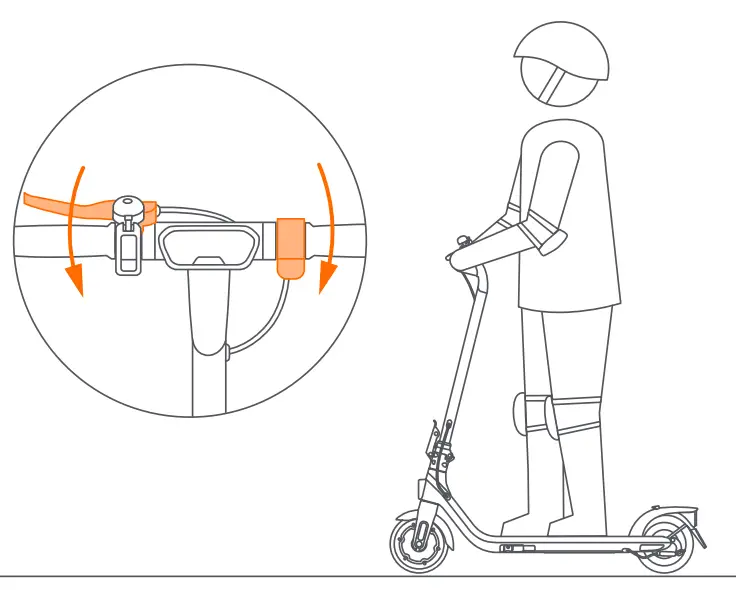
Close: Firmly press down the quick-release lever until the safety button reaches the returning mark
WARNINGS
![]() Power off the scooter before assembly. The brake cable should not wrap around the stem.
Power off the scooter before assembly. The brake cable should not wrap around the stem.
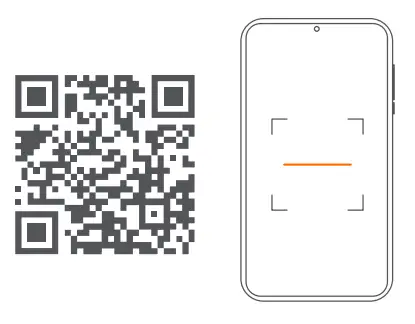
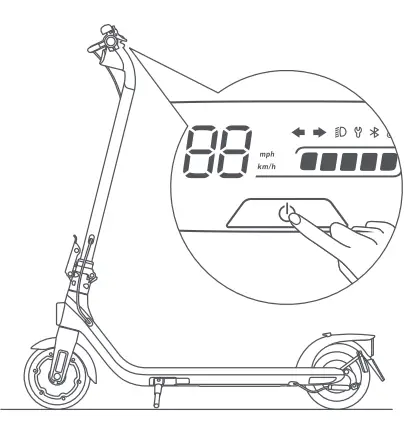
 Activation
 Activation
- Power on the KickScooter. * An deactivated KickScooter will keep beeping when turned on, and its speed is limited to 10 km/h (6.2 mph).

- Scan the QR code to download the Segway-Ninebot app to register or log in.

 Additional and/or supplemental warnings and instructions on how to use the product are also in the Segway-Ninebot app, and such information and/or notice is part of the user materials that an user shall know and learn.
 - Click “Search vehicle” and pair with your KickScooter.

- Follow the instructions and watch the Riding Safety video.

- Click to activate the KickScooter.
* When the scooter is activated, the speed mode is set to D mode by default.
 Additional and/or supplemental warnings and instructions on how to use the product are also in the Segway-Ninebot app, and such information and/or notice is part of the user materials that an user shall know and learn.
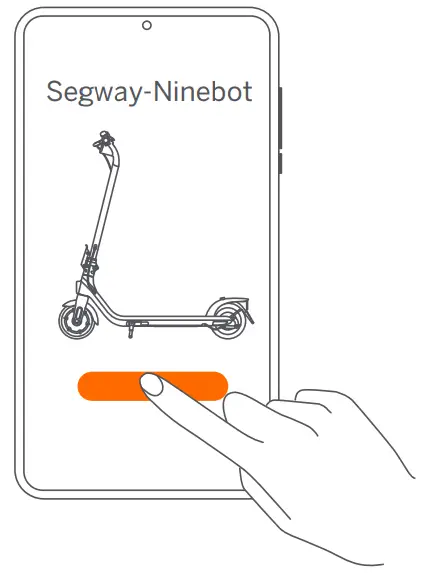


 App Features
 App Features
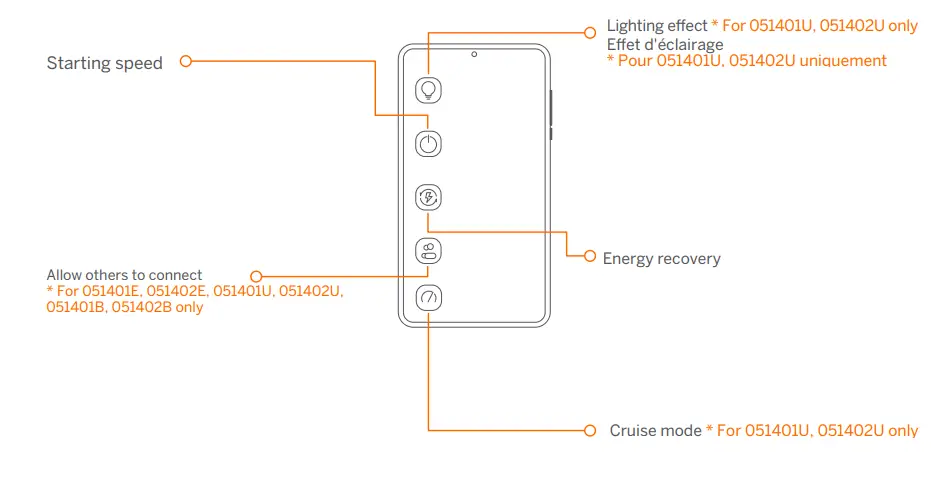
Please customize these features via the Segway-Ninebot app.
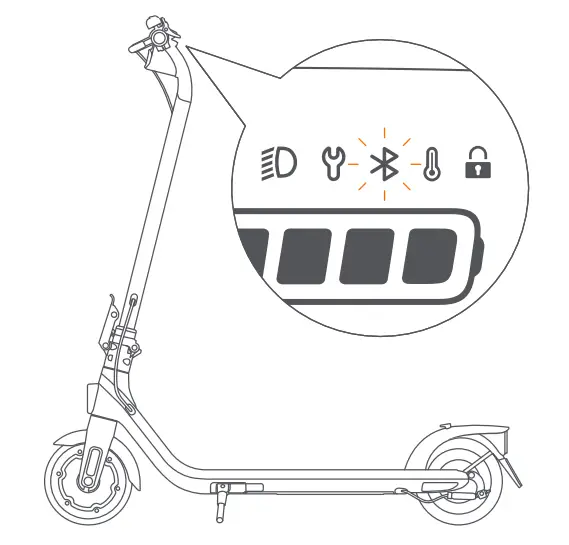
 Charging
 Charging
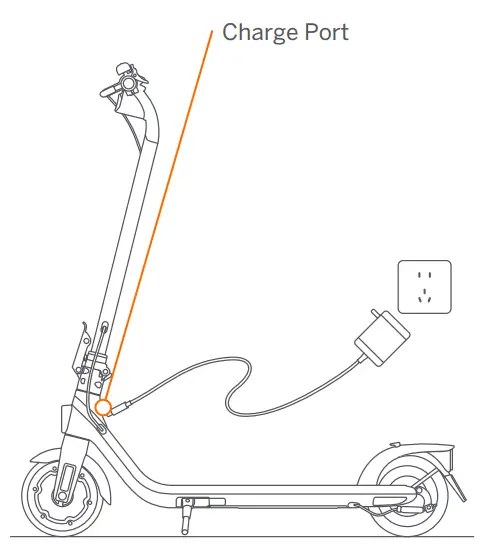
Your KickScooter is fully charged when the LED on the charger changes from red (charging) to green (trickle charge)
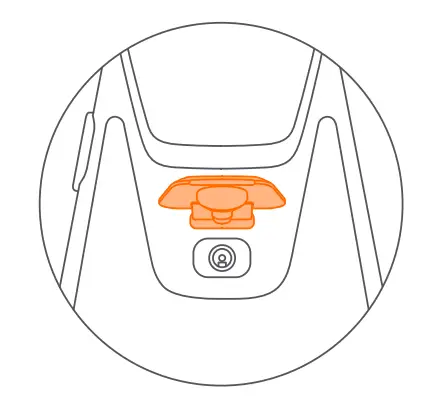
- Open the charge port cover

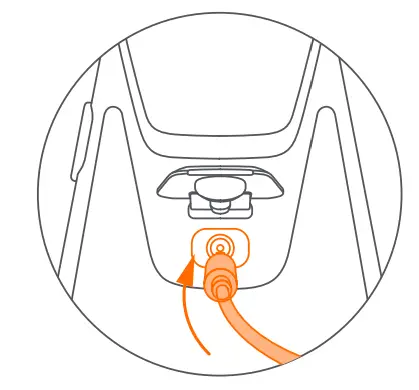
- Insert the charge plug.

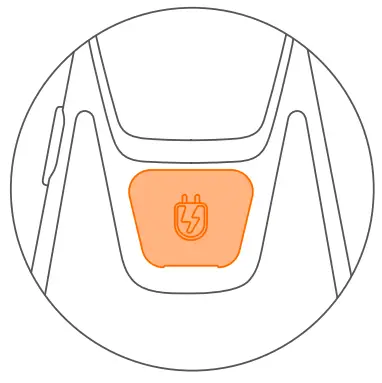
- Close the charge port cover when finished.

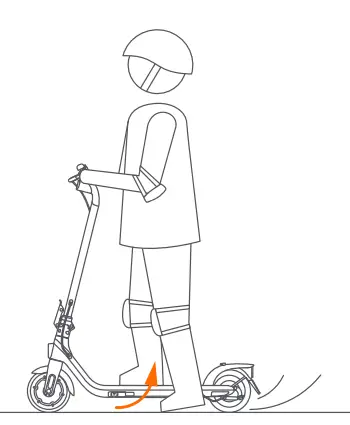
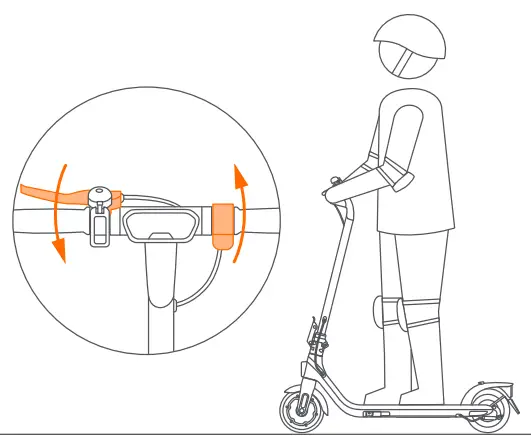
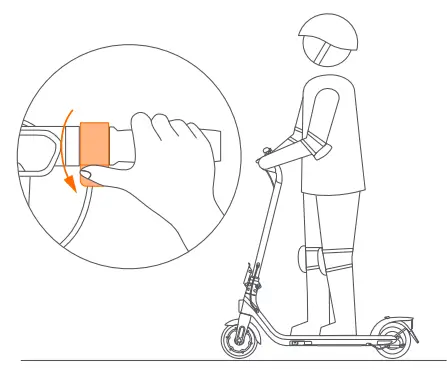
 How to Ride
 How to Ride
- Power on the KickScooter.

- Tuck in the kick stand. Stand on the footboard with one foot and push off with the other foot to start gliding.

- Slow down by releasing the throttle and squeezing the brake lever.

- Put both feet on the footboard and stand stably. Press the throttle to speed up when you are balanced. Note: For your safety, the motor will not engage until the KickScooter reaches 3 km/h (1.9 mph).

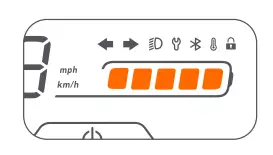
- Toggle the direction indicator switch to the left/right when turning left/right. Toggle the switch back to the middle position to turn off the direction indicators.
* For 051401D only.
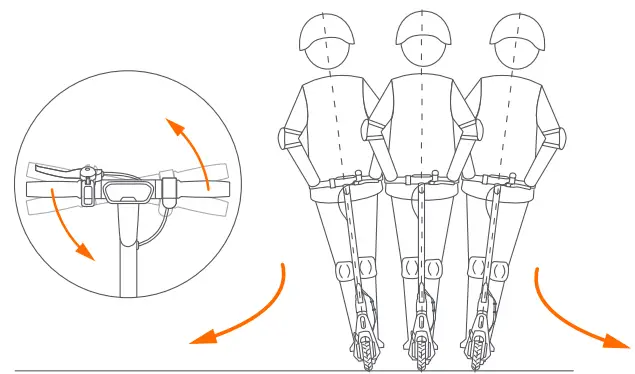
- Slightly turn the handlebar to turn left/right.

- Put down the kickstand when you are getting off the KickScooter.


 Cruise Mode
 Cruise Mode
Enabling Cruise mode via Segway-Ninebot app. When the speed > 3.1 mph (5 km/h), press and hold the throttle and remain the current speed for more than 5 seconds. * A beep will be sounded when the scooter enters cruise mode. You can release the throttle and the scooter will cruise at the current speed.
Press the throttle or squeeze the brake lever to exit the cruise mode.
![]() If the cruise control function is engaged and activated, releasing the throttle will not reduce speed. please press the throttle to inactivate the cruise control or squeeze brake lever to stop.
If the cruise control function is engaged and activated, releasing the throttle will not reduce speed. please press the throttle to inactivate the cruise control or squeeze brake lever to stop.
 WARNINGS
![]() DO NOT ride on public roads, motorways, or highways unless the local laws or regulations have exceptions.
DO NOT ride on public roads, motorways, or highways unless the local laws or regulations have exceptions.
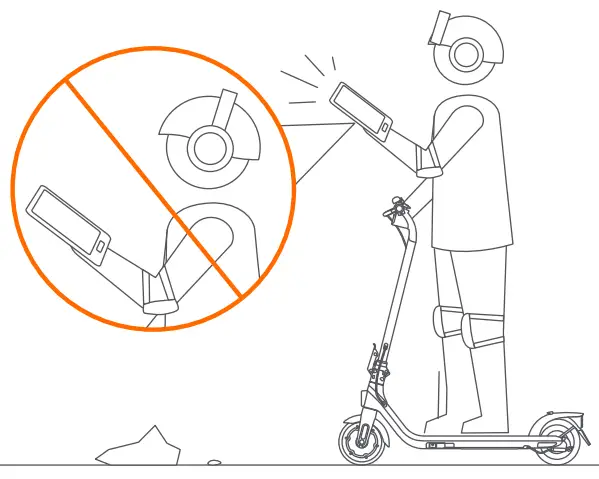
![]() DO NOT use a mobile phone or wear earphones when riding the KickScooter.
DO NOT use a mobile phone or wear earphones when riding the KickScooter.
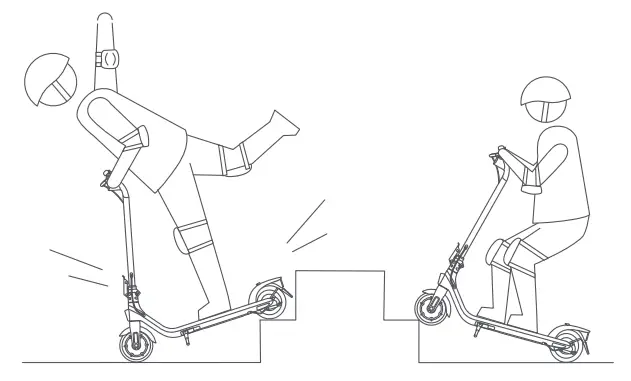
![]() DO NOT ride up and down stairs or jump over obstacles.
DO NOT ride up and down stairs or jump over obstacles.
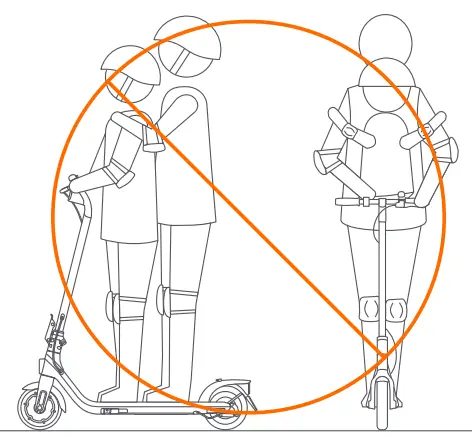
![]() DO NOT carry any passengers.
DO NOT carry any passengers.
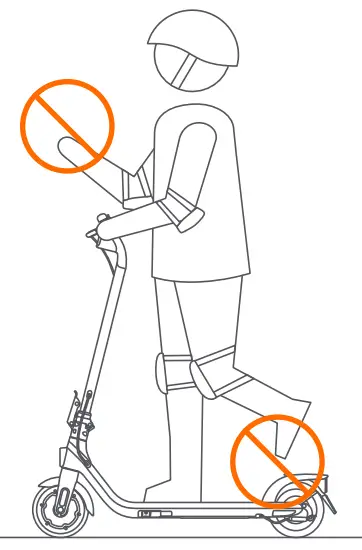
![]() DO NOT ride the scooter with only one foot or one hand.
DO NOT ride the scooter with only one foot or one hand.
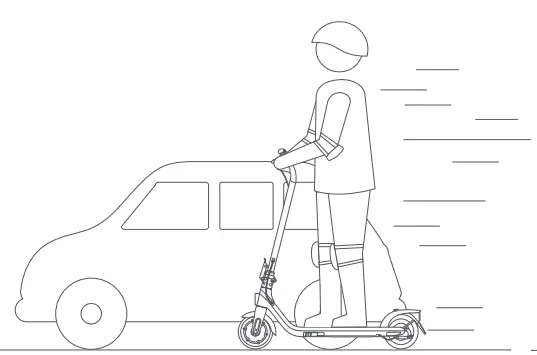
![]() DO NOT overtake
DO NOT overtake
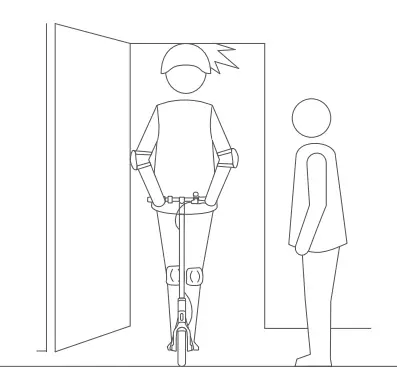
![]() Watch your head when passing through doorways
Watch your head when passing through doorways
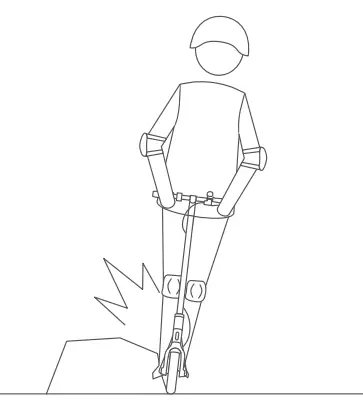
![]() Avoid contacting obstacles with the tire/wheel
Avoid contacting obstacles with the tire/wheel
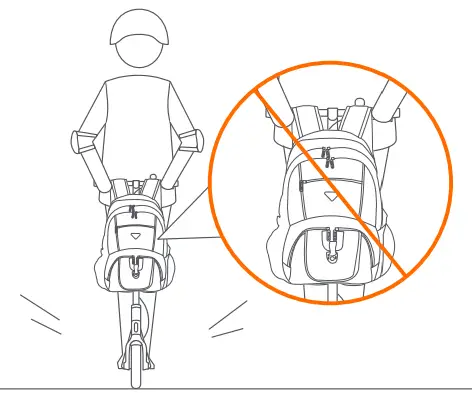
![]() DO NOT carry heavy objects on the handlebar
DO NOT carry heavy objects on the handlebar
![]() Keep your speed between 3.1–6.2 mph (5–10 km/h) when you ride through speed bumps or other uneven surfaces.
Keep your speed between 3.1–6.2 mph (5–10 km/h) when you ride through speed bumps or other uneven surfaces.
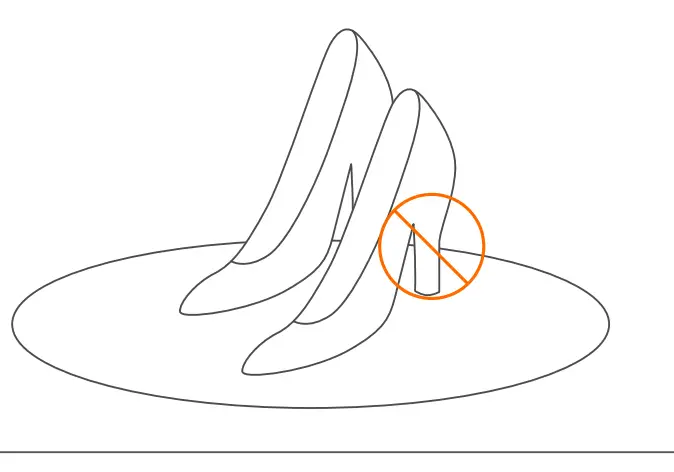
![]() DO NOT wear high heels when riding
DO NOT wear high heels when riding
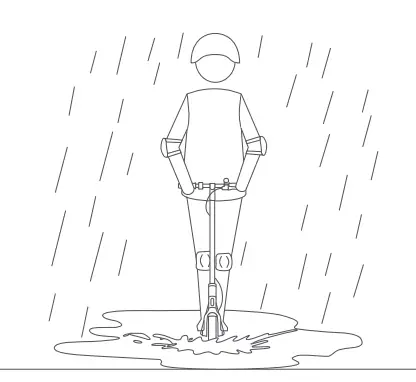
![]() DO NOT ride the scooter in the rain. DO NOT ride through puddles or other obstacles.
DO NOT ride the scooter in the rain. DO NOT ride through puddles or other obstacles.
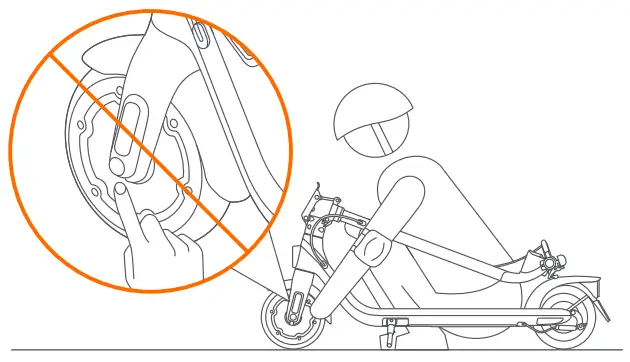
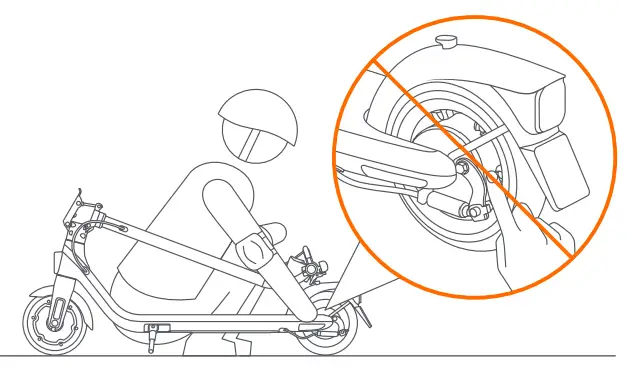
![]() DO NOT touch the hub motor after riding because it can get hot.
DO NOT touch the hub motor after riding because it can get hot.
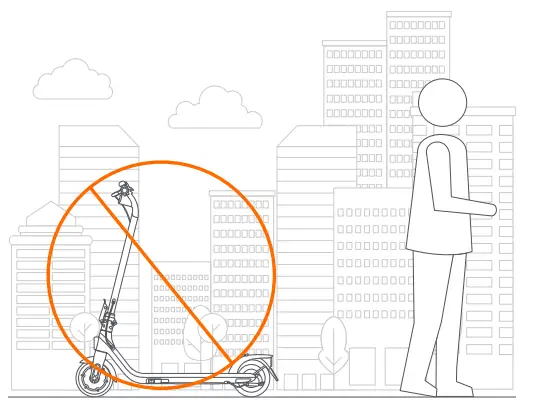
![]() DO NOT park in the open air or outdoors for a long time.
DO NOT park in the open air or outdoors for a long time.
![]() DO NOT touch the drum brake after riding
DO NOT touch the drum brake after riding
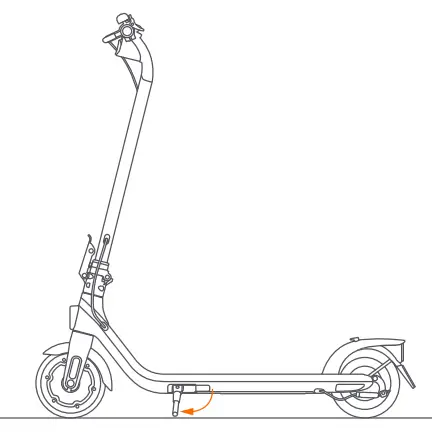
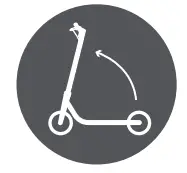
 Folding
 Folding
- Lift the safety button and open the quick-release lever.

- Fold the stem.

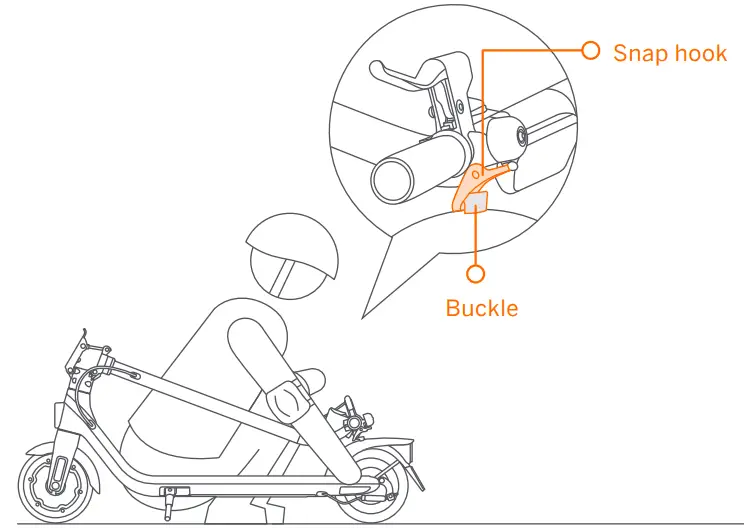
- Align and fasten the snap hook and the buckle.


 Carrying
 Carrying
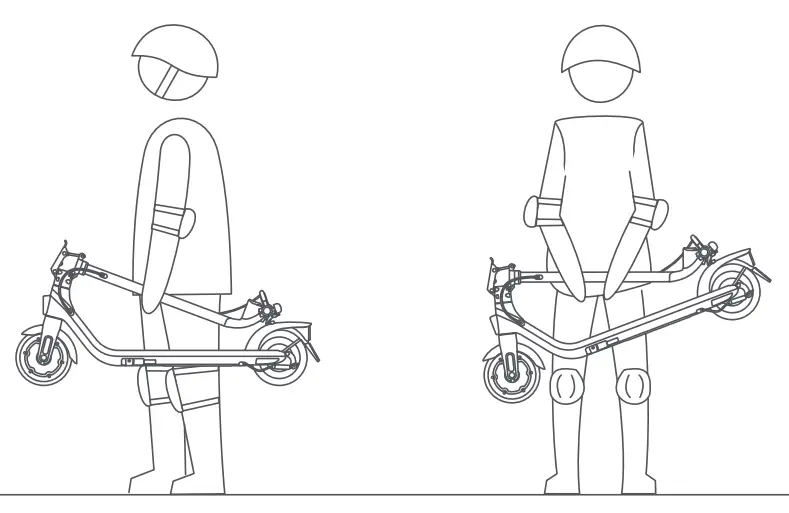
Lift by the stem to carry
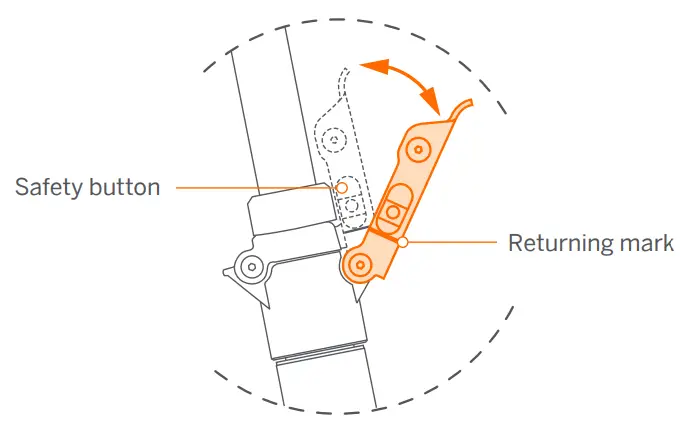
 Unfolding
 Unfolding
Disengage the snap hook from the buckle.
Unfold the stem and close the quick-release lever. Make sure the safety button reaches the returning mark.
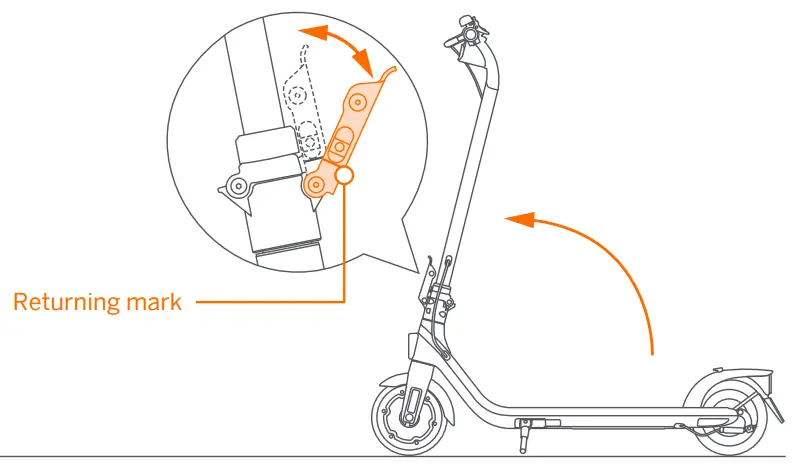
Make sure the safety button is in the locked position before riding!