![]()
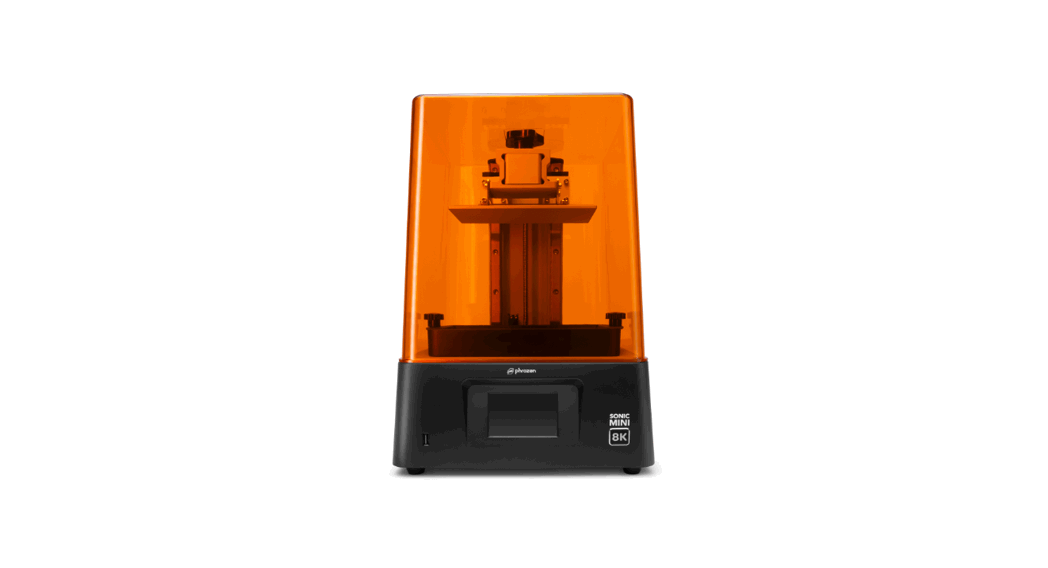
SONIC MINI 8K
5-1-1-1-1-2. Sonic Mini 8K 3D Printer
User Guide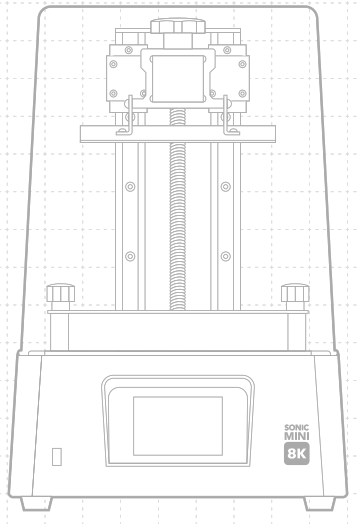
5-1-1-1-1-2. Sonic Mini 8K 3D Printer
Dear User,
Thank you for joining us. Please read the Sonic Mini 8K manual thoroughly and follow the instructions step by step to get the best printing experience.
Introduction
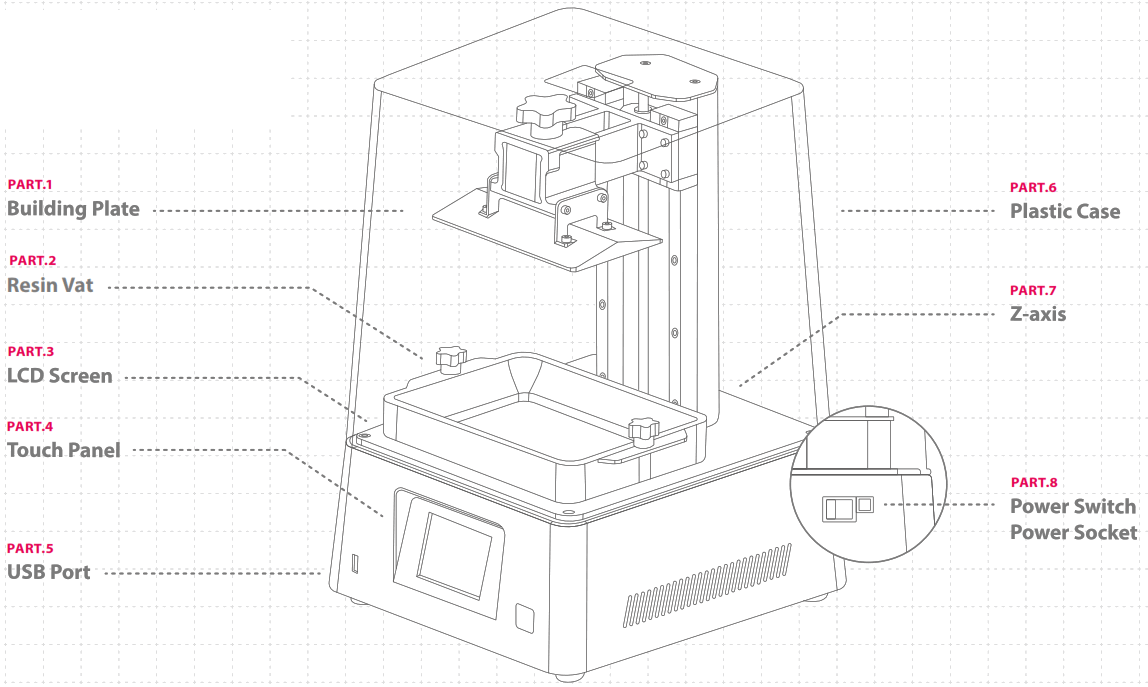
Printer Parts
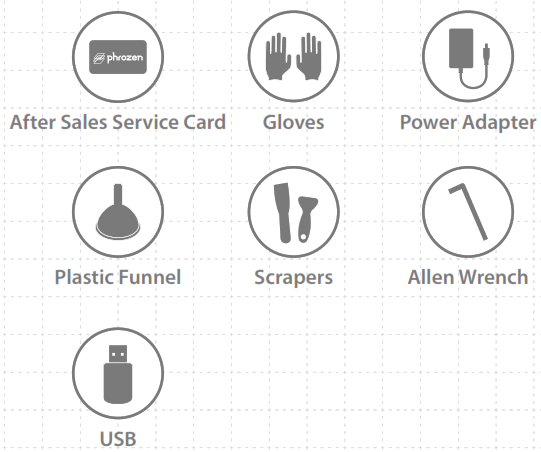
The Toolbox
Operation
| System | Phrozen OS |
| Operation | 3.5 inch Touch Panel |
| Slicer Software | CHITUBOX V1.9.0 or above |
| Connectivity | Front USB Port |
Printing Specifications
| Technology | Resin 3D Printer – LCD Type |
| Light Source | Linear Projection LED Module |
| XY Resolution | 0.022 mm |
| Layer Thickness | 0.01-0.30 mm |
| Max Printing Speed | 80 mm / hr |
| Power Requirement | 100-240VAC ; 50-60Hz |
Hardware Specifications
| Printer Size | L29 x W29 x H42 cm |
| Printing Volume | L16.5 x W7.2 x H18 cm |
| Printer Weight | 13 kg |
All specifications have been tested in a laboratory. Please note that certain specifications may be subject. change without prior notice.
Key Notes Before Start
Stable Printing Environment
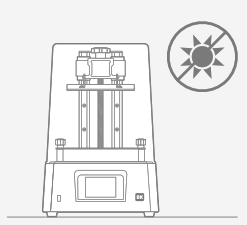 Store your 3D printer in a dry and ventilated environment. Avoid exposure to direct sunlight. Make sure to place the printer on a flat surface.
Protective Measures 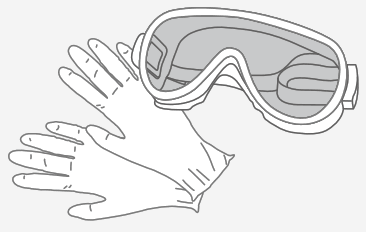
While printing and using resin, please make sure to wear gloves, masks, protective goggles, and long-sleeved clothing.
Maintenance
Clean the Z-axis
First, dry clean the Z-axis T-screw. Then apply a thin layer of general lubricant on it, so that it whirls smoothly.
Clean the 3D Printer
Use sanitizing alcohol and tissue paper to carefully clean the printer, the resin vat, and the building plate. 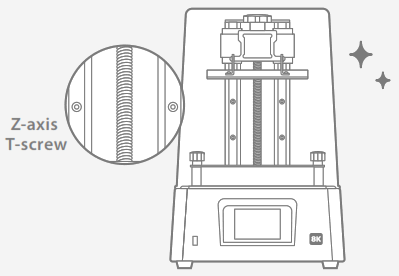
Prepare Your 3D Printer
For first-time use, please thoroughly follow the steps down below to calibrate your Z-axis and conduct the LCD Test so that your 3D printer is ready.
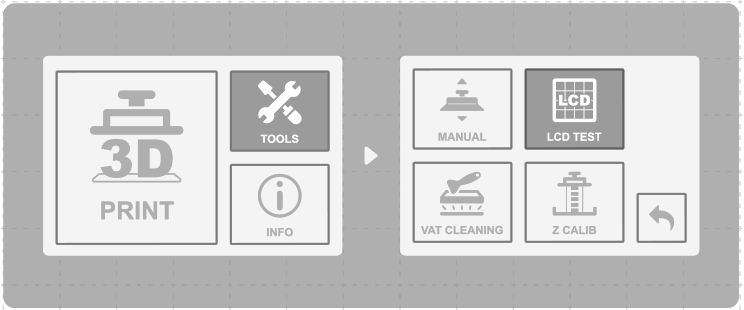
LCD Test
- Click on TOOLS. Then click on LCD TEST.
- Check to see if the LCD screen displays the same image as seen on the touch panel.
- When the LCD screen clearly displays the image, the LCD TEST is complete.
 “Please refer to the actual printer operation based on the touchscreen display.
 “Please refer to the actual printer operation based on the touchscreen display.
Z-axis Calibration
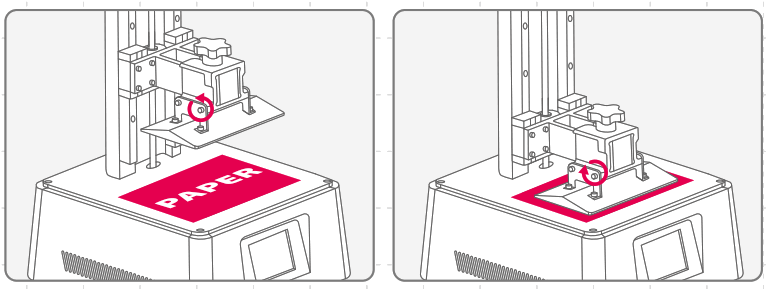
- Click on TOOLS. Then click on Z CALIB.
- Remove the resin vat. Place a piece of A4 paper on the LCD. Unscrew 4 screws on the sides of the building plate.
- Wait until the building plate touches the LCD screen.
- Then tighten all 4 screws. Tug the paper to make sure it can’t be moved easily. Click DONE to finish calibration.
- Wait until the building plate retracts to the TOP. Z-axis Calibration is now complete.
Perform the Printing Test
After conducting the Z-axis Calibration and LCD TEST, let’s move on to the Printing Test.
Prepare Your 3D File
- On your computer, import the STL file to CHITUBOX V1.9.0 or above.
- Click on Settings to add a new printer “Sonic Mini 8K.” Set your Print Parameters according to the resin you will use.
- Slice the 3D file and save it as CTB file, then import it onto your USB.

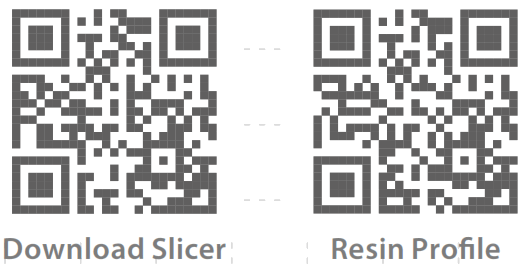
https://lihi1.com/8UT0T https://lihi1.com/P81CE Want to have the best print performance? Then check out our recommended resin profiles now.
Printing Test
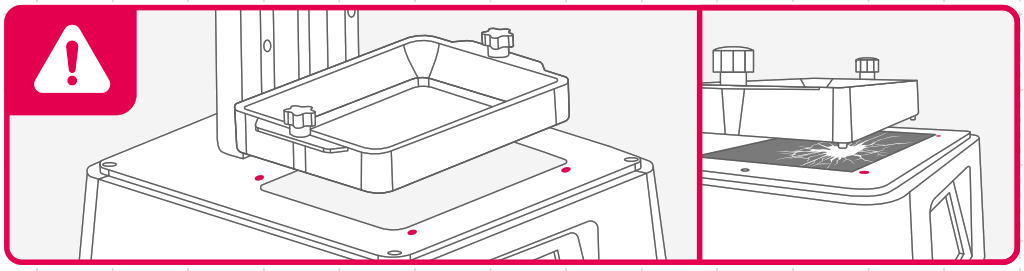
- Please make sure the bottom screws of the resin vat are perfectly aligned with the platform grooves, then tighten the screws on both sides. When placing the resin vat, please pay attention to the bottom screws and DO NOT damage the LCD screen.
- Shake the resin bottle for 1 minute. When pouring, make sure the resin does not exceed the max fill line on the resin vat.
- Insert your USB into Sonic Mini 8K. Choose the file and click GO to begin printing.
- Keep the plastic case closed during printing to prevent exposure to excessive UV light.
- After printing, carefully remove the building plate and then tilt and place it onto a desk or a flat surface. Use a metal scraper to carefully remove your print.
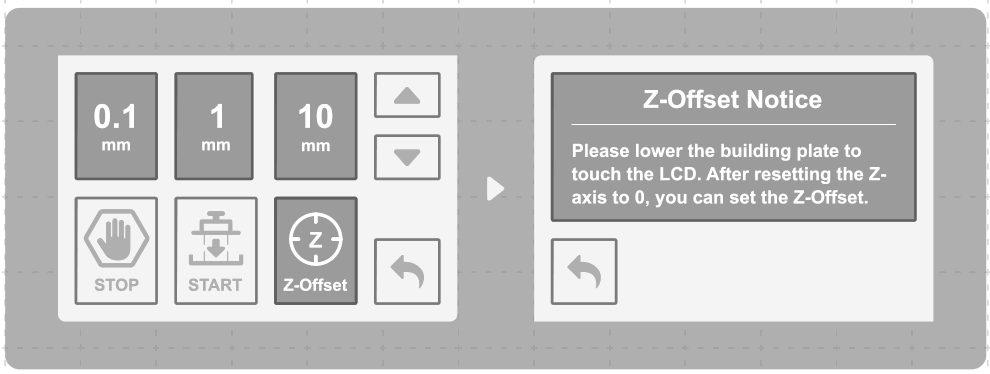
Use the Z-Offset Function to Reposition the Z-axis
After calibrating the Z-axis, you can use this function to modify your Z-axis zero position, if needed. Use this function if you are looking to print flat on the building plate or if the resin flow is slow.
Click the following buttons on the touchscreen: TOOLS > MANUAL > START > 0.1mm up or down RESET > SET
Tips: If you restart the printer, the device will be reset to its original settings.
 After-sales service & warranty
- Phrozen offers a one-year warranty for all parts, excluding consumable components such as the LCD screen and FEP film.
- Sonic Mini 8K LCD screen is covered under a 3-month warranty. Please note that this warranty does not cover any damages caused by human factors.
- If you encounter any difficulties, please scan the QR codes down below to contact us.

Congratulations!
You have just completed your first run. We hope you’ve had a great experience!
Please follow Phrozen’s social media accounts and subscribe to our YouTube channel to learn more about printing tips and share information with the community.
 |  |  |  |
| https://lihi1.com/bQ3w0 | https://lihi1.com/pA4Tw | https://lihi1.com/U7iyD | https://lihi1.com/naYk0 |
![]()


