![]() PrepStand eUP
PrepStand eUP
User Guide
35 kg / 77.1 lbs
Bike weight limitation![]() WARNING
WARNING
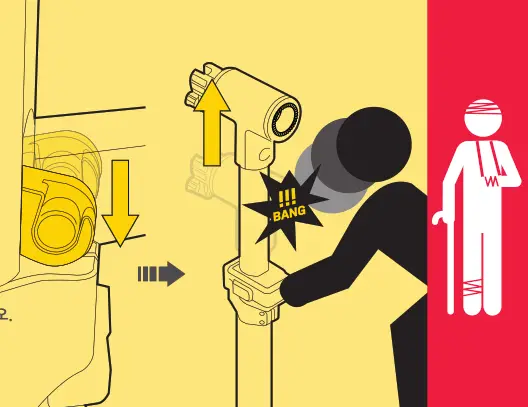
READ ASSEMBLY INSTRUCTIONS THOROUGHLY. Care should be taken during assembly as the built.in pressurized nitrogen, the cartridge may be accidentally deployed. ENSURE THERE IS ADEQUATE SPACE ABOVE THE CLAMP HEAD UNIT TO AVOID INJURY OR DAMAGE.
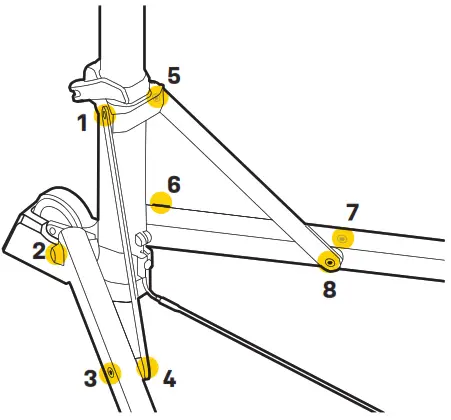
PARTS DESCRIPTION
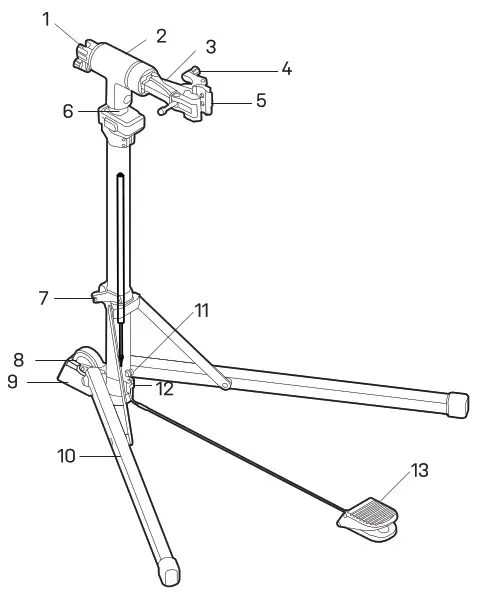
| 1. 360° Rotation knob 2. Clamp holder 3. Clamp 4. Clamp jaw lever 5. Clamp jaw 6. Extension tube 7. QR clamp lever | 8. Wheel 9. wheel chock 10. Support legs 11. Cable end holder 12. Cable retainer 13. Pedal |
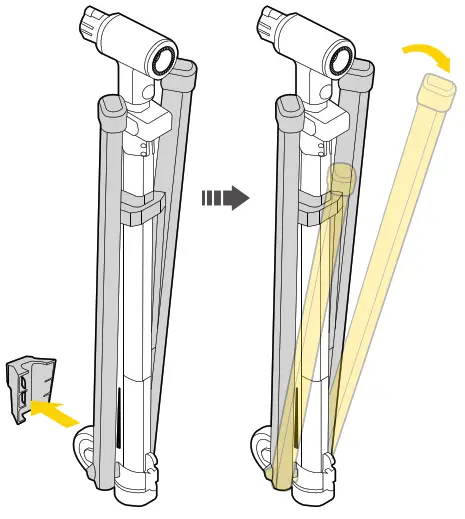
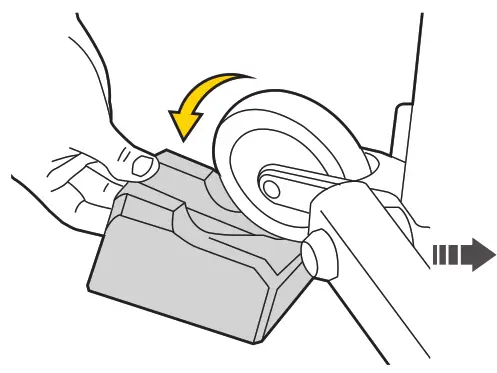
SUPPORT LEG ASSEMBLY
- Remove the wheel chock and fully extend support legs.

- Install the wheel chock

- Close the quick release lever Fermer Rapide
 Make sure the quick release is tightened well.
 WARNING
THE WHEEL CHOCK MUST BE INSTALLED WHILE PREP STAND IP IS IN USE.
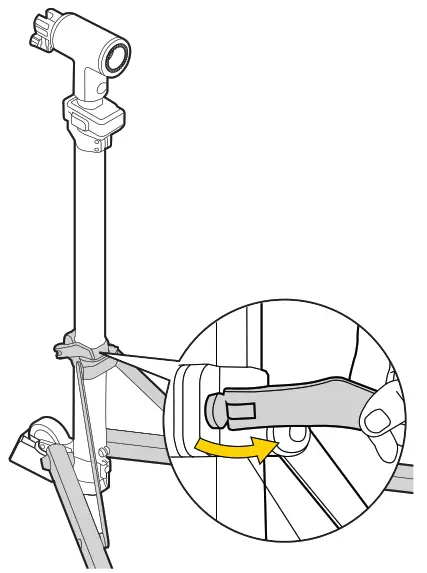
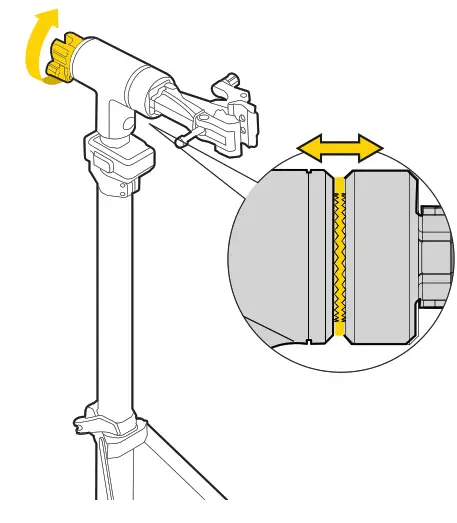
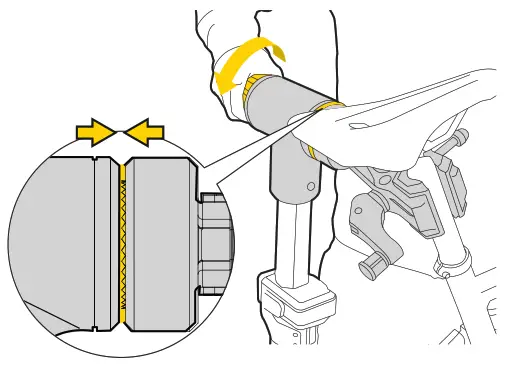
CLAMP ASSEMBLY

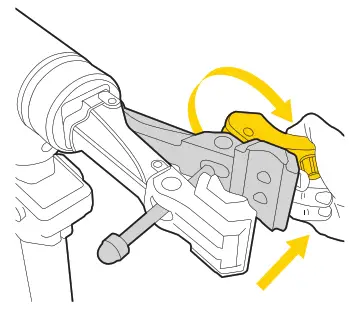
- Insert the clamp into the clamp holder and rotate the lever until ratchet teeth are fully engaged.
Extend the clamp holder lever for the following assembly procedure.
- Periodically check bolts for proper torque values and any wear.
 NOTE
NOTE
DO NOT position the quick release lever where it can be accidentally released.
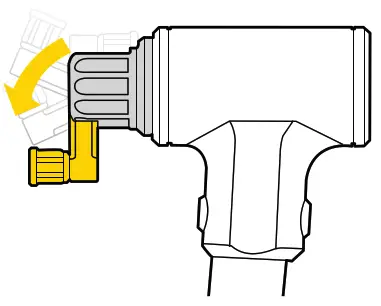
CABLE ASSEMBLY
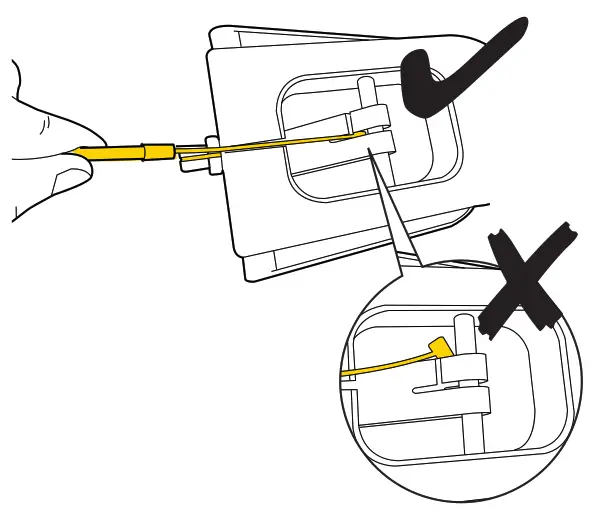
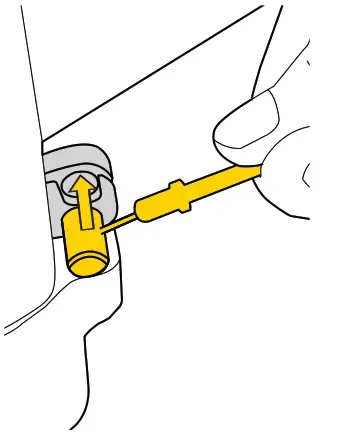
- Ensure cable end is inserted into anchor correctly

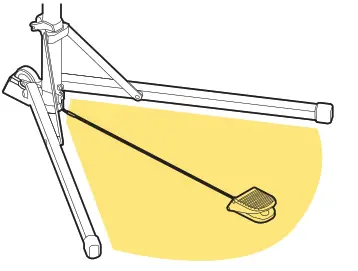
- Place pedal correctly with downside on the floor

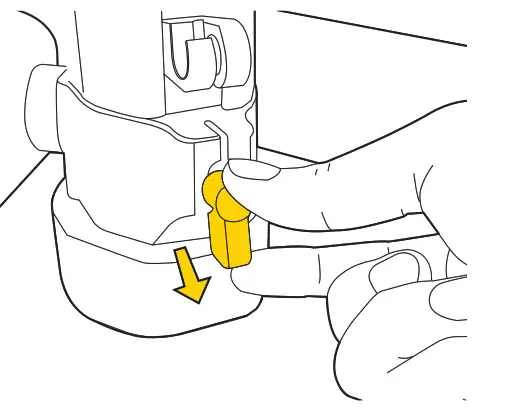
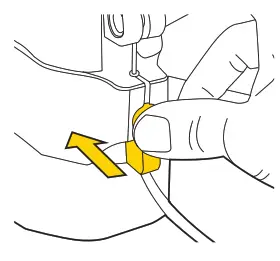
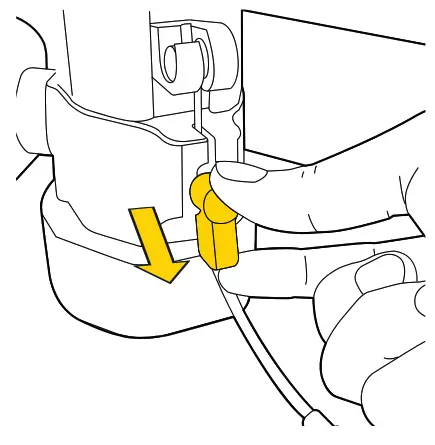
- Remove the cable retainer

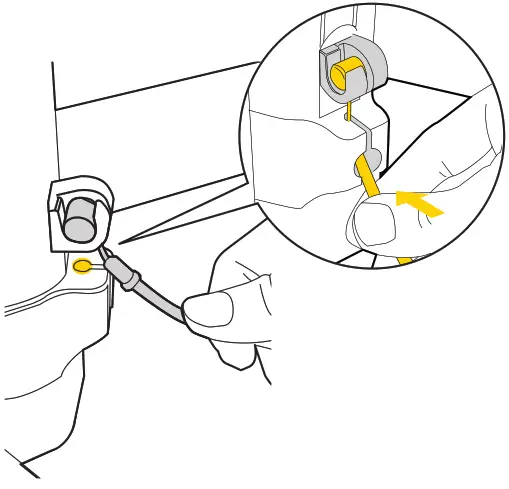
- Place the cable end into the notch


WARNING,
If you can’t place the cable end into the notch smoothly. DO NOT STRETCH THE CABLE TO PLACE IT. Please check whether the cable is out of position first.

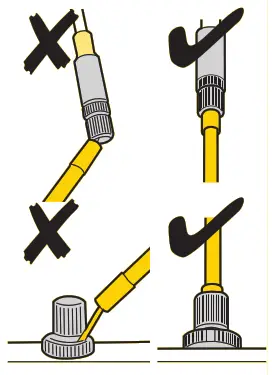
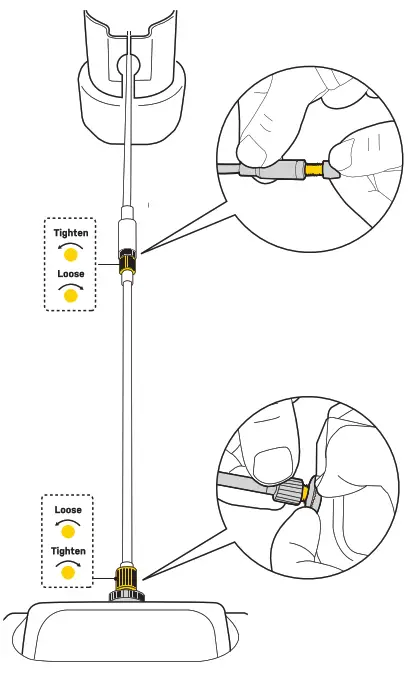
- Adjust the knob to tighten the cable.

- Install cable retainer as shown.

- Place the pedal between the legs to optimize performance.
 NOTE The inner cable will stretch over time. Adjust or replace cable as needed.
 Make sure the quick release is tightened well.
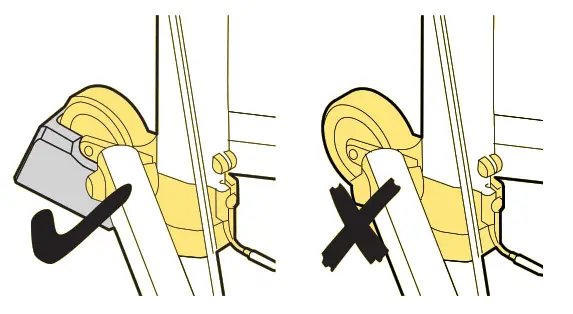

 NOTE
NOTE 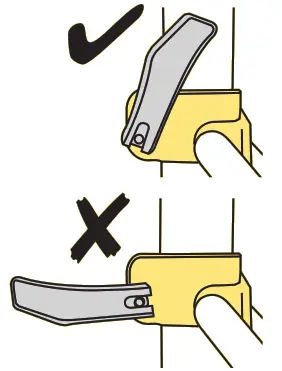
 NOTE The inner cable will stretch over time. Adjust or replace cable as needed.
FUNCTION TEST
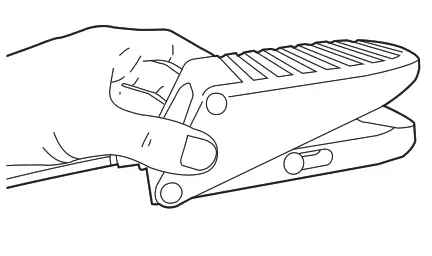
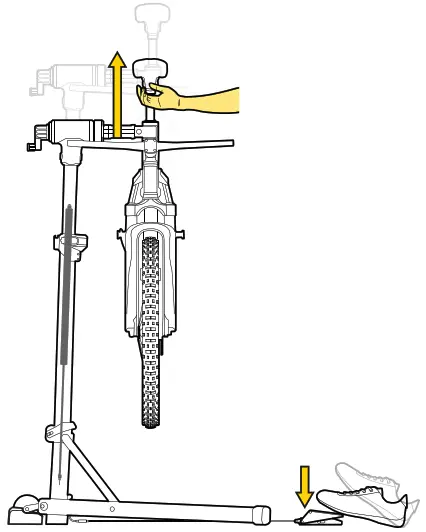
Lift test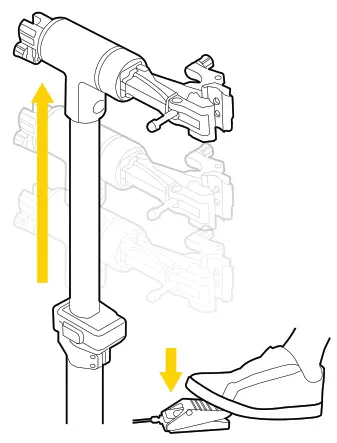 Gently depress pedal. The extension tube should lift.
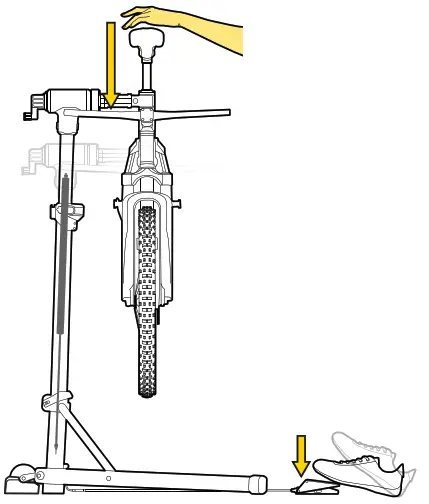
Lower test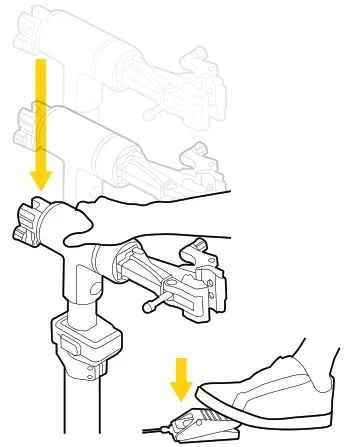
Depress the pedal and push down the clamp holder to lower the extension tube.
NOTE
If the clamp still does not raise or lower after checking assembly, it may indicate that the built-in pressurized nitrogen cartridge is damaged. Please refer to page 14 of this User’s Guide on how to examine the cartridge for proper operation.
ATTACH THE BIKE
 Rotate the clamp jaw lever to adjust the clamp width.
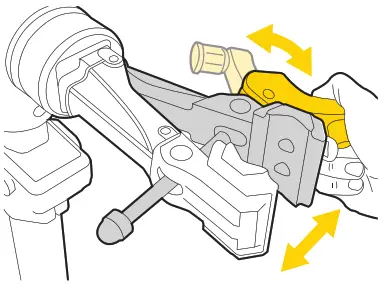
Once the clamp is set to the desired width, quick adjustments can be made by opening the lever. 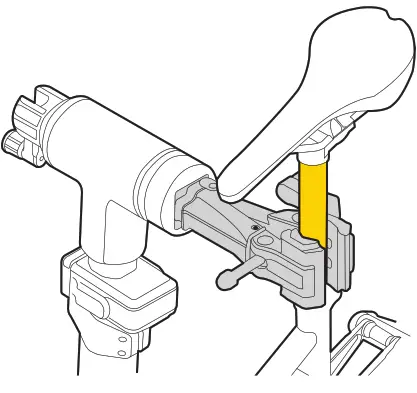
Non-marring rubber jaw fits from
7/8″a#3″ DIA (022,2-076,2 mm)
![]() WARNING
WARNING
If there is a carbon seat post on the bike to be clamped, replace it with an aluminum seaport before using the Prepstand up for safety purposes.
LIFT OR LOWER
The built-in pressurized nitrogen cartridge will provide lift assist while you press the pedal. You can stop at any height by releasing the pedal. To lower, press the pedal and push down on the clamp. Once the clamp is at the lowest position, release the pedal to lock the clamp in position.
 |  |
NOTE,
Depending on your bike’s weight, you may need to provide additional assistance to lift or lower the bike.![]() WARNING
WARNING
When operating the stand. It will tilt 3 to 5 degrees and the clamp should be in horizontal.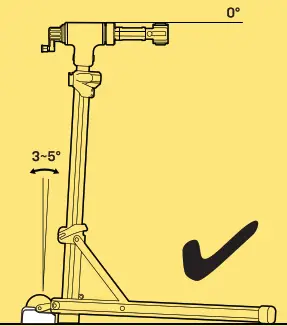
ROTATION
 | 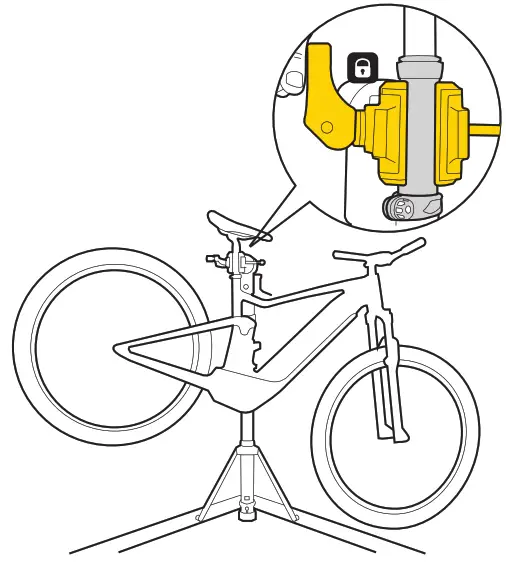 |
| 1. Loosen knob to release rotation clamp for angle adjustment. | 2. Position bike in clamp jaws and tighten to hold. |
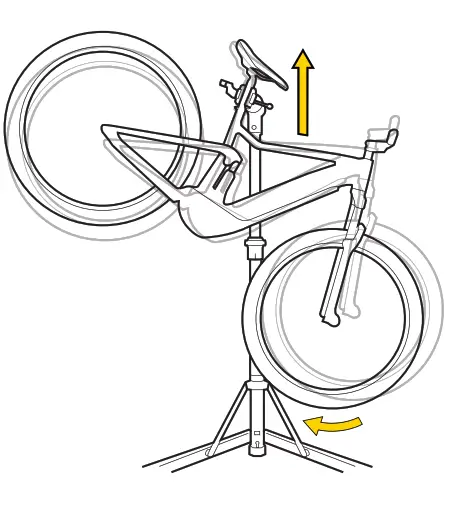 | 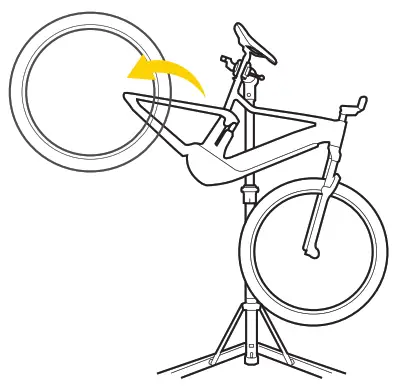 |
| 3. Lift the bike and let the center of gravity balance its natural angle. | 4. Proceed with any parts removal & allow the bike to find its natural balance angle again. |
 | 5. Tighten the 360° rotation knob to fix the operating angle. |
WARNING
Be aware of the weight distribution while removing the parts.
DISASSEMBLY
Remove the cable retainer
 Loosen both adjusting knobs for safety during cable disassembly.
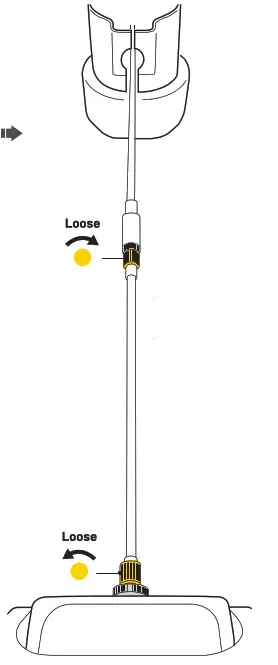
![]() WARNING
WARNING
The pressurized nitrogen cartridge may cause injury or damage.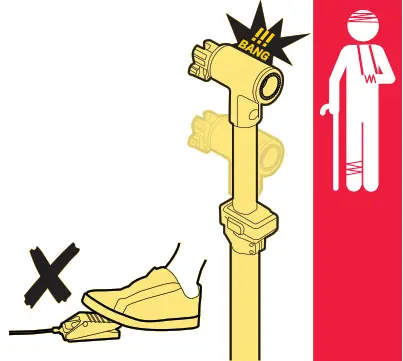
![]() WARNING
WARNING
Ensure there is adequate space above the clamp head unit to avoid injury or damage.
Please make sure the clamp holder has been pushed down to the lowest position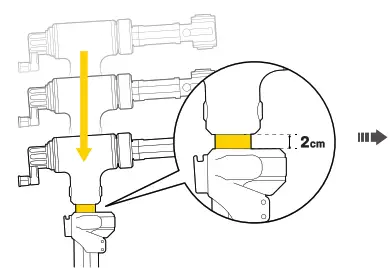
Loosen 360° knob to disengage ratchet teeth and remove the clamp from clamp holder.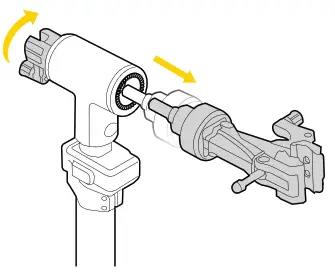
 NOTE
NOTE
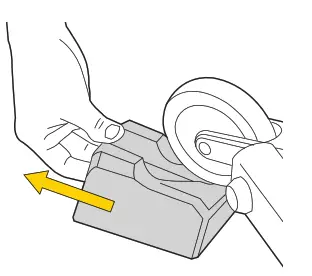
Tilt stand forward and remove the wheel chock.
Slide plastic tube up and store wheel chock as shown.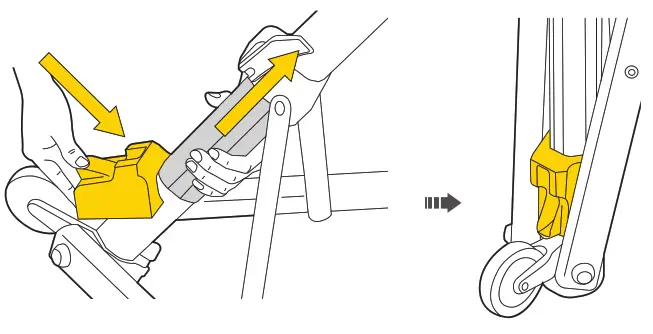 Tighten the QR lever
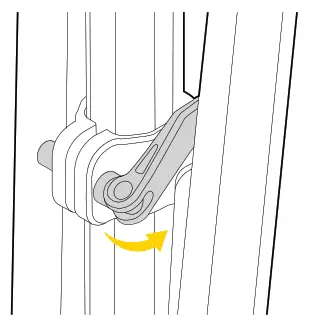
![]() warning
warning
Ensure wheel chock is positioned correctly when storing to prevent damage to stand legs 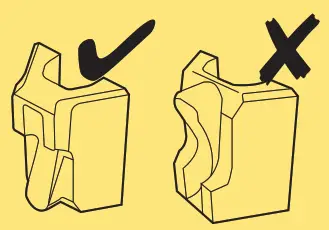
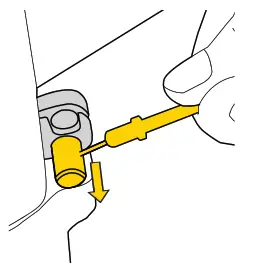
EXAMINING PRESSURIZED NITROGEN CARTRIDGE
The built-in pressurized nitrogen cartridge may be damaged if the clamp head does not lift in lower smoothly during normal operation. Inspect by pressing the cable end holder down to check the function of the pressurized nitrogen cartridge. While the cable end holder is depressed, the clamp holder should raise and can be lowered by pressing down on the clamp holder. If it doesn’t work properly with this method, then the built-in nitrogen cartridge is confirmed to be damaged. Contact your local Topeak dealer for cartridge replacement.![]()
![]() WARNING
WARNING
Care must be taken when examining the pressurized nitrogen cartridge. Accidental deployment of the pressurized nitrogen cartridge may cause injury or damage.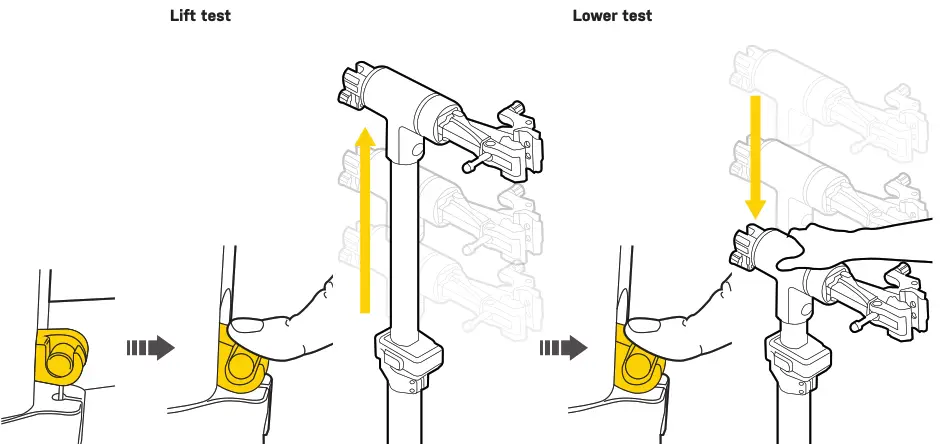
PARTS DESCRIPTION
Optional accessories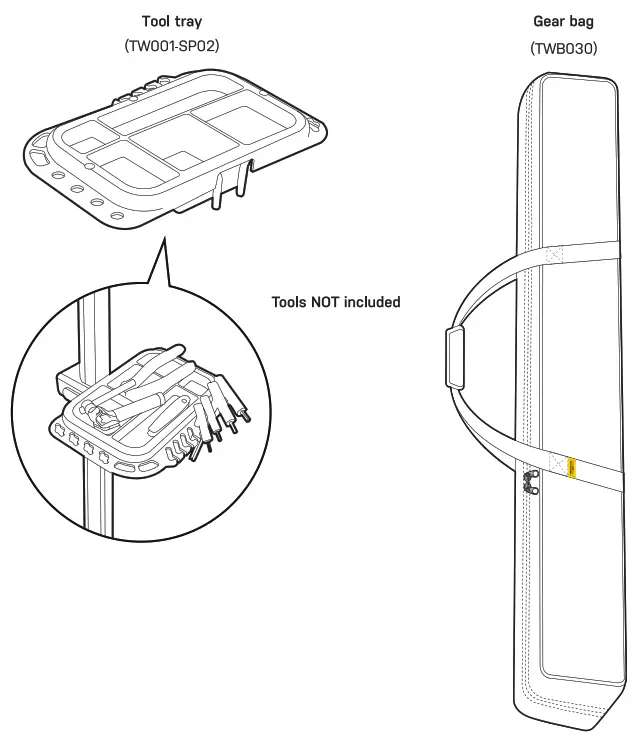
The tool tray can be mounted directly to the work stand.
Repair parts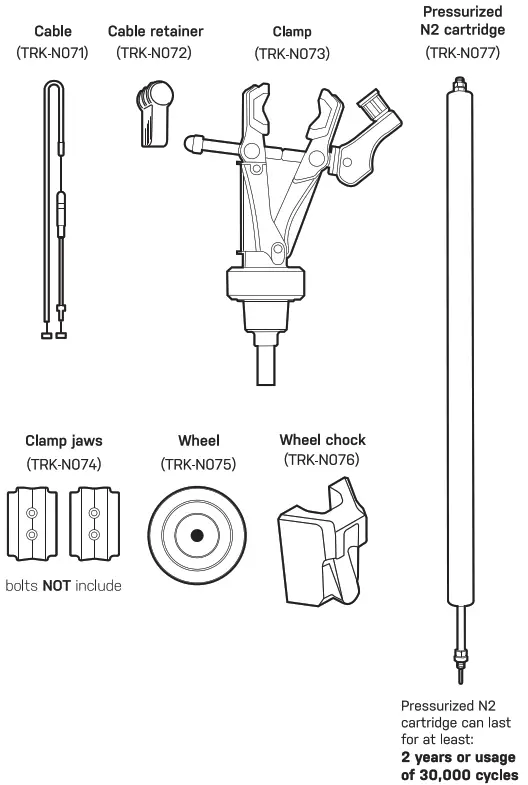
NOTE
For cartridge replacement, it is recommended to return the repair stand to the dealer to ensure function and safety.
WARNING NOTES
- Always fully extend support leg assembly for a steady foundation.
- In case of accidental operation, ensure there is adequate space above the stand to prevent injury or damage during assembly and disassembly of the stand.
- Ensure the 360° knob is tightened adequately to engage ratchet teeth during assembly and operation.
- QR clamp lever should be tightened correctly when assembling and operating the stand.
- To prevent possible damage to the bike, 00 NOT over-tighten clamps.
- The stand may tilt or fall over if the bike being clamped is over 35kg.
- Make sure the clamp assembly is in the lowest position and hold the bike before loosening the clamp.
- DO NOT use the standing wheel to reposition the stand if a bike is clamped.
- Keep the stand pedal positioned safely when storing or using the stand to prevent accidental operation of the pressurized nitrogen cartridge.
- The wheel chock DOES NOT prevent the stand from tipping. Always check the stability of the stand before and during use.
WARRANTY
2-year Warranty: All mechanical components against manufacturer defects only.
Warranty Claim Requirements
To obtain warranty service, you must have your original sales receipt. Items returned without a sales receipt will assume that the warranty begins on the date of manufacture. All warranties will be void if the product is damaged due to user crash, abuse, system alteration, modification, or used in any way not intended as described in this manual.
* The specifications and design are subject to change without notice.
Please contact your Topeak dealer with any questions.
For USA customer service call: 1.800-250-3068
www.topeak.com
![]()


