![]() CM507A
CM507A
Programmable Room Thermostat
Installation and User Guide
This is a legacy product document supported by Resideo. It is no longer manufactured
Introduction
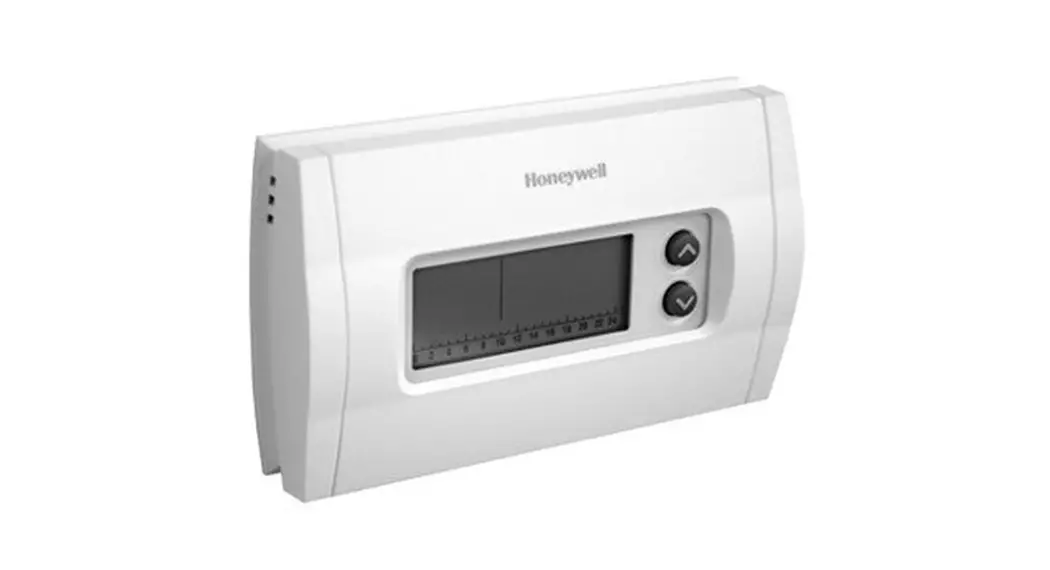
Description
The Honeywell CM507 is a programmable room thermostat designed to control your heating system efficiently. The following instructions explain how to install, program, and use the CM507.
Features
- 7-day heating program with factory default energy-saving schedule
- Timeline display facilitating programming
- Subtle, unobtrusive styling matching a variety of room decors
Display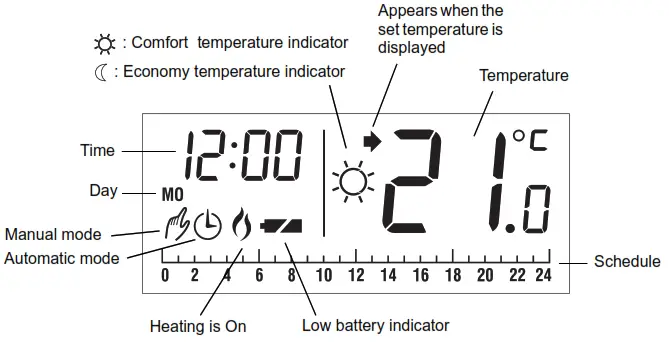
Installation
NOTE: The installation must be performed by an electrician or a qualified installer.
Baseplate Installation
Choose a location approximately 1.5 m above the floor and on an inside wall. Avoid draughty areas (top of the staircase, air outlet, tc.), dead air spots (behind doors), direct sunlight, or areas near concealed pipes or chimneys.
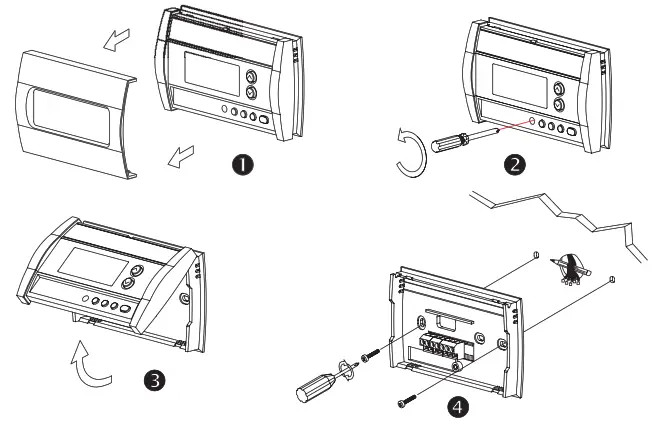
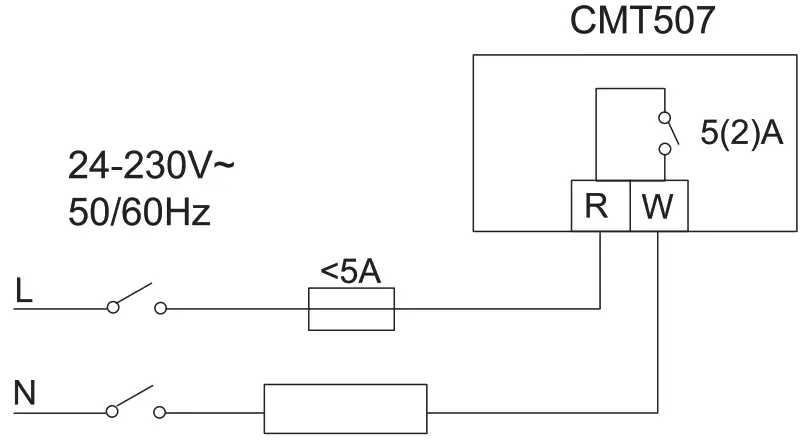
Wiring
Installing the Batteries

Use Alkaline batteries only!
After the batteries are installed, the thermostat performs a series of tests for approximately 5 seconds.
Once installed on the wall, the thermostat will display the ambient temperature. The time and day settings flash to indicate that they must be set (see section 4.1).
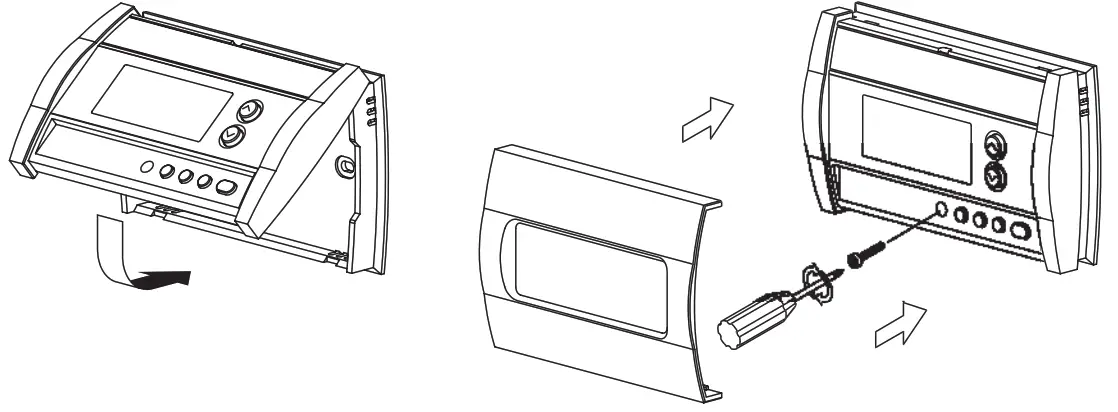
Completing the Installation
Basic Functions
Displaying the Temperature
The measured temperature is normally displayed. To view the set temperature, press once on either of the buttons. The set temperature is displayed for 5 seconds along with the![]() icon.
icon.
NOTE: Pressing either of the buttons more than once will change the set temperature.
Setting the Temperature
Press one of the buttons until the desired temperature is displayed.
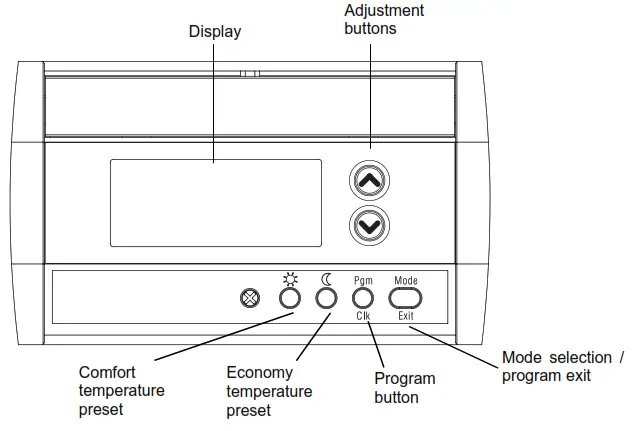
Comfort and Economy Temperatures
The thermostat has 2 preset temperature buttons:
• Comfort ![]() temperature
temperature
• Economy ![]() temperature
temperature
To set the thermostat at the comfort ![]() temperature or economy
temperature or economy ![]() temperature, press the corresponding preset button. The corresponding symbol will be displayed.
temperature, press the corresponding preset button. The corresponding symbol will be displayed.
The following table shows the use and the factory setting of each preset button.
| Button | Intended Use | Default Setting |
| Comfort (when the occupant is awake and at home) | 21°C | |
| Economy (when the occupant is absent or asleep) | 17°C |
To modify the comfort ![]() or economy
or economy![]() temperature:
temperature:
- Set the desired temperature using the
 buttons.
 - Press and hold the appropriate preset button until the corresponding symbol is displayed.
Control Mode
Manual
Use this mode to set the temperature at a fixed value. To use this mode, press Mode to display![]() and set the desired temperature using the
and set the desired temperature using the ![]() buttons or the
buttons or the ![]()
![]() buttons.
buttons.
Automatic
Use this mode to set the temperature according to the energy-saving schedule (see sectionTo place in Automatic mode, press Mode to display![]() .
.
Temporary Override
If you modify the temperature when the thermostat is in automatic mode, the new temperature will be used for the next 2 hours. Afterward, the thermostat will return to the automatic mode settings. The ![]() icon flashes during the override period.
icon flashes during the override period.
Battery Indicator
An icon appears when the batteries need replacement. This icon will flash for 60 days, then the thermostat will cut power to the heating system. The icon disappears once the
batteries are replaced.
After replacing the batteries, readjust the time and day (see section 4.1).

Programming
Setting the Time and Day
- Press Clk for 3 seconds. The hour display flashes
- Set the hour using.
- Press Clk. The minute display flashes.
- Set the minutes using.
- Press Clk. The day display flashes.
- Set the day using.
- Press Exit to exit the programming mode.
Energy-saving Schedule
When the thermostat is placed in automatic mode, it switches between the comfort temperature and economy temperature according to the programmed schedule. You can set a different program for each day of the week. The preprogrammed schedule is as follows:
| Monday to Friday | comfort |
| Economy | |
 | |
| Saturday and Sunday | Comfort |
| Economy: 22:00 to 6:00 | |
 |
Modifying the Schedule
- If not already done, set the comfort
 and economy temperatures (see section 3.3)
 - Press Pgm. The program for Monday will appear and the first hour period (0:00 a.m. to 1:00 a.m.) is selected (flashes).
NOTE: Note: If you wish to use the same program every day, press Pgm for 3 seconds to select all the days of the week. - Press
 or
or  button to advance to the next or preceding hour period respectively.
 - Select the comfort or economy temperature by pressing on the corresponding button( or
 ).
). - Repeat steps 3 and 4 for each switch point.
- To modify the program for another day, press Pgm until the day is selected and repeat steps 3 to 5.
- Press Exit to exit the programming mode.
- To access the configuration menu, press the and buttons simultaneously for 3 seconds.
- To go to the next parameter (menu item), briefly press the and buttons simultaneously.
- To modify a parameter, press or.
- Repeat steps 2 and 3 if necessary.
- Press the and buttons simultaneously for 3 seconds to exit the configuration menu.
| DISPLAY | DESCRIPTION | DEFAULT | SELECTIONS |
 | Time Display | 12 h | 12 h or 24 h |
| 1 Pump Protection | Off | On or Off | |
 | Number of cycles per hour | 4 | 2, 3, 4, 5 or 6 |
| ¹When pump protection is On, the thermostat will activate the heating system for 15 seconds if it has not been activated for the past 24 hours. ²The corresponding cycle lengths are 2=30 min., 3=20 min., 4=15 min., 5=12 min., 6=10 min. Select the cycle according to the type of heating: Gas boiler <30k W – 10 minutes Oil boiler – 20 minutes | |||


