
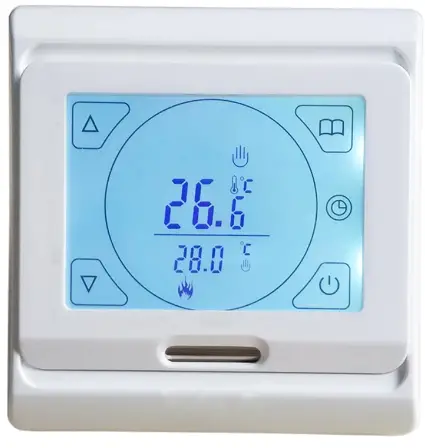
MINCO HEAT ME88AH Electric Wireless Heating Thermostat
Application
The thermostat is designed for the control of electric heating devices (Built-in sensors for measuring room temperature and an external sensor for high-temperature protection, to prevent heating device burned due to high temperature).
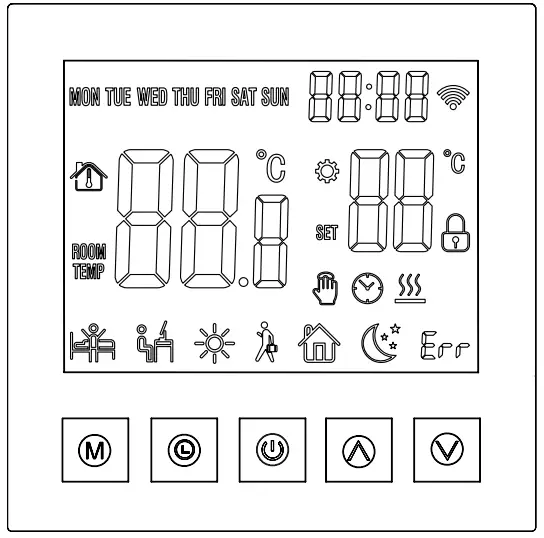
User Operation
- Power Key: Touch the On / Off key to turn the system on or off.
- Mode Key: You can select “period control mode” or “manual mode” by this key. Up / Down key:Touch the Up and Down keys to set the temperature and adjust system parameters. And press Up and Down simultaneously and hold for 5 seconds to enter lock key function.
- Clock key: You can adjust the time and the week by this key.
- Manual mode: Set the temperature manually by this key.
- Automatic mode Adjust to the automatic mode, the thermostat will work cyclically by week programming.
Anti-frozen function
In the state of shutdown, the thermostat will turn on the heating device automatically When the room temperature is below 5℃. when the room temperature is above 7℃, the thermostat will turn off the heating device automatically.
Technical data
- Temperature sensor: NTC
- Temperature accuracy: ±1℃
- Power consumption : <1W
- Voltage: AC230V 50/60Hz
- Load current: 3A/16A
- Temperature setting: 5~90℃
- Key: Touch key
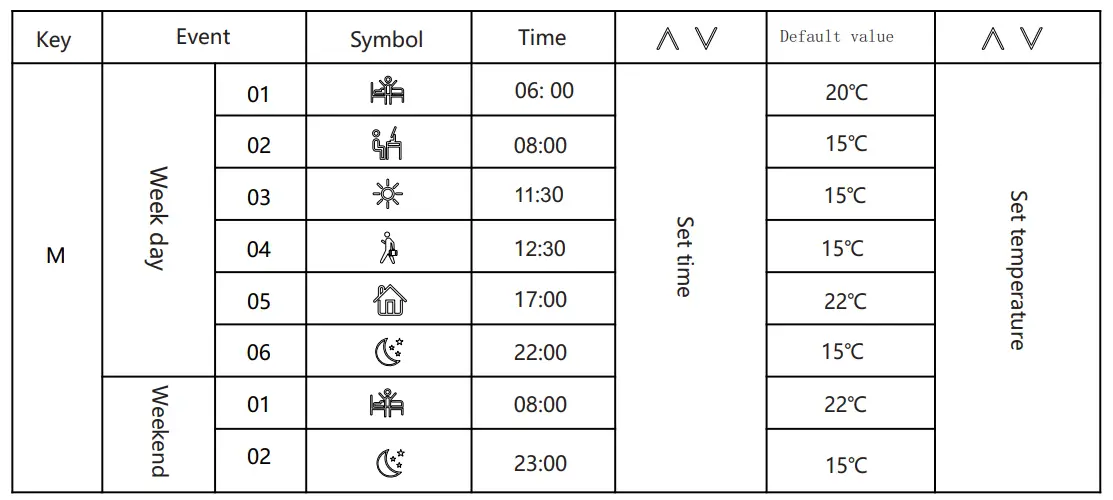
Event time and temperature
In the shutdown state, long-press the mode key ” ” and the clock key ” ” for 5 seconds to enter programming mode. you can switch parameters by mode key. After entering the programming mode, press mode key to adjust ” hour” ,then press mode key to adjust “minute”.Press the mode key again to adjust the temperature.
- Wake-up
- Leave
- Return(am)
- Leave(pm)
- Return(pm)
- Sleep
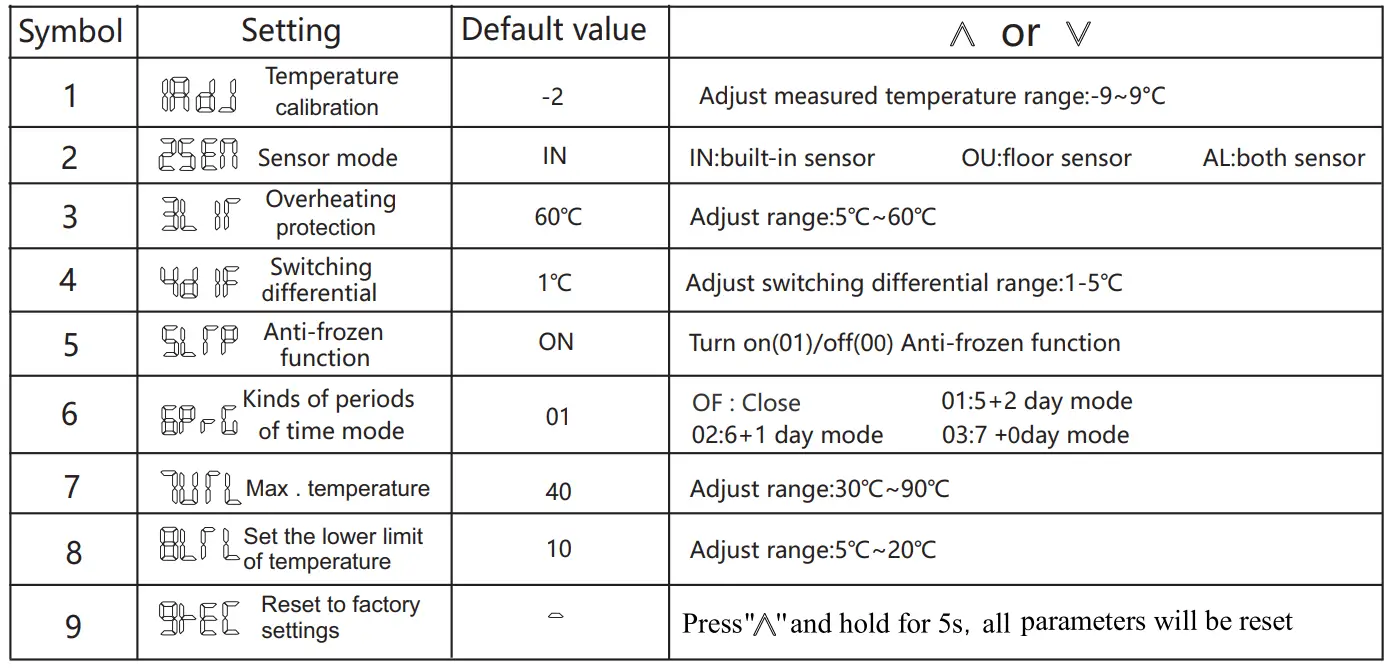
Advanced setting (qualified person preferred)
Press” M “and” “at the same time to enter the model of advanced setting immediately when the thermostat is turned off. The following seven functions can be chosen by the” M “key
Mounting Steps
Connect the power supply box according to the wiring diagram.
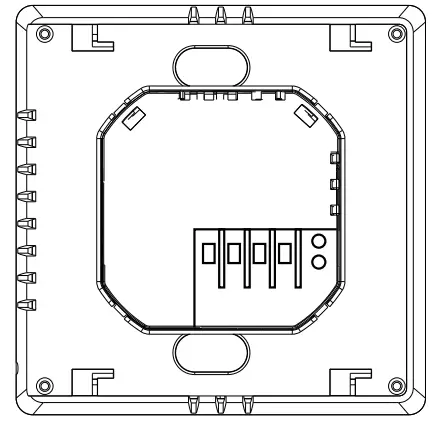
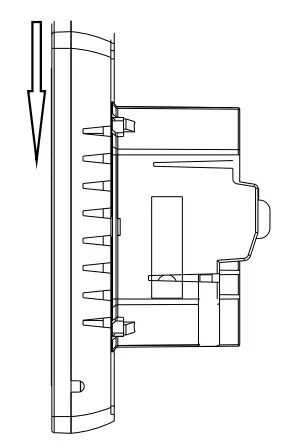
Push the panel up and take it down the panel.
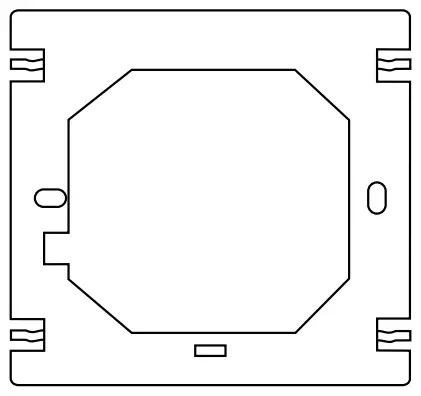
Install the fixed plate of the thermostat in the electrical connection box with screws.
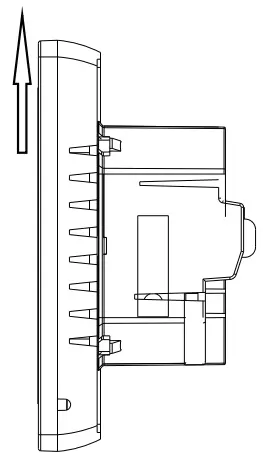
Make the panel buckle to the fixed plate and push it down.
Mounting Location Recommended
The heating thermostat should be mounted on the wall with air flowing freely around. Warning: The mounting location should not be influenced by another heat source (e.g. sunlight), airflow through doors& windows, or the temperature of the outer wall.
| Failure | Handling |
| Crash | 1. Check whether the power supply wiring is correct or not. 2. Check the power key. |
| LCD display garbled | 1. The shell is deformed after installation and can be reinstalled. |
| Display normal No output | 1. Check whether the wiring between the MPU and the power board is damaged. 2. Check whether the null line of the live line is connected wrong. |
| Remote failure | Check if the remote control battery has enough power, if not replace the battery. |
| Temperature display error | Adjust the panel temperature display by the first option in the Advanced tab. |
| Sensor failure | Check the sensor for damage Er1: Built-in sensor disconnected or fault with it. Er2 External sensor disconnected or fault with it. |
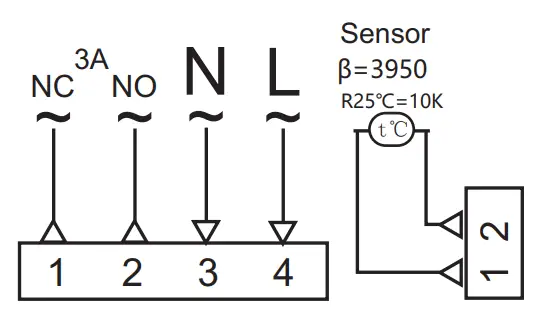
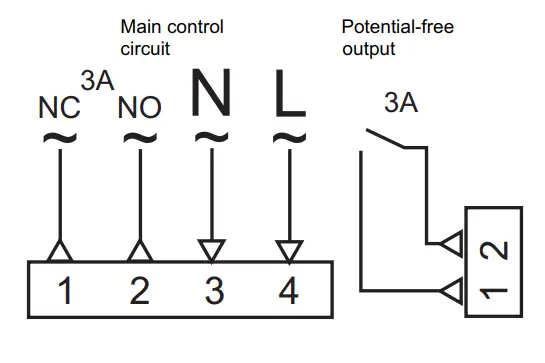
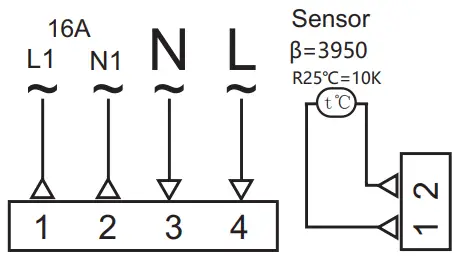
Wiring diagram
ME 88H.03
ME88H.31
ME 88H.16
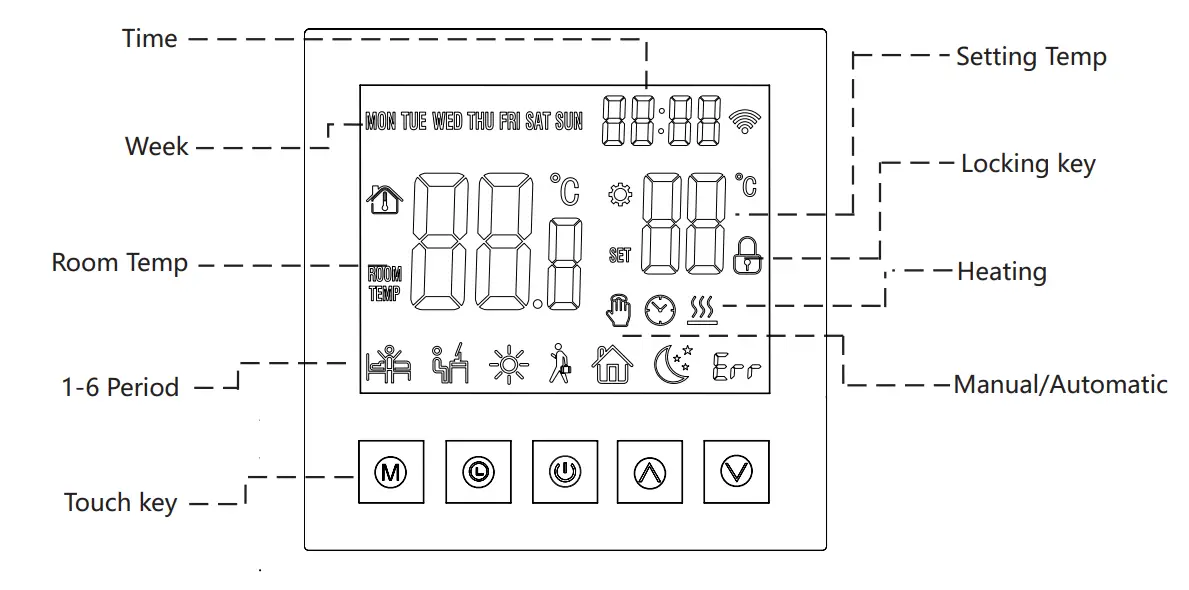
Icon Description
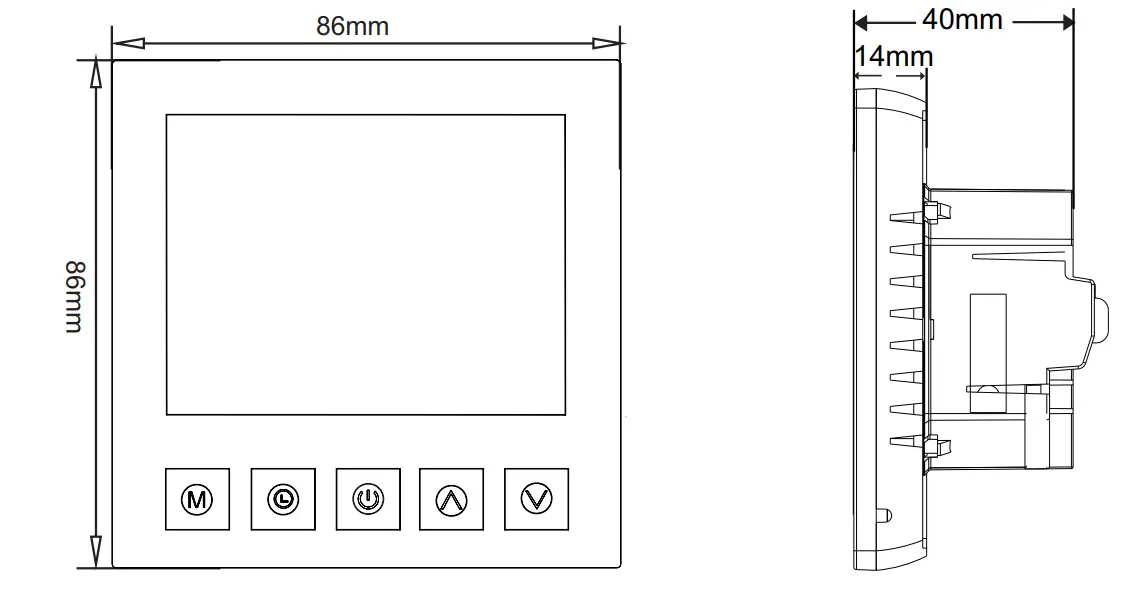
Dimension
Thermostat networking steps
Press and hold the up and down keys for about 5 seconds when the thermostat is turned off. When you hear the buzzer ringing 3 sounds, the thermostat enters the distribution network interface. After the screen displays full display(or press the power button to exit)the thermostat has entered the network initialization status. When the WiFi symbol of the thermostat does not flash, it indicates that the connection is successful. Please note that the router or the corresponding WiFi device is turned on and within 5 meters of the thermostat.
Mobile phone networking steps
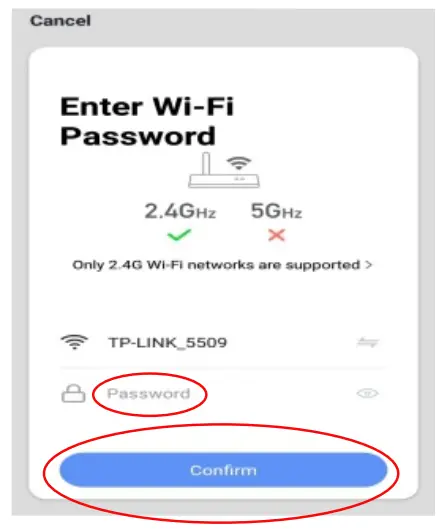
Before configuring WIFI, please make sure your phone is connected to 2.4GHz WIFI.
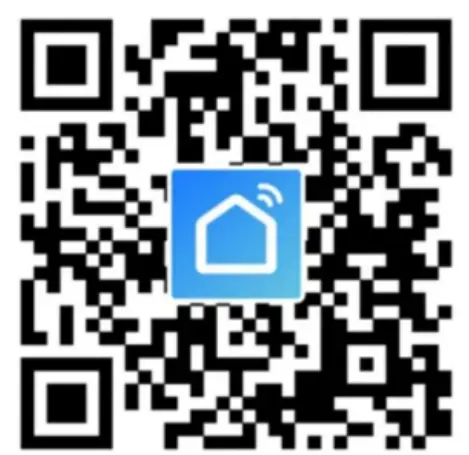
- Use your mobile phone to scan the QR code below to download the” Tuya Smart ”app.
China

Foreign
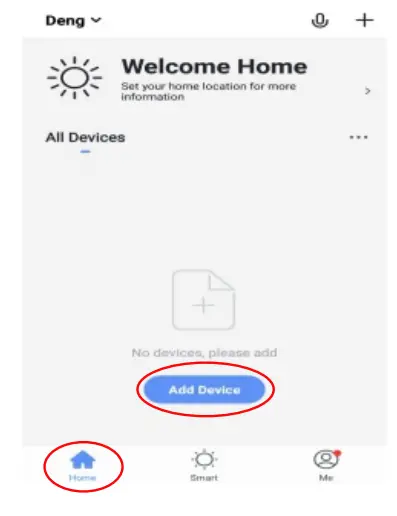
Open the“Tuya Smart ” app and click “Add Device “as shown below.
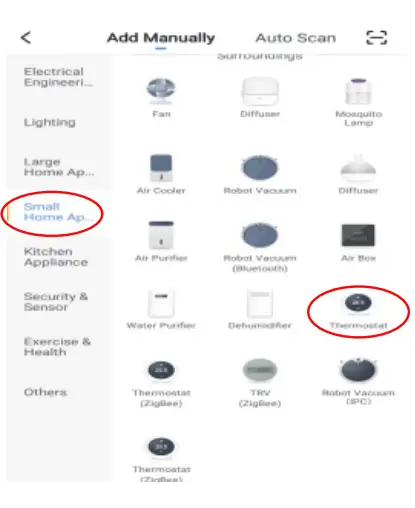
After clicking” Small Home Appliances”, select “Thermostat” as shown below.
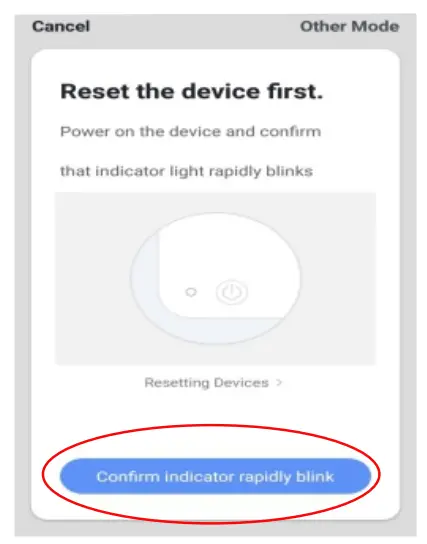
Click” Confirm indicator rapidly blink” as shown below
After entering the WIFI password, press” Confirm” as shown below.
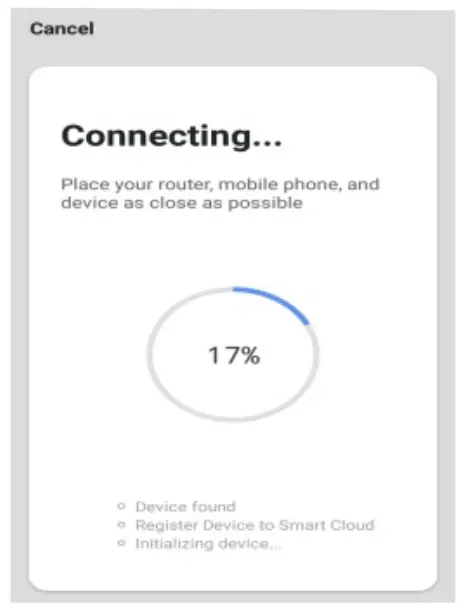
The phone enters the device search and the connection mode is as shown below.
The mobile phone adds the device connects successfully, click” Done” as shown below.
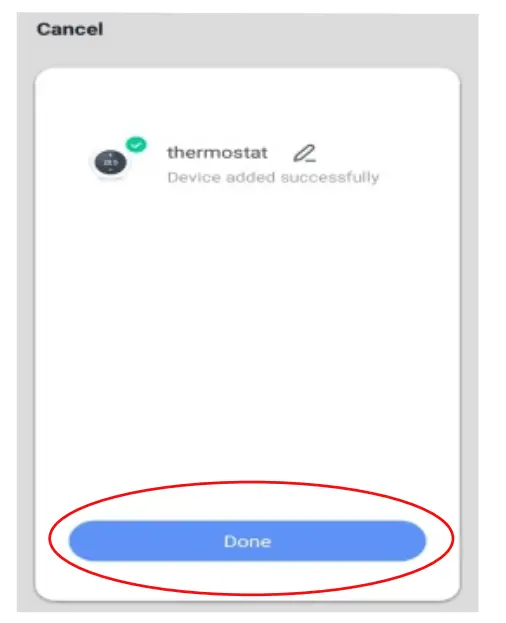
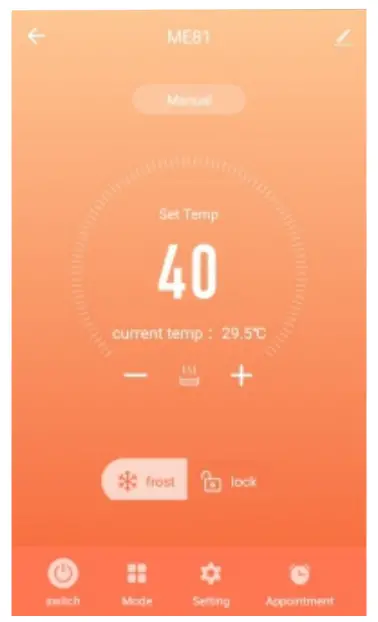
Click on the” Done” button above to enter the control interface as shown below.
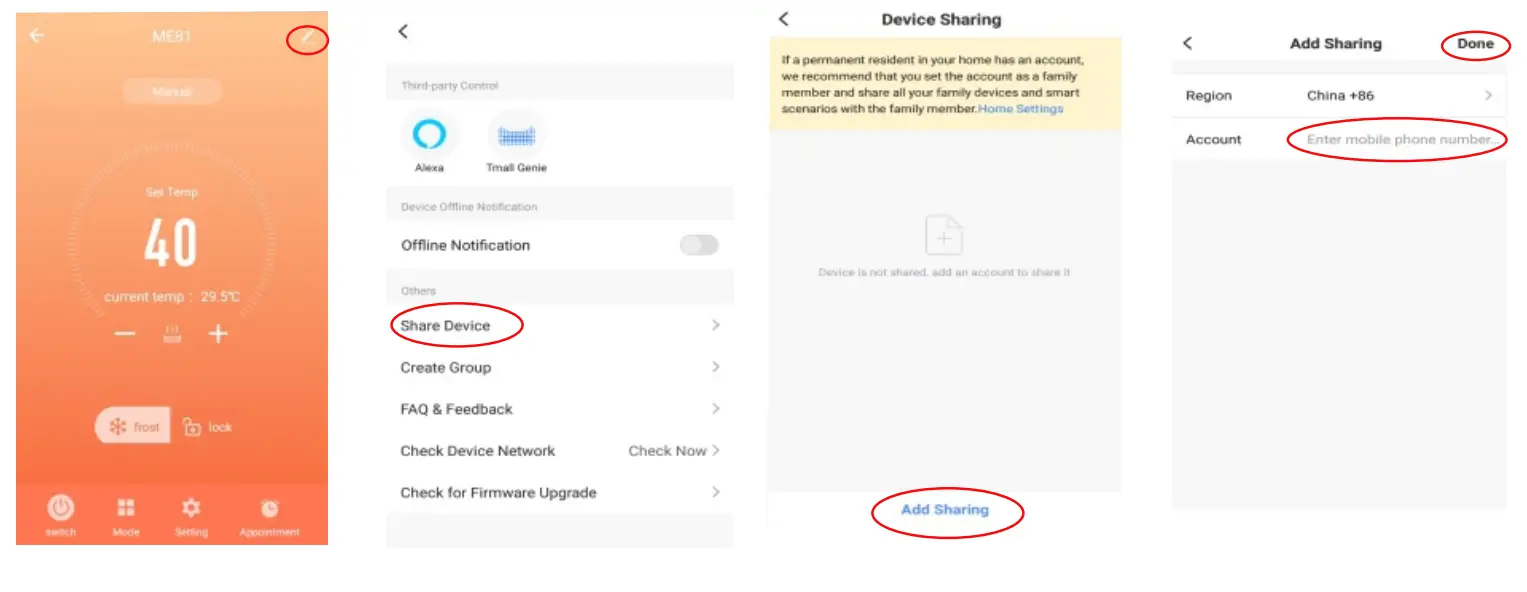
Device sharing instructions
- Click” “as shown
- Click” Share Device”
- Click” Add Sharing”
- After entering the account number below. as shown below. as shown below. , click” Done” as shown below.
Thermostat and mobile phone Exit the network
Press and hold the up and down button for about 5 seconds while the thermostat is off. When the buzzer sounds 3 times into the distribution network interface, the screen displays full display. At this time (or press the power button to exit) the control panel has entered the network exit state (also the distribution network state).
This device complies with part 15 of the FCC Rules. Operation is subject to the following two conditions
- This device may not cause harmful interference, and
- This device must accept any interference received, including interference that may cause undesired operation.
Any changes or modifications not expressly approved by the party responsible for compliance could void the user’s authority to operate the equipment. This equipment has been tested and found to comply with the limits for a Class B digital device, pursuant to Part 15 of the FCC Rules. These limits are designed to provide reasonable protection against harmful interference in a residential installation. This equipment generates, uses, and can radiate radio frequency energy and, if not installed and used in accordance with the instructions, may cause harmful interference to radio communications. However, there is no guarantee that interference will not occur in a particular installation. If this equipment does cause harmful interference to radio or television reception, which can be determined by turning the equipment off and on, the user is encouraged to try to correct the interference by one or more of the following measures.
- Reorient or relocate the receiving antenna.
- Increase the separation between the equipment and receiver.
- Connect the equipment into an outlet on a circuit different from that to which the receiver is connected.
- Consult the dealer or an experienced radio/TV technician for help.
The device has been evaluated to meet general RF exposure requirements. The device can be used in portable exposure conditions without restriction.


