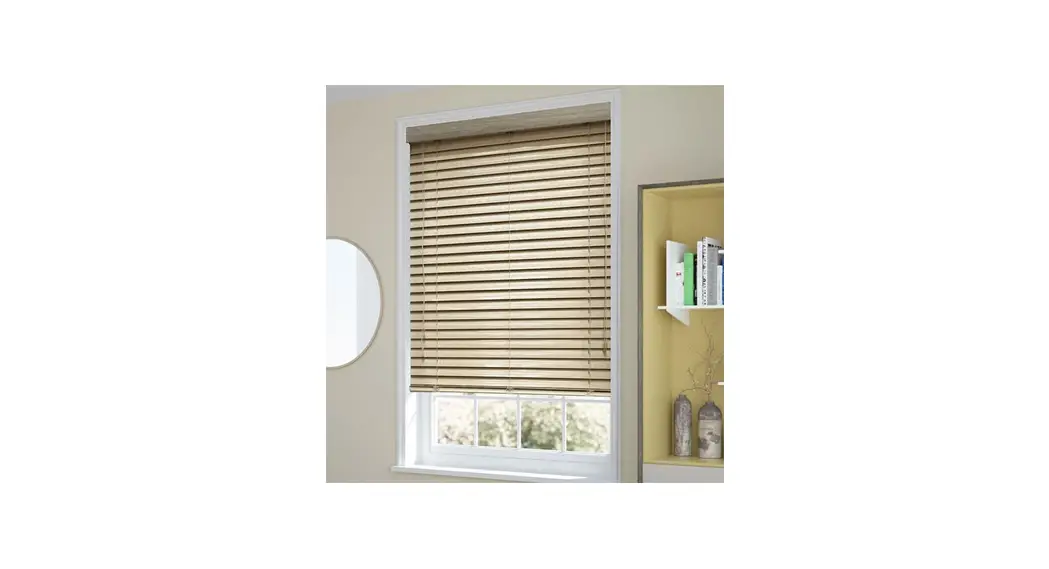
![]() Synergy Venetian Blinds
Synergy Venetian Blinds
Installation Guide
Synergy Venetian Blinds
We’ve made a handy video version of this fitting guide, just click the play button to view it.
If you prefer to print the instructions or simply to follow step-by-step, just keep reading.
Fitting the brackets
The brackets offer two methods of installation: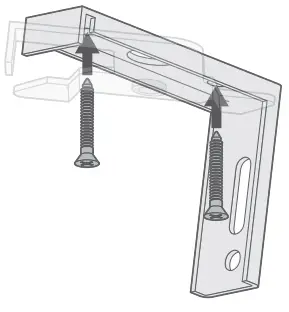
Top-Fixing
Where the brackets are screwed into the lintel (or ‘ceiling’ of the recess)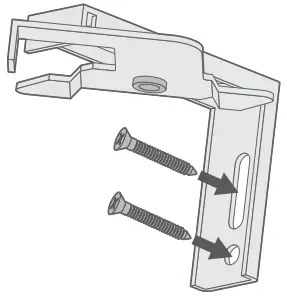
Face-Fixing
Where the brackets are screwed onto a facing surface (a wall or window frame)
The outermost brackets should be mounted at least 5cm in from the ends of the blind.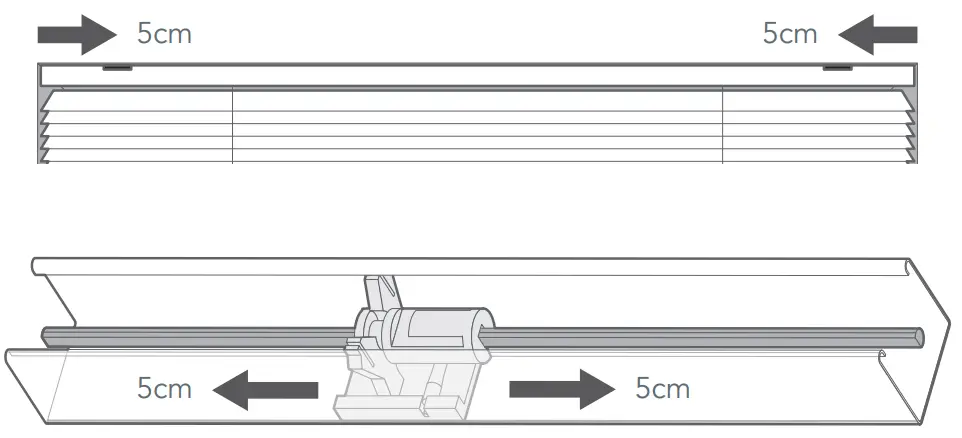
The remainder of the brackets should be spaced evenly along the width of the blind, ensuring that they do not interfere with any of the moving components in the headrail.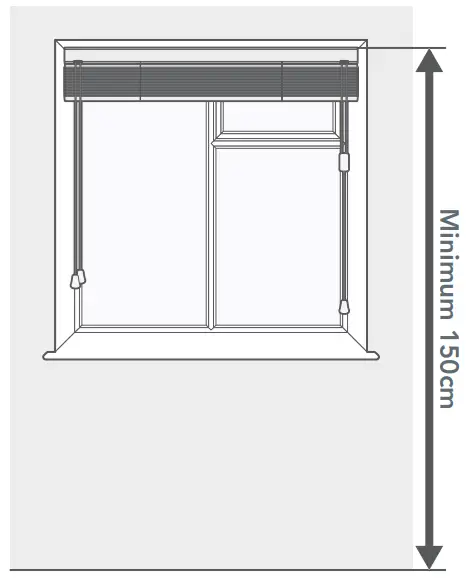
For safety reasons, always ensure that the top of the blind is installed at least 150cm (1500mm) from the floor.
Fitting the blind
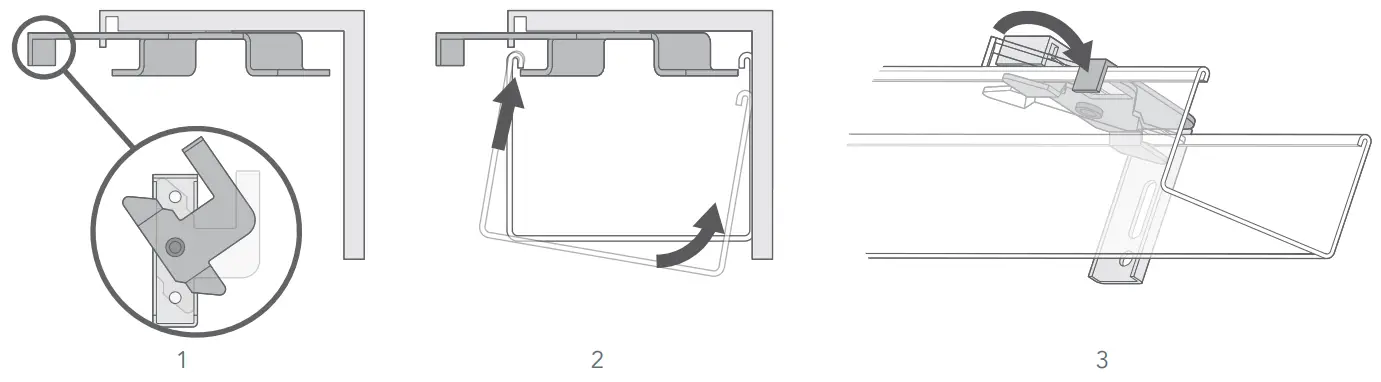
- Turn the swivel arm on the bracket to its ‘open’ position; when open, the swivel part of the bracket will be sitting at a 45 degree angle to the fixed part of the bracket.
- Rest the front lip of the headrail against the front lip of the bracket, then raise the back of the blind so that the headrail is level.
- Push the swivel arm back so that it’s sitting flush with the headrail, this will lock the headrail into the bracket.
Top Tip
If you pull the cords to tilt the blind but the slats do not move:
• Make sure the slats are open and that the tilt cords are both the same length.
• Stack the blind up tightly and lock it off, then take it down from the brackets.
• Push the metal rod inside the headrail all the way over to the left, so that it is connected to the tilting mechanism.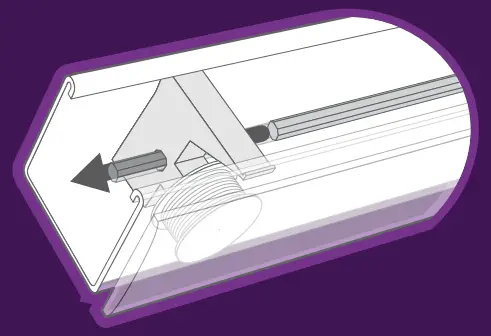
Fitting the pelmet
The pelmet will have magnets pre-attached to the back – simply place the pelmet against the headrail and it will magnetise into place.
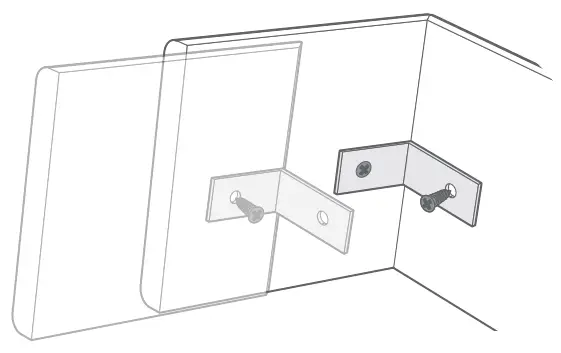
Pelmets for ‘Exact Fitting’
If you’ve ordered ‘exact fitting’ then the pelmet will be sent wider and mitred at the ends, with additional end returns to cover the brackets. Use the ‘L’ shaped metal brackets from your fittings pack and attach the side returns to the pelmet using the screws provided.
Child Safety
Cord Condenser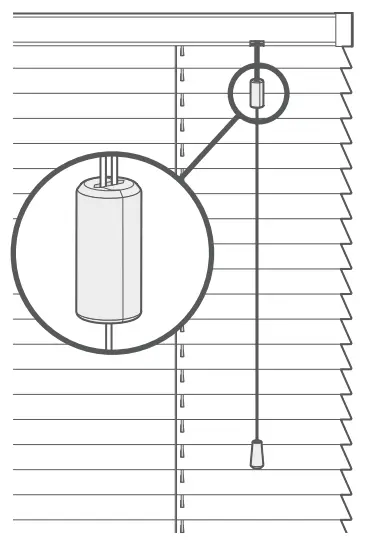
A breakaway cord condenser is pre-fitted to the lift cords so that when a horizontal force is applied to the cords above the condenser, it safely breaks away, eliminating any hazardous loops.
Top Tip
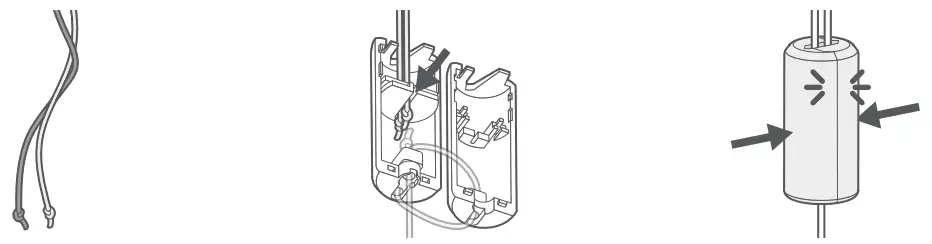
The design of the condenser can vary, so don’t worry if yours doesn’t look exactly like the illustration. Both designs do the same job and clip back together in the same way.
If the cord condenser is pulled apart:
- Untwist the cords so that they’re nice and straight.
- Slot the cords into the channel in the centre of one half of the consenser. If your condenser •
- differs slightly from the diagram, don’t worry, just slot any cords that aren’t already tied into
- place inside in the same way.
- Click the two halves back together, ensuring there is no loose thread trapped at the edges •
- of the condenser.
 WARNING
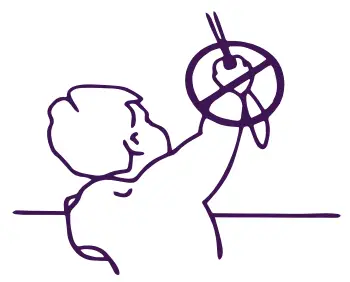
Young children can be strangled by loops in pull cords, chains, tapes and inner cords that operate the product.
To avoid strangulation and entanglement, keep cords out of the reach of young children. Cords may become wrapped around a child’s neck.
Move beds, cots and furniture away from window covering cords.
Do not tie cords together. Make sure cords do not twist and create a loop.
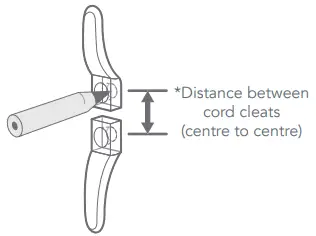
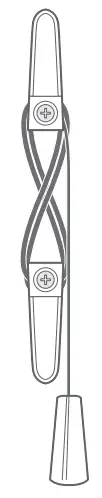
Cord Safety Cleat
The safety cleat shall be installed as close to the headrail as possible and in all cases not less than 1500mm from the floor. The cord must be fully accumulated around the safety cleat(s) when the blind is not in use. Use the table below to determine the distance required between the cleats to fully accumulate the cords when the blind is fully raised.
| Drop of blind | *Distance between cord cleats (centre to centre) |
| 1-1000mm | 100mm |
| 1001-2000mm | 150mm |
| 2001-3000mm | 300mm |
Mark the hole positions and drill as required. Use the screws provided to attach the safety cleat to the wall.
Place the safety cleat in the desired position on the wall and mark the positions of the holes with a pencil.
Wrap the cords around the cord cleats in a figure of 8. When the cords are fully accumulated, ensure they are secure so that when any cord is pulled, no excess cord is released.
![]()


