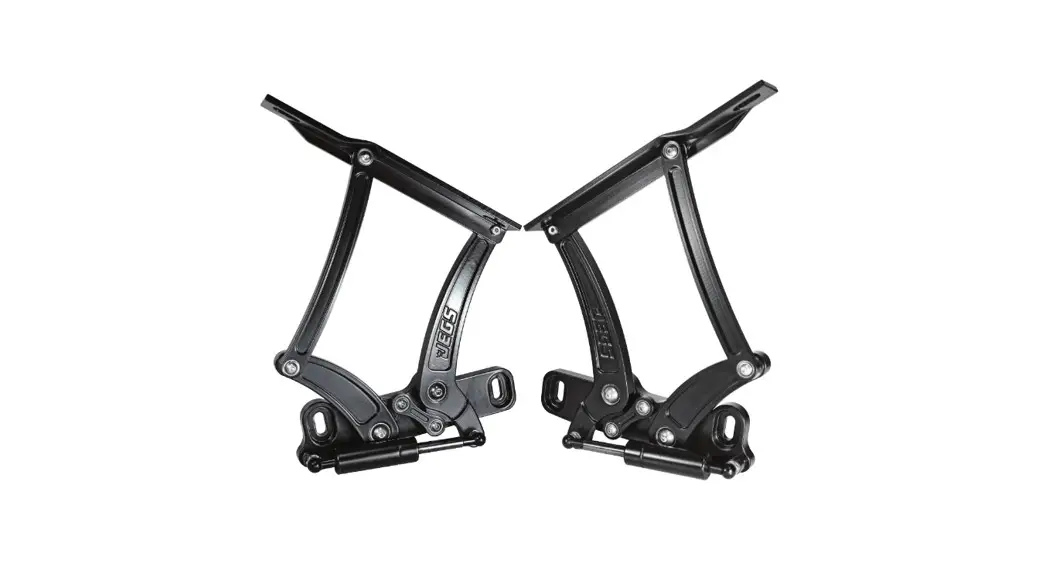
![]() Billet Hood Hinge
Billet Hood Hinge
Installation Instructions
Parts List

| # | DESCRIPTION |
| 1 | Hinge (Left) |
| 2 | Hinge (Right) |
| 3 | Gas Struts |
| 4 | Bolts |
| 5 | Washers |
| 6 | AN Washer |
Introduction
We would like to take this opportunity to thank you for purchasing this set of JEGS billet hood hinges. We welcome any comments or feedback you might have. If you have any questions about our products or about the installation procedure, please feel free to contact us at1.800.345.4545.
Before Installation
- Read all the instructions thoroughly before beginning the installation. If you do not feel that you have the mechanical aptitude to complete the job in a safe manner, JEGS strongly recommends that you employ the services of a knowledgeable technician to perform the installation.
- Use the parts list to verify that you have received all the components and fasteners.
- We recommend that you protect your paint from scratches by applying painter’s tape to all contact surfaces, corners, and seams of the fenders and hood before beginning the installation. JEGS will not be held responsible for scratches or damages that occur during the installation process.
- Note your hood’s fitment (we suggest taking photos). Pay attention to the width of the seams, and alignment of the hood to the fenders, cowl, etc. This will help in the final adjustment of the hood and prevent you from trying to correct a pre-existing condition.
- Do not attempt the installation alone. There are several steps in the installation process that require two people to complete safely.
- To prevent galling of the stainless-steel fasteners, apply an anti-seize compound to all bolt threads. Fasteners that have been seized will not be warranted.
- JEGS billet hood hinges are designed as direct replacement, bolt-on parts. However, due to the age of your vehicle, the lack of quality control that existed when it was originally built, and the vast array of replacement sheet metal, our hinges may not fit exactly as they did on the vehicles used to design them.
- JEGS hood hinges are supplied with a nitrogen-filled gas strut that has been pre-determined to be the correct strength for your vehicle’s stock steel hood. Should your hood be lighter or heavier than the original hood that we tested, we do offer different pressure struts that may be purchased to work with your application. Also, note that the pressure in the struts will be reduced when exposed to cold weather. For your reference, the strut pressure is marked on the body of the strut on a label.
- JEGS does not guarantee the function of our hood hinges on hoods that have been modified (i.e. added hood scoops, excessive customization, heavy filler, mirrors, or under hood additions OF ANY KIND).
- Due to the extreme variance in construction quality, rigidity, and weight of carbon fiber/fiberglass hoods, you may need to use a different pressure strut than what was supplied by the factory. Please reference the list on pg.4 for gas hood strut options.
- In some instances, the JEGS hinges may not operate correctly without being installed on the car WITH the hood attached. We will be unable to assist you with any fitment questions until you have completed the installation to this point.
- JEGS is not responsible for applications that are outside the normal and intended use of our products including specific model and year applications.
- With 2 people, remove the hood.
- Remove the factory hinges from the fenders.
- Check the threads in your fenders with the new bolts. It may be necessary to clean the threads with a tap or thread chaser.
- BEFORE installing the hinges onto your vehicle, apply a small amount of grease to the ball stud on the hinge and remove the wire keeper from each socket end of the strut. Install the stainless-steel gas struts onto the hinge with the shaft side down (“body” end up) to ensure proper operation and to prevent failure.
NOTE: you will NOT be able to collapse the struts without them first being installed and using the leverage of the hood. Also, use caution as there is a small internal ring clip on the inside of the strut end. Should this become dislodged from its mounting grove, it will make it difficult to install the strut on the ball stud. Do not replace the wire keepers at this time as you may need to remove the struts to adjust the hinges. - Position each hinge on the corresponding fender, apply anti-seize to the threads and attach using the supplied 3 /8-16 X 1- 1 /4 in. Button Head Bolts and AN washer. Tighten bolts so they are securely attached to the fender.
WARNING Depending on your hood manufacturer, you may need a shorter bolt when attaching the hinge to the hood. Carefully check the length before installing completely and tightening so as to not dimple or damage your hood. To make it easier to open and close the hood during adjustments, we recommend that you remove the hood latch from the hood. Attach the hood to the hinges using the supplied 3 /8-16 X 1- 1 /4” bolts and flat washers. Be sure to use anti-seize on all bolts before installing. - To avoid hitting your cowl when closing the hood for the first time, slide the hood as far forward as possible before closing. Close the hood carefully making sure it does not hit the fenders or cowl.
- Check the height and position of the hood. Make any adjustments by repositioning the hinge slightly at the hood or fender locations. Note that some installations may take more time than others to properly adjust.
Tips for adjustments:
• Adjust height = adjust at fender plate
• Adjust front to back = adjust at the hood plate
• Adjust left to right = adjust at the hood plate
PLEASE NOTE: IT IS NOT NECESSARY TO MODIFY THE MOUNTING SLOTS IN THE HINGES TO ACHIEVE MORE ADJUSTMENT. DOING SO WILL VOID ALL WARRANTIES. - Once the hood position has been set to your satisfaction, securely tighten all bolts, replace the strut’s wire keepers, install the hood latch, and remove the painter’s tape.
Struts
When installing the gas spring the barrel end of the spring should always be above the rod to keep the lubrication on the rod and not ruin the spring.
| PART NUMBER | STANDARD DUTY HOOD STRUT (10MM BALL STUD) APPLICATION | STRUT PRESSURE |
| 555-95602 | CARBON FIBER | 80 LBS. |
| 555-95605 | LIGHTWEIGHT FIBERGLASS | 115 LBS. |
| 555-95610 | BOLT-ON FIBERGLASS | 140 LBS. |
| 555-95615 | LIGHT STEEL (COMPACT CAR) | 235 LBS. |
| 555-95620 | STANDARD STEEL (PONY CAR) | 265 LBS. |
| PART NUMBER | HEAVY-DUTY HOOD STRUT (14MM BALL STUD) APPLICATION | STRUT PRESSURE |
| 555-95630 | AFTERMARKET STEEL (MID-SIZE CAR) | 300 LBS. |
| 555-96535 | STOCK STEEL (MID-SIZE CAR / C10 TRUCK) | 360 LBS. |
| 555-95640 | FACTORY COWL (MID-SIZE CAR) | 400 LBS. |
| 555-95640 | STOCK STEEL (FULL-SIZE CAR) | 400 LBS. |
| 555-95640 | HEAVY STEEL (MODIFIED: MOLDING FILLER, PANELS, ETC) | 500 LBS. |
| MODELS BY CHASSIS TYPE | |
| TYPE | MODELS |
| COMPACT | NOVA |
| PONY | 1STGEN CAMARO/FIREBIRD |
| MID-SIZE | 1964-1972 GM A-BODY, 1970-1981 GM F-BODY |
| FULL-SIZE | IMPALA, BISCAYNE, ETC. |
| TRUCK | 3100, C10, SUBURBAN, BLAZER |
Options
With a variety of options for different models and styles of hoods, choose the hinges that are best suited for your applications.
| Part Number | Years | DESCRIPTION (CARS) | Weight |
| 555-95503 | 1955-1956 | 150, 210, BEL AIR, NOMAD | STEEL |
| 555-95504 | 1957 | 150, 210, BEL AIR, NOMAD | STEEL |
| 555-95505 | 1963-1964 | IMPALA | STEEL |
| 555-95525 | 1963-1964 | IMPALA | LIGHTWEIGHT |
| 555-95506 | 1964 | CHEVELLE, EL CAMINO | STEEL |
| 555-95506 | 1964-1965 | SKYLARK, GRAND SPORT SPECIAL | STEEL |
| 555-95507 | 1964 | CHEVELLE, EL CAMINO | LIGHTWEIGHT |
| 555-95507 | 1964-1965 | SKYLARK, GRAND SPORT SPECIAL | LIGHTWEIGHT |
| 555-95508 | 1963-1965 | NOVA | STEEL |
| 555-95526 | 1963-1965 | NOVA | LIGHTWEIGHT |
| 555-95509 | 1967-1969 | CAMARO, PONTIAC FIREBIRD TRANS AM | STEEL |
| 555-95510 | 1967-1969 | CAMARO, PONTIAC FIREBIRD TRANS AM | LIGHTWEIGHT |
| 555-95511 | 1965-1967 | CHEVELLE/EL CAMINO | STEEL |
| 555-95512 | 1965-1967 | CHEVELLE/EL CAMINO | LIGHTWEIGHT |
| 555-95513 | 1966-1967 | NOVA | STEEL |
| 555-95514 | 1966-1967 | NOVA | LIGHTWEIGHT |
| 555-95515 | 1969-1972 | CHEVELLE/EL CAMINO | STEEL |
| 555-95516 | 1969-1972 | CHEVELLE/EL CAMINO | LIGHTWEIGHT |
| 555-95517 | 1970-1981 | CAMARO | STEEL |
| 555-95517 | 1969-1972 | GTO, TEMPEST, LEMANS | STEEL |
| 555-95518 | 1970-1981 | CAMARO | LIGHTWEIGHT |
| 555-95518 | 1969-1972 | GTO, TEMPEST, LEMANS | LIGHTWEIGHT |
| 555-95519 | 1968-1979 | NOVA | STEEL |
| 555-95520 | 1968-1979 | NOVA | LIGHTWEIGHT |
| Part Number | Years | DESCRIPTION (TRUCKS) | Weight |
| 555-95521 | 1955-1957 | CHEVY TRUCK | STEEL |
| 555-95527 | 1955-1957 | CHEVY TRUCK | LIGHTWEIGHT |
| 555-95523 | 1967-1972 | CHEVY TRUCK | STEEL |
| 555-95528 | 1967-1972 | CHEVY TRUCK | LIGHTWEIGHT |
| 555-95524 | 1973-1980 | CHEVY TRUCK | STEEL |
| 555-95529 | 1973-1980 | CHEVY TRUCK | LIGHTWEIGHT |
JEGS.com
1-800-345-4545


