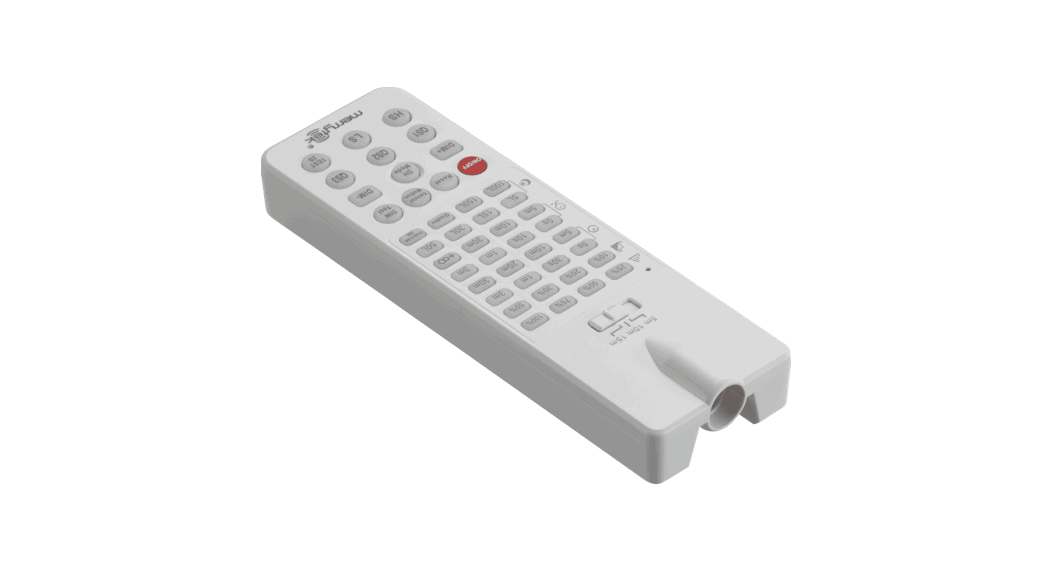
![]() AXREMC Axel AXSMOD Programming Remote
AXREMC Axel AXSMOD Programming Remote
Installation Guide
GENERAL INSTRUCTIONS
These instructions should be read carefully and retained after installation by the end user for future reference and maintenance.
These instructions should be used to aid installation of the following products:
AXREMC
Note: To change the settings on the optional AXSMOD microwave sensor module, the AXREMC remote controller is required.
AXREMC REMOTE CONTROL PROGRAMMER
- Insert 2 x AAA batteries (not included)
- Adjust sensor settings as required (see Fig. 1)
- The sensor remote has a maximum range of 15m
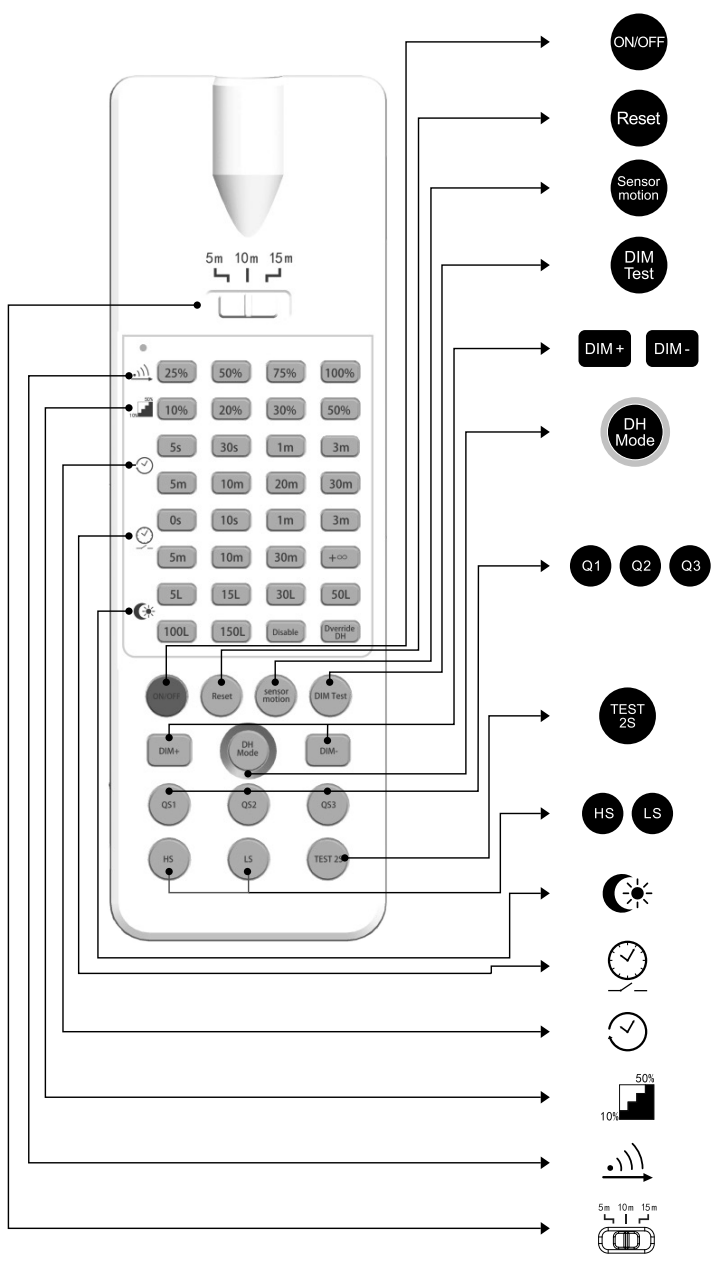
| BUTTON | FUNCTION | |||||||
| Press the “ON/OFF” button, the light goes to constant on/off mode. sensor is disabled. Press “Reset” or “Sensor motion” button to quit from this mode and the sensor starts to work | ||||||||
| Press “Reset” button, all parameters are same as setting of DIP switch or factory settings. | ||||||||
| Press “Sensor motion” button, the light quits from the constant on/off mode. and the sensor starts to work (The latest setting stays in validity) | ||||||||
| Press “DIM Test’ button, the 1-10 V dimming works to test whether the 1-10Vdc dimming ports are connected properly. After 2s, it returns to the latest setting automatically. | ||||||||
| Short press “DIM+ / DIM-” button to transmit dimming signal. The brightness of the lamp adjusts at 5% per unit. (only apply for sensor with daylight harvesting function) | ||||||||
| Long press>3s, sensor will take current light level as target lux level, to dim up/ down load automatically according to the change of ambient light level. (only apply for sensor with daylight harvesting function) | ||||||||
| Scene Options | Detection Area | Hold time | Stand-by period | Stand-by dim level | Daylight Sensor | Induction model | ||
| 51 | ### | 30`; | 1min | 10, | ,Lux | 11s | ||
| 0S2 | ### | 1mt | min | 10, | 10Lux | 1. | ||
| 53 | ### | 5mir | 1Omin | 10, | 30Lux | . | ||
| Note: Detection area / Hold time / Stand-by period / Stand-by d’m level / Daylight sensor can be adjusted by pressing the corresponding button. The latest setting will stay valid. | ||||||||
| Press the “TEST 2S” button can enter the test mode anytime. At the mode, the sensor parameters as below: Detection Area is 100%. Hold Time is 2s, Stand-by Dim Level is 10%, Stand-by Period is Os, daylight sensor disable. This function only for testing. Quit the mode by pressing “RESET” or any other functions buttons. | ||||||||
| BUTTON | FUNCTION |
| Press “HS” button to set the detection area to be high sensitive. Press “LS” button to set the detection area to be low sensitive. The adjustment bases on the “Detection Area” parameter you set. | |
| Daylight Sensor Set up daylight threshold: 5Lux/ 15Lux/ 30Lux/ 50Lux/ 100Lux/ 150Lux/ Disable | |
| Stand-by period Set up stand-by time: 0S/ 10S/ 1min/ 3min/ 5min/ 10min/ 30min/ +∞ | |
| Hold time Set up hold time: 5S/ 30S/ 1min/ 3min/ 5min/ 10min/ 20min/ 30min | |
| Stand-by dim level Set up stand-by dim level: 10%/ 20%/ 30%/ 50% | |
| Detection Area Set up detection area: 25%/ 50%/ 75%/ 100% | |
| Remote Distance Toggle bottom can set the remote distance of remote control and sensor. |
WARRANTY
This product has a warranty of 5 years from date of purchase, Improper use, or removal of the batch code will invalidate the warranty. If this product should fail within its warranty period, it should be returned to the place of purchase for a free of charge replacement. ML Accessories does not accept responsibility for any installation costs associated with the replacement product. Your statutory rights are not affected. ML Accessories reserve the right to alter product specification without prior notice.
Supplied By:
(UK) Manufacturer
ML Accessories Ltd, Unit E Chiltern Park, Boscombe Road,
Dunstable LU5 4LT, www.mlaccessories.co.uk
(EU) Authorised Representative
nnuks Holding GmbH, Niederkasseler Lohweg 18, 40547
Düsseldorf, Germany
Email: [email protected]![]()


