ASUS Q17559 Rog Gladius III Wireless Gaming Mouse 
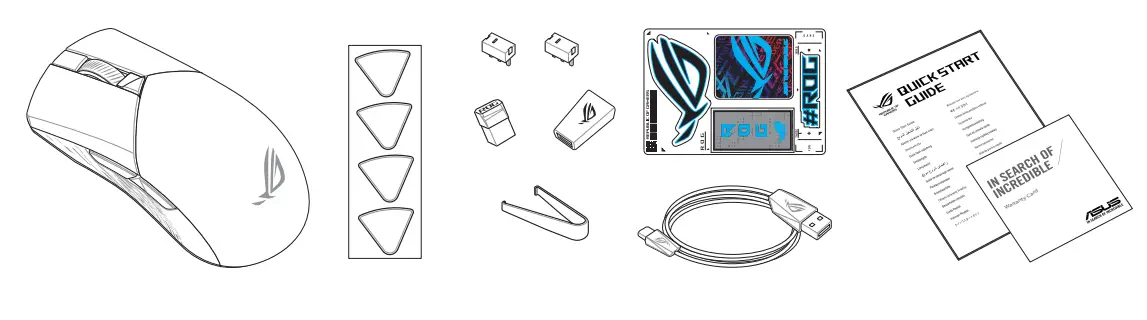
Package Contents
Mouse features
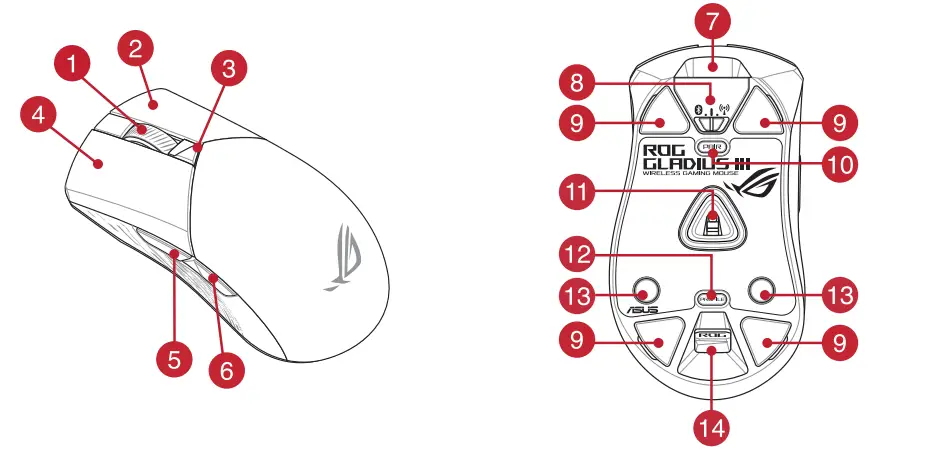
- Scroll wheel
- Connection mode switch
- Right-click button
- Mouse feet
- DPI button DPI
- Pairing button
- Left-click button
- Optical sensor
- Forward button
- Profile button
- Backward button
- Rubber cover
- USB Type-C® connector
- USB Type-C
- USB dongle / USB
Profile switching
Press the profile button on the bottom of your gaming mouse to switch through the 5 profiles available. For more information on the profiles and the lighting effects, please refer to the table below:
| Profile | Default lighting effect | Default color |
| Profile 1 | Rainbow | Multi color |
| Profile 2 | Color cycle | Multi color |
| Profile 3 | Breathing | Blue |
| Profile 4 | Reactive | Green |
| Profile 5 | Comet | Yellow |
Specifications
| Resolution | 100 DPI to 26000 DPI |
| DPI 1 | 400 DPI |
| DPI 2 | 800 DPI |
| DPI 3 (Default) | 1600 DPI |
| DPI 4 | 3200 DPI |
Replacing the switches
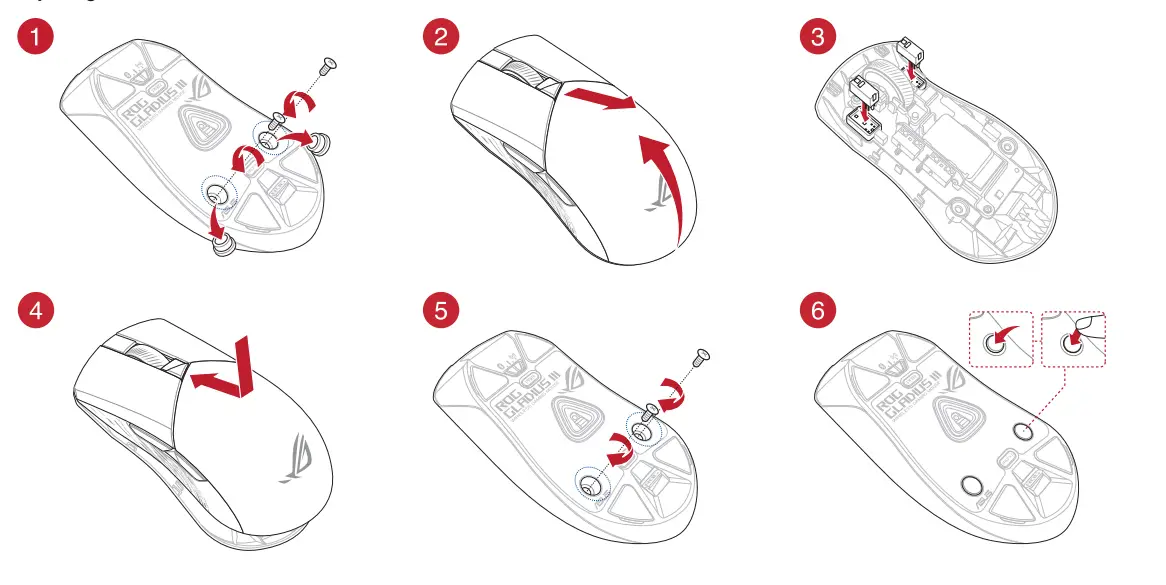
Replacing the mouse feet

Removing the USB Dongle Storing the USB Dongle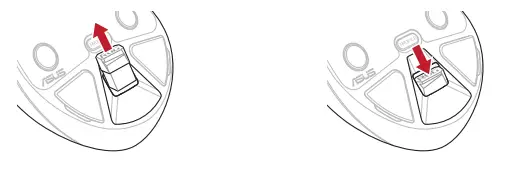
Updating the firmware and customization
- Connect your gaming mouse using the bundled cable and the USB dongle to USB ports on your computer.
- Download and install the Armoury Crate software from https://rog.asus.com
- Follow the software instructions to update your gaming mouse firmware.
- Customize your gaming mouse using Armoury Crate.
Connecting your gaming mouse
Using the bundled cable
Connect the bundled USB Type-C® to Type-A cable to your gaming mouse and a USB port on your computer.
Using RF wireless mode
- Connect the USB dongle to a USB port on your computer.
- Set the connection switch to the RF 2.4G Wireless mode.
Pairing Bluetooth mode for the first time
Set the connection switch to the Bluetooth mode.
Pairing Bluetooth mode to additional host devices (max. 3)
- Set the connection switch to the Bluetooth mode.
- Press and hold the Pairing button for 3 seconds until the LEDs on your gaming mouse start to blink blue. Once your gaming mouse has been successfully paired, the LED indicator on your gaming mouse will light up blue for 3 seconds.
Switching between Bluetooth host devices
Press the Pairing button to switch between different host devices your gaming mouse is already paired to. The LEDs on your gaming mouse will blink for 1 second depending
| BLE Host | Farbe des Lichteffekts |
| Host 1 (Standard) | Rot |
| Host 2 | Lila |
| Host 3 | Blau |
Using the DPI On-The-Scroll tuning function
The DPI On-The-Scroll tuning function allows you to customize the DPI of your gaming mouse without using Armoury Crate.
- Press and hold the DPI button for 3 seconds until the LEDs on your gaming mouse light up.
- Scroll the scroll wheel forwards or backward to adjust the DPI. The LED color hue on your scroll wheel will differ depending on the DPI adjustment.
- Press the DPI button once you have finished customizing the DPI value to save the changes made.


