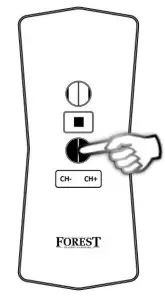
FOREST 5201001362 Multi Receiver Click-On

TECHNICAL SPECIFICATION
- 3V battery type CR2450
- battery life < 3 years
- frequency 433.92MHz
- transmit power max. 10mW
- transmit range indoor max. 30mtr
- working temperature -10°C – +50°C
- each channel can control up to 20 receivers
BATTERY EMPTY
After changing the battery, programmed receivers will stay in memory of wall switch. Please follow the local regulations for disposal of the empty battery.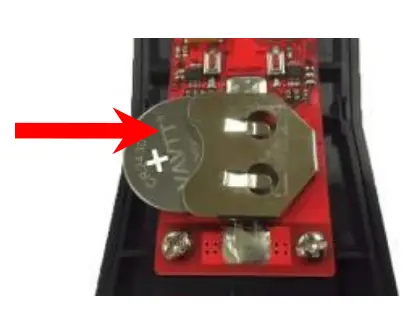
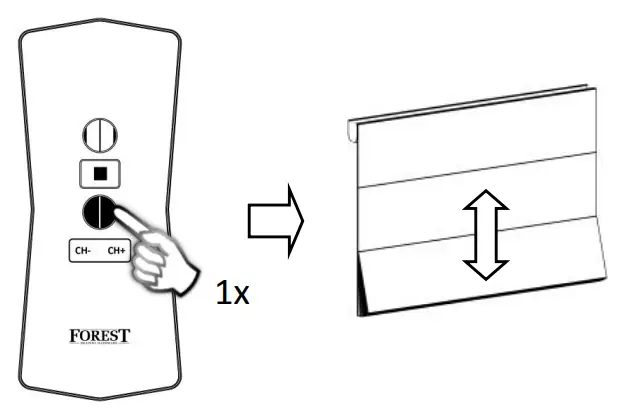
You can recognize these Shuttle motors by the white antenna cable
To program a Diamond Remote to a Shuttle S / L / M Receiver: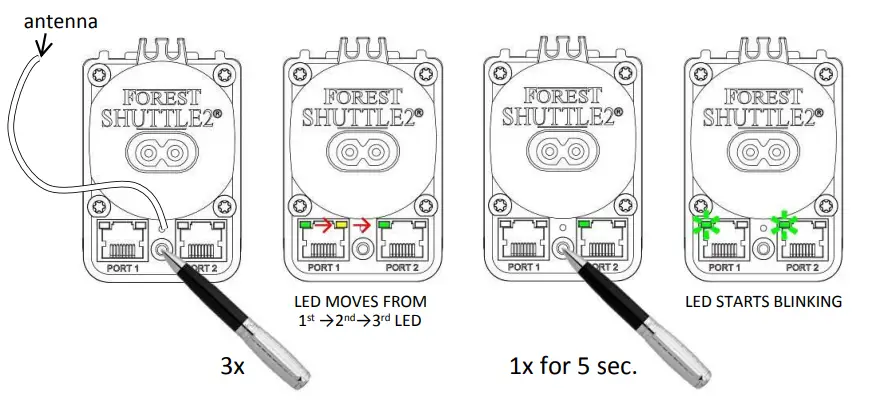
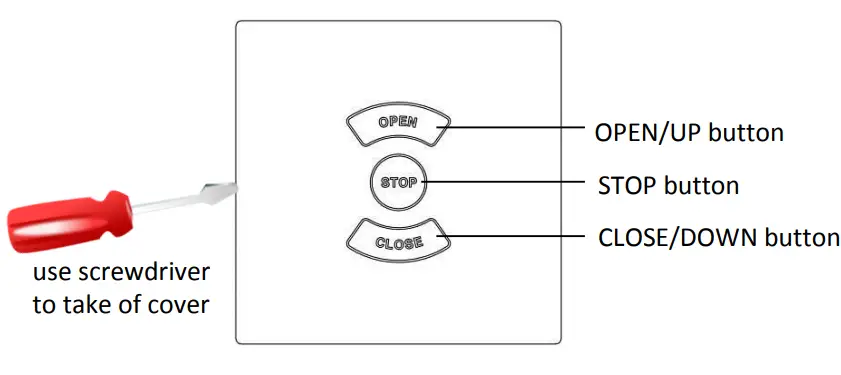
press 1x OPEN button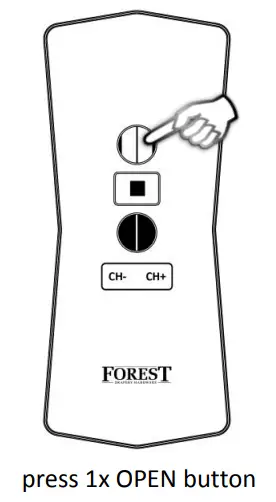
Same procedure, but press CLOSE instead of OPEN, will erase the programmed channel.
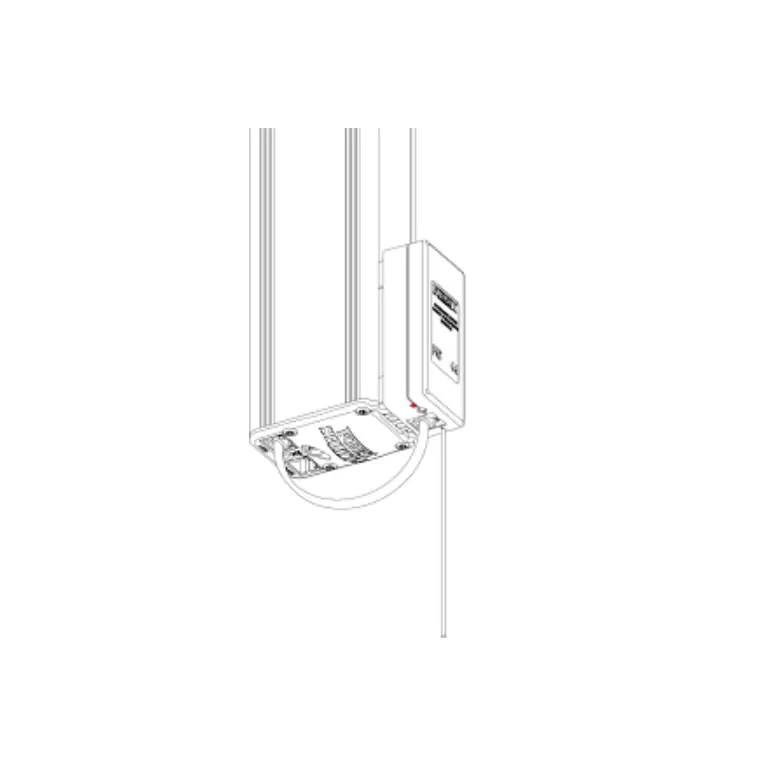
![]() Do not mount the motor within 1 meter from other equipment and receivers. This will interfere with the receiver.
Do not mount the motor within 1 meter from other equipment and receivers. This will interfere with the receiver.
TECHNICAL SPECIFICATION
- powered by Shuttle M
- connect to port 1 of the Forest Shuttle M
- working temperature -10°C – +50°C
- controlled by Forest Multi Remote and Forest Multi Wall Switch RF
![]() Do not mount within 1 meter from other equipment and receivers. This will interfere with the receiver.
Do not mount within 1 meter from other equipment and receivers. This will interfere with the receiver.
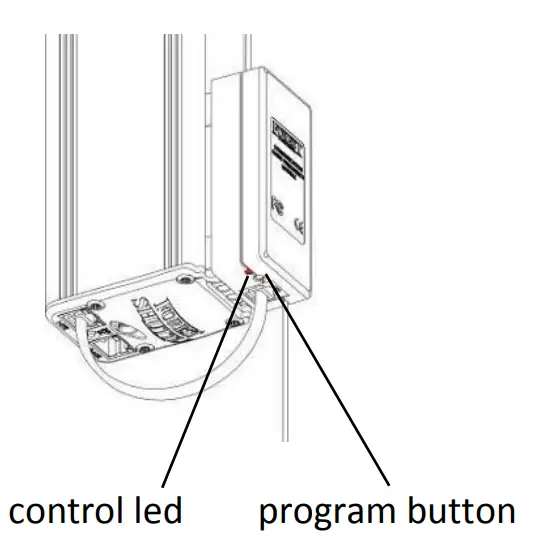
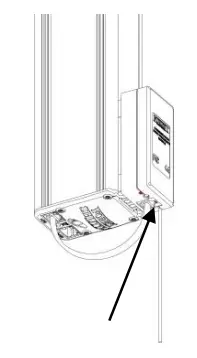
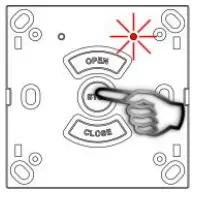
PROGRAMMING WALL SWITCH TO CLICK-ON RECEIVER
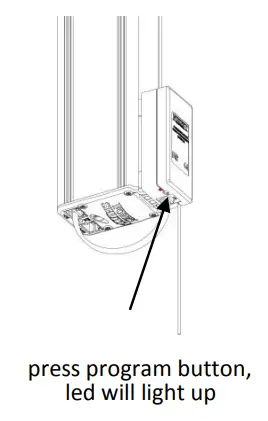
hold the wall switch within 2 mtr from receiver. Select channel and press OPEN button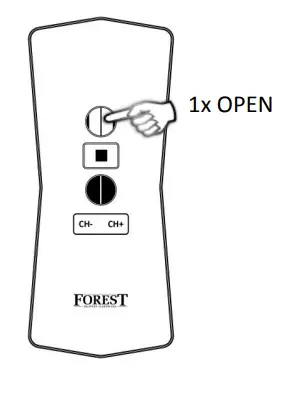
on receiver: led blinks 3 times and will go off
REMOVE PROGRAMMED CHANNEL
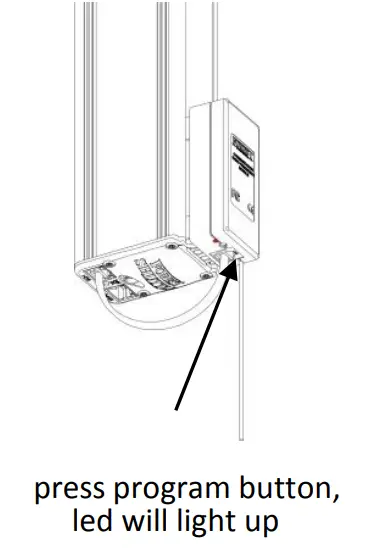
select (to be cancelled) channel and press CLOSE button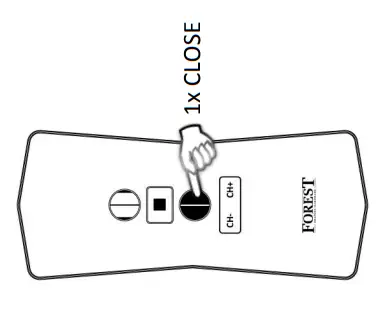
on receiver: led will blink once and will go off
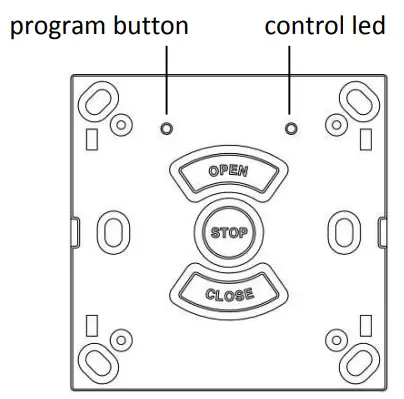
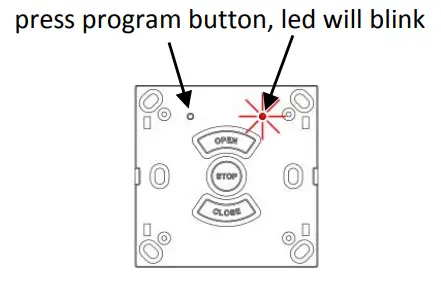
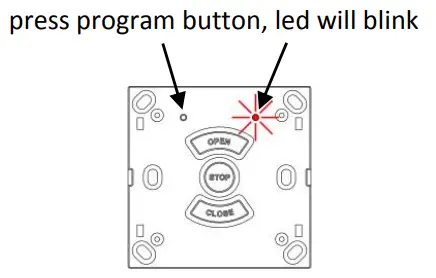
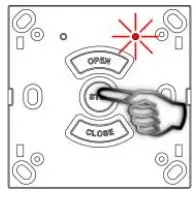
DELETE ALL PREVIOUS PROGRAMMED CHANNELS
press and hold the program button for 10 seconds until control led starts blinking
TECHNICAL SPECIFICATION SHUTTLE M RECEIVER
- powered by Shuttle M
- can also be used as wall switch
- cable 0,5mtr → 5201001360
- cable 3,5mtr → 5201001361
- connect to port 1 of the Forest Shuttle M
- working temperature -10°C – +50°C
- controlled by Forest Multi Remote and Forest Multi Wall Switch RF
TECHNICAL SPECIFICATION FMS/BCS RECEIVER
- power 230Vac – 500W
- controls one tubular or FMS motor
- can also be used as wall switch
- terminal max 2,5mm²
- working temperature -10°C – +50°C
PROGRAMMING REMOTE TO RECEIVER
press STOP button
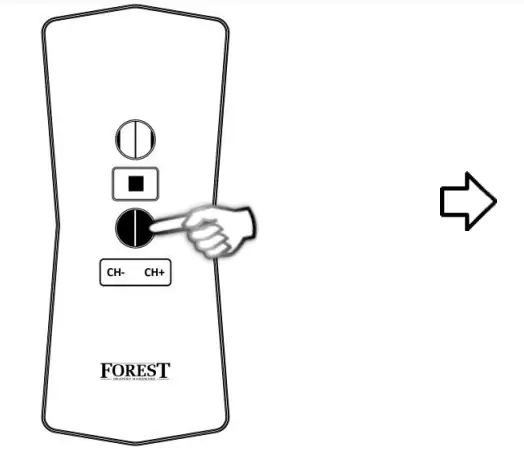
hold the remote within 2 mtr from receiver. Select channel and press OPEN button
led blinks 3 times and will go off: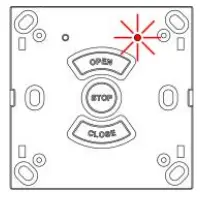
REMOVE PROGRAMMED CHANNEL
press STOP button
select (to be removed) channel and press CLOSE button
led will blink once and will go off

DELETE ALL PREVIOUS PROGRAMMED CHANNELS
press STOP and CLOSE button of receiver for ~6 sec.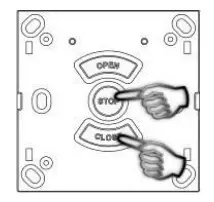
led will blink and will go off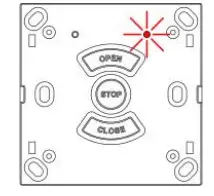
![]() Do not mount within 1 meter from other equipment and receivers. This will interfere with the receiver.
Do not mount within 1 meter from other equipment and receivers. This will interfere with the receiver.
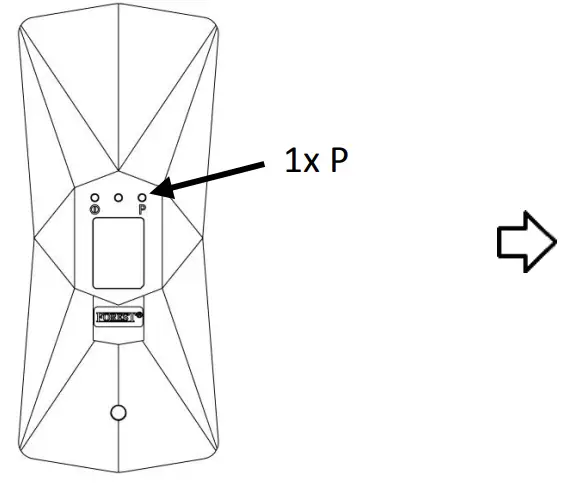
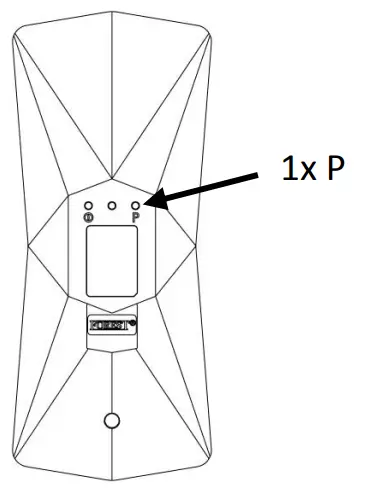
PROGRAMMING REMOTE TO TUBULAR MOTOR
press button on motor, motor will turn short to acknowledge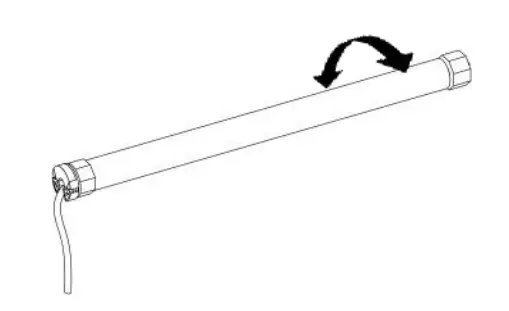
within 6 seconds:
press P button two times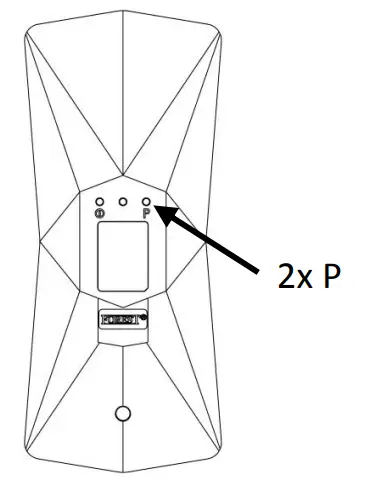
press OPEN button one time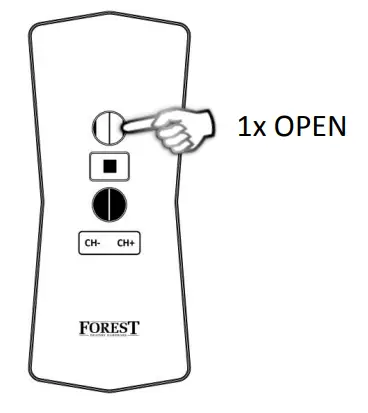
motor will turn to acknowledge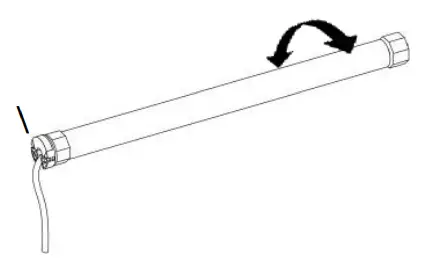
CHANGING DIRECTION OF ROTATION:
To change the direction of rotation, keep green button on motor pressed for 7 sec, until motor turns to acknowledge.
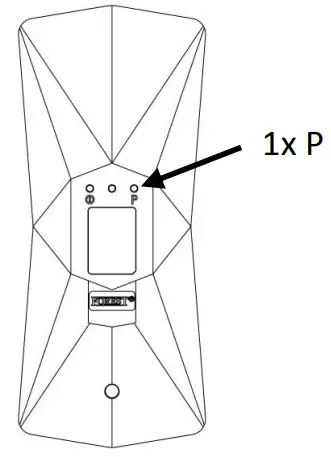
ADD MORE REMOTES OR CHANNELS TO TUBULAR MOTOR
①st remote: press P button two times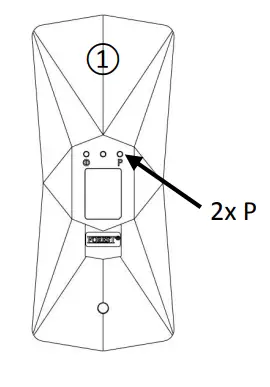
②nd remote: press P button one time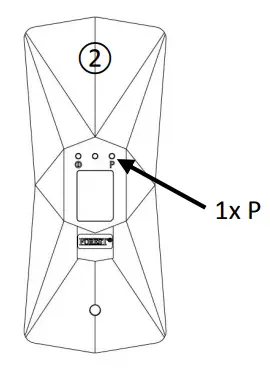
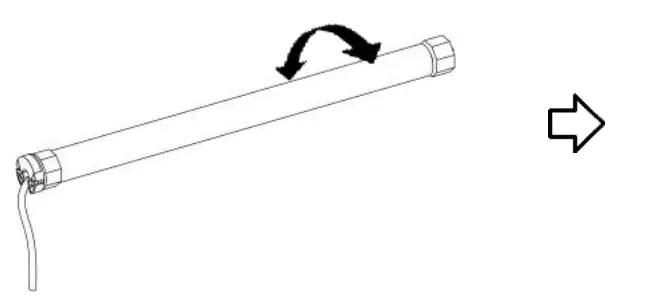
motor will turn to acknowledge to add another channel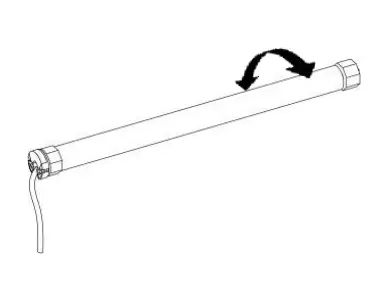
- press 2xP button of programmed channel,
- select other channel and press P button motor will turn to acknowledge
CANCEL ALL REMOTES
press P button one time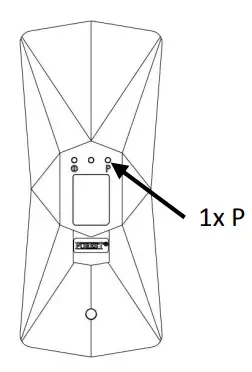
press STOP button one time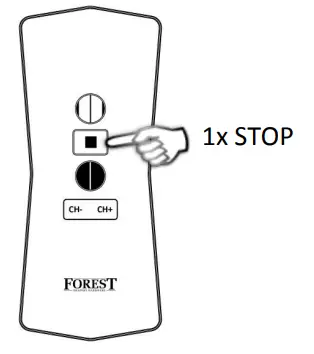
press P button one time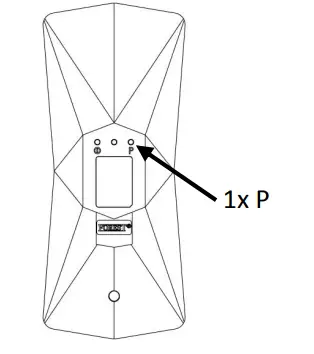
motor will turn to acknowledge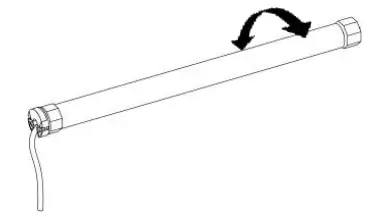
ADJUSTING UPPER AND LOWER END LIMITS
![]() IMPORTANT:
IMPORTANT:
– when more motors are programmed to one channel, end limits of all motors will be adjusted
– during programming, keep the remote within 2 mtr from the receiver/motor
| press P button one time | press OPEN button one time | press P button one time |
 |  |  |
| motor will turn to acknowledge | adjust to UPPER position | press STOP button when required height is reached. Press STOP button 5 times slowly for 1 seconds to confirm |
 |  | 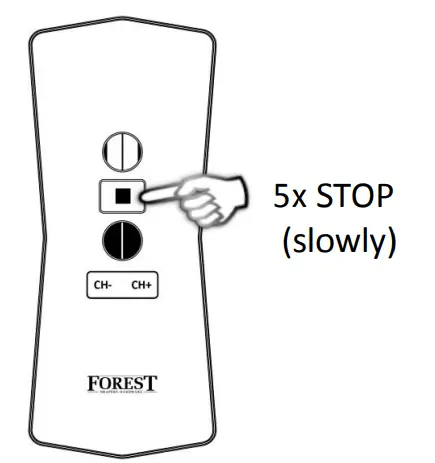 |
| motor will turn to acknowledge | adjust to LOWER position | press STOP button when required height is reached. Press STOP button 5 times slowly for 1 seconds to confirm |
 |  |  |
motor will turn to acknowledge, limits have been set successfully.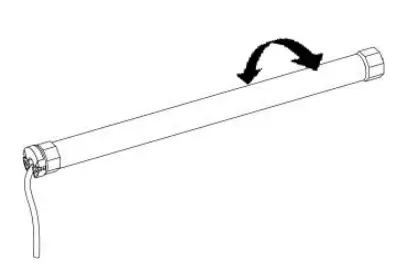
CANCELLATION OF UPPER AND LOWER END LIMITS
IMPORTANT: When cancelling end limits, the limits of all motors, programmed to selected channel, will be cancelled
| press P button one time | press CLOSE button one time | press P button one time |
 |  |  |
motor will turn to acknowledge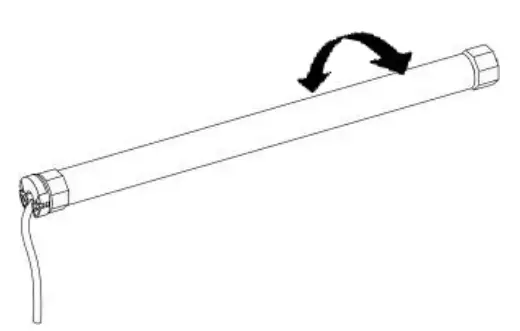
REVERSE DIRECTION SETTING
When motor is not running, press button on motor for ~ 7 seconds, until motor turns to acknowledge
CHNICAL SPECIFICATION
- 24Vdc, 16Watt
- nom. 0.8Nm – max. 1.0Nm
- 34 rpm
- max. running time 7 min.
- max. curtain weight 4 kg
- max. 5 cord rolls
- has to be used with Diamond remote, Multi remote and/or Multi wall switch RF
- only to be used in Forest BS system and with Forest power supply for BS motor
![]() IMPORTANT: WHEN USING THE QUICK LOCK CORD ROLL, BE SURE TO LOCK THE CORD BEFORE USING THE MOTOR
IMPORTANT: WHEN USING THE QUICK LOCK CORD ROLL, BE SURE TO LOCK THE CORD BEFORE USING THE MOTOR
PROGRAMMING WALL SWITCH TO BS MOTOR
switch on power to the motor: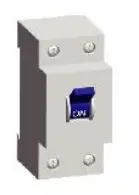
motor will jog to acknowledge: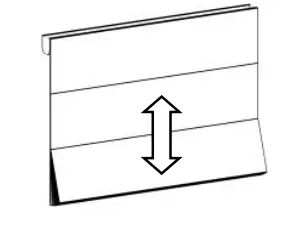
within 10 seconds, select channel press P button and press OPEN button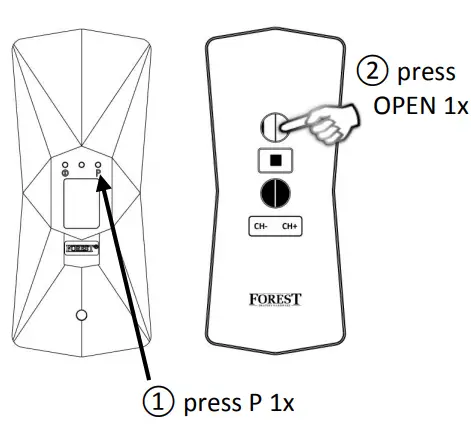
motor will jog to acknowledge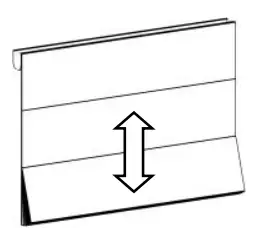
REMOVE PROGRAMMED CHANNEL
switch on power to the motor: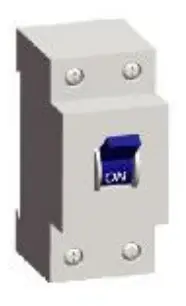
motor will jog to acknowledge: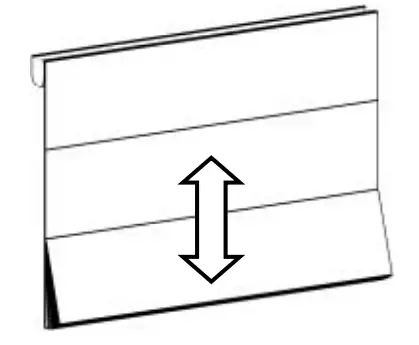
within 10 seconds, select channel, press P button and press STOP button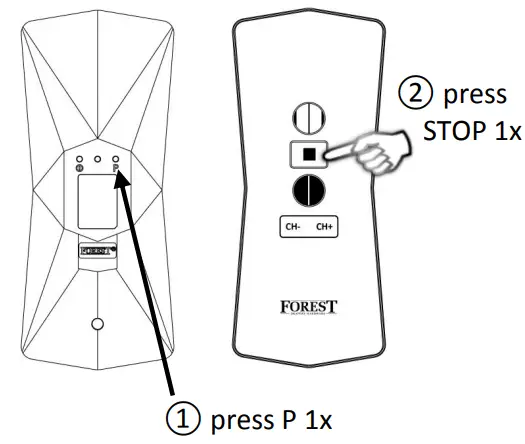
motor will jog to acknowledge: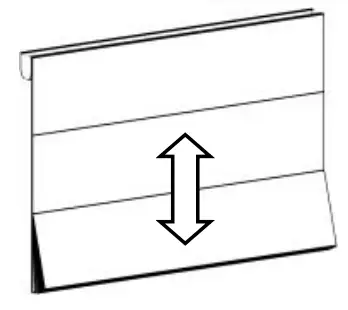
CHANGE MOTOR DIRECTION
switch on power to the motor:
motor will jog to acknowledge: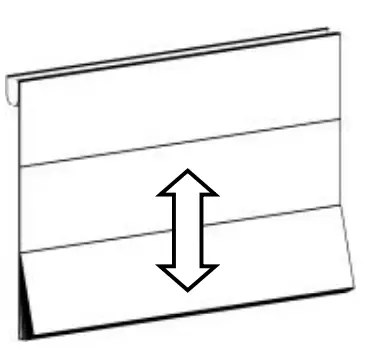
within 10 seconds, select channel, press P button and press CLOSE button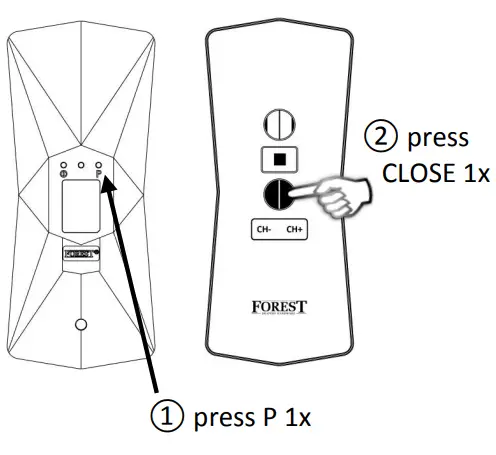
motor will jog to acknowledge: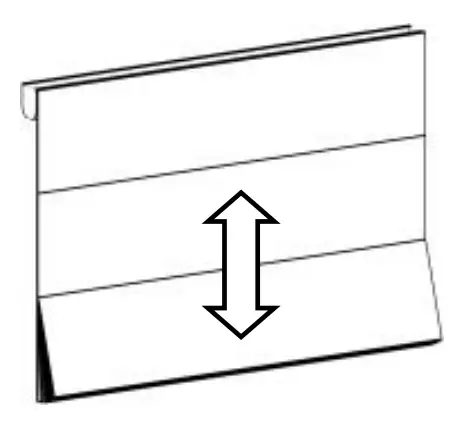
SET UPPER END LIMIT
press P button once motor will jog to acknowledge: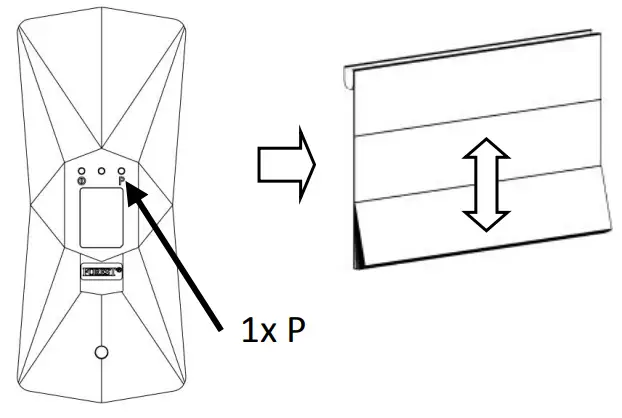
press OPEN button once, motor will jog to acknowledge: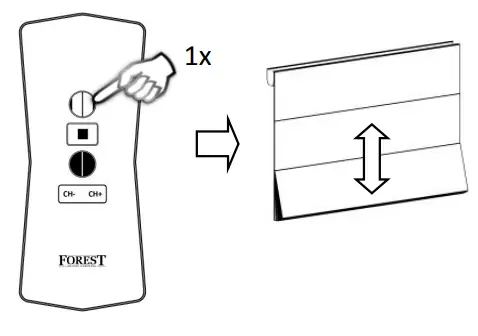
press P button once, motor will jog to acknowledge: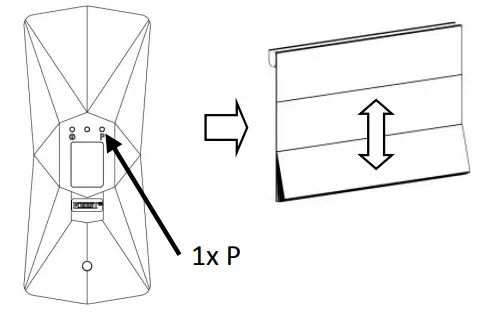
adjust desired upper end limit and press P to save the upper limit: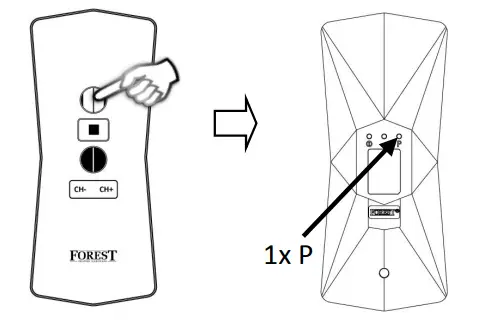
motor will jog to acknowledge: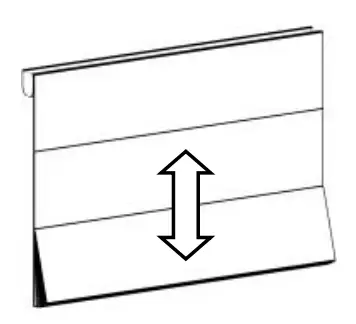
SET LOWER END LIMIT
press P button once, motor will jog to acknowledge: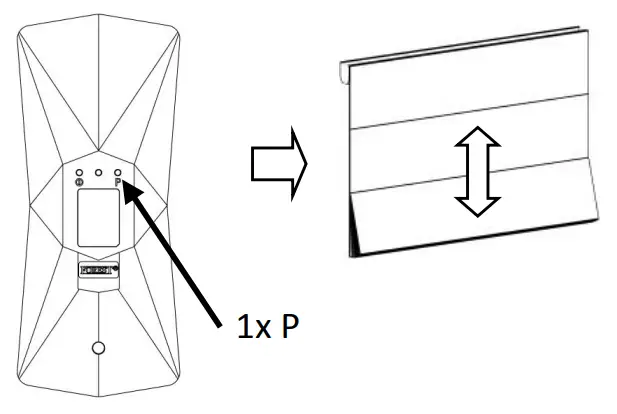
press CLOSE button once, motor will jog to acknowledge: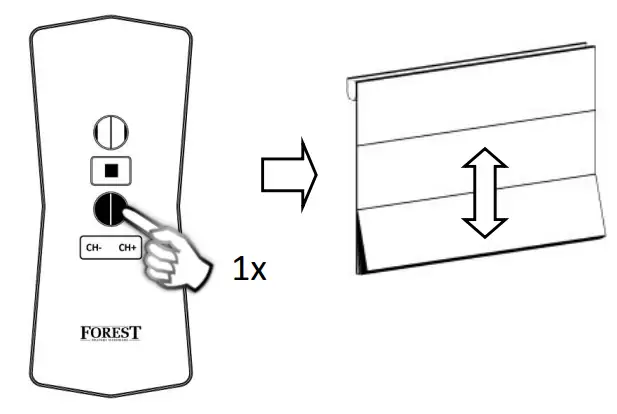
press P button once, motor will jog to acknowledge: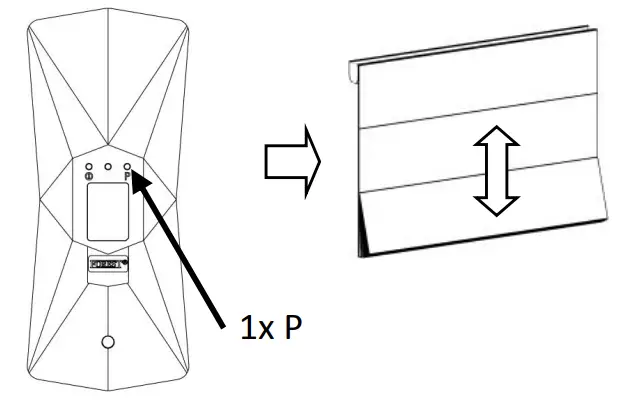
adjust desired lower end limit and press P to save the lower limit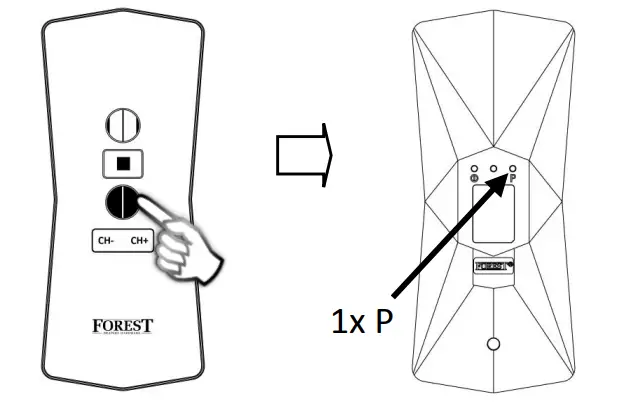
motor will jog to acknowledge:
DELETE LIMITS
press P button twice, motor will jog to acknowledge: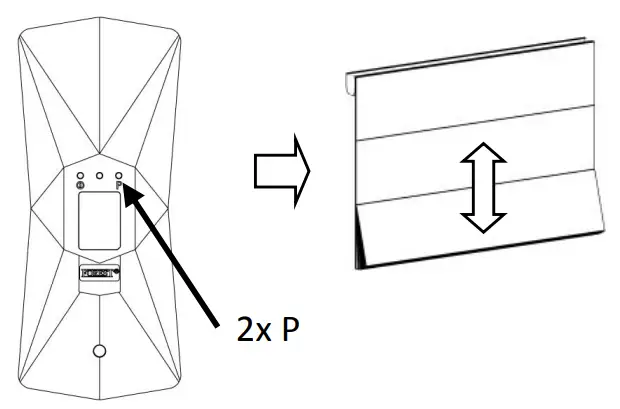
press OPEN button once, motor will jog to acknowledge: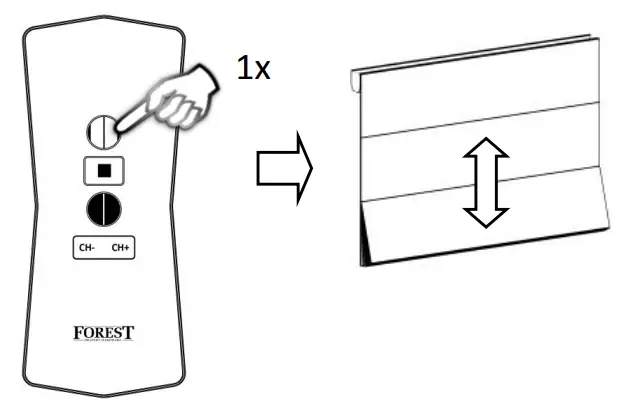
DELETE ALL MEMORY
press P button twice motor will jog to acknowledge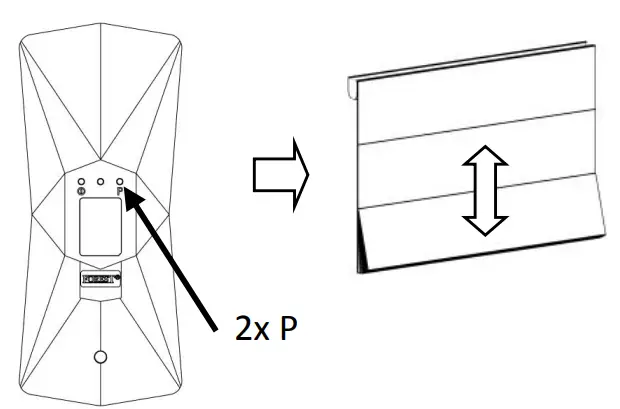
press CLOSE button on remote, motor will jog twice to acknowledge