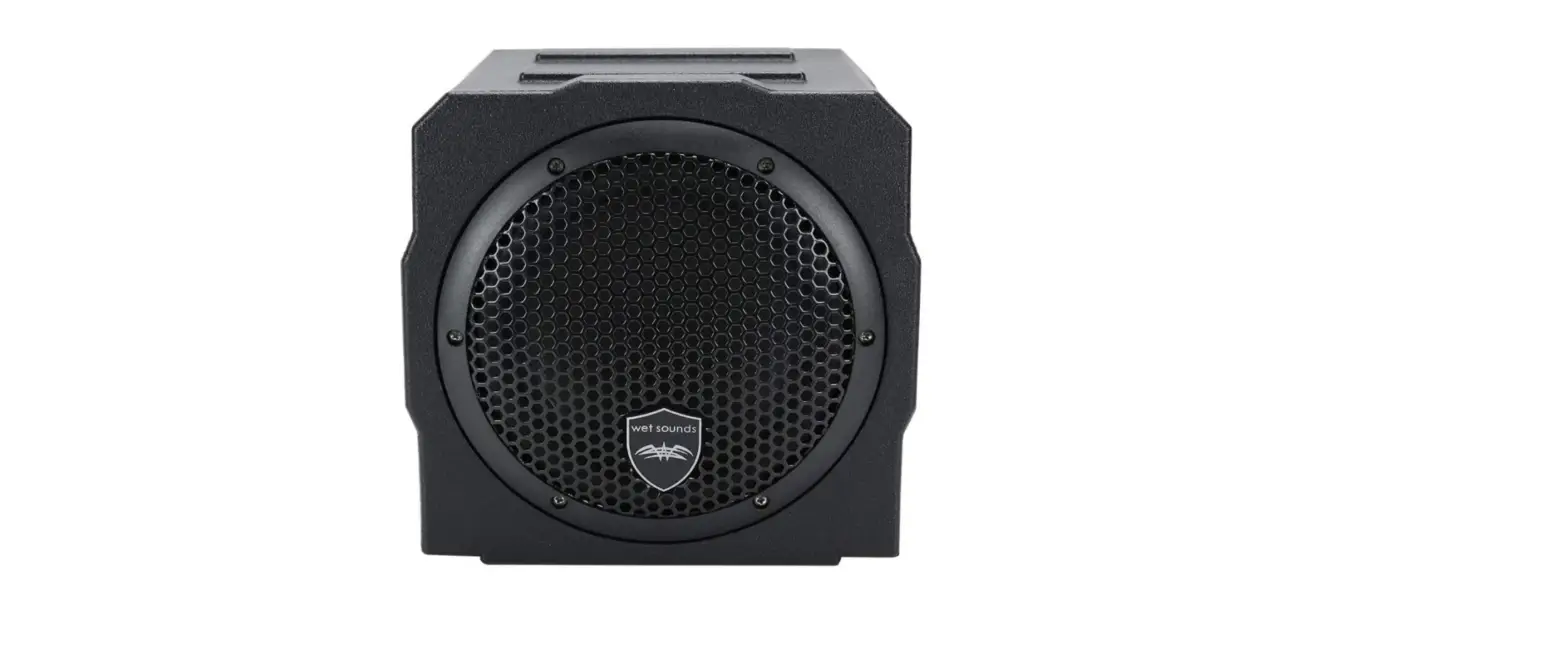

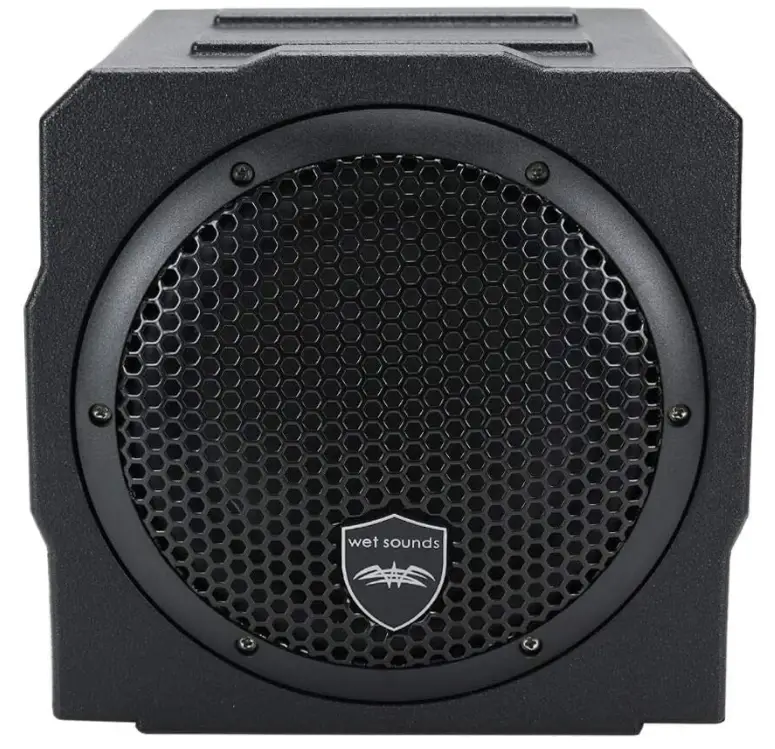
Wet Sounds Stealth AS-8 watt Active Subwoofer Enclosure
Specifications
- DIMENSIONS: 16 x 14.3 x 11 inches
- WEIGHT: 9.93 Kilograms
- AMP: Built in 350 Watt Amp
- FREQUENCY RESPONSE: 20Hz – 250Hz
- BATTERY VOLTAGE RANGE:5 – 16 VDC
- VARIABLE LOW PASS CROSSOVER: 50 Hz – 200 Hz
- VARIABLE BASS BOOST: 0-12dB @ 45 Hz
- FUSE SIZE: 1 x 30A
Introduction
The active subwoofer enclosure for 350 watts is called the Wet Sounds Stealth AS-8. The improved sound quality and sturdy, molded polyethylene housing are made to withstand the hostile environment. For added security and power, the Class D amp is protected against moisture and dirt. The AS-6, AS-8, and AS10 have been constructed with the proper connectors to work with our sound bars “plug & play.” If a user has an earlier sound bar, the sub includes auto detecting as well to switch on automatically. On newer sound bars, the Remote Turn On Wire connects to the remote out. If a user owns a Wet Sounds sound bar, installation is relatively simple; nevertheless, it will function flawlessly with any other brand.
Congratulations! Thank You for purchasing the Wet Sounds STEALTH Series powered subwoofer system.
Wet Sounds professional marine audio products represent the ultimate in high performance marine audio. Wet Sounds products are specifically engineered to withstand the rigorous marine environment.
The STEALTH series powered subwoofer enclosures bring Wet Sounds performance technology to the harsh marine and off-road environment in a complete, all in one package. Stealth subwoofers will bring on the bass thumping sound to make a good Boat, ATV, or UTV audio system GREAT!
- Lightweight Rotationally Molded Polyethylene Housing – tough enough to withstand harsh environments
- 500 Watt Amplifier (AS-10), 350 Watt Amplifier (AS-8), 250 Watt Amplifier (AS-6)
- High Efficiency Class D Design – sealed against moisture and dirt
- Easy Plug & Play connection with STEALTH Soundbars, or any other system
- High Excursion subwoofer driver – computer matched to the enclosure
- Remote level control included
- Stainless steel mounting hardware included
- Durable aluminum grill
- Auto or manual turn-on function
- Thermal and over/under voltage protection circuitry
INSTRUCTIONS
IMPORTANT! BEFORE MAKING ANY CONNECTIONS, DISCONNECT THE BATTERY POWER UNTIL THE INSTALLATION IS COMPLETED TO AVOID POSSIBLE DAMAGE TO THE ELECTRICAL SYSTEM.
INSTALLATION
Mounting
Find the proper spot in your vehicle to mount the subwoofer enclosure. The enclosure should be mounted securely to a flat surface using the supplied hardware. For the ST AS-10, the mounting holes are integrated into the enclosure. For the ST AS-6 / 8, install the supplied mounting feet to the enclosure using the supplied hardware. The feet can be rotated to fit the floor of the vehicle.
WIRING THE HARNESS FOR THE ST SERIES SUBWOOFER
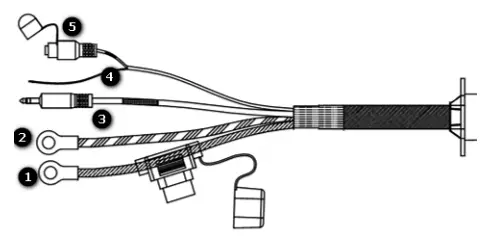
IF INSTALLING ON A GAS OR DIESEL VEHICLE – wire the Negative (Black) wire (2) on the subwoofer harness to the Negative (-) battery terminal and the Positive (Red) wire (1) on the subwoofer harness to the Positive (+) battery terminal.
IF INSTALLING ON AN ELECTRIC VEHICLE – switch it into TOW mode. Wire the Negative (Black) wire (2) on the subwoofer harness to Ground on the DC-DC Converter and the Positive (Red) wire (1) on the subwoofer harness to the Positive (+) post on the DC-DC converter.
Note: DC-DC Converter is required on electric vehicles to avoid damage to the accessory and the vehicle!
INSTALLATION / REMOTE LEVEL CONTROL
Route the Blue Remote Turn On Wire (4) to a location where it can connect to the Remote Turn On Output from the source unit. If using the latest Wet Sounds Stealth Sound Bar, this will be a blue wire. On a traditional head unit, this wire is often labeled “power antenna remote”. It should be a wire that supplies +12V when the source unit is powered on and returns to 0V when the source unit is powered off. If using this turn on method, be sure that the AUTO TURN ON switch on amplifier built in to the ST series subwoofer is in the “REM” position.
If the source unit does NOT have a Remote Turn On Output (like earlier model Wet Sounds Stealth Sound Bars) make sure the AUTO TURN ON switch on the amplifier built in to the ST series subwoofer is set in the “AUDIO” position. See further instructions below for more information on the AUTO TURN ON switch. Apply tape to insulate the end of this wire if not being used.
Route the 3.5mm plug labeled “Signal Input” (3) to a location where it can connect to an audio output from the source unit. On Wet Sounds Sound Bars this is a 3.5mm jack labeled “AUX OUT”. If using a traditional head unit with RCA style preamp output, a 3.5mm-RCA adapter will likely be needed.
Route the 3.5mm jack labeled “Remote Level Control” (5) to a location where it can connect to the supplied Remote Level Control. This control is intended to allow easy adjustment of the overall output of the ST series subwoofer, so mount the control in a location that is accessible.
REMOTE LEVEL CONTROL
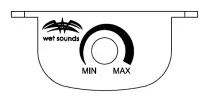
Before connecting the remote level control, find a location that is easily accessible for adjustment. The attached cable will need to be run to the 3.5mm jack on the harness for the ST series subwoofer. To avoid the possibility of induced noise from the vehicle’s electrical system, keep the cable away from the vehicle’s electrical wiring.
AMPLIFIER ADJUSTMENTS
AMPLIFIER ADJUSTMENTS FOR THE ST SERIES SUBS
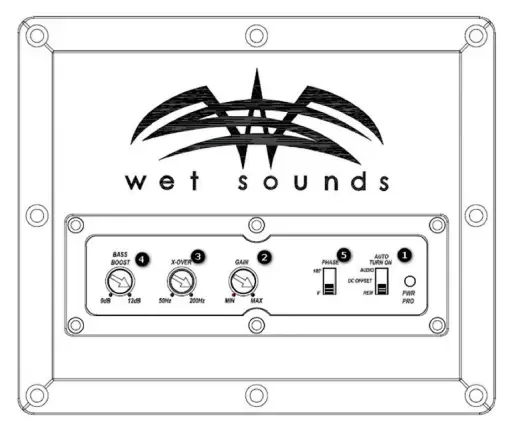
- AUTO TURN ON SWITCH The “REM” setting is the most reliable way to turn the ST series subwoofer on and off, but if the source unit does not have a Remote Output wire then either the “AUDIO” or “DC OFFSET” setting can be used. Not all source units are the same, so three different turn on options are provided. Select the setting that works best with the source unit in the system: “REM” Setting is used when the source unit has an output that supplies +12V when powered ON and returns to 0V when powered OFF. Newer model Wet Sounds Stealth Sound Bars have this feature and should be used in this way. “DC OFFSET” Setting senses voltage change when the source unit is powered on and off. This setting does not depend on music. This setting should be used if the “AUDIO” setting does not properly turn on the ST series Subwoofer. “AUDIO” Setting senses a music signal to turn on the amplifier built in to the ST series subwoofer. This setting is recommended for earlier model Wet Sounds Stealth Sound Bars. Please note – if the source unit is powered ON, but at “0” volume, the ST series subwoofer will likely not turn on until the volume is increased.
- The Gain adjustment controls the sensitivity of the amplifier built in to the ST series subwoofer. It has been included to allow adjustment to match the output of any source unit to the input of the amplifier. Gain controls are one of the most misunderstood adjustments. By rotating the control in the clockwise direction, the amplifier’s input will become more sensitive and the subwoofer output will increase. To determine if the amplifier’s gain control is set properly, turn the system on and slowly increase the volume control on the source unit. Usually about ¾ volume can be reached before the system gets loud without distortion. It is very important to not overdrive the subwoofer to the point of distortion, which will cause permanent damage to the subwoofer. If ¾ volume without distortion is not possible, the gain should be reduced (by decreasing the gain adjustment). Gain adjustments should be done very slowly and carefully. The Remote Level Control should be unplugged while the gain is adjusted, then plugged in after final adjustments are made. The Remote Level Control will only decrease the output of the amplifier and will not affect the gain control setting.
ADJUSTING THE X-OVER, BASS BOOST AND PHASE - The Variable Crossover Network allows adjustment of the frequency range that the amplifier sends to the subwoofer. This should be adjusted to fall slightly above the lowest frequency that the full range speaker/s in the system can reproduce.
- The Variable Bass Boost allows the selection of the amount of bass boost – centered at 45Hz – that is desired in the system. There is no specified setting for this. It is suggested to be set by the listener’s preference.
ADJUSTMENTS - The Phase Control can be used to adjust the output of the subwoofer depending on location. This adjustment can be made by ear to determine which setting is preferred. After all the above setting are complete, THE WATERPROOF COVER SHOULD BE REATTACHED AND LEFT IN PLACE. These settings should not require changing under normal use and should be considered “set and leave” controls. The components in Stealth Series Subwoofers are designed for maximum performance as complete units. Substitution of any other amplifier or subwoofer is NOT recommended and WILL VOID The WARRANTY!
WHAT THIS WARRANTY COVERS
This is a “limited” warranty. This warranty covers any defect in materials and workmanship. This warranty only covers the original purchaser and is not transferrable. This warranty is also only valid if the original purchase was made from an authorized Wet Sounds dealer.
HOW LONG COVERAGE LASTS
This warranty extends for 2 years from the date of purchase. It is recommended to REGISTER your warranty online within 45 days of purchase at www.wetsounds.com – click on “warranty registration”.
WHAT IS NOT COVERED
This warranty does not cover fading or discoloration caused by exposure to sunlight or chemicals such as ammonia, household bleach, or any cleaning material that contains abrasive substances. Wet Sounds, Inc. does not cover the expense for removal or reinstallation. Additionally, shipping TO Wet Sounds, Inc. must be paid for by the purchaser. This warranty is void and inapplicable is Wet Sounds deems that the product was abused or misused; including but not limited to damage caused by accident, mishandling, improper installation, removing the inline fuse on the power connection, negligence, normal; wear and tear, excessive water or heat damage, freight/shipping damage, or products that have been disassembled by anyone other than Wet Sounds technical staff. Wet Sounds will not be responsible for any incidental or consequential damages, except to the extent provided (or prohibited) by applicable law. This warranty gives you specific rights, and you may also have other rights which vary from state to state.
WHAT WET SOUNDS, INC. WILL DO
Wet Sounds, Inc. will repair any part of your product that proves to be defective in materials or workmanship. In the event repair is not possible, Wet Sounds will replace the product in question. If it is deemed necessary Wet Sounds, Inc. will either replace the entire product with a refurbished unit or it will be replaced with a model that is similar in price is that model is no longer available. Labor costs and materials needed to complete this service will be at No Charge to the purchaser. Additionally, return shipping FROM Wet Sounds, Inc. to the purchaser will be paid for by Wet Sounds.
HOW TO GET SERVICE
Contact Wet Sounds, Inc. either by phone (877-938-7757) or by email ([email protected]). A service representative will assist you in confirming that the problem you are experiencing is caused by a defective product and if that product is covered under warranty. The service representative will issue you a Return Manufacturer’s Authorization (RMA) and other details to obtain service for your product.
DO NOT RETURN YOUR PRODUCT WITHOUT THE PROPER RETURN AUTHORIZATION (RMA)!
INTERNET WARNING
Wet Sounds, Inc. products sold on any non-authorized web site or internet auction site are void of any and all manufacturer’s warranty. Please contact Wet Sounds (877-938-7757) or visit our web site (www.wetsounds.com) for a list of authorized online sellers or to find an authorized installing retailer near you.
FREQUENTLY ASKED QUESTIONS
Yes, it comes with mounting feet.
Yes, it has a remote gain dial that can be installed on the dashboard to change the sub volume.
A self-contained speaker and amplifier make up this kind of subwoofer. For optimum performance, the speaker and amplifier are matched, and both are contained in the same enclosure.
Despite all of the benefits of passive subwoofers, active subwoofers are still more frequently used. They don’t require the use of or the acquisition of any additional parts or components, but instead provide a deeper, more powerful sound.
Home theatre designers like passive subwoofers because they are perfect for huge spaces that may require several speakers. Active subwoofers, also referred to as powered subwoofers, have a built-in amplifier as their own power source.
The fundamental distinction between a powered and passive subwoofer is that the former doesn’t require an amplifier to play low-frequency music. Because it contains a built-in power supply or amplifier, it is sometimes known as an “active subwoofer.”
Even though some have the amplifier built into the enclosure, a subwoofer is simply a type of loudspeaker, and all loudspeakers require amplifiers even if they don’t seem to.
Active subwoofers feature internal amplifiers and can function without an additional amplifier.
Yes, as long as your subwoofer includes an auto standby mode, you can leave it on constantly.
If your subwoofer is active (that is, it has its own built-in amplifier), connect it to your powered AMP using a standard RCA connection in addition to hooking it into the wall for power.
It is advised that you choose a subwoofer with at least 100 watts RMS of power in order to achieve a respectable amount of power.
The subwoofer in question’s wattage determines its power; a higher wattage indicates a more potent subwoofer.
The power, sensitivity rating, and enclosure style should all be taken into account. Select the largest subwoofer you can if you want the system to play loud, low music and you have enough room.


