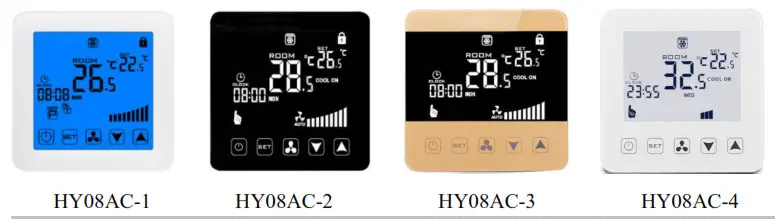
HY08AC Touch Screen Thermostat
User Manual
Many thanks for your selection of our products and services, and also for your trust and support to us.
Application
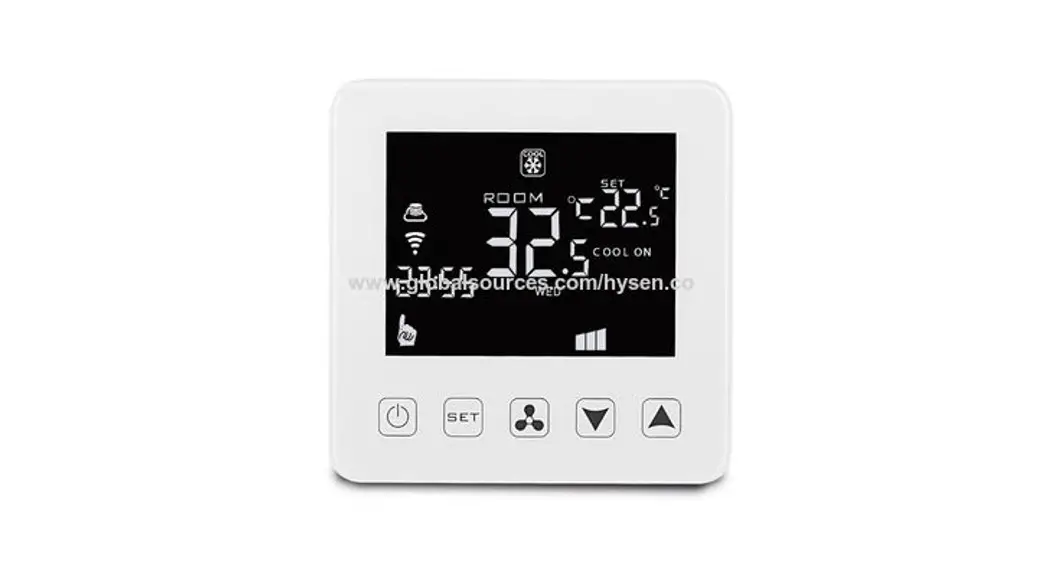
HY08AC fan coil units thermostat is used for control room temperature in central air conditioning fan coil units system. By comparing room temperature with setting the temperature to open and close fan coil units and motorized valve in the end of air conditioning system,to achieve the purpose of adjusting room temperature, comfort and saving energy. HY08AC uses microprogrammed control unit, large LCD display, LCD display mode: working mode (cooling,heating,ventilation), fan speed (high,middle,low, auto),room temperature,setting temperature,time,7 days 4 period programming,timing turn on/off etc.
Technical Data
| Power Supply | 220V 50/60Hz | Installation | Flush Installation |
| Rated current | 3A | Sensor | NTC |
| SetPoint Range | 5~35℃ | Accuracy | ±0.5°C |
| Ambient | 0~50℃ | Protection Class | IP30 |
| Size | 86*86*14 | Housing | PC+ABS plastic |
| Ambient temperature | 0°C~50°C | Storage temperature | -10°C-60°C |
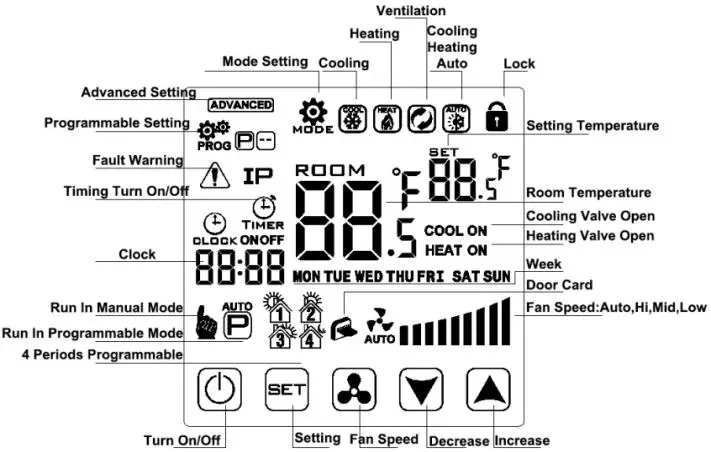
Operation Key
| NO. | symbols | represent |
| A |  | Increase key: adjust temperature and value |
| B |  | Setting key |
| C |  | Decrease key: adjust temperature and value |
| D |  | Fan speed key; |
| E |  | Turn-ON/OFF |
Operation Instruction
| Operation | Description |
| Turn-ON/Turn OFF | Press“ |
| Setting Temperature | In turn-on state, press “ temperature, press every time, temperature change 0.5℃. |
| Fan Speed Choice | In turn-on state, press“ |
| Time Setting | In turn-on state, long press“ choose “ |
| Timing Turn on/off Setting | In turn-on state, long press“ choose “ |
| Working Mode Choice | In turn on state,long press“ |
| Manual And Programmable Mode Choice | In turn-on state, short press“ |
| Motorized | In cooling(heating)mode,when room temperature higher(lower)setting |
| Valve Control | Temperature 1℃,open motorized valve; when room temperature reach setting temperature, close motorized valve, fan coil continues to work(it can be set as fan close together with valve in advanced setting). Ventilation mode(fan coil unit is not under control Fan coil unit is under control,it is a valve and fan coil unit close together. |
| Key Lock Function | Key Lock function:if thermostat opens key lock function,no any operation after 10 minutes will lock keys automatically(screen display “ |
| Door Key Energy Saving Mode (HY08AC-K) | Enter into energy-saving mode by door card. When pulling out the door card, “ set as 26℃ automatically,fan-run in low speed;if the thermostat is in heating mode, temperature set as 18℃ automatically,fan-run in low speed |
| Alarm | Sensor occurs fault, thermostat close fan coil and motorized valve and display“ E1:sensor short circuit alarm E2:sensor open circuit alarm When temperature higher than 55℃ displays “HI” when temperature lower than 0℃ displays“LO” |
Programmable Mode Setting And Working
HY08AC fan coil units thermostat can set different time different temperatures; there is “— ”(manual programmable) and “P ”(cancel programmable) 2 programs can be chosen.
Manual Programmable
Long press “![]() ”for 3-5 seconds to enter into the setting screen,, short press ”
”for 3-5 seconds to enter into the setting screen,, short press ” ![]() ”to choose “ P” and press “
”to choose “ P” and press “ ![]() ”to confirm and enter into the manual programmable setting. After entering into manual programmable,To begin with the first period(“
”to confirm and enter into the manual programmable setting. After entering into manual programmable,To begin with the first period(“ ” flashing) of Monday, press “
 ![]() ” to confirm, starting time(default 6:00), it can press“
” to confirm, starting time(default 6:00), it can press“ ![]() ”or“
”or“ ![]() ”to adjust by yourself,press every one time to increase or decrease 30 minutes and then press “
”to adjust by yourself,press every one time to increase or decrease 30 minutes and then press “![]() ”,press “
”,press “![]() ”or“
”or“ ![]() ” to adjust the temperature,press “
” to adjust the temperature,press “ ![]() ” enter into the second period “
” enter into the second period “ ![]() ” etting,the same as above to finish 4 periods setting,then enter into Tuesday setting,the same setting method as Monday,then finish 7 days setting,no any operation for 5 seconds will save and exit automatically.
” etting,the same as above to finish 4 periods setting,then enter into Tuesday setting,the same setting method as Monday,then finish 7 days setting,no any operation for 5 seconds will save and exit automatically.
Cancel programmable:long press “![]() ”for 3-5 seconds to enter into setting screen,short press “
”for 3-5 seconds to enter into setting screen,short press “![]() ” to choose “
” to choose “ ![]() ”programmable,press “
”programmable,press “![]() ”to confirm and to cancel programmable mode back to upper setting screen.Press “
”to confirm and to cancel programmable mode back to upper setting screen.Press “ ![]() ”to choose next setting or waiting for 5 seconds to exit
”to choose next setting or waiting for 5 seconds to exit
Default Setting
| Period | Period Setting | Default Timer | Default Temperature | |
| Monday To Sunday | 1 | 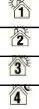 | 6:00 | 23 |
| 2 | 8:00 | 26 | ||
| 3 | 17:30 | 26 | ||
| 4 | 22:00 | 23 | ||
Advanced Setting
In turn off state, long press “ ![]() ” for 5 seconds to enter into the advanced setting.Press“
” for 5 seconds to enter into the advanced setting.Press“![]() ”or“ ”to set,short press “
”or“ ”to set,short press “ ![]() ”to next option and press“ ”or“ ”to set.
”to next option and press“ ”or“ ”to set.
| Display Sign | Setting Options | Data Setting Function | Factory Default |
| Al | Measure Temperature Calibration | -9-+9°C (Display om temperature, Press | 0.5°C n Accuracy Calibration |
| A2 | Children Lock Setting | 0:Half Lock;(can turn on/off and adjust temperature) 1:Full Lock | 0 |
| 2:Cancel Children Lock | |||
| A3 | Setting Temperature Lowest Limit | 1-25°C | |
| V4 | Setting Temperature Highest Limit | 30-70°C | 35 C |
| V:7, | Fan Coil Units Control | 0=Fan Under Control 1=Fan Isn’t Under Control | U |
| A6 | Timing Turn On/Off Running Way | 0=Timing Turn On/Off For One Time I =Timing Turn On/Off For Cycle Running | 0 |
| A7 | Key Card Status | 00:S1 Connect S2 Means Put-in Card Status; 01:S1 Disconnect S2 Means Pull-out Card Status. | 0 |
| 48 | After Door Card Pull Out To Cool Temperature | Setting Range 22 ∼32 °C | 26°C |
| A9 | After Door Card Pull Out To Heat Temperature | Setting Range 10’∼21°C | 18°C |
| AA | Valve Output Choose | 2: 2Pipes 4:4 Pipes | 4 |
| AB | Return To Factory Default Setting | Display Ao, Long Press Fan Key To Return To Factory Default Setting |
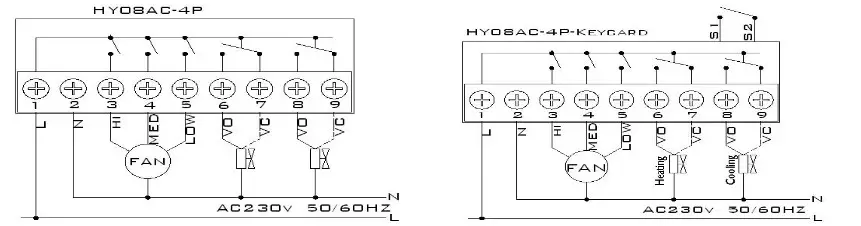
Wiring Diagram
Cautions on Installation and Use
- To prevent the thermostat display from a high fluctuation, special treatment has been made to the program. Therefore, it is normal that the thermostat cannot immediately display the sudden change of temperature.
- The thermostat was installed 1.5m above the ground.
- For the thermostat installed, please take care not to install it to the wall corner, door/window side or behind the door or in such unheated area as exterior wall. Avoid hot/cold air duct, radiator, flue or thermal pipe.
- If you have any problem with the installation, please contact our company hysen, we will make a demonstration for you
- Only professional technicians are permitted to open the transmitting and receive a box of the thermostat for installation. When installing the power supply, make sure that the power cable is well insulated.
- The thermostat is an unrepairable product. The user shall not open the internal circuit board.
- HY08AC series thermostat design for the standard 75x75x 35mm wall mount box installed. Follow the instructions to open the rear cover base, mount it on the wall, and wire it.
- Before installing the thermostat, make sure that the system is disconnected. The maximum voltage of the system shall meet the requirements specified in the Instruction Manual (Max. AC Voltage: 250V).
Warranty
We offer a warranty of 18 months, from the sales day. The products of our company can have a lifetime warranty if it is not the quality problems, or beyond the warranty period, we will charge for the after-sale service.


