![]() innovators in instrumentation technology
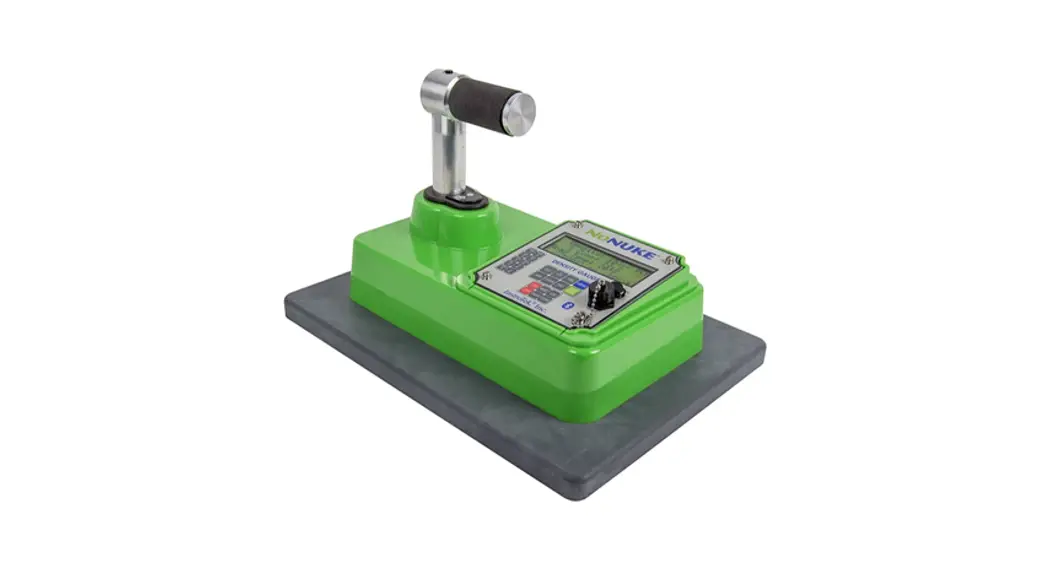
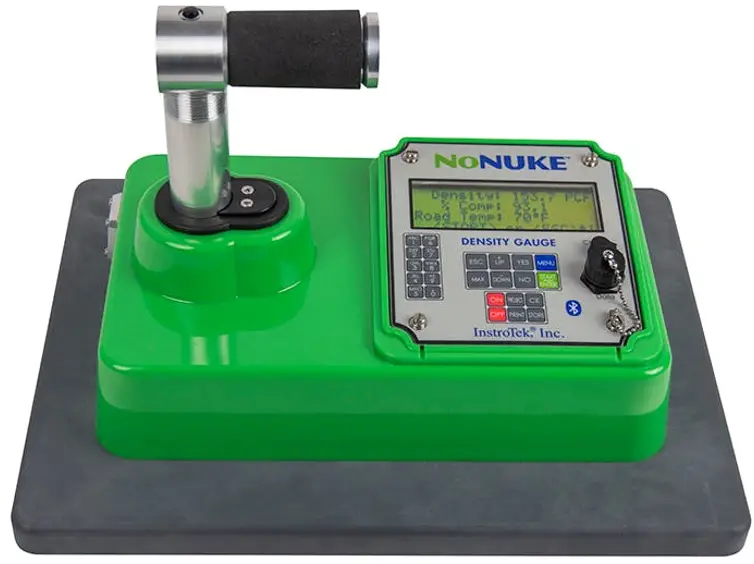
innovators in instrumentation technology![]() Non-Nuclear Asphalt Density Gauge
Non-Nuclear Asphalt Density Gauge
Quick Start Guide
919.875.8371
Research Triangle Park, North Carolina
www.instrotek.com
Keypad Overview:
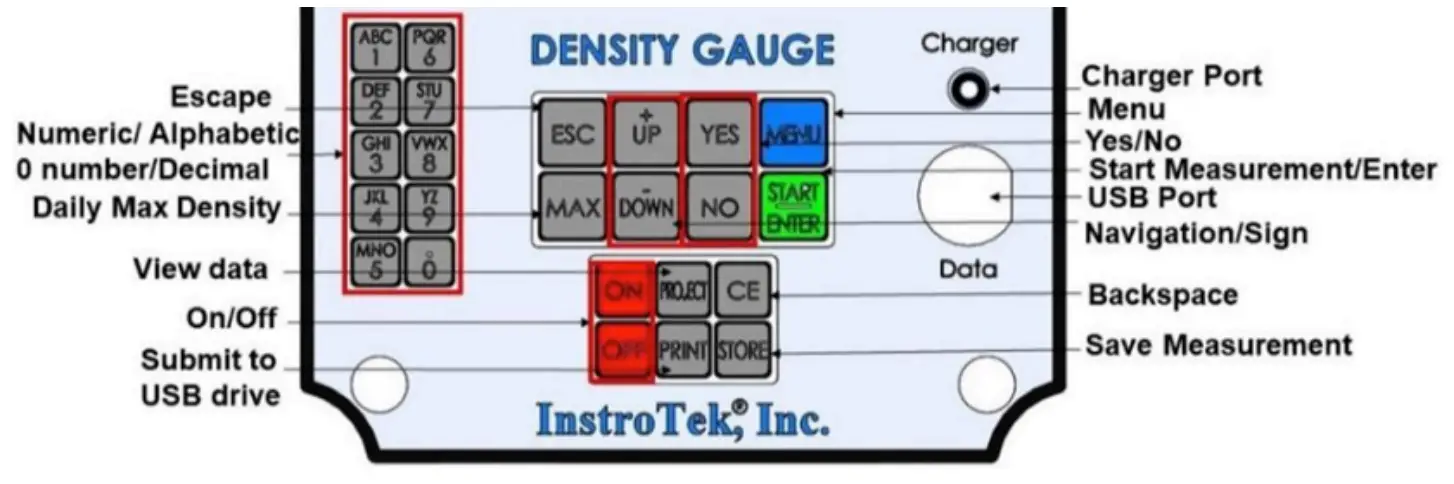
NOTE: Press and hold Zero (0) Key for the decimal character
This guide covers the initial setup and basic operation of your gauge from powering on to taking a measurement. Please refer to the Operators Manual for more details. The following initial steps are recommended to start taking measurements with the NoNuke. The gauge operation accuracy can be checked at any time by using the Verification function in the menu item. Refer to the manual to periodically verify the operation of the gauge.
- Powering the gauge ON
- Set Time/Date
- Set Units
- Input Max Density
- Input Mix Information: mat thickness and max aggregate size
- Take a Measurement
- Density Measurement
Powering the Gauge ON
| Press the ON key to power the gauge on. When the gauge is powered on the NoNuke will show: | InstroTek |
| After 3 seconds the serial # and battery voltage will be displayed. | NoNuke Rev #.## Serial #:# Battery: # V |
| After displaying this screen for 2 seconds, the gauge will be ready to be used for testing. | Gauge Ready <Start> to Begin Date Time |
Setting Time/Date
| To provide the proper time and date for measurements, complete the following steps. Press <MENU> and the MENU screens will be shown. | -MENU 1. Verification 2. Density Offset 3. Reading Mode |
| Press <DOWN> and scroll to the Set Time/Date screen to select Menu item 5. Set Time/Date screen, press <5>. | -MENU 4. Set Units 5. Set Time/Date 6. LED Backlight |
From the Date/Time menu press <1> to modify the date and time. The other options on this screen allow for the date/time and hour formats to be changed. Follow the screen prompts to change the time and date format.
| 1. Change Time/Date 2. Change M/D Order 3. 24 Hour Time ESC to Exit | Date Time Change Value? Press YES or NO ESC to Exit | Enter Current Date: MM/DD/20YY <YES> to Accept <ESC> to Exit | Select 1. AM 2. PM |
Setting Units
The default for the gauge is in English units; lb/ft3 (PCF). The units displayed can be (PCF/ºF), (kg/m3 / ºC), or (g/cc / ºC). You may change the units by following the below steps.
| Press <MENU> to enter the MENU screen. | Press <DOWN> to scroll to the next Menu screen. | Press <4> to select Menu item 4. Set Units. Choose the units you want to use. |
| -MENU 1. Verification 2. Density Offset 3. Reading Mode | -MENU 4. Set Units 5. Set Time/Date 6. LED Backlight | 1. PCF 2. kg/m3 3. G/CC Select#, ESC Exit |
Press <1> for (PCF-inch-ºF), <2> for (kg/m3-mm- ºC), or <3> for (g/cc /mm/ ºC).
After selecting the Unit of Measurement, the NoNuke returns to the Menu screen. Press <ESC> to return to the main screen.
Input Max Density
NoNuke measures % compaction based on the MAX Density input by the operator. In NoNuke, you can easily change the MAX (lab determined) density value as needed to
accurately measure % compaction. To set the daily MAX density value complete the following steps.
| From the READY screen, press the <MAX> key on the keypad. Press <YES> or <NO> to change the value or confirm the current value. This value can be the same as the Gmm converted to density units provided by the lab and can be changed as needed to account for product variations. Press <YES> to change the displayed value, <NO> to use the displayed value, or ESC to exit. | MAX: #PCF Change Value? <YES> or <NO> <ESC> to Exit |
Note: The max density is used to calculate percent compaction. For accurate measurements with the NoNuke, it is necessary to establish a density offset for a specific mix.
Input Mix Information: mat thickness and max aggregate size
The NoNuke has a dedicated area for storing important mix parameters. This can be done under Menu item 11. Details on entering this mix information can be found in the Operators Manual. Under this menu item, you can (1) Select an already stored mix information, (2) Review an already entered mix information, (3) enter New mix information, and (4) Erase an already stored mix information.
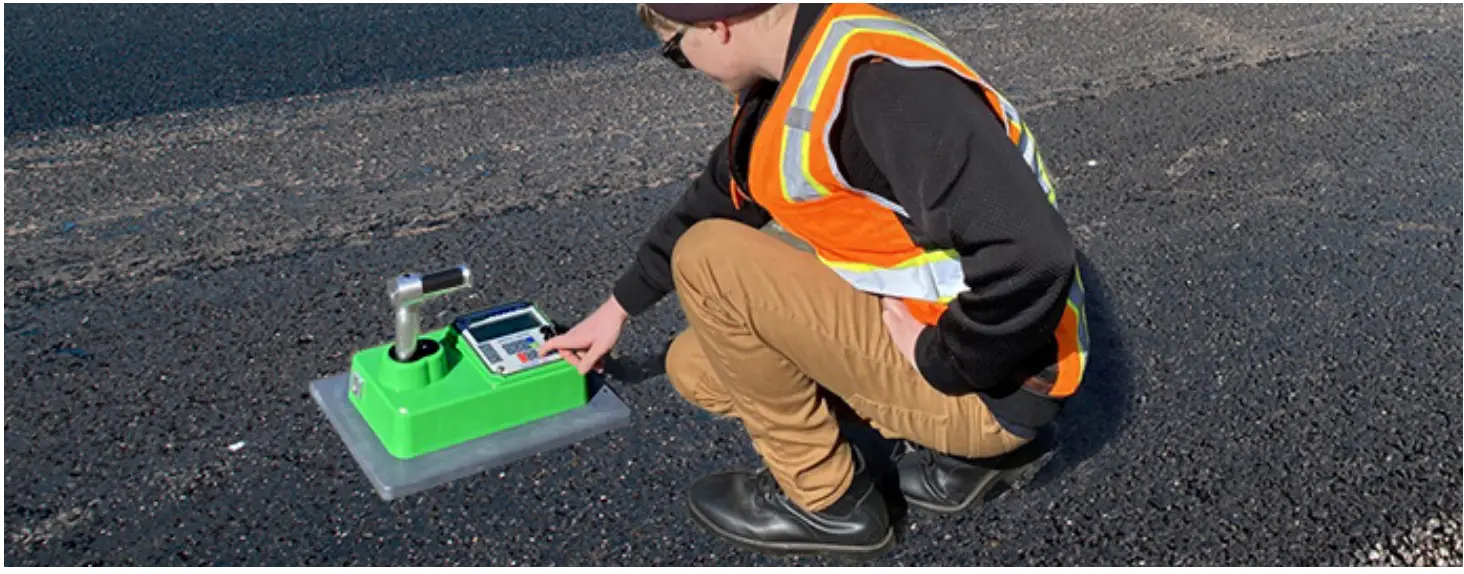
Take A Measurement
The gauge should be placed making sure there is proper contact between the gauge bottom surface and the pavement. Avoid wet areas.
From the READY screen press <START> on the keypad or push the quick button on the handle, which will measure density, % compaction, air void, road temperature and further information such as GPS location and project information, if applicable. To view GPS and project information, scroll through the screens by pressing <UP> or <DOWN>. The GPS screen is only shown if the GPS is enabled through the MENU options. The GPS module is set to disable to preserve battery life. Enable the GPS
module through the menu options.
| Density: ## % Comp: ## % Air: ## <Start> or <ESC> | Road Temp: ## Date Time | LAT: LNG: ALT: |
Density Measurement
The NoNuke is designed to measure asphalt density and display % compaction. The density values measured by the gauge can be easily adjusted by using a density offset based on measurements obtained from cores or previous calibrations.
Determining A Density Offset
The density offset value is equal to the difference between NoNuke measured density and density obtained by analyzing core results. It is recommended that five core locations are tested with the gauge (five readings per location for a total of 25 readings), and then compare the NoNuke density average of all five locations to the core result density averages at those same locations. (AASHTO T343). To use Density Offset you should set the reading mode to Multiple Readings and set the reading number to 5.
Press <MENU> to enter the MENU screen and go to menu item 3. READING MODE by pressing <3>. There are three choices in the READING MODE:
- Single Reading,
- Multiple Readings,
- Reading Number.
Press <1> to take a single density reading. Press <2> for Multiple Reding Mode. In this mode selected number of readings are collected and averaged. The default number of
readings in this mode is 5. To change the total numbers to average, select <3>, Reading Numbers.
- Single Reading
- Multiple Readings
- Reading Number Select #, ESC Exit
Press <3> to review and/or change the reading numbers averaged in Multiple Readings mode. To change the total number of readings, press <YES> and enter the new number of readings to the average for each location. Press <ESC> to exit the Reading Number screen when the correct number of readings is entered. Press <ESC> again to leave the MENU screens and return to the READY screen.
You can use the single reading mode for controlling the rolling pattern on new pavements. Place the gauge on the mat after each roller pass until no more gain in density is observed with increased number of roller passes. Note, on some projects you may see a rise in density and then a drop at the end or on the next pass. This may indicate a break in the rolling density profile, indicating max compaction has been achieved.
Establishing Density Offset
Make sure the area/spot you want to use for calibration is flat and dry. A reading pattern like the one in the diagram should be used for taking measurements. The idea is to move the gauge between readings to get a representative measurement of the spot that is being tested. 
Place the NoNUKE on the pavement and press <START> (or the remote start button on the handle) to take the measurement.
After each reading, move the NoNuke to the next location in the pattern, and press <START> again. After the fifth reading (or when total of all the readings) are completed,
the NoNuke will display the average density. Record this density and the densities from the other core locations. Take the cores from these locations and measure their densities in the lab. Compare the average gauge readings for all locations to the average of all core density values for the same locations. The difference between these results is what should be used for Density Offset. The difference can be positive or negative. If gauge readings are higher than the core readings, the offset will be negative. If gauge readings are lower than the core results, the offset will be positive.
To add an offset, press <Menu> to enter the MENU screens.
-MENU
- Daily Verification
- Density Offset
- Reading Mode
Item <2> Density Offset allows you to turn the Density Offset on or off, and to change the density offset value. Press <2> from the Menu screen, The Density Offset screen will appear.
- ON/OFF
- Offset Value <ESC> to Exit
Press <1> to turn the Density Offset ON. Note: To avoid faulty readings when gauge is moved from one project to the next, Density Offset is deactivated when the gauge is
physically turned off with the Off key. You must activate the density offset when you need to use a density offset for a particular project.
Press <2> from the Density Offset screen to review and/or change the Offset value.
Press <YES> to change the offset value.
Density Offset:
## PCF
<YES> to Change
<ESC> to Exit
Input the calculated offset value and press <ENTER> to accept the new offset. Press <ESC> to exit without saving the new value.
Enter Value for Offset: ##
<ENTER> to Accept
<ESC> to Exit
NOTE: The minus key <-> is also the <DOWN> key. The decimal point is entered by holding the <0> key down for over one second. To back up and change the offset, the
Clear Entry key <CE> is used.
After changing the offset value, you are asked whether Density Offset should be activated or not. Press YES to activate or NO to exit.
Activate Density Offset?
<YES> to Accept
<NO> to Exit
Project Storage and Printing
The NoNuke is equipped with data storage capability. Up to 25 Projects and more than 1000 stations (readings) per project can be stored in the NoNuke. Please refer to Operators Manual for instructions on how to setup projects and store data.
![]()
Call today for top quality, best value and superior service!
tel: 919.875.8371
ªemail: [email protected]
visit: InstroTek.com
HEADQUARTERS:
One Triangle Drive, Research Triangle Park, NC 27709
phone: 919.875.8371
OTHER LOCATIONS:
Bensalem, PA phone: 215.645.1064
Grand Rapids, MI phone: 616.726.5850
Austin, TX phone: 512.452.8848
Denver, CO phone: 303.955.5740
Las Vegas, NV phone: 702.270.3885
Concord, CA phone: 925.363.9770


