![]()
Making Your Job More Enjoyable
Vacuum Gauge
Operation Manual
VMV-1

![]() Quality Assurance
Quality Assurance![]()
Description
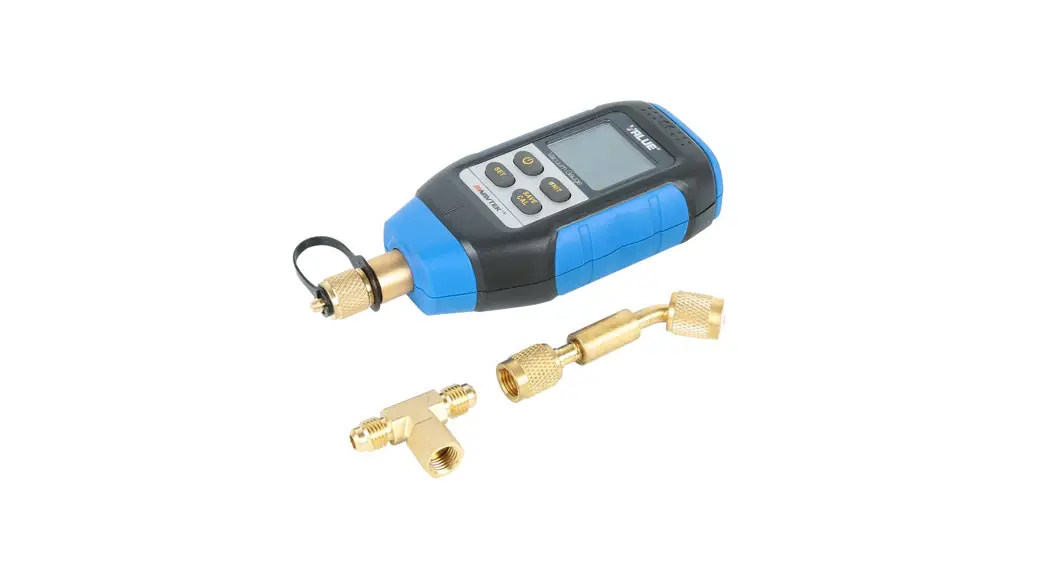
VMV-1 built with Pirani professional vacuum sensor can precisely measure the vacuum level. From the measurement, you can therefore gather information about humidity and the removal of foreign matter (oil, foreign gases, etc.), and thus know the best status to fill refrigerants. VMV-1 can be used for the monitoring vacuum system, leaking detection and distinguishing the pump in quality.
Safety Instruction
- The operation should according to this instruction and be within the scope of the specified parameters.
- Replace the batteries with new ones when the power is low. Do not mix new batteries with old batteries, and different brands of batteries are forbidden. Remove all batteries if it remains unused for a long period.
- Do not clean the instrument with corrosive detergents or solvents.
- Wear goggles and protective gloves.
- Tighten the copper cap and store in a dry place.
Instrument overview
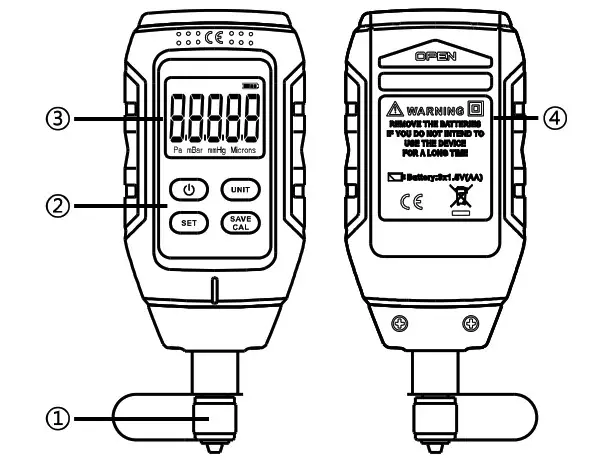
| 1. | 1/4″ Flare |
| 2. | |
| UNIT: Unit selection/Add value in Set Mode | |
| SET: Long press the button into Alarm Set Mode | |
| SAVE/CAL: Save alarm value/Full-scale calibration/ Zero Calibration in Set Mode | |
| 3. | Display (Vacuum degree, Units and Battery capacity) |
| 4. | Battery cover (3xAA batteries) |
Technical Parameters
| Maximum Overload Pressure | 14PSI / 0.1Mpa |
| Range | 0-10000 Pa, 0-100.00 mBar, 0-75.000 mmHg, 0-75000 Micron |
| Resolution | 0.01 (<10 Pa), 0.0001 (<10 mBar) , 0.0001 (<10 mmHg) , 1 (<30000 Microns) |
| Accuracy | 2-100 Pa: ±5% of reading (at 20t) |
| Operating Temperature | 0–50°C (32-122 F) |
| Battery Life | 45 hours (3xAA batteries) |
| Unit | Pa, mBar, mmHg, Microns |
| Refresh Rate | 0.5 second |
| Connections | 1×1/4″ Flare |
| Sensor | lx Pirani sensor |
| Auto-Off Time | 10 minutes |
| Backlight Time | 20 seconds |
| Buzzer Alarm | 90 db, shut down after 10 seconds |
| Weight | About 125g (without batteries) |
| Application | Atmospheric environment (It can not be measured in the presence of refrigerants and another gas environment) |
Operations
- Install three “AA” batteries.
- Long press and hold the power button CD for 3 seconds to turn the LCD light on. The display shows ” when the unit is completely warm-up.
- Connected to the system directly or via connection accessories.
- Start the vacuum pump, the display will show ultimate pressure from high to low. Once reached the target ultimate pressure, the vacuum meter buzzing alarms and the backlight will blink simultaneously for 10 seconds.
- Press and hold the power button 0 for 3 seconds to turn the power off.
Unit Selection
Press the UNIT button to select the unit of measurement.
Set the Alarms
- Press and hold the “SET” button for 3 seconds to enter into Set Mode.
- Press the “SET” button to select digit position. The digit position will blink when it is selected.
- Press the “UNIT” button to modify the blinking value.
- Press the “SAVE/CAL” button to save the set value.
Vacuum leak alarm
The vacuum meter will buzz the alarm when the vacuum becomes poorer until to the setting value, and the backlight will blink simultaneously.
Backlight
Press the power button ![]() to turn the backlight on when the instrument power on. The backlight will automatically turn off after 20 seconds.
to turn the backlight on when the instrument power on. The backlight will automatically turn off after 20 seconds.
Auto-off
The unit is set to automatically power off without any operation for 10 minutes.
Full-Scale Calibration
If the unit completes warm-up and the display does not shows ” —-“, press and hold button SAVE/CAL at atmospheric pressure for 3 seconds until the display shows”—-“
Zero Calibration
Connect vacuum meter to the vacuum system, when the vacuum level of the system reaches 0.1 Pa, and then press and hold button “SAVE/CAL” for 3 seconds until the display shows “0.1 Pa” to complete the zero calibration.
Sensor cleaning
During the procedure, it is possible that the sensor is polluted by foreign matter, and then you need to clean the sensor. Follow these instructions:
- Turn off the vacuum gauge, and remove all the batteries.
- Shake out the foreign matter.
- Using an eyedropper or a syringe, fill the sensor chamber with alcohol or isopropanol. Tighten the copper cap, and then rinse the sensor chamber 3-4 times with alcohol or isopropanol.
- Thoroughly dry the sensor by vacuolization or at least 2 hours of air dry.
- Inspect the vacuum meter and make a Zero Calibration.
Battery Installation
Remove battery compartment cover, install three “AA” batteries and make sure it is in the correct polarity. Attention: Remove all batteries from the instrument if it remains unused for a long period.
Appendix
3xAA Batteries, Connection accessories, Tee fitting, Instructions.
Troubleshooting
| Cannot Power On | Check the battery and the polarity |
| Inaccurate ultimate vacuum | Check the connection if is tight. Zero Calibration /Clean the sensor |
| There is a vacuum degree in start-up while inaccuracy of full scale | Please full-scale calibration under atmospheric environment. if the degree of fullness caused by the refrigerant is not allowed, please hold for 24 hours and then calibrate the full scale. |

http://www.worldvalue.cn/lead/en.aspx
VALUE Mechanical & Electrical Products CO., LTD
Add: Jiulong Avenue, Western Industrial District, Wenling, Zhejiang, China
Tel:+86-576-86191959 Fax:+86-576-86191957
Email:[email protected]
www.worldvalue.cn


