![]()
CaesAid Cup
QuickGuide
Disclaimer: This document provides a general overview for successful use of Medela’s electric vacuum delivery system. It is not a training manual for vacuum extraction, and it assumes that all clinicians using this Medela system are fully trained in the safe application of medical suction for vacuum extraction procedures. This QuickGuide in no way replaces the instructions for use REF 200.5524/200.5525/177.0224.
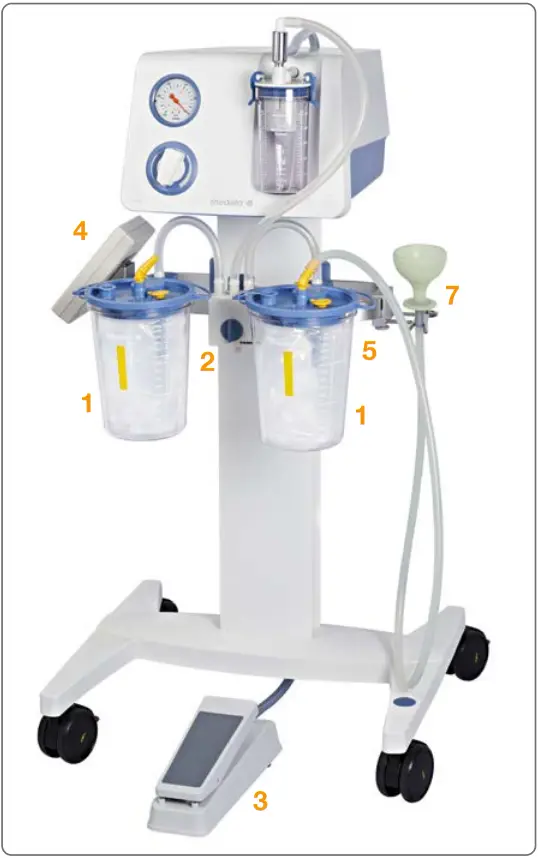
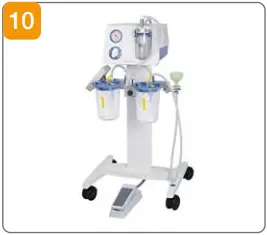
| 1 | Disposable Collection System | Steps 1–2 | |
| 077.0083 | Disposable suction liner 1.5l or | ||
| 077.0084 | Disposable suction liner 1.5l with solidifier | ||
| 077.0082 | Suction jar PC for liner 1.5l | ||
| 077.0521 | Clamp holders for jars | ||
| 2 | Change-over valve | Steps 3–4 | |
| 077.0563 | Change-over valve | ||
| 3 | Foot vacuum regulator | Step 5 | |
| 077.0731 | Foot vacuum regulator | ||
| 4 | Apgar Timer | Step 8 | |
| 017.0015 | Apgar timer for standard rail (10x25mm) | ||
| 5 | Tubing holder | Step 9 | |
| 077.0751 | Left side | ||
| 077.0752 | Right side | ||
| 6 | Fingertip tubing | ||
| 077.0951 | Disposable Fingertip tubing (not shown) | ||
| 7 | CaesAid Cup | Next page | |
| 077.0081 | CaesAid Cup | ||
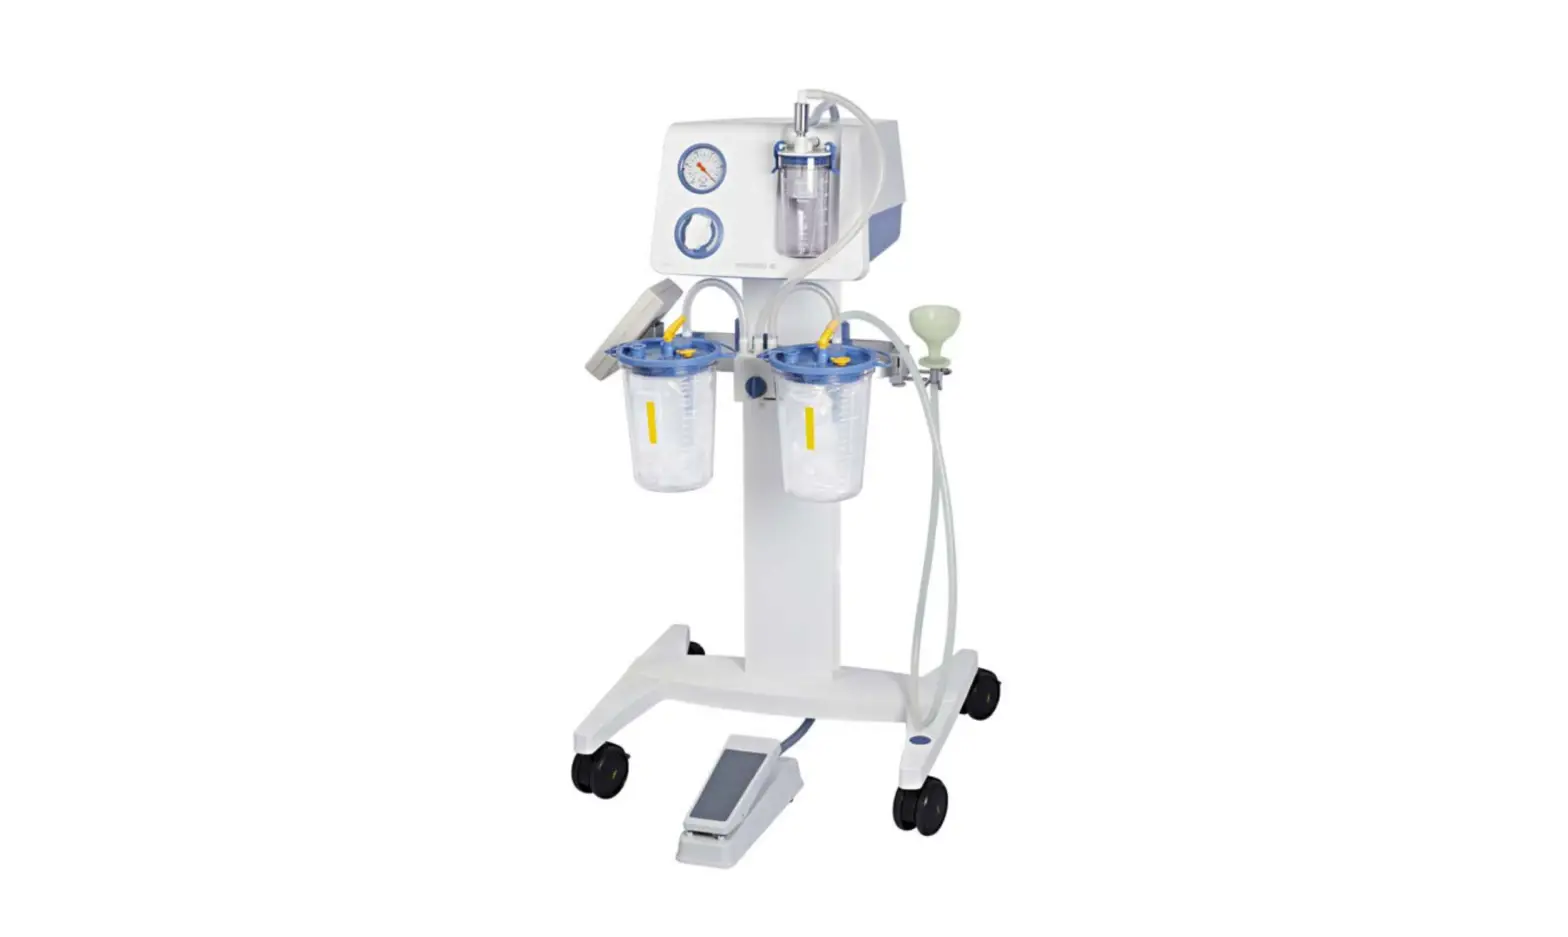
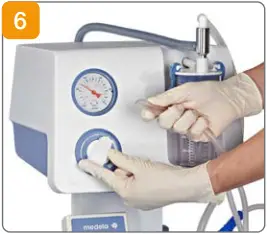
Setting up the vacuum pump

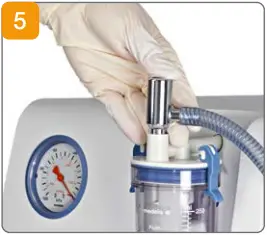
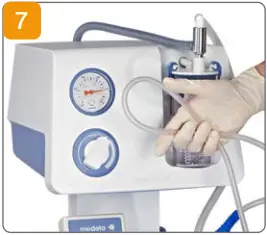
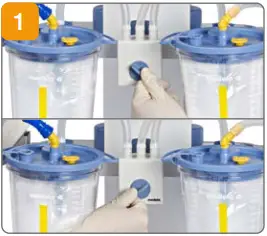
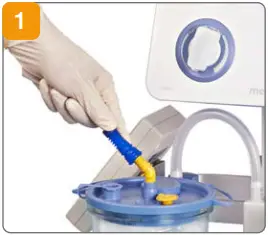
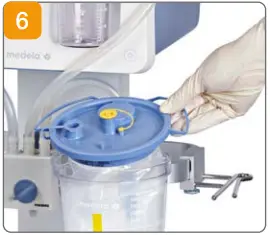
Attach the clamp holder on the rail. Attach a 1.5 liter suction jar for the disposable system.

Prepare a new 1.5 liter disposable suction liner. Insert and press lid on firmly. Repeat for second jar.
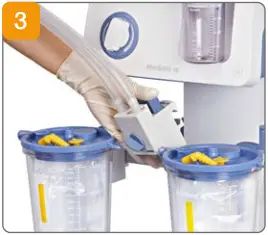
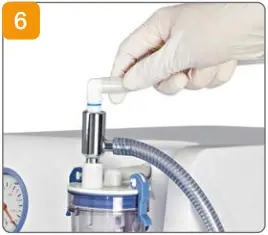
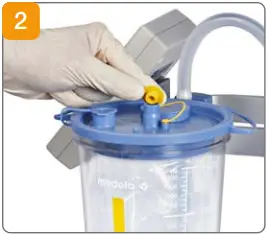
Attach the change-over valve to the rail (between the two jars).
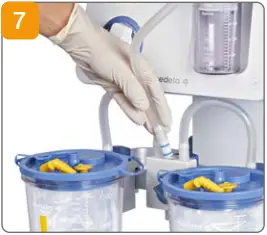
Connect the tubing from the change-over valve to the vacuum ports of the suction jar.
Connect the foot vacuum regulator: the silver 3-way adapter must be fully seeded into the safety device (overflow jar) of the suction pump.
Plug the supplied tubing into the 3-way adapter.
Plug the other end of the tubing into the vacuum port of the change-over valve.

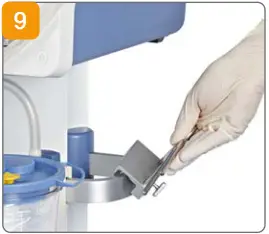
Attach Apgar Timer on the side rail (recommended position is the side).
Attach tubing holder on the other side.
Connecting sterile components and setting desired traction pressure
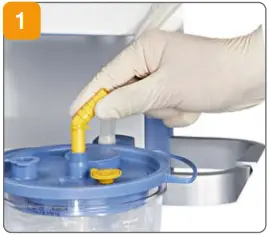
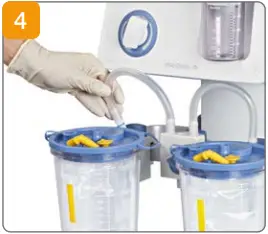
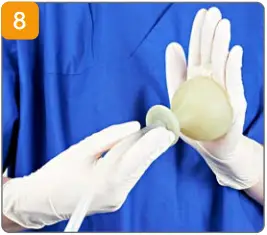
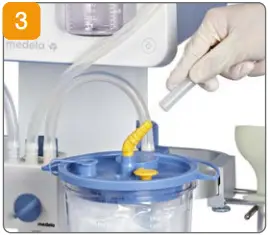
Take the angle piece (attached on lid of disposable liner) and insert it into the patient connection port.
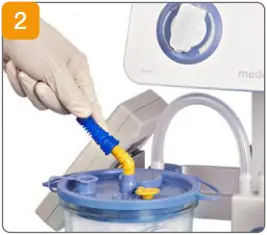
Attach fingertip tubing to angle piece.
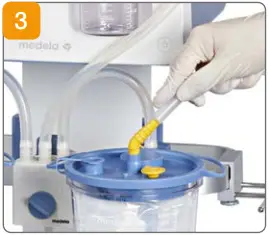
Attach tubing from CaesAid Cup to inserted angle piece of second jar.
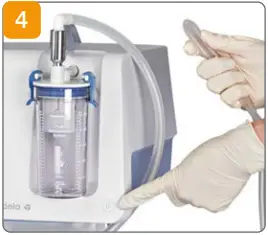
Turn on the pump and bend tubing.
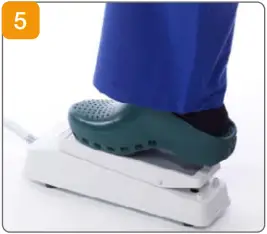
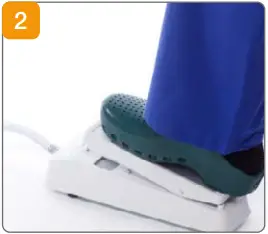
Fully depress the vacuum regulator (forward and down, using ball of foot).
Set to the required maximum vacuum (clockwise) using the vacuum regulator. Recommended vacuum is between -60 and -80 kPa (-450 and -600 mmHg):
Release the tubing.
If desired, test vacuum against a gloved sterile hand. Release vacuum with foot vacuum regulator and remove hand.
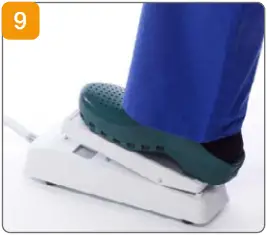
Return foot vacuum regulator to resting “zero pressure” state (rear and down using heel of foot).
At this point, the equipment is ready for use for the vacuum delivery procedure.
Application
General suction: switch to the first jar. CaesAid Cup: switch to the second jar.
As soon as the baby’s head is born, push down with heel on the foot vacuum regulator to release suction.
Post delivery
Disconnect the sterile tubing and the angle piece. Discard with cup per hospital policy.
Close the patient port with the plug.
Disconnect the tubing from the CaesAid Cup. Reprocess according to hospital policy or the Medela reprocessing guide (200.2391)
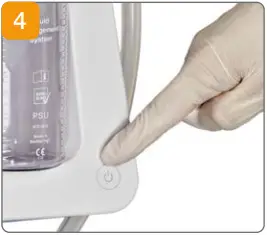
Close the patient port with the plug. Turn off the pump.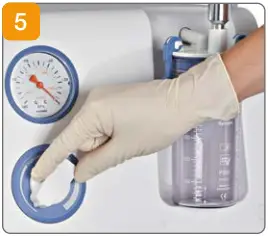
Turn the vacuum regulator fully counterclockwise to set the vacuum level to 0.
Remove disposable liners and discard according to hospital policy. To save set-up time for the next procedure, insert new disposable liner into clean jar.
![]() Medela AG
Medela AG
Lättichstrasse 4b
6340 Baar, Switzerland
www.medela.com
 0123
0123
International Sales
Medela AG
Lättichstrasse 4b
6340 Baar, Switzerland
Phone +41 41 562 51 51
Fax +41 41 562 51 00
[email protected]
www.medela.com
Precious life - Progressive care
©Medela AG/200.8258/2021-05/B


