acaia AP001AT Pearl Coffee Scale
In the Box
Introduction
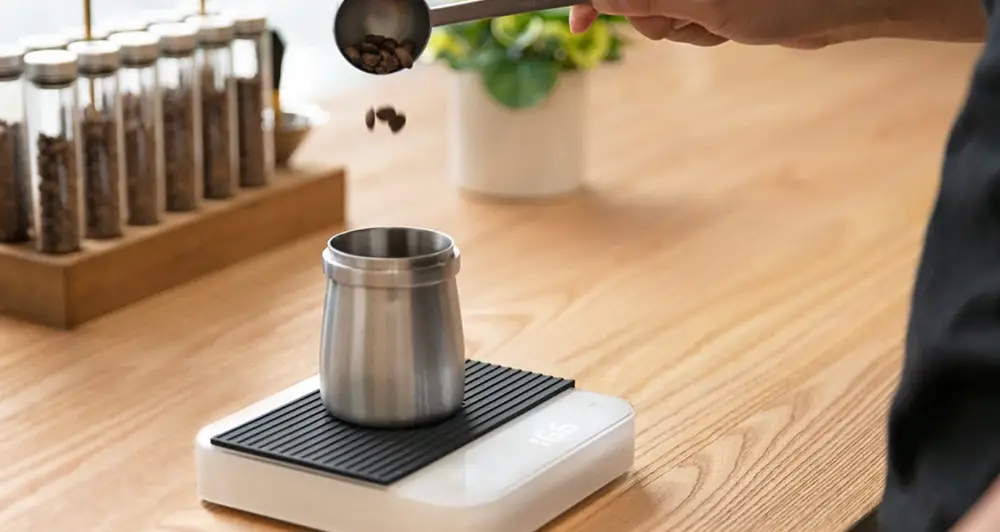
Thank you for choosing one of our scales. The Acaia Coffee Scale is designed and manufactured to the most rigorous standard to give you the best coffee brewing experience. First, check the shipping carton to find the following:
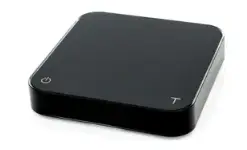
- Acaia Coffee Scale

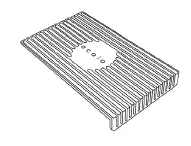
- Heat Resistant Pad

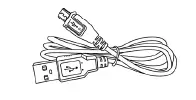
- Micro USB Charging Cable

Next, follow the instructions in the “Getting Started” chapter in this manual to start using your scale. To take full advantage of the many features of the Pearl Model S, carefully read through this user manual for step-by-step procedures, examples, and other information.
Warning: Incorrect handling of this product could result in personal injury or physical damage.
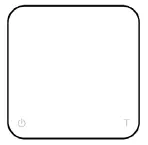
Scale Overview
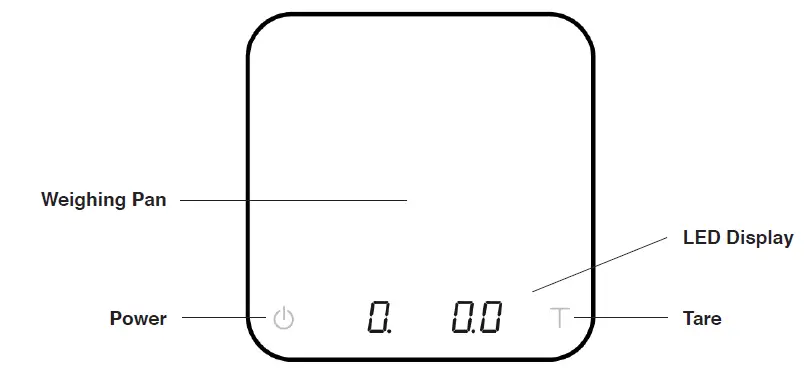
Note: For the best performance, place the weight in the center of the weighing platform.
Getting Started
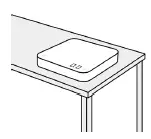
- Placement
- Select a work place that is stable, vibration-free and, if possible, a horizontal location for the weighing platform.

- Select a work place that is stable, vibration-free and, if possible, a horizontal location for the weighing platform.
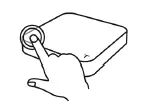
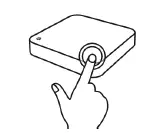
- Power On / Off
- [Press] to turn on the scale.
[Double tap] to turn off the scale.
- [Press] to turn on the scale.
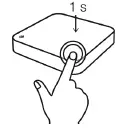
- Tare Weight
- [Short press] to tare / zero the weight.

- [Short press] to tare / zero the weight.
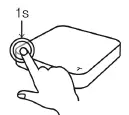
- Switch Mode
- [Press and hold] to switch modes.
Please see the “Mode Introduction” section for more details.
- [Press and hold] to switch modes.
- Toggle Unit
- [Press and hold] to toggle units.

- [Press and hold] to toggle units.
Product Care Information
Battery Charge
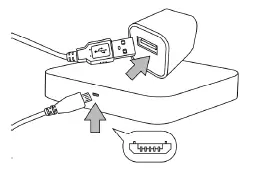
- You can charge the battery by plugging the USB cable into any of the power supplies listed below:
- A computer
- A USB wall-charger with an output of 5 volts and 1 amp
- A DC car-charger with an output of 5 volts and 1 amp
- It takes about 1-2 hours to fully charge the battery from empty. Try not to let the battery completely run out before charging. Charge the battery as needed, but it is best not to exceed more than once a week.
- A fully charged battery can work continuously for about 25 hours.
- Battery percentage can be viewed via the Acaia apps.
Note: Using a “fast-charging” charging block or charging hub (a charging block/hub delivering over 5v at 1A) could damage your Acaia scale’s circuit board.
Battery Indicator
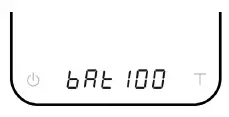
- Press and hold the Power button while the LED display shows [ ACAIA ] and then changes to [ SEt ]. Continue to hold the Power button until the battery percentage is displayed.
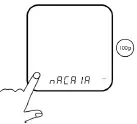
Calibration
- Turn on scale
Turn on the Acaia scale.
- Tap T button
Make sure the scale is in weighing mode and the unit is set to ‘gram’, then tap the ‘T’ button rapidly.
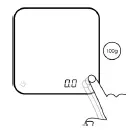
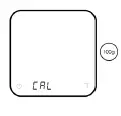
- See CAL display
Keep tapping the ‘T’ button until ‘CAL’ is shown on the display.
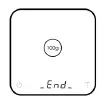
- Place a weight
Place a weight (100g/500g/1000g) on the scale and wait until the display shows ‘_End_’. Calibration is now complete!
Mode Introduction
Mode 0 – Weighing Only Mode
 In the Weighing Only Mode, the scale will only display weight in either grams or ounces.
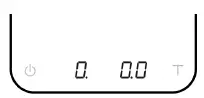
- There are two different weighing units in Weighing Only Mode: gram and ounce. A dot will appear in the upper right of the LED display and the scale will read 0.000 when weighing in ounces.
- The readability is 0.1 g for grams and 0.005 oz for ounces.
- The LED display shows [0.0] when weighing in grams.
| Action | Operation |
| Tare Weight | Tap Tare button |
| Toggle Unit g/oz | Long press Tare button |
| Reset Mode | Double tap Tare button |
| Switch Mode | Long press Power button |
Mode 1 – Espresso Mode
- This mode displays the LED timer on the left, and the weight on the right.
- The timer displays 0 to 59 seconds and will reset to 0 when 60 seconds has been reached. When it resets, the mode indicator flashes.
- When the weight exceeds 999 grams, the LED display only shows the integer part (the decimal point will not be displayed). The LED display shows up to 1999 grams. If the weight exceeds 1999 grams, the scale will display [ _ _ _ _ ].
| Action | Operation |
| Start/Stop/Reset Timer | Tap Power button |
| Tare Weight | Tap Tare button |
| Reset Mode | Double tap Tare button |
| Switch Mode | Press and hold Power button |
Mode 2 – Dual Display Mode
- There are two different weighing units in Dual Display Mode: gram and ounce.
- In grams, the LED display shows [0.00 0].
- In ounces, the LED display shows [0.00 0.00].
- The maximum display time will be 9 minutes and 59 seconds. The weight shown on the right side of the display measures from 0 to 999. When the value is over 1000, it will restart from 0 with mode indicator flashing.
| Action | Operation |
| Tare Weight | Tap Tare button |
| Toggle Unit g/oz | Long press Tare button |
| Reset Mode | Double tap Tare button |
| Switch Mode | Long press Power button |
Mode 3 -Timer Starts with Flow Mode
- Place an item on the scale. Tap the power button to automatically tare and prepare the timer to detect the flow of water. The timer will flash, indicating that it is ready. Begin pouring and the timer will start with flow detection from the pour. The timer stops when the brewing equipment is removed.
- The LED display shows [0:00 0] with the timer on the left and the weight on the right in grams.
- The LED display shows [0:00 0.00] with the timer on the left and the weight on the right in ounces.
- The timer will display from [0:00] to [9:59] before stopping.
| Action | Operation |
| Start/Stop/Reset Timer | Tap Power button |
| Tare Weight | Tap Tare button |
| Reset Mode | Double tap Tare button |
| Switch Mode | Press and hold Power button |
Mode 4 – Beverage Mode
Designed for pour overs and extraction measurements. Follow instructions on the display to place the carafe/cup, filter, and coffee (tap tare in between steps). The timer will start when the first flow of water is detected. Timer stops when the power button is tapped or items are removed (dripper). The flashing number is the beverage weight with all items subtracted.
- There are two different weighing units in Beverage Mode: gram and ounce.
- As soon as the weight is stabilized or the tare button is pressed, the next step will show in display.
- After the process is completed and the filter is removed, the display will blink and flash between the water weight and beverage weight (marked with “b”).
| Display | Action/Description |
| CUP | Put the carafe/cup on the scale |
| FLt | Put the filter in your pour over dripper and place on the carafe/cup |
| COF | Put the coffee in the filter |
| Timer Flashes | Ready to brew |
| -FLt- | Remove the filter |
| bxxxx.x xxx.x | Beverage Weight Total Weight |
| Action | Operation |
| Next Step | Tap Tare button |
| Previous Step | Tap Power button |
| Stop Timer | Tap Power button |
| Reset Mode | Double tap Tare button |
| Switch Mode | Long press Power button |
Mode 5 – Portafilter Mode (for versions after 2.0.009)
The Portafilter Mode is designed to simplify the workflow of weighing coffee grounds in a portafilter. The scale automatically detects a portafilter or other vessel and tares the weight of the vessel. Remove the portafilter to add coffee grounds, then place on the scale again to measure the weight of the coffee grounds. Repeat as needed to adjust the weight. After the portafilter has been removed for 15 seconds, the scale will reset the mode to default for the next workflow.
- In grams, the display shows [ Atr 0 ] before a portafilter is placed on the scale.
- In ounces, the display shows [ Atr 0.00 ] before a portafilter is placed on the scale.
| Action | Operation |
| Tare Weight | Tap Tare button |
| Reset Mode | Double tap Tare button |
| Switch Mode | Long press Power button |
Configuration
Enter Settings
- With the Pearl powered off, press and hold the power button.
- When the display shows [ ACAIA ] and then [ SEt ], continue to hold the power button and tap the tare button.
- Release both power button and tare button when display shows [ F.0000 ].
- Press and hold tare button to move the flashing digit to the right. Repeat this step for 4 times to enter Settings. It will show the first setting [ SLEEP ].
| Action | Operation |
| Next Setting | Tap Tare button |
| Enter Setting | Press and hold Tare button |
| Toggle Options | Tap Tare button |
| Save Option | Press and hold Tare button |
| Back to Menu without Saving | Tap Power button |
| Exit Settings and Return to Modes | Double tap Power |
| Setting | Display | Options | Default |
| Sleep Timer Setting | SLEEP | 5,10, 20, 30, 60, Off | 5 |
| Auto Zero Setting | 0.AUto | On, Off | Off |
| Zero Tracking Setting | trAcE | 2d, 3d, Off | 2d |
| Key Sound Setting | bEEP | On, Off | On |
| Zero Range Setting | 0.rAnGE | 2, 100 | 100 |
| Weighing Filter Setting | Fi lt | 2, 4, 6, 8, 16, 32, 64, 128 | 16 |
| Default Weighing Unit Setting | Unit | Gram, Ounce | Gram |
| Weighing Resolution Setting | rESoL | Default, High | Default |
| Espresso Mode Setting | NodE_1 | On, Off | Off |
| Dual Display Mode Setting | NodE_2 | On, Off | On |
| Timer Starts with Flow Mode Setting | NodE_3 | On, Off | Off |
| Beverage Mode Setting | NodE_4 | On, Off | Off |
| Portafilter Mode Setting | NodE_5 | On, Off | On |
| Portafilter Auto Reset Setting | Port.rS | 15, 30, 60, Off | 15 |
| Reset to Default Setting | rESEt.d | Yes, No | No |
| Bluetooth Setup Setting | bt_SEt | On, Off | On |
Sleep Timer Setting [ SLEEP ]
- The Sleep Timer setting can also be configured in the Acaia apps.
- The number displayed indicates the amount of time before the scale will automatically power off. For example, when 10 is selected and the scale is disconnected from all mobile devices, the scale will power off after 10 minutes of no use.
- Tap the tare button to toggle through the options.
Auto Zero Setting [ 0.AUto ]
- When the Auto Zero function is off or disabled, the initial weight on the weighing pan must be less than 50% of capacity, i.e., less than 1 kg, before the scale is turned on; otherwise, an error [ Er.303 ] occurs. When the error occurs, the scale will not work until the initial weight on the weighing pan is cleared.
- When Auto Zero setting is on or enabled, the scale displays the initial weight directly even if the weight is over 50% of capacity.
Zero Tracking Setting [ trAcE ]
- Zero Tracking is a function to help compensate the weight readout fluctuations at zero point to improve the usability of the scale. Acaia Pearl is allowed to compensate fluctuations of up to 2 d according to the industrial weighing guidelines.
- OFF: It is not recommended to turn off Zero Tracking as the zero indication would drift easily as the room temperature changes.
- 0.5 d~3 d: For example, since each division is 0.1 g, 3 d = 0.3 g. When Zero Tracking is set to be 3 d, any initial weight between +/- 0.3 g on the weighing pan would be zeroed out.
- 2 d is recommended in general for Acaia coffee scales.
Key Sound Setting [ bEEP ]
- Key Sound settings can also be configured in the Acaia apps.
- Set the Key Sound function to on/off to turn the beeping sound on/off.
Zero Range Setting [ 0.rAnGE ]
- Zero Range setting determines the range for which the tare button executes zero operation instead of tare operation.
- When Zero Range is set to 2, the range for zero setting will be 2% of the capacity, i.e., +/- 40 g for Acaia coffee scales. By pressing the tare button, any weight +/- 40 g is zeroed out by zero operation while any weight outside the range is tared out by tare operation.
- If Zero Range is set to 100, the range for zero-setting will be 100% of the capacity, i.e., +/- 2 kg for Acaia coffee scales. Therefore, instead of tare operation, zero operation would be exe-cuted in this setting whenever the tare button is pressed.
- Note: The difference between zero operation and tare operation is that zero operation would simply ignore the weight and display as 0 while tare operation would deduct the weight from the weighing result. However, zero operation does not increase the scale capacity.
Weighing Filter Setting [ Filt ]
- The number shown on the LCD indicates the current filter parameter. The Weight Filter Setting determines the speed for the load receptor to respond to weight and to determine the weighing value. The higher the level, the more stable but slower the weighing result will be.
- Press the tare button to change the parameter.
Default Weighing Unit Setting [ Unit ]
- The Default Weighing Unit is set to grams if [ 9 ] is selected and ounce if [ o2 ] is selected.
- Tap the tare button to switch the Default Weighing Unit between gram and ounce.
Weighing Resolution Setting [ rESoL ]
- The default Weighing Resolution is set to [ dEFAUt ]; the division is 0.1 g for weights of 1000 g or less and 0.5 g for weights between 1000 g and 2000 g.
- When the Weighing Resolution is set to high, the division will be 0.1 g throughout the entire time from 0 g to 2000 g.
- Tap the tare button to switch the weighing resolution between [ dEFAUL ] and [ hiGh ].
Espresso Mode Setting [ NoDE_1 ]
- The default Espresso Mode Setting is set to OFF, which means this mode is disabled.
- ON: The Espresso Mode is enabled.
- OFF: The Espresso Mode is disabled.
Dual Display Mode Setting [ NodE_2 ]
- By default, the Dual Display Mode Setting is set to ON, which means this mode is enabled.
- ON: The Dual Display Mode is enabled.
- OFF: The Dual Display Mode is disabled.
Timer Starts with Flow Mode Setting [ NodE_3 ]
- By default, the Timer Starts with Flow Mode Setting is set to OFF, which means this mode is disabled.
- ON: The Timer Starts with Flow Mode is enabled.
- OFF: The Timer Starts with Flow Mode is disabled.
Portafilter Mode Setting [ NodE_5 ]
- The default Portafilter Mode is set to ON, which means this mode is enabled.
- ON: The Auto-Tare Mode is enabled.
- OFF: The Auto-Tare Mode is disabled.
Portafilter Auto Reset Setting [ Port.rS ]
- The default value is 15 seconds.
- In Portafilter Mode, after a portafilter is removed, the weight will automatically reset. This setting gives you options on how long to wait before resetting.
- If this setting is set to Off, the scale will automatically tare whenever a portafilter is placed onto or taken off from the scale.
Reset to Default Setting [ rESEt.d ]
- Select “YES” to reset all settings to default value.
Bluetooth Setup Setting [ bt_SEt ]
- ON: The Bluetooth is enabled. The scale allows Bluetooth connection. Users may connect the scale with Acaia apps.
- OFF: The Bluetooth is disabled. The scale does not allow any Bluetooth connection.
Appendix

| Function | Example | |
| Power Button
| Turn on | Long press to turn on the scale. |
| Turn off | Double tap to turn off the scale. | |
| Switch mode (Default) | While the scale is turned on, press and hold for 2 seconds to switch mode. | |
| Start/Stop/Reset Timer | While in Timer Mode, tap to start/stop/reset timer. | |
| Back | While in Settings Menu, tap to go back to Weighing Only Mode. | |
| Tare Button
| Tare | While in Weighing Mode, tap to perform tare operation. |
| Toggle units | Long press to switch between gram and ounce in Weighing Only Mode. | |
| Toggle settings option | While editing a setting, tap to scroll through its options. | |
| Reset mode | Double tap to reset a mode. This zeros the weight and sets the timer to 0:00. | |
| Confirm | While editing a setting, press and hold for 2 seconds to confirm the option selected. | |
| Enter Calibration Mode | While in Weighing Only Mode, continuously press multiple times to enter Calibration Mode. |
LED Indicators
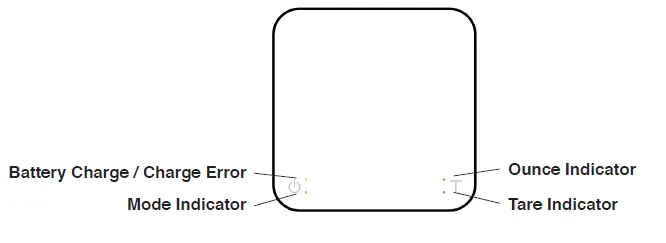
- Battery Charge / Charge Error
The orange LED indicator on the upper left turns on when the battery is charging and turns off when the battery is fully charged. The indicator starts flashing or does not appear when the USB cable is not working. - Mode Indicator
When in espresso mode, the timer displays from 0 to 59 seconds and will reset after reach-ing 60 seconds. The orange LED indicator on the lower left turns on when the timer resets. - Tare Indicator
The green tare indicator on the lower right turns on when the tare button is pressed. - Ounce Indicator
The green ounce indicator on the upper right turns on when the weighing unit is in ounces.
Error Codes
| Error Code | Description |
| Error 100 | Access Code Error, unrecognized access code. |
| Error 101 | EEPROM error, unable to access memory. Please contact Acaia support. |
| Error 102 | AD error, unable to access weighing signal. Please contact Acaia support. |
| Error 303 | Unable to find acceptable starting Zero point, most likely due to damage of the loadcell by excessive force or drop. Please contact Acaia support. |
| Over load: the weight is over the maximum capacity. | |
| Under load: the weight is under the minimum capacity. | |
| Error 304 | Calibration error. Calibration cannot proceed when environmental noises are too strong. Please calibrate in a stable environment free of wind, vibration, etc. |
| Error 802 | Unable to tare because the weight exceeds the acceptable tare range. |
| Error 803 | Unable to tare because the weight is unstable. |
| Error 900 | Passcode error (the default passcode is 0000) |
Other
| Display Code | Description |
| UPdAtE | The scale is in update mode. During the update process, the orange LED will blink until the process is complete. Note: If you want to leave update mode, please connect the scale’s USB to a power source. |
Specifications
| Approx. Weight | 462 g | ||
| Capacity | 2000 g / 70.54 oz | ||
| Measuring Units | g, oz | ||
| Weighing Range 1 | Maximum capacity | 1000.0 g | 35.280 oz |
| Minimum capacity | 1.0 g | 0.035 oz | |
| Division | 0.1 g | 0.005 oz | |
| Weighing Range 2 | Maximum capacity | 2000.0 g | 70.540 oz |
| Minimum capacity | 1000.0 g | 35.280 oz | |
| Division | 0.5 g | 0.020 oz | |
| Indication Limit | 2060.0 g / 72.660 oz | ||
| Unit Dimensions | (L x W x H) 160 x 160 x 30 mm | ||
| Input | 5 V/500 mA | ||
| Battery | Lithium-ion rechargeable 3.7 V 1100 mA | ||
| Display | 8 digit LED | ||
| Bottom | Anti-slip flat rubber surface | ||
| Connectivity | Bluetooth 4.0 | ||
| Linearity | +/- 0.2 g | ||
| Work Time | Up to 25 hours | ||
| Operating Temperature | 15℃ ~40℃ |
Copyright
This user manual is protected by copyright. All rights reserved. No part of this manual may be reproduced, processed, duplicated or published in any form by photocopying, microfilming, reprinting or any other method, in particular electronic means, without the written consent of Acaia.
© Acaia, California, 2022.


