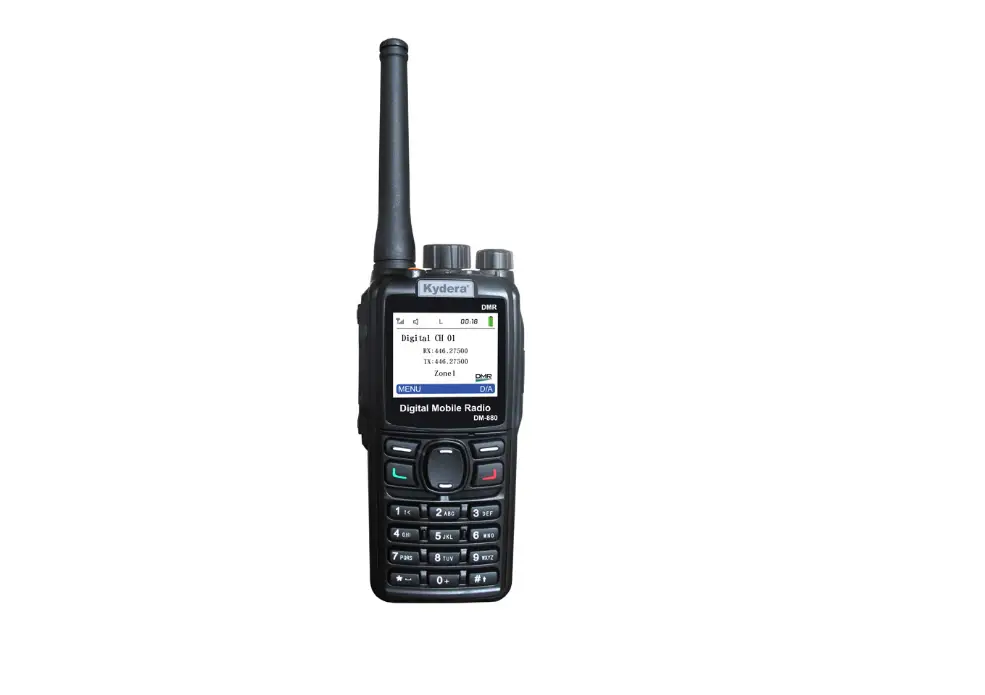
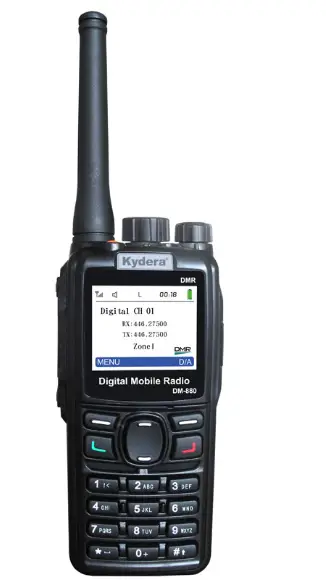
Kydera DR-8200 Series Digital Handheld Radio 
Thank you for your interest in our products. This manual will help you to master the operation and use of the DR-8200. This manual should be read and studied to ensure that the user understands the operation of the DR-8200. Please read the Safety Information Manual before use.
TO THE USER
Thank you for purchasing this digital two-way radio designed and manufactured
by the Fujian New Century Communications Co., Ltd. This product is designed and developed according to EU standards and advanced international technologies. The radio has an ergonomic design and a comprehensive set of functions to deliver an advanced communication solution. It will bring you a whole new operation and digital communication experience, improve your work efficiency, and provide reliable communications.
Our products are tested to strict and rigorous test procedures using advanced test instruments and equipment to internationally recognized standards.
This manual should be read and studied to ensure that the user understands the operation of the DR-8200. Please read the Safety Information Manual before use.
Copyright Information
Kydera is a registered trademark of Fujian New Century Communications Co., Ltd (Hereinafter referred to as we) in the PRC and other countries or areas. We retain the ownership of its trademarks and product names. All other trademarks and I or product names that may be used in this manual are properties of their respective owners.
The products described in this manual may include computer software and firmware that is stored in internal memory and/or other media. We maintain exclusive rights to our intellectual property which is protected by the People’s Republic of China or other countries and relevant international laws. The purchase of this product does not imply that we grant the purchaser an interest in such computer software and/or firmware. No company, organization or individual may copy, alter, distribute, decompile, or reverse engineer any software and/or firmware without prior written authorization.
Disclaimer
We strive for the accuracy and completeness of this manual, but no warranty is given on its content. All the specifications and designs are subject to change without prior notice due to continuous technology development. No part of this manual may be copied, modified, translated or distributed in any form without our prior written authorization.
The third-party products referred to in this manual are property of those third parties. We do not guarantee their accuracy, validity, timeliness, legality or completeness. For more information or any suggestions to this manual, you are welcome to visit our website, http://www.Kydera.com or call our service hotline: 400-6525399
USER NOTICES
SAFETY:
The user should be aware of and understand the general hazards in operating a two-way radio transceiver. We cannot guarantee the safety and operation of our transceiver with aftermarket accessories unless they have been tested and sold by us.
Our transceiver should be maintained and serviced by a qualified two-way radio dealer and their technical staff. Failure to do so may violate our warranty.
WARNING:
No two-way radio transceiver including ours shall be operated including powered on in hazardous areas such as explosive atmospheres including Inflammable gas, dust particles, metallic powders, grain dust, etc. This shall include confined spaces where these hazards exist, in areas where blasting or blasting products are in use or stored, and while fueling at refueling centers. In any of these conditions or where hazards exist, the transceiver shall be powered off.
PRECAUTIONS
Observe the following precautions to prevent fire, personal injury and transceiver damage.
- Do not modify or attempt to adjust this transceiver for any reason.
- Do not expose the transceiver to direct sunlight for long periods , nor place it close to a heat source.
- Do not place the transceiver in a dusty, humid or wet area, nor place on unstable surface.
- If an abnormal odor or smoke is detected coming from the transceiver, switch OFF immediately and remove the battery pack from the transceiver. Contact your dealer.
How to use this user manual
This manual introduces the basic operation of Kydera compatible
DMR handheld transceiver.
Your dealer or system administrator may have already perset the features of this radio based on your operational requirements. Please consult with your dealer or system administrator about the details.![]() The icons below are used for di Qital features.
The icons below are used for di Qital features.
This icon indicates the function is available in Digital mode
Packing list
The following items are contained in the gift box. If any item is missing or damaged, please contact your dealer.
| Item Name | Quantity (pc) | Item Name | Quantity (pc) |
| Radio unit | Antenna | ||
| Battery pack | Belt clip | ||
| Charger | Hand strap | ||
| Power supply | User manual |
Note: After purchase, please check the items and quantity in the box to ensure everything is correct.
Radio Controls
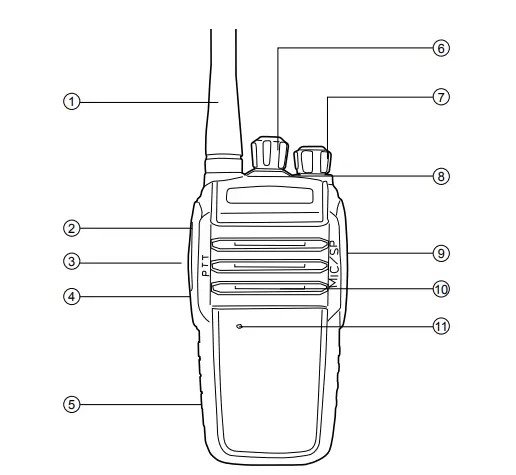
Parts description
| No. | Part Name | No. | Part Name | No. | Part Name |
| CD | Antenna | ® | Battery pack | ® | SP/MIC connector |
| Cl) | Side Key (PF1) | ® | Channel selector | @) | Speaker |
| ® | PTT key | (f) | Power switch Nolume control | ® | MIC |
| @ | Side Key (PF2) | ® | LED indicator |
Preparation for operating the terminal
Install the antenna
Do not hold the antenna with your hand, as this will reduce the radio performance.
- Screw the threaded end of the antenna into the top antenna port on the main unit.
- Tighten the antenna clockwise.
Install the battery pack
Press the battery pack firmly while pushing it in the forward direction until a “click” sound is heard.
Note: To remove the battery, turn off the radio, push the bottom battery button down, and then remove the battery in the backward direction.
Install the belt clip
- Use a screwdriver to remove the belt clip screw from back housing of the main unit.
- Align the belt clip mounting holes with the threaded holes on the main unit, insert screws, and tighten the screws to hold the belt clip.
Install the audio accessories
- Open the dust cover of the accessory interface.
- Insert the audio accessory plug into the accessory connector.
Charge the battery pack
Note:
- Please charge the battery pack with the designated charger.
- Please refer to the charging safety information before charging to obtain the necessary battery safety information.
When the terminal is used for the first time without charging, there may be a low battery alert. Please turn it off and charge before use.
Please follow the below steps to charge:
- Plug the power supply connector into the jack on the back of the charger.
- Plug the charger power supply into a power outlet.
- Install the battery or the radio with the battery into the charger.
- Observe the charging LED indicators to know the current charging status:
| Charger LED Indicators | Current Status |
| Charging | |
| Fully charged |
Programmable Keys
- Short Press: press and release quickly (programmable range is from 50ms-750ms).
- Long Press: press and hol d for programmed time length (programmable range is from 500ms-5000ms), and then release.
Programmable Functions
If desired, the following terminal features can be preset for programmable keys:
| Type | Features | Description |
| Radio Revive | Revive a target radio that has been remotely disabled | |
| Radio Detection | Determine if targeted radio is active | |
| Radio Kill | Disable targeted radio remotely | |
| Remote Monitor | Covert activation of targeted radios transmitter without local indicators. | |
| Encryption ON/OFF | Turn ON/OFF encryption | |
| Emergency ON/OFF | Initiate an emergency alarm mode or call based on programmed preset. | |
| Monitor | Press this key to turn ON or OFF the the receiver squelch circuit. Receiving weak analogue signals from the air. | |
| Permanent Monitor | Always monitor the selected channel until disabled. | |
| Zone Switch | Changes from selected Zone to new Zone |
| Type | Features | Description |
| Scan ON/OFF | Turn scanning on/off | |
| Scan Mode | Switch between SE, TO, and CO mode. | |
| VOXON/OFF | Switch between VOX ON and OFF. | |
| High /Low Power | Switch transmits power between high and low power | |
| Squelch level | Switch between 1~9 level. | |
| Repeater /Talk Around | Switch between Repeater and Talk Around Mode | |
| Info query | Query the current channel information and the current battery level etc. | |
| Shortcut key 1 | Press the shortcut key to send the preset target call or function. | |
| Shortcut key 2 | Press the shortcut key to send the preset target call or function. | |
| Shortcut key 3 | Press the shortcut key to send the preset target call or function. | |
| Prompt tone ON/OFF | Turn ON or OFF prompt tone (including voice prompt). | |
| Roaming | On/Off | |
| Voice Recording | On/Off | |
| Recording Playback | lay received /transmitted voice recording | |
| DTMF | On/Off | |
| Companding | On/Off | |
| Scrambler | On/Off |
Keys usage and ENC knob operation
| Type | Status | Operations | Description |
| . Side key [PF1) | Standby | Short press | Function works based on programmed preset. |
| Long press(3S) | Funcliooworks based on programmed preset | ||
| Side key [PF2] | Standby | Short press | Funcliooworks based on programmed preset |
| Long press(3S) | Funclioo works based on programmed preset | ||
| [ENC) Knob | Standby | Rotate | value decreased/ increased; channel /frequency selection |
LED Indicators
| LED indicator | Radio Status |
| Digital transmitting | |
| Digital receiving | |
| Scanning |
Basic operations
| Icon | Operation instruction |
 | Turn ON: turn the [PowerNolume] knob clockwise until you hear “click” |
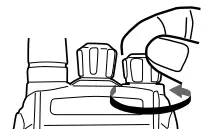 | Turn OFF: turn the [PowerNolume] knob counterclockwise until you hear a click |
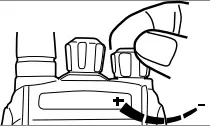 | After power ON, rotate the [Power/ Volume] knob to increase or decrease the volume |
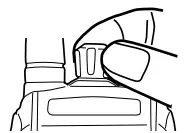 | After power ON, rotate [Power/ Volume] knob to select your desired channel or frequency. |
PTT call
To ensure an optimal transmission, hold the radio in a vertical position at one top two inches (2.5 to 5.0 centimeters) away from the mouth.
Digital channel call
Digital calls are made as a group call, private call or All Call based on the programming of the radio. An individual channel may be preset to one of these calling functions.
Main functions description
| Classification | Function | Description |
|
Public Functions | Zone | A zone is a group of channels.The radio supports 16 zones and contains up to 256 channels. |
| Power | The power level is for transmission power level of the current channel, which can be set to high or low power. | |
|
Scan | When radio scans a signal on a channel, it will stay on the channel to listen, so as to understand the current activity status of the relevant team members. | |
| Emergency alarm | Emergency alarm has the highest priority. | |
| Vax | The radio transmits when voice is detected by the microphone | |
| Busy channel lockout | Busy channel lockout prohibits transmission and prevents interference to other users when the radio is receiving traffic. |
|
Public Functions | TOT | When a transmission times out, the terminal will automatically terminate the transmission and issue a warning sound. |
| Power saving | Power saving is a preprogrammed function based on time that places radio into a sleep-wake mode to conserve the battery. | |
|
Digital functions | Private call | One-to-one call. |
| Group call | One-to-many call. | |
| All call | l’JI call is a call to all oontacts on the current channel. | |
| Talk around | Talk around allows communications on the repeaters output frequency. | |
| TOMA direct mode | TOMA direct mode is used to divide a direct channel (simplex) into two time slots to allow efficient channel usage. Multiple parties may share the channel without interference depending on slot setting. | |
| DTMF | If DTMF activated, when you press PTT, the local radio and receiving radio will be heard a preset DTMF tone first before talk. |
General guide for fault handling
| Malfunction | Analysis of causes | Handling method |
| Radio fails to power on | Battery is installed incorrectly | Re-install battery |
| Battery power lower than preset value | Please change or charge battery. | |
| Bad battery contacts or contacts in dirty. | Check and clear the battery contacts. | |
|
Receive signal decreases, is unclear or is interrupted. | Battery power gets lower. | Please change or charge battery. |
| Volume control at low value. | Adjust the volume to be higher. | |
| Antenna gets loose or antenna frequency is incorrect. | Power off radio, and re-install antenna, or change antenna with right frequency. | |
| Speaker is blocked or damaged. | Try to clear the outer speaker or contact your dealer. | |
| Using the radio under poor working environment or electromagnetic interference | Change working environment or shift antenna direction. | |
|
Unable to communicate with group members | The current working channel frequency or signaling value is different. | Change channel or reset signaling and frequency to be same as the group members |
| The setting of Digital or Analogue channel is incorrect. | Reprogram the current digital or analogue channel. | |
| Out of range of group members | Move back within range |
| Noise or unrelated communications on current channel | Co-channel user interference | Change frequency or channel. |
| Channel not programmed with correct signaling | Reprogram radio to correct signaling or change signaling to prevent interference. | |
| Weak voice traffic with noise during communications | The communication distance is too great | Reduce range between users. |
| Signals are blocked during to environment such as buildings and terrain. | Reduce range between users or move to unimpeded line of sight. | |
| Weak voice traffic with noise during communications | Strong local environmental interference. | Move away from interference source. |
| Failure to obtain GPS position (Optional) | Radio lacks optional GPS feature or satellite view blocked by environment. | Add GPS feature; move to open site with clear view of sky. |
Note: If the above methods fail to solve your problem, or you confront different malfunctions, please contact your local dealer or appointed maintenance station.
Maintenance and Clean
To ensure the best performance and prolong working life, please
acquaint yourself with the following for maintenance and cleaning.
Maintenance
- Please do not scratch or puncture the device with hard or sharp object.
- Please do not place the device in an environment which can corrode electronic circuits or under direct solar radiation.
- Please do not carry the device by its antenna or headset.
- Please make sure the SP-MIC plug is covered when not in use.
Clean
- Please clean your device regularly by using a dry clean cloth or soft brush to wipe the dust on the surface and on the charger contacts,
- The keypads, control knob and housing of the device may be dirty from use. Please use nonwoven wipes to clean them. Do not use chemicals to clean it such as detergent, alcohol, spray or petroleum products, on the device surface or printed labels. Chemicals can damage the housing, display and remove the printing on the labels. Before power on the radio, please make sure the device is dry completely.
FCC Statement
Any Changes or modifications not expressly approved by the party responsible for compliance could void the user’s authority to operate the equipment.
This device complies with part 15 of the FCC Rules. Operation is subject to the following two conditions:
- This device may not cause harmful interference, and
- This device must accept any interference received, including interference that may cause undesired operation.
SAR tests are conducted using standard operating positions accepted by FCC with the device transmitting at its highest certified power level in all tested frequency bands, although the SAR is determined at the highest certified power level, the actual SAR level of the device while operating can be well below the maximum value. Before a new model is a available for sale to the public, it must be tested and certified to the FCC that is does not exceed the exposure limit established by the FCC. Tests for each product are performed in positions and locations as required by the FCC.
For body-worn operation, this device has been tested and meets the FCC RF exposure guidelines when used with an accessory designated for this product or when used with an accessory that contains no metal.
To maintain compliance with FCC RF exposure guidelines hold the transmitter and antenna at least 1 inch (2.5 centimeters) from your face and speak in a normal voice, with the antenna pointed up and away from the face.
Your wireless hand-held portable transceiver contains a low-power transmitter. This product sends out radio frequency (RF) signals when the Push-to-Talk(PTT) button is pressed.
The device is authorized to operate at a duty factor not to exceed 50%.
Note:
This equipment has been tested and found to comply with the limits for a Class B digital device, pursuant to part 15 of the FCC Rules. These limits are designed to provide reasonable protection against harmful interference in a residential installation. This equipment generates, uses and can radiate radio frequency energy and, if not installed and used in accordance with the instructions, may cause harmful interference to radio communications. However, there is no guarantee that interference will not occur in a particular installation. If this equipment does cause harmful interference to radio or television reception, which can be determined by turning the equipment off and on, the user is encouraged to try to correct the interference by one or more of the following measures:
- Reorient or relocate the receiving antenna.
- Increase the separation between the equipment and receiver.
- Connect the equipment into an outlet on a circuit different from that to which the receiver is connected.
- Consult the dealer or an experienced radio/TV technician for help.


