![]() OHM READING GUIDE
OHM READING GUIDE
Snow Melting Mats and Cables
You will need: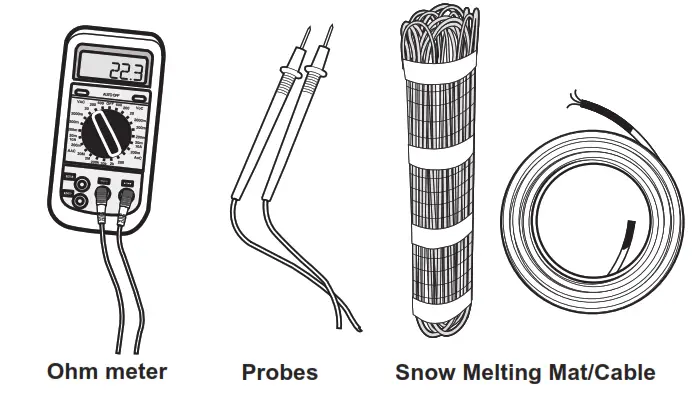
Before beginning, verify the circuit breaker is off and verify no power is present at the thermostat Supply Line. Ohm Readings
Why? We do a quick and simple Ohms test to make sure no breaks or shorts have occurred that could affect the system’s performance.
When? We advise that Ohm readings be taken before, during and after installation and that these are recorded for future reference.
How? By following the five simple steps clearly indicated, to complete the (3) three different readings that are required.
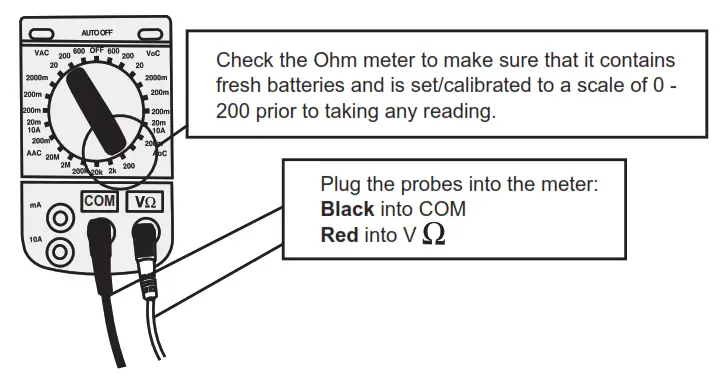
Step 1 – Setting the Ohm Meter
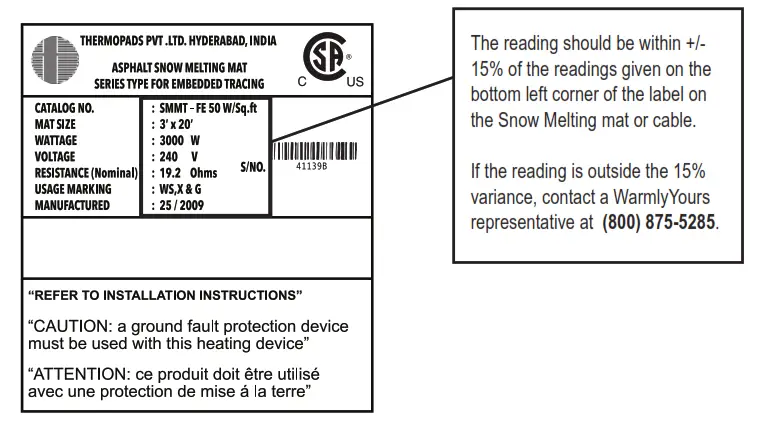
Step 2 – Taking the Readings
When taking the readings please ensure the following:
- Your fingers are not touching any wires
- The probes are firmly attached to the selected wires
- There is no power in the circuit
- The heating system is rolled out flat
- The wires are not connected to the thermostat

Step 3 – Core to Core Ohms Reading
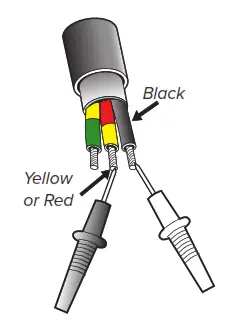 Connect the probes to both inner wires and record the reading off the Ohm meter. This is the reading between the two inner conductors of the lead wires.
VALUE:________________
Step 4 – Ground to Core Ohms Reading
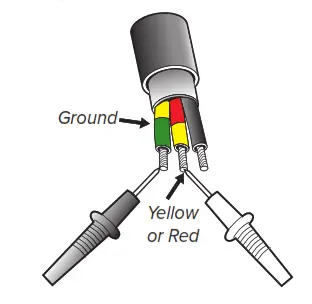 Connect the probes to both the Core wire and the Ground wire at the START of the lead.
Take the reading then repeat this reading at the other core wire.
VALUE:________________
Step 5 – Ground to Core Ohms Reading
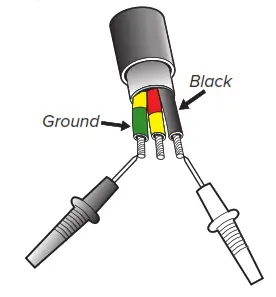 Connect the probes to both the Core wire and the Ground wire at the START of the lead.
VALUE:________________
IMPORTANT!
It is very important that for both CORE to GROUND readings you get “NO READING” – defined by a ‘0’, ‘1’, ‘OL’ or ‘∞’. IF NOT you may have a short and should call for technical assistance at (800) 875-5285.
![]()
Installation Support • (800) 875-5285 • www.WarmlyYours.com


