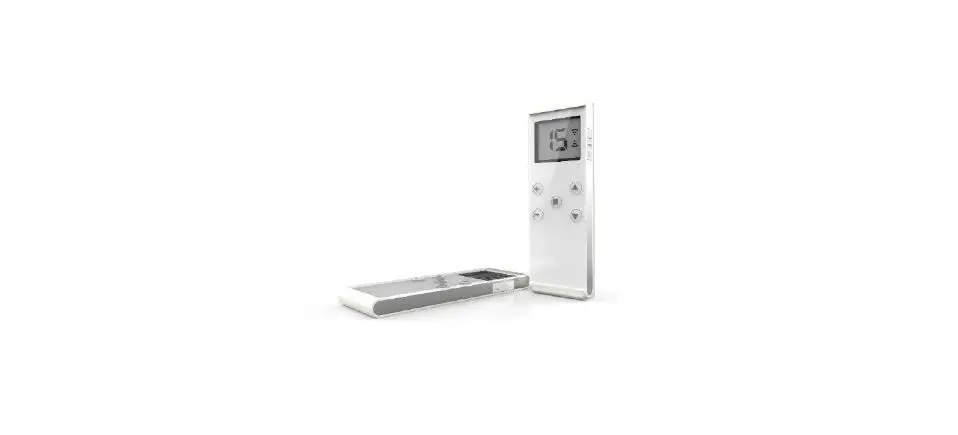
Rollease Acmeda TDBU 15CH Remote Control 

PRODUCT RANGE
This Quick Start Programming Guide is for the Top Down Bottom Up system (controller and remote).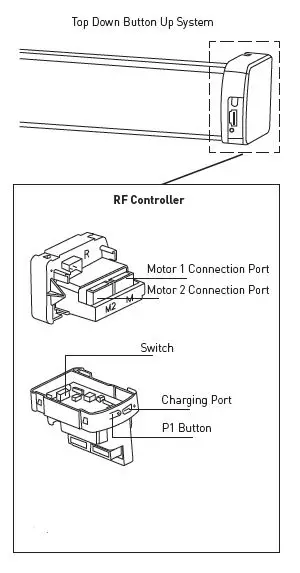
Note:
There are 2 different End Caps:
- Left End Cap
- Right End Cap
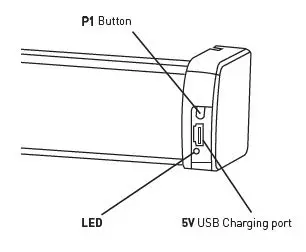
P1 LOCATIONS
LED Status: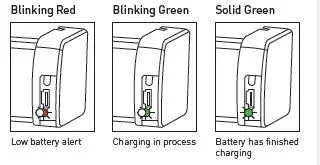
INSTALLER BEST PRACTICES AND TIPS
SLEEP MODE
If pre-programmed: before shipping the motor ensure the motor is put into sleep mode so it doesn’t activate during transit.
LOCK REMOTE
Prevent users from accidentally changing the limit; ensure the remote is locked as your last step of programming.
ZONE / GROUPS
Ask the customer the day before to think how shades will be zoned on the remote. This may save an extra call out.
SETTLE FABRIC
Run the fabric up and down several times to ensure fabric has settled to some extent and re adjust the limits if needed.
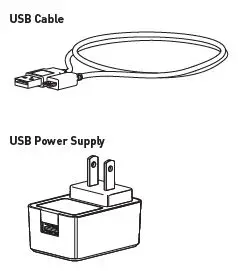
CHARGE 100%
For battery motors ensure the motor is fully charged as per instructions.
INSTALLERS REMOTE
Use a spare remote to individually program each shade. Then use that remote to group rooms as per the user’s needs. If you go back and service the installation later then, that same remote can be used to check the individual shades.
STEP 1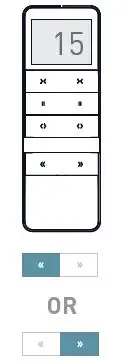
Press (lower channel) or (higher channel) buttons to select the channel that needs to be programmed
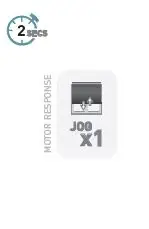
STEP 2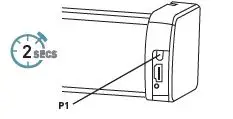
Press the P1 button on the motor for 2 Seconds until the motor responds The motor will respond with Jog x1 Within 10 seconds hold the Left STOP button on the remote until the motor Jogs x2: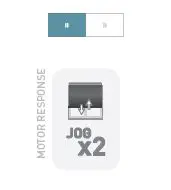
STEP 3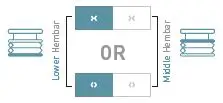
Press >< (Up) or <> (Down) to check the motor direction. If correct skip to step 5.
STEP 4
If the shade direction needs to be reversed; press and hold the >< (Up) & <> (Down) buttons together for 2 seconds until the motor Jog x1.
STEP 5
Move the middle member to the desired top limit by pressing the right >< (Up) button repeatedly.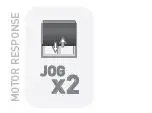
Repeat this process using the left >< (Up) button to set desired top limit and left >< (Up) & left STOP for 2 seconds to set the lower hembar top limit.
STEP 6
Move the middle hembar to the desired bottom limit by pressing the right <> (Down) button repeatedly.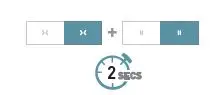
Then press and hold right <> (Down) & right STOP buttons together for 2 seconds to save the bottom limit.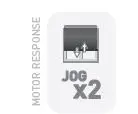
Repeat this process using the left <> Down) button to set desired bottom limit and left <> (Down) & left STOP for 2 seconds to set the lower hembar top limit.
STEP 7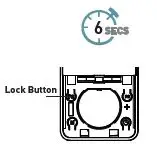
Repeat steps 1-6 for all motors. Once complete Press the lock button for 5 seconds to lock the remote, the L will breifly appear on the screen.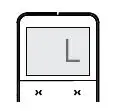
FACTORY RESET
MOTOR RESET PROCEDURE
To reset all settings in the motor press and hold the P1 Button for 14 seconds, you should see 4 independent jogs.
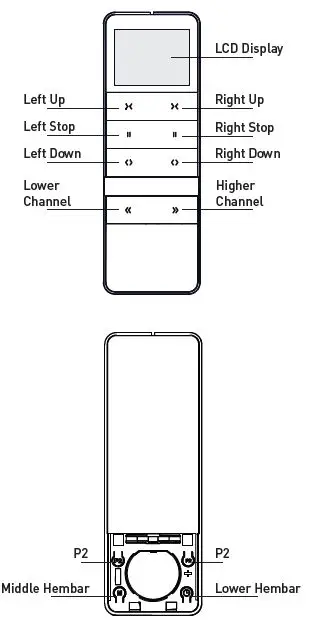
BUTTON OVERVIEW
REPLACE BATTERY
Remove Battery Isolation Tab
Remove cover
Use a tool (such as a SIM card pin, mini screwdriver, etc.) to push the battery cover release button and simultaneously slide the battery cover down.
Install Battery
WALL MOUNTING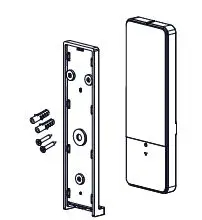
Use supplied fasteners and anchors to attach the base to wall.
HIDE UNUSED CHANNELS
Your multi-channel remote can be configured to have anywhere between 1 or 15 visible channels. Inactive channels will not be visible when scrolling through the Channel selection.
Hold STOP and Channel Button
Remote Respose: Flashing Stops Continue holding Channel Button and select required channel qty by pressing >< (UP) or <> (Down)
Press STOP to confirm
SELECTING A CHANNEL
STEP 1
Press left and right arrow; to scroll through channels as required.
STEP 2
READY FOR CONTROL
Now while the channel is active follow the control instructions.
If no button is pressed the channel slection will automatically be confirmed.
GROUP CONTROL
Channel “0” is pre-set to control ALL shades paired to your Muli-channel remote.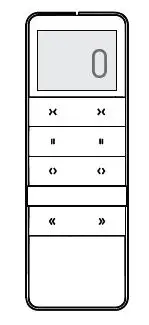
CONTROLLING A SHADE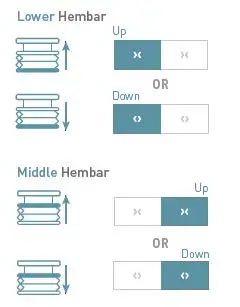
While the channel is displayed press >< (Up) or <> (Down) to move shade accordingly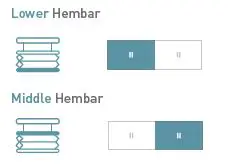
Press the corresponding STOP button to stop the hembar at any point. Press and hold Left STOP for 2 seconds to send shade to favorite position (if set).
DISABLE LIMIT SETTING
This mode is intended to be used after all shade programming is completed. User Mode will prevent locking/unlock the remote.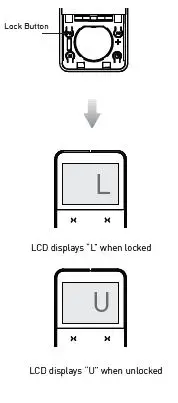
SET A FAVORITE POSITION
Repeating these steps after creating a favorite position will delete it.Move Hembar to desired position by pressing >< (Up) or <> (Down) on the remote.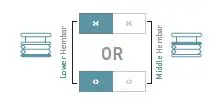
Move shade to desired position >< (Up) and <> (Down) buttons
STEP 1.
Press P2 on controller
STEP 2.
Press Left STOP on controller
STEP 3.Press Left STOP on coAntroller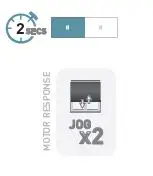
CREATE CUSTOM GROUPS
It is possible to copy one channel to another channel to create custom groups 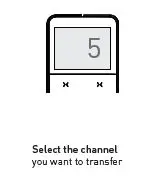
STEP 1.
Press P2 on existing controller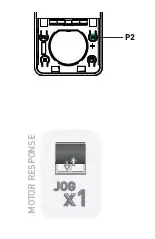
STEP 2.
Press P2 again on existing controller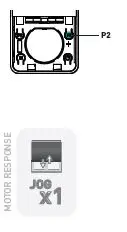
Step 3 to be completed within 4 seconds of Step 2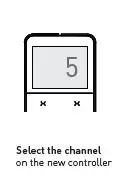
STEP 3.
Press P2 on new controller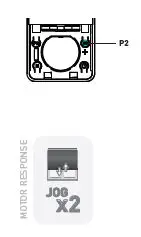
Safety
WARNING:
Important safety instructions to be read before installation and use. Incorrect installation or use can lead to serious injury and will void manufacturer’s liability and warranty. It is important for the safety of persons to follow the enclosed instructions.
Save these instructions for future reference.
- Do not expose to water, moisture, humid and damp environments or extreme temperatures.
- Persons (including children) with reduced physical, sensory or mental capabilities, or lack of experience and knowledge, should not be allowed to use this product.
- Use or modification outside the scope of this instruction manual will void
- Installation and programming to be performed by a suitably qualified installer.
- For use with motorized shading devices. Frequently inspect for improper operation.
- Do not use if repair or adjustment is necessary.
- Keep clear when in operation.
- Replace battery with correctly specified type.
This product contains a coin/button cell battery. If the coin/button cell battery is swallowed, it can cause severe internal burns in just 2 hours and can lead to death. Keep new and used batteries away from children. If the battery compartment does not close securely, stop using the product and keep it away from children. If you think batteries might have been swallowed or placed inside any part of the body, seek immediate medical attention.
FCC & ISED STATEMENT
This device complies with part 15 of the FCC Rules. Operation is subject to the following two conditions:
- This device may not cause harmful interference, and
- this device must accept any interference received, including interference that may cause undesired operation. Caution: Changes or modifications to this unit not expressly approved by the party responsible for compliance could void the user’s authority to operate the equipment.This device contains license-exempt transmitter(s)/receiv-er(s) that comply with Innovation, Science and Economic Development Canada’s licence-exempt RSS(s). Operation is subject to the following two conditions:
- This device may not cause interference.
- This device must accept any interference, including interference that may cause undesired operation of the device.
NOTE:
This equipment has been tested and found to comply with the limits for a Class B digital device, pursuant to part 15 of the FCC Rules. These limits are designed to provide reasonable protection against harmful interference in a residential installation. This equipment generates, uses and can radiate radio frequency energy and, if not installed and used in accordance with the instructions, may cause harmful interference to radio communications. However, there is no guarantee that interference will not occur in a particular installation. If this equipment does cause harmful interference to radio or television reception, which can be determined by turning the equipment off and on, the user is encouraged to try to correct the interference by one or more of the following measures:- Reorient or relocate the receiving antenna.
- Increase the separation between the equipment and receiver.
- Connect the equipment into an outlet on a circuit different from that to which the receiver is connected.
- Consult the dealer or an experienced radio/TV technician for help.


