Dsoon Tech NV5000 1080P Night Vision Binoculars and Goggles Pro User Manual
Product Overview
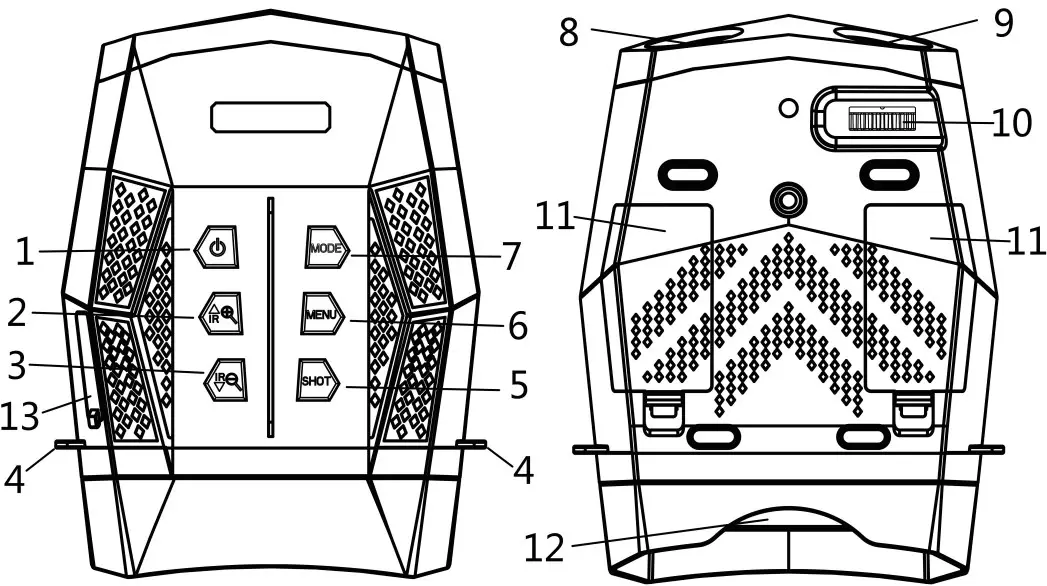
- Power Button
- IR Up/Zoom in/Up Button
- IR Down/Zoom out/ Down Button
- Strap Hole
- Shot Button
- Menu Button
- Mode Button
- IR LEDs
- Lens
- Focus wheel
- Battery Cover
- View Area /display screen
- USB port/Micro SD card slot Cover
Specification
| Photo Resolution | 【3M(2048×1536)】 /【2M(1600×1200)】/【1M(1280×960)】/【VGA(640×480)】 |
| Video Resolution | 【1080P(1920x1080P@30FPS )】 /【960P (1280 x 960 @30FPS )】/【VGA(640×480@30FPS )】 |
| Lens | F1.0 larger aperture, f=35mm, Auto IR filter |
| Lens Angle | 10.3° |
| Display Screen | Inner screen is 2.5” 640*480 TFT |
| Outer screen | 98x48mm,with 6X large window magnifier |
| USB Port | Micro USB 2.0 |
| Auto off | 3 min/ 5 min/ 10 min/OFF |
| IR LED | 5W,850nm strong infrared spotlight , 7 grades infrared adjustment |
| Display brightness | 7 grades adjustable |
| View Distance In Complete Darkness | About350-400 meters |
| View Distance In Low Light | 1 meters~infinity |
| Display brightness | Digital Zoom 4X |
| Power Source | 8*AA Alkaline battery, External 5V mobile power supply/Rechargeable battery |
| OSD Language | Multiple languages are optional |
| Date Stamps | Support to set date and time. Date and time stamp on photo and video files |
| Operation Buttons | 6 buttons |
| Operation Temperature | -10℃ to +50℃ |
| Storage Temperature | -20℃ to +60℃ |
| Dimensions | approx. 196.3*144.6*61.5mm |
| Weight | about 795g with battery |
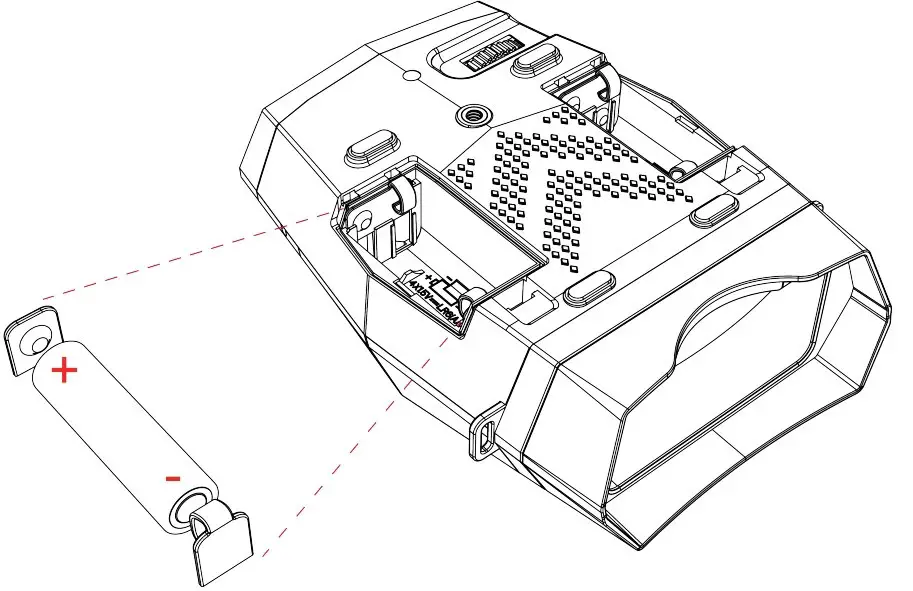
Install Batteries
- Please install batteries into the device before using.
- Open the battery cover on the back of device.
- Insert 8 x 1.5V AA brand new Alkaline/Rechargeable batteries into the battery compartment. Make sure the polarity is correct.
- Close the battery cover.

Inserting Memory Card
- Please prepare a Class 10 Micro card (up to 32GB) in advance.
- Open the card slot cover, you will see the card slot.
- Insert the Micro SD card into the slot. Make sure the direction is right.
- Never insert the card forcibly.
- Format the Micro SD card,this can improve the compatibility of Micro SD card.
- To remove the card from the memory card slot of the device, press the edge of the memory card in gently, the card will pop out. Then remove the card.
Note: If the TF card is not inserted or the card is not inserted correctly, the prompt icon of SD card and the number of photos or recording time will not appear on the screen when the machine is turned on. When pressing the shoot button, the prompt of “No card” will appear
Formatting Memory Card
If you want to clear the data on the memory card, you can solve it by formatting. In the photo/video mode, press MENU button to enter the menu. Using the “IR +” or “IR –” button to select up and down, press the SHOT button to confirm. Please formatting the SD card before using it for the first time.
Note: All data will be lost after formatting, please pay attention to backup!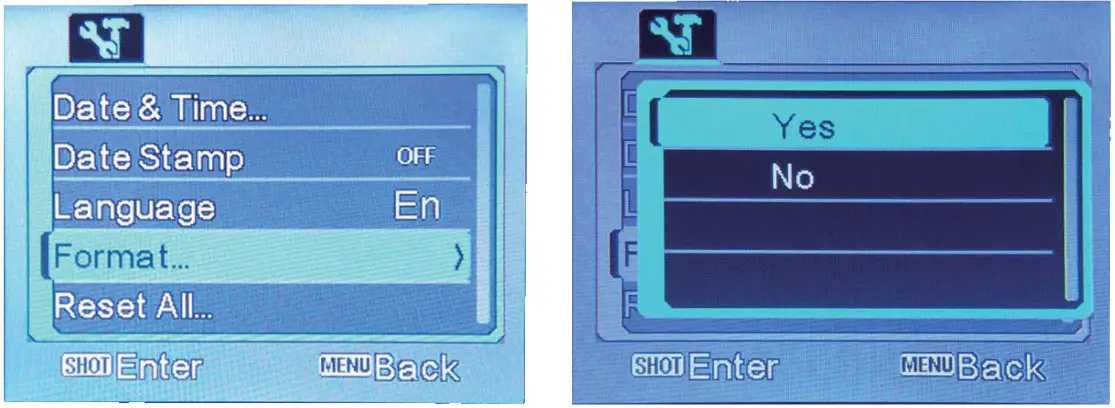
Basic operation
Turn On And Turn Off
Long press the POWER button for 3 seconds to turn on the device. Long press the POWER button to turn off the device. Watch the eyepiece/display screen and adjust the focus wheel according to the actual distance to focus until the screen is clear. If the light is insufficient or used in the evening, turn on the IR by pressing the IR Up/Zoom in/Up Button. Increase the brightness by pressing the button repeatedly.It has 7 levels of brightness(0〉1〉2〉3〉4〉5〉6〉7〉0…)The brightness can be adjusted according to your needs. Long press IR up to zoom.
Changing The Modes
The night version has 3 different modes : photo mode, video mode and playback mode. Press the Mode button can change mode.
| Photo Mode | For taking still photos. | |
 | Video Mode | For recording video. |
 | Playback Mode | For playing the recorded files. |

a. When the device is turned on, by default it will be in Video mode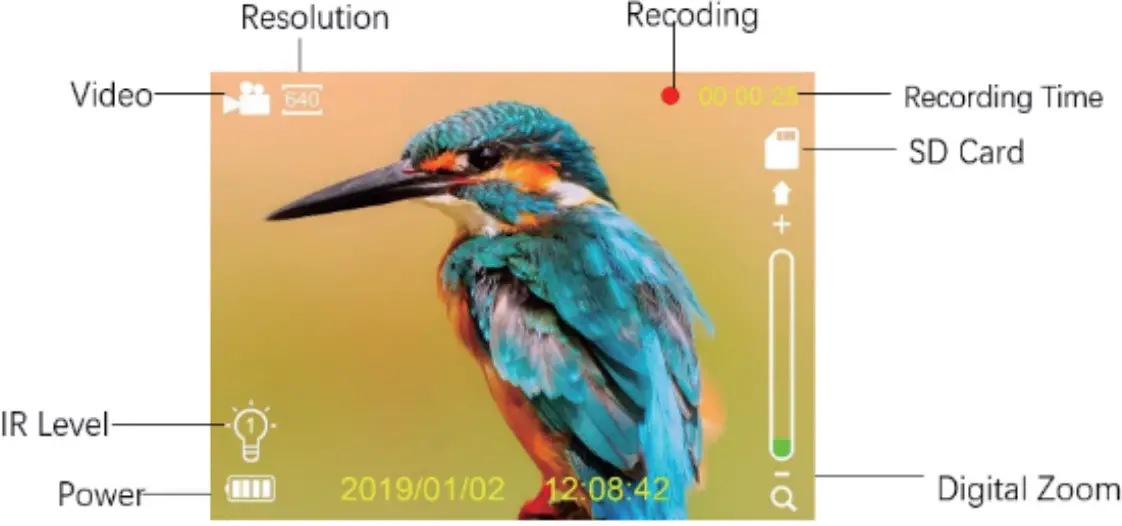
b. Please press the “Mode” button (9) to switch to Photo mode.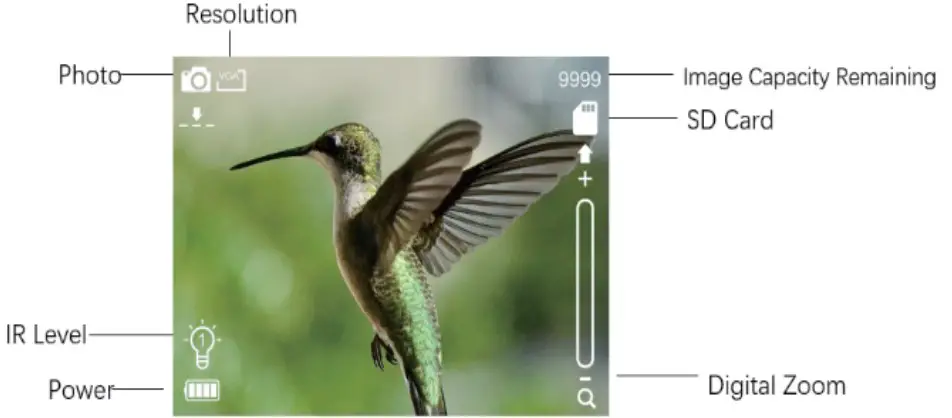
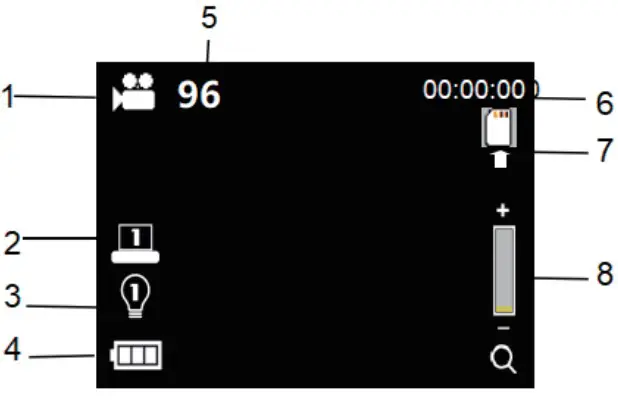
Taking pictures
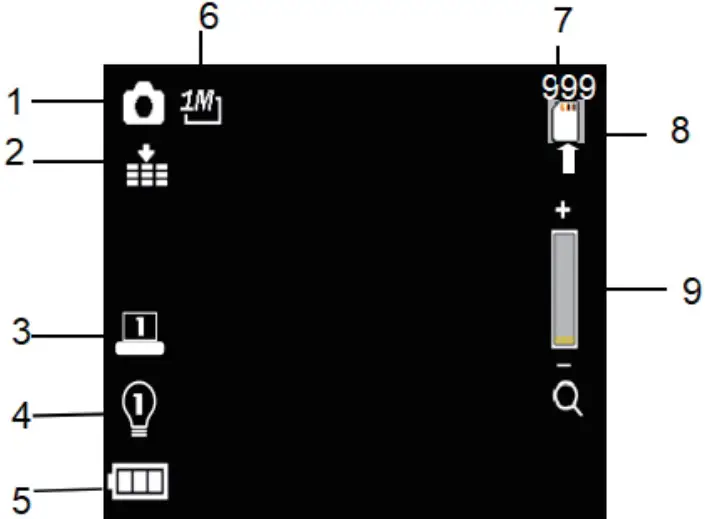
| 1.Camera mode |
| 2.Default high quality images |
| 3.Screen brightness gear |
| 4.Infrared light gear |
| 5.Battery status |
| 6.Photo Resolution |
| 7.Number of pictures that can be taken |
| 8.SD card prompt |
| 9.Digital zoom indication |
- Turn on the device,the default is Video mode. Please press the Mode button to switch to photo mode.
- Zooming:
Keep pressing the “IR +” or “IR-” button (3 / 4) to zoom in or zoom out the image. the value of the magnification level appears on the LCD screen, the maximum support 4x.
Zoom Off
Zoom On - Take a still photo.
- View your subject via the LCD screen.
- Adjust the focus by turning the focus wheel. For night or insufficient light use,turn on the IR by pressing the IR Up/Zoom in/Up Button.Increase the brightness by pressing the button repeatedly.It has 7 levels of brightness(0〉1〉2〉3〉4〉5〉6〉7〉0…)The brightness can be adjusted according to your needs.
- Press the Shot button to take a photo.
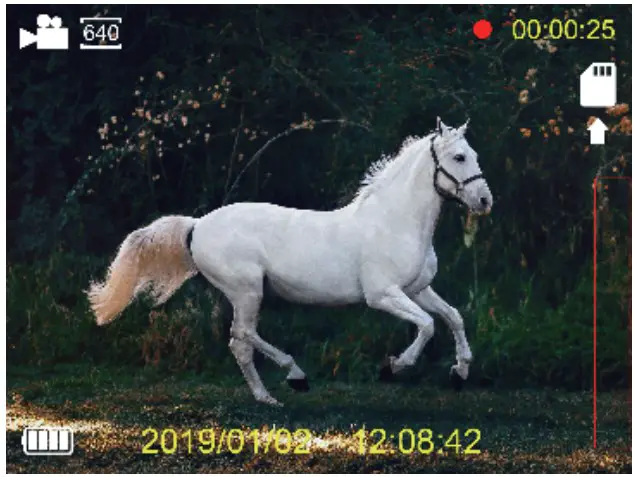

Recording Video
| 1.Video mode |
| 2.Screen brightness gear |
| 3.Infrared light gear |
| 4.Battery status |
| 5.Video Resolution |
| 6.Number of picturesthat can be taken |
| 7.SD card prompt |
| 8.Digital zoom indication |
- Turn on the device,the default is Video mode. If not, press the Mode button to switch to Video mode.
- Zooming: Keep pressing the “IR +” or “IR-” button (3 / 4) to zoom in or zoom out the image. the value of the magnification level appears on the LCD screen, the maximum support 4x.
Zoom Off}
Zoom On - Start to record video.
- View your subject via the LCD screen.
- Adjust the focus by turning the focus wheel For night or insufficient light use,turn on the IR by pressing the IR button.Increase the brightness by pressing the button repeatedly. It has 7 levels of brightness(0〉1〉2〉3〉4〉5〉6〉7〉0…)The brightness can be adjusted according to your needs,darker and need adjusted more brightness.
- Press the Shot button to start to record.The record duration will be
shown on the LCD screen. 4.Finish recording. - Press the Shot button again to stop recording.
- The device will stop recording automatically once capacity of the memory card is full.
Device Power Off
If the device fails to activate, check for defective, missing or improperly-installed batteries. Replace or install batteries correctly. Please make sure to use good quality alkaline batteries or rechargeable batteries, inferior batteries will damage the product.
Poor Image
a. If you wear glasses, please keep them on while using the device. If at day, make sure the IR is off (if IR is on, screen will turn from colored to black and white ).
b. If at night, make sure you have turned on the IR, press IR up(3) (if IR is on, screen is black and white).
c. Please adjust the focus by turning the focus wheel – Rotate the focusing wheel in the corresponding direction according to the far/near viewing distance. You need to rotate the focusing wheel to the left for close viewing, and to the right for long-distance viewing. The focus is in place until the screen display is clear.
d. If you use rechargeable batteries, we strongly recommend that you use Well-known brand rechargeable batteries to ensure stable product performance.
e. Please do not use it through windows
Whether or not the infrared light (IR) is turned ON, the device cannot observe objects through window glass.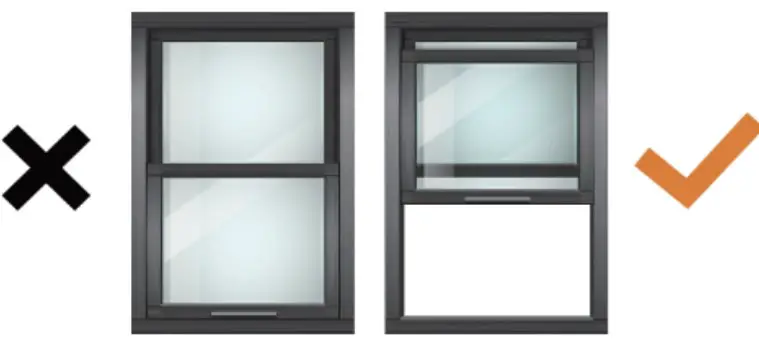
f. Please use the device in the correct direction as shown in the figure.
IR–LED (Night vision function)
In photo/video mode, if you have to view the darkness environment, please short press IR UP button to activate the IR LEDs, the image will change to black and white. The IR LEDs have seven levels, short press IR UP button to up the level, short press IR DOWN button to down the level. (If the battery voltage is not enough, the IR LEDs level will down automatically. IR level can up to 7 level when the battery power is full. If only left half power, the level just can up to 5. If only left 25% power, the level just can up to 3. If the battery power is lower than 25%, IR LEDs can not be activated.)
Note: If the battery voltage is not enough, the IR LED level will get lower automatically.
| Battery Power | IR Levels Available |
| 100% | 7 |
| 50% | 5 |
| 25% | 3 |
| <25% | 0 |
Menu Setting
| Press Menu button in photo or video mode, can change the settings. | |
| Menu | Function |
| Photo Resolution | Set the photo resolution.Options:[3M(2048×1536)] /[2M (1600 x 1200)] / [1M 1280×960] /[VGA 640×480] |
| Video Resolution | Set the video resolution.Options:[FHD 1920X1080 ][960 1280×960]/ [640 640×480]. |
| Night vision sensitivity | Choose the night vision sensitivity.Options:[Low]/[Middle]/[High]. |
| Burst Shooting | Options:[Off]/[On] |
| Screen Brightness | You can according to their need to adjust thebrightness of the Lcd screen.Options:[Level 7]/ [Level 6]/[Level 5]/[Level 4]/ [Level 3]/[Level 2]/[Level1]. |
| Power Frequency | Set the light source frequency to match frequency of electricity supply in local region to prevent interference. Options:[50Hz]/[60Hz]. |
| Power Saving | Set the time to shut down the device for power savingif the device is idle.Options:[3min]/[5min]/[10min]/[OFF]. |
| Date&Time | Set the date and time of device. |
| Date Stamp | Add the date stamp on the photo or video files. Options:[Off]/[Date]/[Date&Time]. |
| Language | Set OSD (on-screen) language.Options: [English]/[Simplified Chinese]/ [Traditional Chinese]/[Francais]/[nederlands]/[Espanol]/[Italiano]/[Portugues]/ [Deutsch]/[Pyccknn]/[Japanese]/[Korean]. |
| Format | Format your TF card. Format TF card will delete all files including the protected files. Please copy the important files before confirm.Options:[Yes]/[No]. |
| Reset All | Restore the setup to factory default settings. Options:[Yes]/[No]. |
| FW Version | User can see the firmware version information. |
Playback
Watching Stored Videos and Photos in the photo mode: press MODE button to select the Playback mode. In playback mode, press the up or down button to turn pages forward and backward, the playback order is the shooting orde
Playback menu list :
| Menu | Function |
| Lock | Lock or unlock the current one file or all files in memory card.Options:[Lock/Unlock onel]/[Lock All]/ [Unlock All]. |
| Delete | Delete the current one file or delete all files in memory card.Options:[One]/[All]. |
Download files to PC
There are two ways to download files from the device to a computer:
- By inserting the memory card into a card reader.
- By connecting the device to a computer using the supplied USB cable.
Using a Card Reader
- Eject the memory card from the device and insert it into a card reader. Then connect the card reader to a computer.
- Open [My Computer] or [Windows Explorer] and double-click the removable disk icon that represents the memory card.
- Copy images from the card into a directory of your choice on the computer’s hard disk.
Connecting the Device to a PC through the USB Cable
- Turn on the night vision. Connect it to a computer through the supplied USB cable.
- When connecting to the computer, it will appears “MSDC” on the screen.
- Open [My Computer] or [Windows Explorer]. A”Removable Disk” appears in the drive list. Double-click the “Removable Disk” icon to view its contents. Files stored on the camera are located in the folder named “DCIM”.
- Copy the photos or files to your computer
NOTES on Cleaning
NOTES on Cleaning
Before cleaning the device, disconnect it from the power supply (remove batteries)! Only use a dry cloth to clean the exterior of the device. To avoid damaging the electronics, do not use any cleaning fluid. Clean the eyepieces and/or lenses only with a soft, lint-free cloth, (e.g.microfibre cloth). To avoid scratching the lenses, use only gentle pressure with the cleaning cloth. Protect the device from dust and moisture. Store it in a bag or box. Remove the batteries from the device if it is not used for a longer time
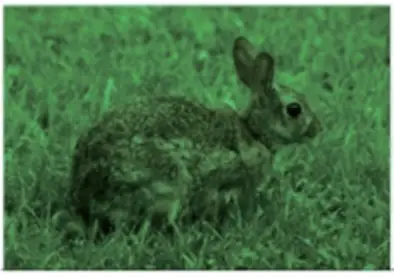
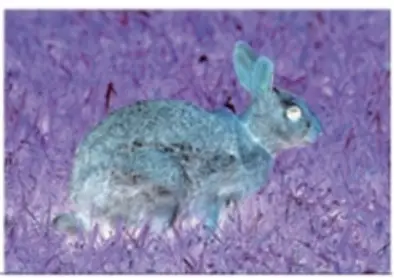
New and Special Color Effects:
Luminous Green Color Effect & Film Color Effect.
These 2 color effects are available in both normal mode and infrared night vision mode.
Steps
Long press “Menu”- > Luminous Green Color Effect,
Long press “Menu”- > Film Color Effect,
Long press “Menu”- > Get back to normal color mode.
- Colorful Effect

- Black and White Effect
- Luminous Green Color Effect
- Film Color Effect

WARRANTY
This product comes with a 12-MONTH WARRANTY.
Please don’t hesitate to contact us with any questions and problems.
You can contact us via:
Email: s[email protected]
If you are not happy with the Dsoon in any way, please contact us and we will take care of it as soon as possible. We are always happy to help!
- This warranty does not cover devices that have been:
- Neglected or abused (including, but not limited to, water damage caused by submersion, battery leakage or improper storage).
- Modifications or repairs by unauthorized agents.
- Damaged devices that have cracked or broken outer cases due to excessive impact, heat, or mishandling.
- Damages caused by wild animals.
Before starting warranty service, please contact us by email: [email protected].
THE COMPLETE HUNTER KIT
Night Vision Binoculars NV3182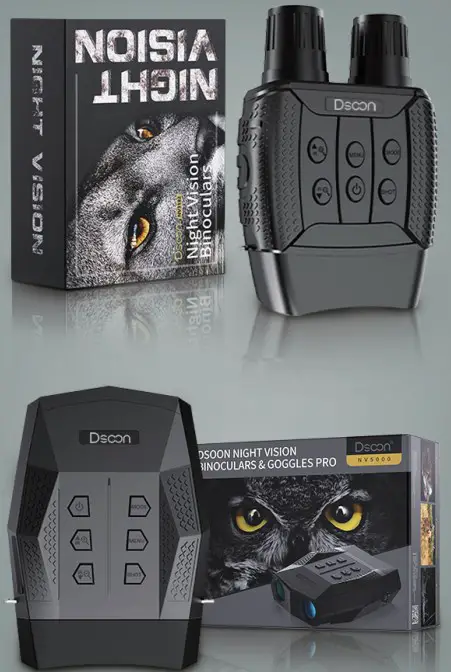
Night Vision Scopes NV3000
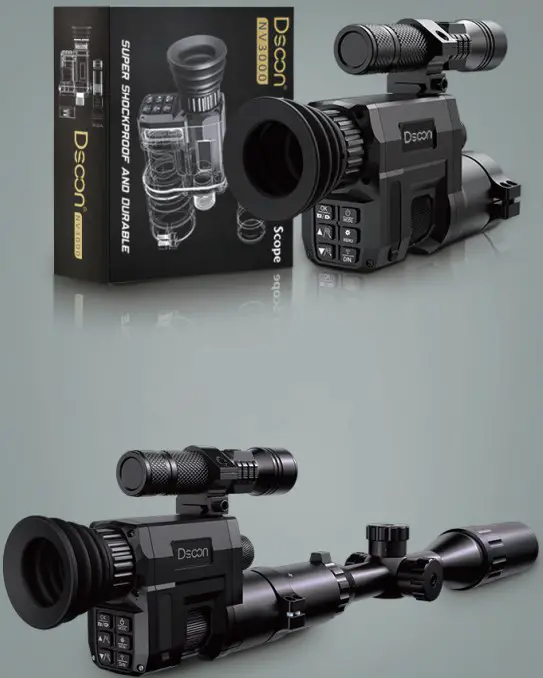
Hunting Rifle Scope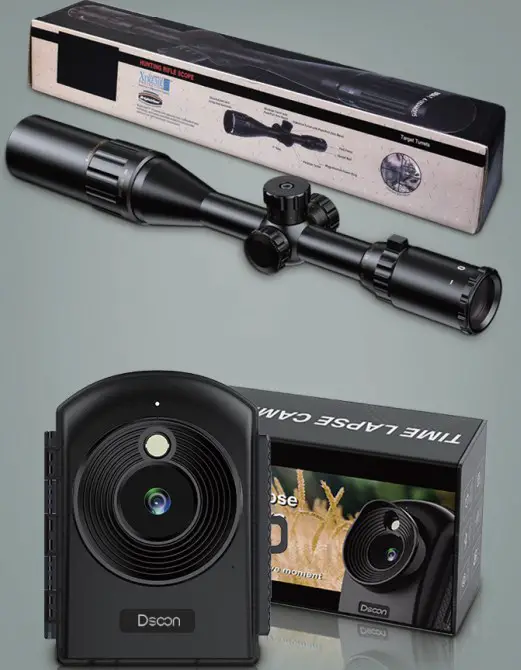
Solar Panels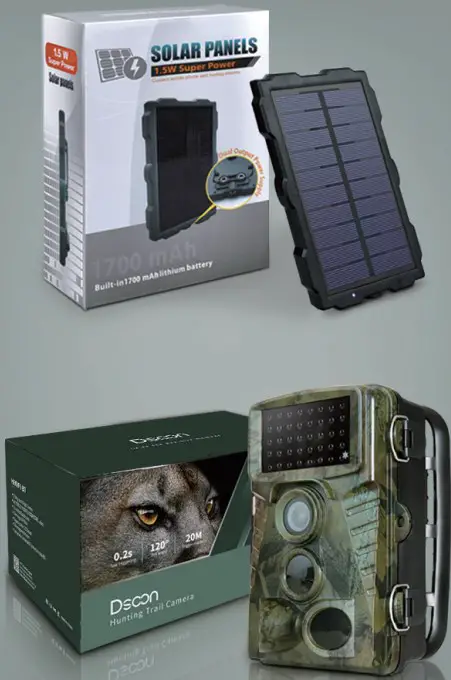
Hunting Camera H8203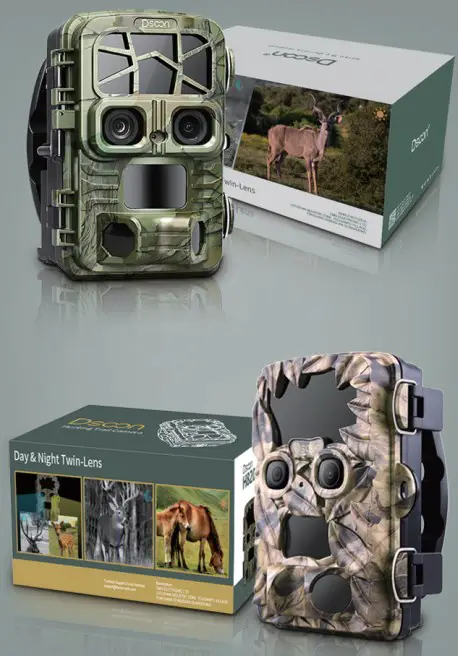
Hunting Camera H855C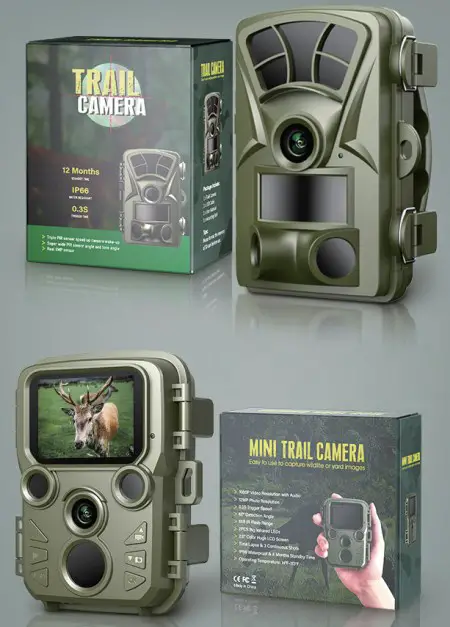
MANUFACTURER: OMG ELECTRONIC LTD.
ADDRESS: LEFUSHAN INDUSTRY ZONE, YOUGANPU VILLAGE, FENGGANG DONGGUAN GUANGDONG
AC WORKS CONSULTING SRL
ADDRESS: VIA VILFREDO PARETO 125, CESENA (FC), 47521, ITALY EMAIL: [email protected] TEL: +39 054729444
HUA TENG LIMITED
ADDRESS: 3 GLASS STREET, HANLEY, STOKE ON TRENT, ST1 2ET, UK
EMAIL: [email protected] TEL: +44 2035824092
![]()