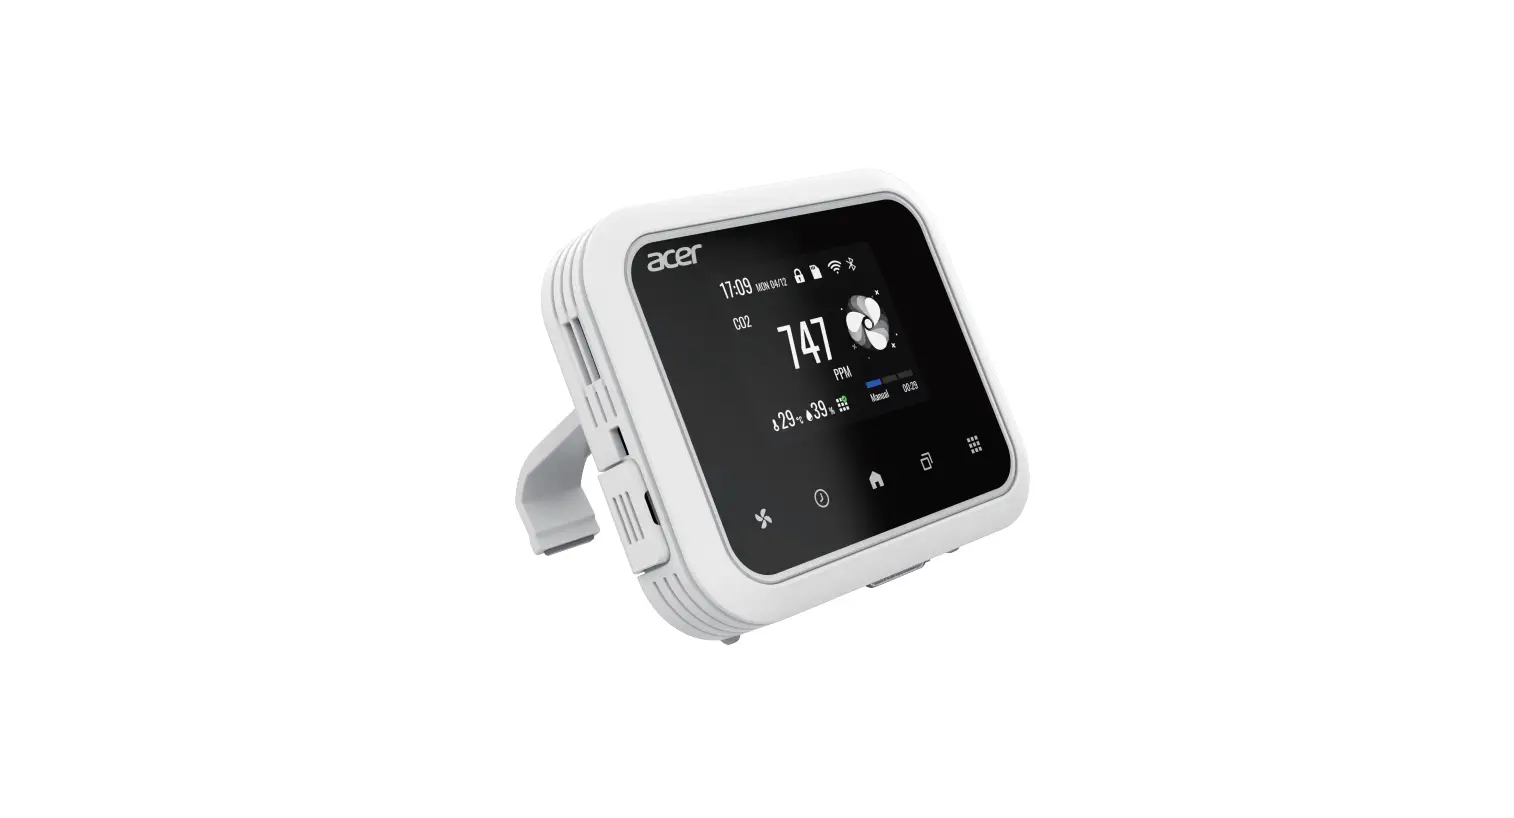
acer HLZ-AMM Smart Environment Monitor and Controller User Guide
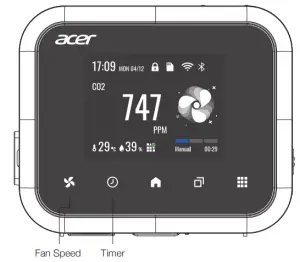
Fan Speed
Short Touch: Manual Speed 1 > Manual Speed 2 > Manual Speed 3 > Automatic Control Long Touch: Stop
When switching to manual speed, the timer will be set to 30 minutes by default. After 30 minutes, the controller will switch to automatic mode.
Timer
In manual mode, each press on the button corresponds to 1hr increment. Once the time exceeds 6hr, the decide would be in always on mode, and the device would display 24hr.
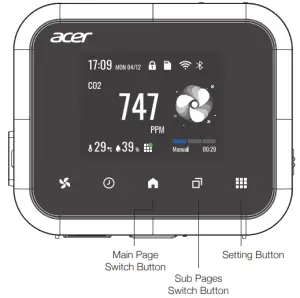
Main Page Switch Button
There are 5 main pages. Press this button to switch main page sequentially. Default Main Page > Sensor Page > Ventilation Equipment Page > Settings > About
Sub Page Switch Button
Press the button to display detailed information related to the Main page.
Setting Button
In the settings page, press the button to switch and configure options.
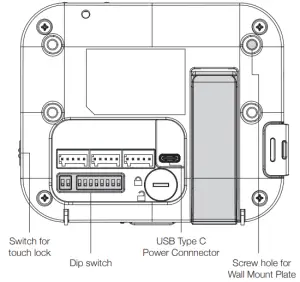
Phoneix Connectors
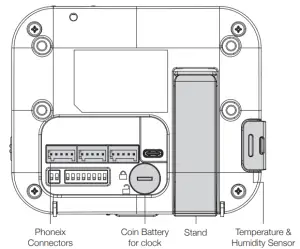


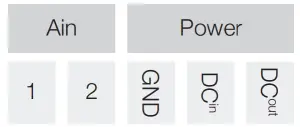
- NO1-NO3 can be used for controlling fan speed in order. Only one of NO1-NO3 can be switched on at a time.
- NO4 can be used to turn on a relay switch for further controlling a dehumidifier, compressor, or valve.
- AO: Analog Output
Product Overview
Description of Wi-Fi LED Light
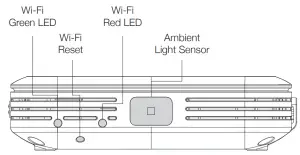
| Wi-Fi Status | Red | Green |
| Waiting for provisioning | ON | OFF |
| Connecting to access point | OFF | Slow flashing |
| Connecting to cloud server | OFF | Fast flashing |
| Connected to cloud server | OFF | ON |
| Communication Error to Sensor | Slow flashing | Slow flashing |
Wi-Fi Reset: Long press reset button to switch Wi-Fi to provision waiting mode.
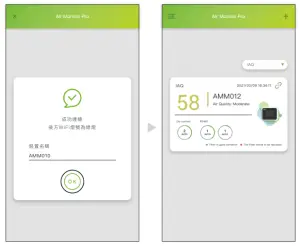
Set up cloud connection and connect to ventilation equipment
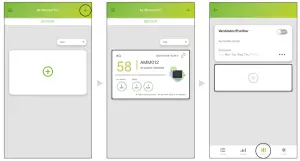
- Launch Acer Air Monitor Pro APP
- Click “+” to add Acer AMM Smart Environmental Monitor and Controller. Follow the steps indicated on APP to complete the settings.
- To connect to a ventilation equipment, please click an AMM device then click “+” to select an equipment. Follow the steps indicated on APP to complete the settings..
Scan right QR Code to download the APP.


Schedule setting
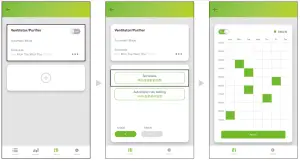
- Click a AMM device, click Control, then click “Ventilator/Purifier”.
- Click “Schedule”
- On schedule setting page, click on the table column corresponding to each hour to turn it on or off.
Notice
When the schedule control is enabled, AMM will switch to automatic control mode over time.
When the schedule is set to ON, the automatic control is started.
When the schedule is set to OFF, it turns to the off mode.
Bluetooth Remote Control
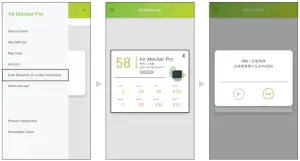
- Launch APP
- Click manual icon then click “Scan Bluetooth air quality broadcasts”
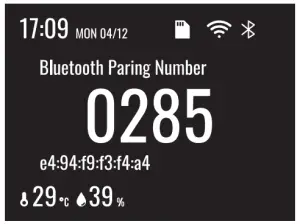
- Select the AMM that has strongest signal. The LCD display on the corresponding AMM device will show a 4-digit number.
- Input the 4-digit number on APP to complete paring process, and then you can perform remote control functions.
Notice
Please turn on Bluetooth on your smartphone.
The 4-digit number will disappear after 5 seconds automatically. Please complete the pairing process in time.
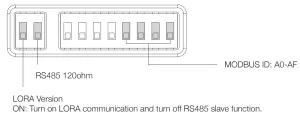
LORA Configuration
- Please login the cloud account into LoRa Master device for setting the connection.
- Once the setting is completed, you can use the APP to access the AMM.
Notice
Please contact business window for LORA relative functions.
FEDERAL COMMUNICATIONS COMMISSION INTERFERENCE STATEMENT
This equipment has been tested and found to comply with the limits for a Class B digital device, pursuant to part 15 of the FCC Rules. These limits are designed to provide reasonable protection against harmful interference in a residential installation. This equipment generates, uses and can radiate radio frequency energy and, if not installed and used in accordance with the instructions, may cause harmful interference to radio communications.
However, there is no guarantee that interference will not occur in a particular installation. If this equipment does cause harmful interference to radio or television reception, which can be determined by turning the equipment off and on, the user is encouraged to try to \correct the interference by one or more of the following measures:
- Reorient or relocate the receiving antenna.
- Increase the separation between the equipment and receiver.
- Connect the equipment into an outlet on a circuit different from that to which the receiver is connected.
- Consult the dealer or an experienced radio/ TV technician for help
CAUTION:
Any changes or modifications not expressly approved by the grantee of this device could void the user’s authority to operate the equipment. This device complies with Part 15 of the FCC Rules. Operation is subject to the following two conditions: (1) this device may not cause harmful interference, and (2) this device must accept any interference received, including interference that may cause undesired operation.
RF exposure warning This equipment must be installed and operated in accordance with provided instructions and the antenna (s) used for this transmitter must be installed to provide a separation distance of at least 20 cm from all persons and must not be co located or operating in conjunction with any other antenna or transmitter. End-users and installers must be provide with antenna installation instructions and transmitter operating conditions for satisfying RF exposure compliance.
| Category | Item | Specification |
| Power | USB Type C Power Input | DC 5V 2A |
| DC-in Power Input | DC 9-24V 2A | |
| DC-Out Power Output | DC 5V | |
| RTC Backup Battery | CR1220 3V Coin Battery | |
| Human-Machine Interface | Display | TFT LCD 320×240 16bit color display |
| Touch Button | 5 x Capacitive Touch Button | |
| Air Quality Light | Full color breathing light Green: Good;Yellow: Moderate; Orange: Unhealthy for Sensitive Group Red: Unhealthy;Purple: Very Unhealthy | |
| Sensor <Note 1> | CO2 | Method: NDIR (Non-Dispersion Infrared) Range: 0-10,000ppm Resolution: 1ppm |
| Temperature | Method: Semiconductor Range: 0-100°C Resolution: 0.1°C | |
| Relative Humidity | Method: Semiconductor Range: 0-100% Resolution: 0.1% | |
| Particulate Matter | Method: Laser Scattering Range: 0-1,000μg/m3 |
| Sensor <Note 1> | Formaldehyde Sensor | Method: Electrochemical Sensor Range: 0-1.600ppm |
| Total Volatile Organic Compound Sensor | Method: Semiconductor Range: 0-10ppm Resolution: 0.1°C | |
| Ambient Light Sensor | Method: Dual Diode Semiconductor Range: 0-10,000Lux Resolution: 1Lux | |
| Communication <Note 2> | Wireless Network | 2.4GHz, IEEE802.11 b, g, n |
| Low Power Bluetooth | BLE 2.4GHz | |
| Wired Communication | MODBUS-RTU protocol over RS-485; 9600bps 8n1 | |
| LORA | 920MHz Peer to Peer Communication | |
| Storage | SD-Card Slot | Micro SDCARD 32GB, FAT32 File System |
| Control | RS-485 | MODBUS-RTU protocol over RS-485 Master 9600bps 8n1 |
| Analog | 0-10V output control | |
| Digital | 4 port Normal Open Control Point |
Note 1: The sensor is equipped according to the product model, and the sensor needs to be calibrated regularly.
Note 2: The communication function is optional according to the product model.
- Lock the barb rack to the back cover with salad head screws.
- Lock the wall mount plate on the double box with self-tapping screws.
- Self-tapping screws are placed in the gecko screw group.
- Align the barb hanger with the rectangular hole on the wall mount. Past down fixed and lock with hexagon socket screws.
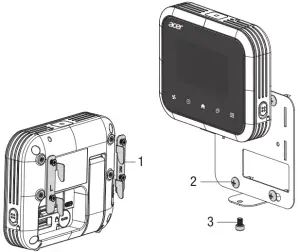
| Barb hanger (L) | 1 | Salad head screws | 4 |
| Barb hanger (R) | 1 | Gecko screw group | 2 |
| Double box wall mount plate | 1 | Hexagon socket screws | 1 |
Notice
- This product contains a coin / button cell battery. If the coin / button cell battery is swallowed, it can cause severe internal burns in just 2 hours and can lead to death.
- Keep new and used batteries away from children.
- If the battery compartment does not close securely, stop using the product and keep it away from children.
- If you think batteries might have been swallowed or placed inside any part of the body, seek immediate medical attention.


