User Manuel
HDMI Sync Box And Lighting Kits
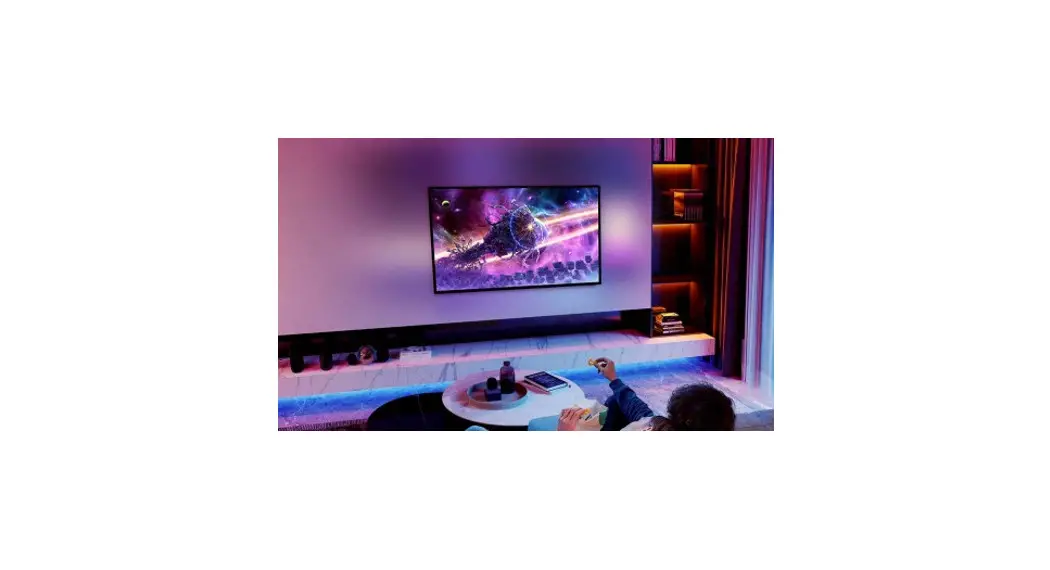
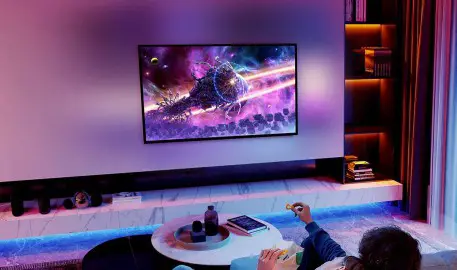
The HDMI sync box lighting kits render you a thoroughly immersive experience in watching movies or playing games, bringing you into a fabulous vision and sound feast. A must for movie, music, and games enthusiasm people.
| Product name | HDMI sync box and lighting kits |
| Adapter voltage | DC12V |
| Standby power consumption | 2W |
| Maximum power consumption | 48W |
| Video resolution | Video resolution |
| Bluetooth Support | Yes |
| Control Way | Phone&Voice |
| Voice assistants | Amazon Akira, Google Assistant, Samsung |
| CEC | Yes |
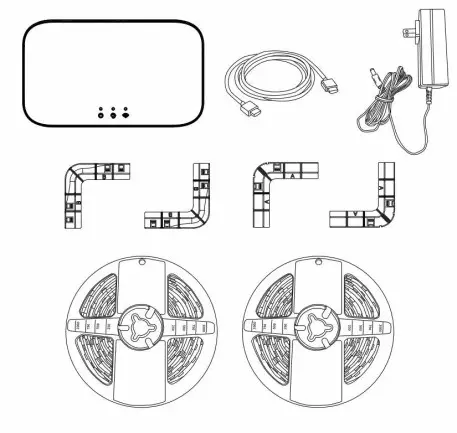
Package Item
| Item List | Quantity |
| Synchronous lighting control box | 1pc |
| HDMI Cable | 1pc |
| AC Power Adapter | 1pc |
| Fixing Brackets for led strip corner | 4pcs |
| Full-color RGB led strip | 2Rolls |
| Manual Instruction | 1pc |
The Introduction Of Sync Box
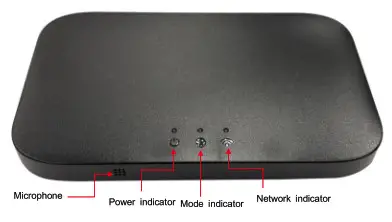
| Mode indicator | Red: Synchronization mode |
| Green: Music mode | |
| Blue: Funny mode | |
| Network indicator | Flash with long intervals: no WWI connection |
| Flash with quick intervals: in connecting | |
| Solid on: connection succeed |
| Symbol | Function description |
| Reset | Long press ‘Reset’ button for 5s until “network indicator” flashes quickly |
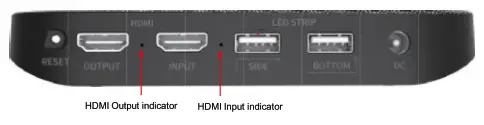
| Output | HDMI output, connecting TV, projector or monitor screen, etc. devices |
| HDMI | HDMI output indicator/HDMI input indicator (As the pic) |
| Input | HDMI input, connecting PS4, Switch and other games devices/ Computer/Laptops/TV box and other HDMI signal devices |
| Led strip | Side led strip |
| Bottom led strip | |
| DC | 12V power adapter |
How To Install
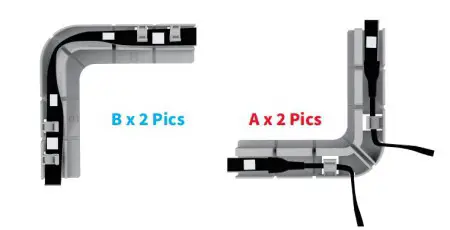
- Install the brackets
There are 2 brackets A and 2 brackets B, Bracket A should be fixed at two terminals of led strips while bracketing B at the turning corner between two terminals. See the picture below, you can choose one from (L) or (R).
- Led strip Installation
There are 2 approaches to installing led strips based on brackets installation. Approach (L) and (R) both can work. You can select one based on your TV port design and cable length for convenience.
Merely approach (L) and (R) is feasible, not the third approach.
Approach (L) as below:
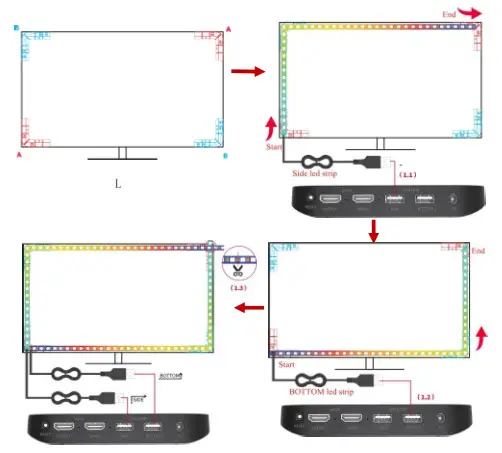
- Facing the back of the TV, start from the start ( left bottom corner ), finish the strips adhesion along from the top to the end (right top corner), then we call this light strip as SIDE strip; (pic 1.1).
- Start from the start (left bottom corner), finishing the strips. adhesion along from the bottom to the end (right top corner), then we call this light strip a BOTTOM strip; (Pic 1.2).
- Cutting off extra extended strips.
Approach (R) as below:

- Facing the back of the TV, start from the start (right bottom corner), finishing the strips adhesion along from the top to the end ( left top comer), then we call it the SIDE strip; (Pic 2.1)
- Start from the start (right bottom corner), finishing the strips adhesion along from the bottom to the end (left top corner), then we call this light strip a BOTTOM strip; (Pie 2.2)
- Cutting off extra extended strips.
Finished Overall Structure As The Pic(Based on the approach R)
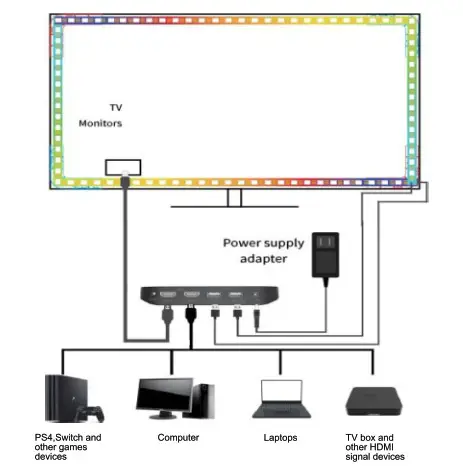
After installing the fixing bracket, led strips, and connection of the devices via input and output port, finally sequentially power on the HDMI sync box. we call this light strip a BOTTOM strip; (Pie 2.2)
Connection:
- Output port—HDMI cable—N, projector, or monitor screen
- Input port—HDMI cable—PS4, Switch, and other games devices/ Computer/Laptops/TV box and other HDMI signal devices
- DC port-12V power adapter
- USB port 1(SIDE)–Side led strip
- USB port 2(BOTTOM): Bottom led strip
How To Control The Sync Box
There are two methods to control the sync box:1.Control by smartphone &2.Control by voice.
1. Control by smartphone:
1.1: Download and install the “Tuya APP” on your Android phone or iPhone from Google Play or Apple store or Application store;(OR scan below QR code to download directly).
 https://smartapp.tuya.com/tuyasmart
1.2: Open the Application and register to log in.
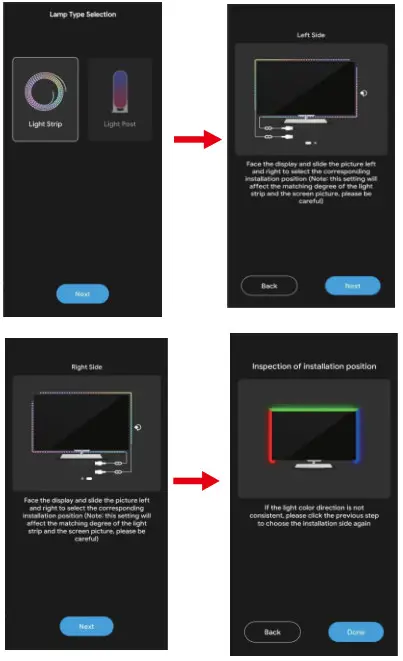
1.3: Select the “light strip” under Lamp type Selection, OR automatic search.
1.4: Based on the below choices and you can into the APP and control it.
Please note:
If you select approach (1) in the previous bracket & light strips connection, here below please choose the “Left Side” Picture; If you select (2), please choose the “Right Side” Page. As below:
After the light setting is finished, then just start your games, music, or movies and enjoy yourself, you can select the mode and intensity on your phone.
2. Control by voice:
2.1: In the APP on your phone, you can select one voice support software.
Voice APP Supported:

2.2:Register or log in if you have had an account
After the light selling is finished, you can control the mode and intensity via voices.
Note
- The sync box only supports 4K/30P sources. If you need to use it to display higher-level sources, you can use a Selector Switch Boxes to convert it.
- The sync box doesn’t support two or more phones connection meanwhile
- You can reset to restore to the factory setting to start again if there is any problem or failure in connection.
- The box can be controlled via voice control after logging in to the account of the voice assistant.
- We recommend keeping the item in a dry and ventilated place and getting away from wet or humid situations.
- It’s a normal case the box gets heated after plugging and working for several hours. please plug it out in time if not used for a period.
FCC WARNING
This device complies with part 15 of the FCC Rules. Operation is subject to the following two conditions: (1) this device may not cause harmful interference, and (2) this device must accept any interference received, including interference that may cause undesired operation. Any changes or modifications not expressly approved by the party responsible for compliance could void the user’s authority to operate the equipment. NOTE: This equipment has been tested and found to comply with the limits for a Class B digital device, pursuant to Part 15 of the FCC Rules. These limits are designed to provide reasonable protection against harmful interference in a residential installation. This equipment generates, uses, and can radiate radio frequency energy and, if not installed and used in accordance with the instructions, may cause harmful interference to radio communications. However, there is no guarantee that interference will not occur in a particular installation. If this equipment does cause harmful interference to radio or television reception, which can be determined by turning the equipment off and on, the user is encouraged to try to correct the interference by one or more of the following measures:
— Reorient or relocate the receiving antenna.
— Increase the separation between the equipment and receiver.
— Connect the equipment into an outlet on a circuit different
from that to which the receiver is connected.
— Consult the dealer or an experienced radio/TV technician for help. To maintain compliance with FCC’s RF exposure guidelines, This equipment should be installed and operated with a minimum distance of 20cm the radiator your body: Use only the supplied antenna.


