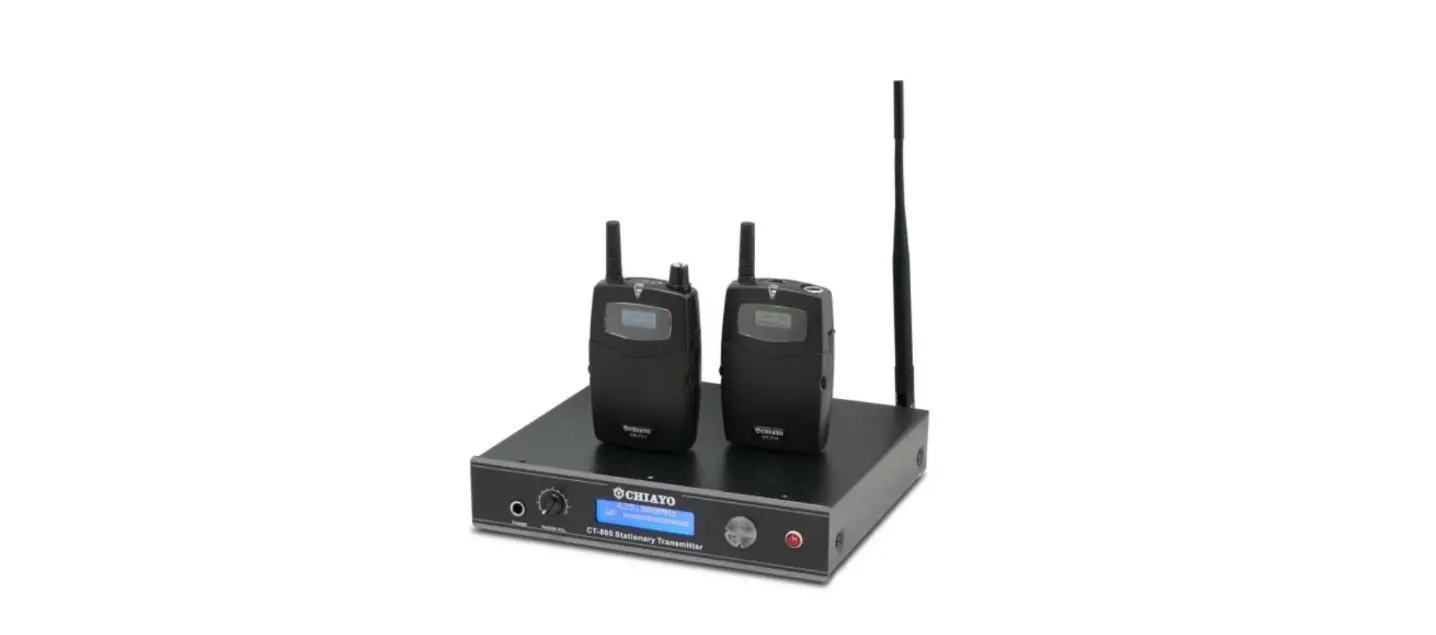
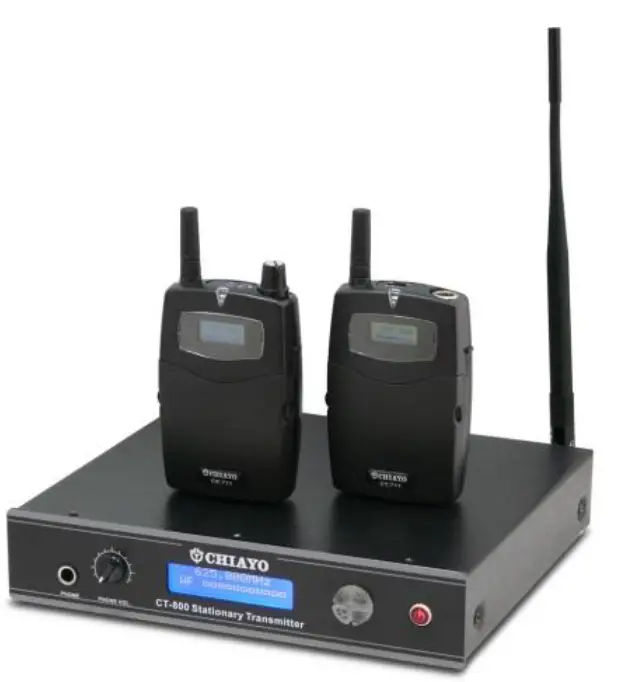
CHIAYO CT-800/CT-711/CR-711 Stationary Transmitter
Introduction
Congratulations and thank you for purchasing CT-711/CR-711/CT-800 tour guide/assistive listening system. This system is PLL-synthesized with 100 channels. Please read this manual thoroughly to familiarize yourself with its controls and functions.
Applications
- CT-800: Stationary transmitter
- CT-711: Mini transmitter
- CR-711: Mini receiver
Simultaneous language interpretation
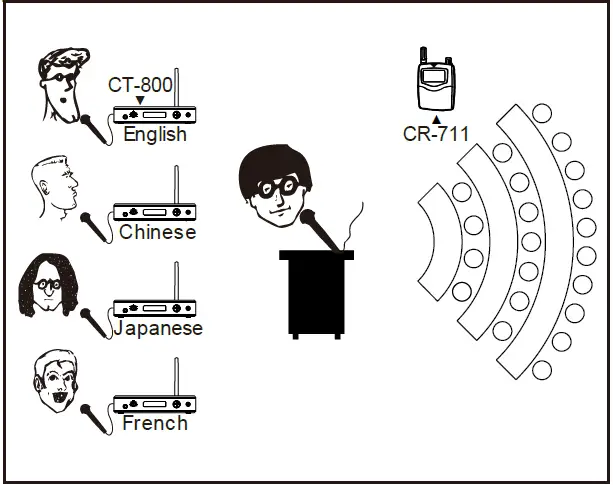
- CT-800: Several, depending on number of languages used.
- CR-711: Many. Each language must use different channels and all these channels must be interference-free.
Fitness center broadcasting
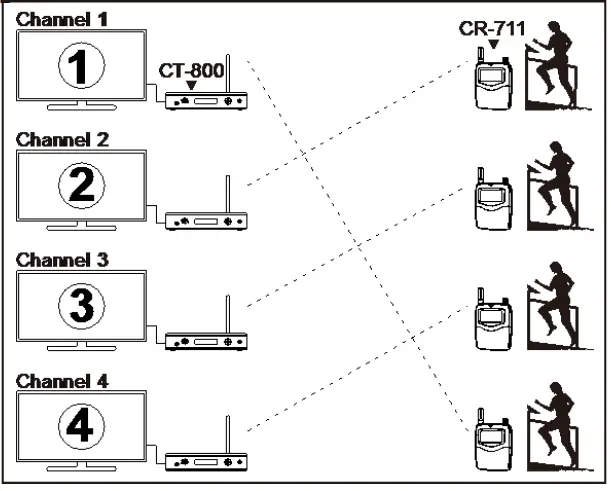
- CT-800: Several, depending on number of TV sets.
- CR-711: Many. Personally carried by club members. Each broadcast must use different channels and all these channels must be interference-free.
Guide tour
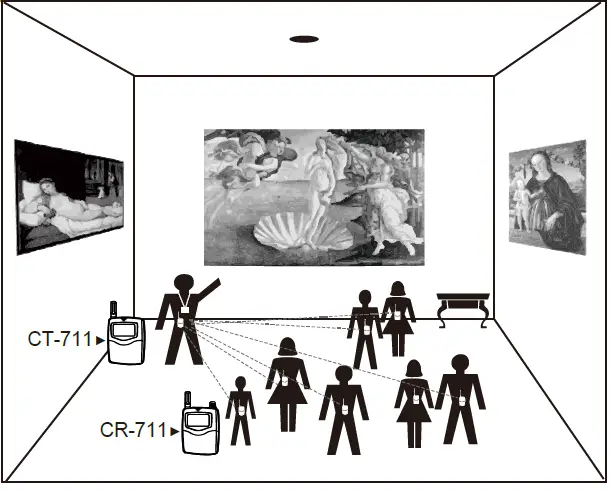
- ◼ CT-711: One
- CR-711: Many
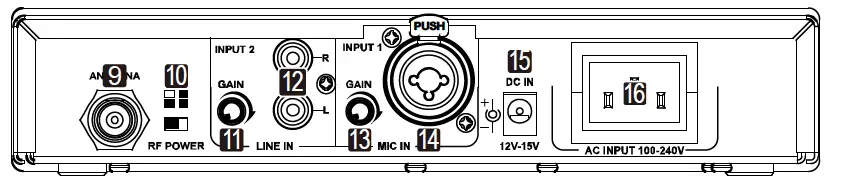
Parts and functions of CT-800 stationary transmitter

- Monitor earphone input (6.3mm)
- Earphone volume control
- LCD
- UP button
- DOWN button
- MENU button
- SET button
- Power control
- Antenna socket (TNC type)
- Output power switch
- LINE IN GAIN control
- LINE IN (RCA R/L)
- MIC IN GAIN control
- MIC IN (XLR-6.3mm combo)
- DC input
- AC input
CT-800/CT-711/CR-711 Language Assistant / Tour Guide System
Changing channel/frequency
- Press the MENU button to choose CHANNEL-AF page.

- Press and hold SET button 3 seconds and the channel number will flash to denote readiness for setting.
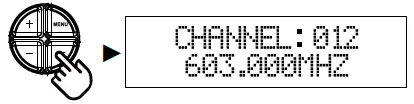
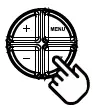
- Press the buttons to select a new channel.
Press : forward, press : backward. Press and hold : keep forward Press and hold : keep backward.
- After a channel is chosen, press SET button 3 seconds to store the setting.
Changing user name
- Press the MENU button to choose USER NAME-CHANNEL page.
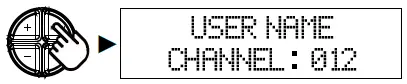
- Press and hold SET button 3 seconds and the upper-left digit will flash to denote readiness for setting.
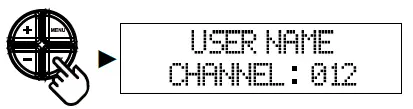
- Press the buttons to select a new ASCII code, which can be A~Z, 0~1 or punctuation mark (!,@,#,$,…).When a digit is done, press SET button to continue to set the next digit.
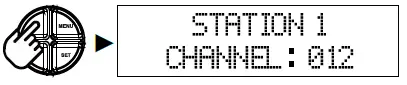
- After a user name is chosen, press SET button 3 seconds to store the setting.

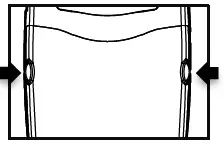
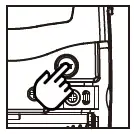
Changing output power
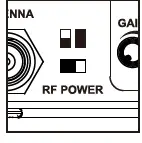 Position
 ![]() (left) for low output power and
(left) for low output power and ![]() (right) for high output power.
(right) for high output power.
Low output power will reduce the RF transmission distance and high output power can extend the RF transmission distance.
IMPORTANT: The transmitter automatically enters power-saving mode after idling for about 5 minutes and the output level will be reduced. Its previous level will return right after the transmitter receives audio signal again.
Audio input and gain setting
There are two audio inputs with individual control on the rear panel. Each audio input has its own GAIN control to adjust the sensitivity level. Higher sensitivity will lower the dynamic range of input signals, which may result in more noise and feedback problem. Please set the sensitivity at a proper level.
| LINE IN | connector | MIC IN | connector |
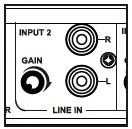 | RCA R/L jacks | 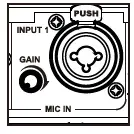 XLR and 6.3mm combo jack XLR and 6.3mm combo jack | |
Parts and functions of CT-711 Mini transmitter
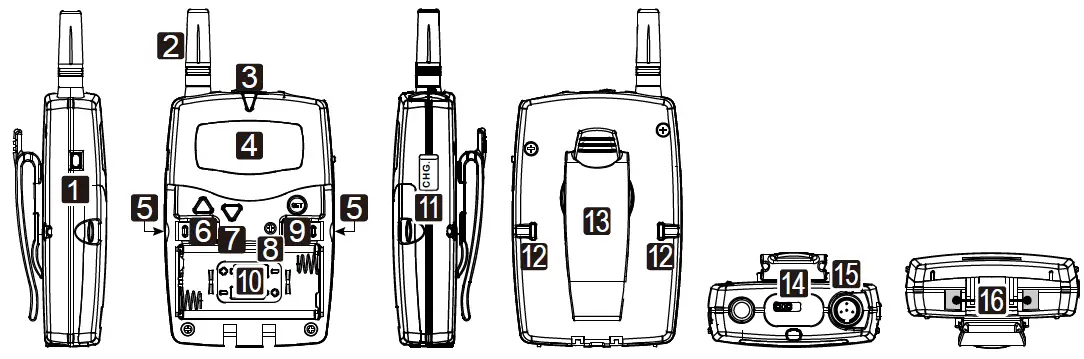
- Power control
- Antenna
- Battery/charging indicator
- LCD
- Cover release buttons
- UP button
- DOWN button
- Sensitivity control
- SET button
- Battery compartment
- Charging port
- Battery cover lock
- 360∘ Belt clip
- Audio mute switch
- XLR connector
- Charging contacts
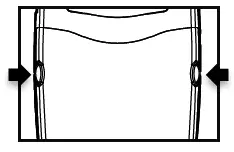
Opening the battery compartment cover
- Use a small tool to pick both locks ⑫ upwards to unlock.
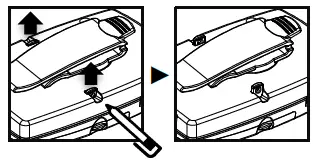
- press release buttons ⑤ on both sides to open the cover.
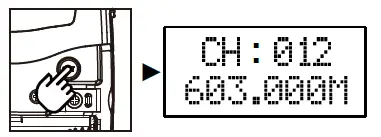
Changing channel/frequency
- Press the SET button to choose CHANNEL- FREQUENCY page.
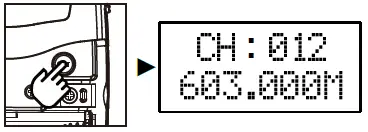
- Press the ▲▼ buttons to select a new channel.
Press▲: forward, press▼: backward. Press and hold▲: keep forward Press and hold▼: keep backward.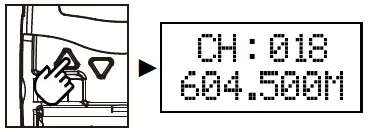
- After a channel is chosen, press SET button or wait 5 seconds to store the setting.
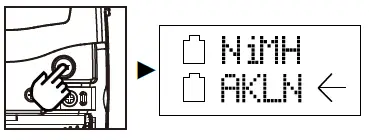
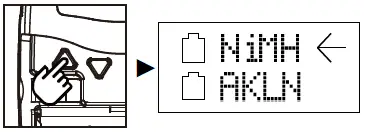
Changing battery type
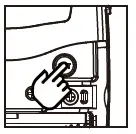
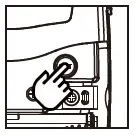
- Press the SET button to choose BATTERY TYPE page.
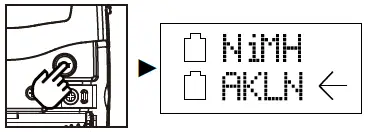
- Press the ▲▼ buttons to select either NiMH (rechargeable battery) or AKLN (alkaline battery).
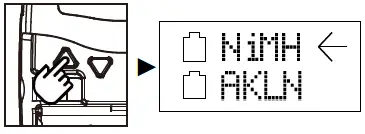
- After a battery type is chosen, press SET button or wait 5 seconds to store the setting.
Battery charging
NiMH battery must be selected when rechargeable battery is in use. DO NOT select AKLN (alkaline) when transmitter is intended for charging as alkaline battery isn’t rechargeable. Wrong battery setting will affect battery sensing electronics and may display wrong status information.
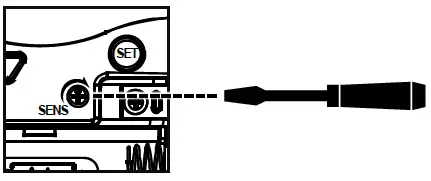
Sensitivity setting
After opening the battery compartment cover, a SENS trimmer potentiometer⑧ can be found nearby the SET button⑨.
Higher sensitivity will lower the dynamic range of input signals, which may result in more noise and feedback problem. Please set the sensitivity at a proper level.
- ◼ When the microphone is held close to the mouth, a lower sensitivity is recommended.
- When the microphone is mounted on the stand, a higher sensitivity is recommended.
- ◼ The sensitivity level can be adjusted by rotating the potentiometer with a small screw driver. Clockwise direction to increase the level.
Parts and functions of CR-711 Mini receiver
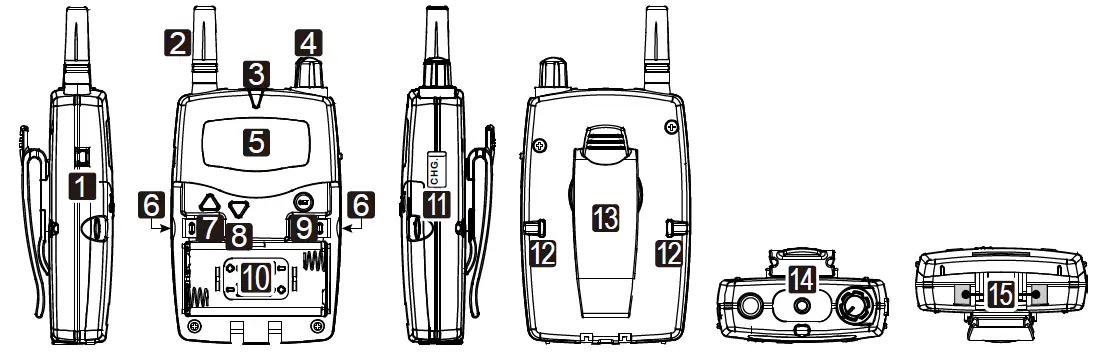
- Power control
- Antenna
- Battery/charging indicator
- Volume control
- LCD
- Cover release buttons
- UP button
- DOWN button
- SET button
- Battery compartment
- Charging port
- Battery cover lock
- 360∘ Belt clip
- Earphone jack
- Charging contacts
Opening the battery compartment cover
- Use a small tool to pick both locks ⑫ upwards to unlock.
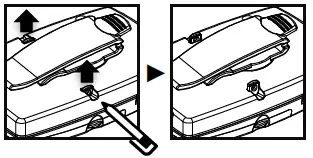
- Press release buttons ⑥ on both sides to open the cover
Changing channel/frequency
- Press the SET button to choose CHANNEL-FREQUENCY page.
- Press the ▲▼ buttons to select a new channel.
Press▲: forward, press▼: backward. Press and hold▲: keep forward Press and hold▼: keep backward.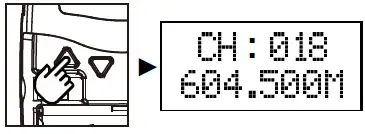
- After a channel is chosen, press SET button or wait 5 seconds to store the setting.
Changing battery type
- Press the SET button to choose BATTERY TYPE page.
- Press the ▲▼ buttons to select either NiMH (rechargeable battery) or AKLN (alkaline battery).
- After a battery type is chosen, press SET button or wait 5 seconds to store the setting.
Channel programming
Channel programming allows user to determine whether a channel to be functional or not. Even a channel is set to be non-functional, it can be changed in the same way.
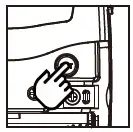
- Press the SET button to choose CHANNEL STATUS page.

- Press the ▲▼ buttons to select any channel.
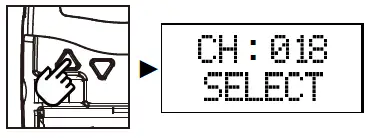
- Press the SET button to select either SELECT (functional) or DELETED (non functional).
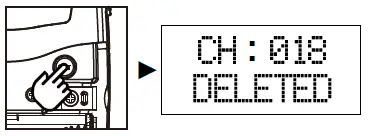 After a channel status is chosen, press SET button or wait 5 seconds to store the setting.
Channel scanning
For an interference- free operation, a cleaner channel might be necessary if the current one receives too much interference.
- Press the SET button to choose SCAN UP/DW page.
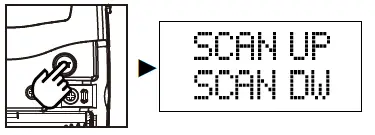
- Press the ▲▼ buttons to find and locate a clear, interference- free channel.
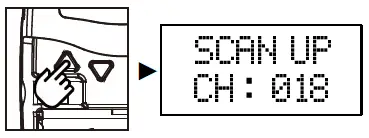
- After a channel is chosen, press SET button or wait 5 seconds to store the setting.
Auto power off
Auto power off is designed to reduce necessary power consumption. When this function is activated, the receiver will turn off automatically if it doesn’t receive any signal from the transmitter.
- Press the SET button to choose AUTO OFF page.

- Press the ▲▼ buttons to select either DISABLE (auto off) or ENABLE (no auto off).
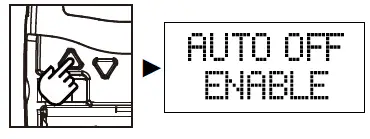
- After a power off status is chosen, press SET button or wait 5 seconds to store the setting.
Battery charging
NiMH battery must be selected when rechargeable battery is in use. DO NOT select AKLN (alkaline) when transmitter is intended for charging as alkaline battery isn’t rechargeable. Wrong battery setting will affect battery sensing electronics and may display wrong status information.
Federal Communication Commission Interference Statement
This equipment has been tested and found to comply with the limits for a Class B digital device, pursuant to Part 15 of the FCC Rules .These limits are designed to provide reasonable protection against harmful interference in a residential installation. This equipment generates, uses and can radiated radio frequency energy and, if not installed and used in accordance with the instructions, may cause harmful interference to radio communications. However, there is no guarantee that interference will not occur in a particular installation. If this equipment does cause harmful interference to radio or television reception, which can be determined by turning the equipment off and on, the user is encouraged to try to correct the interference by one of the following measures:
- Reorient or relocate the receiving antenna.
- Increase the separation between the equipment and receiver.
- Connect the equipment into an outlet on a circuit different from that to which the receiver is connected.
- Consult the dealer or an experienced radio/TV technician for help.
FCC Caution
To assure continued compliance,(example-use only shielded interface cables when connecting to computer or peripheral devices).Any changes or modifications not expressly approved by the party responsible for compliance could void the user’s authority to operate this equipment.
This transmitter must not be co-located or operating in conjunction with any other antenna or transmitter.
FCC Radiation Exposure Statement
This equipment complies with FCC radiation exposure limits set forth for an uncontrolled environment. This equipment should be installed and operated with minimum distance 20 cm between the radiator & your body.
This device complies with Part 15 of the FCC Rules. Operation is subject to the following two conditions:
- This device may not cause harmful interference, and
- This device must accept any interference received, including interference that may cause undesired operation.
CHIAYO ELECTRONICS CO., LTD.
http://www.chiayo.com.tw
Email: [email protected]
Office: 30, Lane 27, Section 4, Jen-Ai Road, Taipei 10685,
Taiwan Tel: 886-2-27415741
Fax: 886-2-27525242
Factory: 88, Chung-Hsiao Street 2, Chiayi 60080, Taiwan
Tel: 886-5-2711000
Fax: 886-5-5767611